1
Mega Pixel
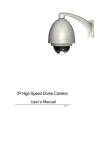
IP Speed Dome Camera
User’s Manual
V1.1
Mega Pixel IP Speed Dome Camera User’s Manual
Contents
CHAPTER 1 PROFILE
2
1.1 Functions And Characteristics
2
1.2 Applications
3
CHAPTER 2 INSTALLATION
3
2.1 Cautions
3
2.2 Panel Illuminate
4
2.2.1 Rear Elevation
4
CHAPTER 3 PARAMETER SETUP
5
3.1 Setup Parameter By IE Browser
5
Appendix
6
CHAPTER 4 SYSTEM INSTALLATION
7
4.1 Installation
7
4.2 Installation Steps
9
4.3 Disassembly And Installation Of Main Body
11
4.4 Dome Configuration
11
APPENDIX A: 24VAC Wire Diameter And Transmission Distance
Comparison Chart
12
APPENDIX B: Wire Gauge Conversion Chart
13
APPENDIX C: Lightning Proof And Surge Signal Proof
14
1
Mega Pixel IP Speed Dome Camera User’s Manual
Chapter 1 Profile
Network Camera is a kind of embedded digital surveillance product collected traditional
simulation camera and network video server. Adopts embedded Linux Operation System and
has characteristics of high efficiency on system adjustment, solidified code on Flash, small
bulk, high stability and high reliability.
1.1 Functions and Characteristics
Basic Function
Video compression tech: adopts H 264 video compression tech, high compression ratio with
super agility handling.
Network function: integrate TCP/IP protocols and video, alarm, voice data supported, builtin WEB browser, IE interview supported.
Heartbeat function: host computer is able to know running state of network camera real time
by heartbeat function.
PTZ control function: control for PTZ, kinds of decoder protocols and dome cameras
supported.
Alarm function: 1 channel alarm input (signal parameter), 1 channel alarm output (on-off
parameter), motion detective, video lost, mask alarm, alarm link output.
Voice speech: two-way voice speech, one-way voice broadcast.
POE power supply supported.
User management: multi-level user management.
Compression Handling Function
1 channel video signal supported, separate hardware compression, adopts H.264
compression standard on video compression, not only support change code ratio, but also
support change frame ratio, while setting up video image quality, it's able to restrict
compression bit rate of video image.
PAL:1280*720, NTSC:1280*960 supported
OSD supported date and time setup available.
Remote interview and transmission function
One self-compliant 10M/100M Ethernet interface as standard accessory.
PPPoE, DHCP, DDNS protocol supported.
Available to set parameter, browse real time video, check network camera state through
applications or IE browser. Available to realize alarm link and save compressed bit rate
through network.
Available to realize remote upgrade and maintenance through network.
RS-485 can support one-way network rendezvous point aisle connection, client side can
control serial devices through network rendezvous point aisle of network camera.
2
Mega Pixel IP Speed Dome Camera User’s Manual
1.2 Applications
Suitable for circumstances required for network remote surveillance
ATM, Bank Counter, Supermarket, Factory etc.
Nursing House, Kindergarten, School etc.
Intelligent door management system
Intelligent Building, community management system
Electricity station, telecom base station etc. unmanned on duty system
Outdoor bridge, tunnel, crossing traffic etc. surveillance system
Flowing line and warehouse surveillance
24h surveillance to road traffic
Remote surveillance to forest, fountain and river etc.
Chapter 2 Installation
2.1 cautions
Please check carefully while unpacking, be sure articles inside accordance to the list.
Please read this chapter carefully before installation.
Be sure to off all concerned power while installation.
Check power and voltage in case to damage facility because of unmatched voltage.
Installation circumstance: do not install in circumstances of high humidity or high
temperature, please keep good ventilation, pay attention to defend rain, avoid installing in
acute vibrate circumstance.
In times of malfunction, do not attempt to dismantle and service the camera yourself.
Please refer to qualified serving personnel to repair or contact our technical department to
solve the problems.
Remark: power supply, lens and SD card optional while ex-factory.
3
Mega Pixel IP Speed Dome Camera User’s Manual
2.2 Connections
2.2.1 Cable Connections
Fig. 2.1 Connection Cable
ID
1
2
Cable
Red
Function
Connection
AC24V Input
Please refer to the camera parameter
Video Output
Connect to video cable of monitor, standard BNC interface
Black
N/A
3.5mm interface, connect to acoustics device, such as speaker etc
for audio speech output(impedance: >16Ω); connect to audio input
device, such as tone arm(impedance: 1kΩ)
3
N/A
Audio In/Output
4
N/A
Network interface
Yellow
RS485+
Gray
RS485-
Blue
Alarm in(DC12V)
Connect to Ethernet device, such as Ethernet exchanger, HUB etc.
Connect to RS-485 device, such as Pan/Tile, PTZ etc.
5
Connect to alarm input, 1 channel signal alarm(0~DC12V)
Pink
Alarm in GND
4
Mega Pixel IP Speed Dome Camera User’s Manual
Chapter 3 Parameter setup
Some network parameters must be setup firstly after finishing installation, includes IP
address, subnet mask, port etc, can be setup through many kinds of ways, see below two kinds
for examples:
1. Setup parameters such as IP address and PPPoE etc. through IE browser
2. Setup parameters through applications on client’s side.
Please be confirm PC and network camera already be connected, and the network camera can
be PING!
3.1 Setup parameter by IE browser
( Microsoft Internet Explorer only )
The default IP:192.168.0.120, Default port: 30001, user: admin, password: admin
Login network camera by IE, input IP address, and will shoot out logging in window, input
username and password, click “ login ” to enter IE client interface.
Function detailed guide please refer to “ Network Video Manager System Manual ”.
Important Note: to check device by IE, the premise is to set browser security level,
open IE browser, enter “ tool / Internet option / security / user-defined level ”, set
security level ”security level-low ”, or directly set “ ActiveX, Widget and Insert ” to
open.
5
Mega Pixel IP Speed Dome Camera User’s Manual
Appendix
Parameter
10X
Image sensor
1/3” Ex-view 1.3Mega Pixel CCD
18X
Horizontal Resolution
720TVL(PAL) 810TVL(NTSC)
Min. illumination
0.1Lux/F1.2 , 0.02Lux/F1.2(Slow shutter)
S/N Ratio
>50dB
AGC
Auto
BLC
Auto
Electronic Shutter
Auto
Decoder
Internal
Panning angle
360º Continuous rotation
Tilt angle
0º~92º
Rotary speed
Level 0.1~240º/S, Vertical 0.1~160º/S
Preset
255
Digital Zoom
10X
18X
Focal Length(mm)
4.95-49.5mm
4.7-84.6mm
Iris
Auto/Manual
Focus
Auto/Manual
Protection level
IP66, 24-hour, safety cover,TVS1500W lightning proof and surge proof
Video Output
PAL/NTSC, 1.0Vp-p, 75ohm loading, BNC connector
Video Compression
H.264(ISO/IEC 14496-10) baseline profile to level 3.1
Picture Resolution
PAL:1280x720p@25fps NTSC:SXGA(1280x960p)@22.5fps.
Bit Rate
CBR、VBR
Multi-stream
Up to 2 configurable frame rate/bit rate streams for preview and recording
PAL 1280*720 and 640*360 NTSC 1280*960 and 640 * 480
OSD
Time,DayDevice name,Channel name and user-defined text
Audio Out/In
One audio out , One audio line in
Audio compression
G723.1, 8KHz, 16bits
Audio Bit Rate
6.3Kbps
Video synchronization
Support
Bidirectional Talk
Two way audio
Motion detection
Support
heartbeat
Support
Alarm events
I/O and motion detection, Picture upload via email
User Access Limit
Max of 10 concurrent connected users
Network Transmission
Auto adaptive flow control technology
Web Server
Build-in Web Server
Network Protocol
IPv4/v6, RTP/RTCP, TCP/UDP, HTTP, DHCP, DNS, FTP, DDNS, PPPOE, SMTP
Network Port
RJ-45,10/100Base-T
I/O alarm in
One Alarm in(DC5-12V)
6
Mega Pixel IP Speed Dome Camera User’s Manual
PTZ Control
RS485
SD Card
Support one up to 32GB Micro SD/HC Card
Dependability
Hardware watch Dog
Working Temperature
-10-60℃ Humidity 10-90%
Storing Temperature
-20-70℃ Humidity 0-95%
Power Consumption
Max. 13W
Power Supply
24VAC ±5% , 2500mA
Security
Multi-level user and group management, user access control
CMS Client
Supplied CMS client suitable for IP products (Camera/NVS/PTZ etc)
SDK
Highly documented SDK for be-spoke custom requirements and application
development
Chapter 4 System Installation
4.1 Installation
338
315
1) Dimension
ø200
ø238
Indoor
Outdoor
7
Figure 1
Mega Pixel IP Speed Dome Camera User’s Manual
2) Installation Style
343
368
a Wall Installation
ø9
ø155
ø237
278
Figure 2
ø155
ø200
278
Outdoor
122
160
ø18
ø9
103
140
Demension
Indoor
605
620
200
200
63
63
b Pendant Installation
Figure 3
ø155
ø237
ø155
ø200
Outdoor
Indoor
104
5
ø1 2 0
104
ø8.
Demension
c Ceiling Mounting
this hatch aim at the side where
cable comes out
309
80
80
4the size of installation hole at
Dome’s pedestal
Figure4
ø200
8
ø7
Mega Pixel IP Speed Dome Camera User’s Manual
d Ceiling mount
Dimension
Embed into a cutout with a diameter slightly
larger than 236mm (9.25”).
Figure5
4.2 Installation Steps
Taking wall-installation style as example:
1. Unpacking the carton and carefully take out the dome camera and its attachments.
2. According to the size of Dome, drill the installation hole in the wall and fixed expander bolts.
(Also can drill hole according to fixed hole of bracket )
3. Rotate the dome cover CCW (counterclockwise) and to remove.
4. Rotate the dome cover CW (clockwise) to install Dome.
5. Fix the bracket on the main body of dome, rotate the Dome CW (clockwise), and keep the
bracket hole and the mounting flange in line. Tighten the three screws.
6.Fetch the signal cable, video cable and power wires from bracket. Fix the cover plate, tighten
the knurled-screw.
7.Fix the assembled Dome on the wall and tighten the 4PCS of supplied screws.
Counter clockwise rotate the
transparent cover
switch
Dome Main Body
button
Figure 6
9
Mega Pixel IP Speed Dome Camera User’s Manual
8.Instruction of surface installation:
According to the size of Dome's fixed board, drill the installation hole on the ceiling and fixed
expander bolts (Also can drill hole according to fixed hole of fixed board. Fix the fixed board,
fix the main body of dome on fixed board along the guide pole, rotate the Dome anticlockwise,
and tighten the screws.
Figure 7
Figure 8
Ceiling
天花板
此两箭头对准
Regulate arrowhead
Pedestal
固定座
CLOS E
O PEN
Main
Body
球机主体
1) 1)将固定座安装在天花板上
Fix pedestal on ceiling
2)将球机主体对准固定座上的3根导柱向上安装
2) Fix the main body on pendestal along 3 guide poles
Knurled
screw
止退螺丝
3)将球机主体逆时针旋转安装到位
3) CCW
rotate main body at correct location
10
4)将止退螺丝旋到底,完成安装
4) Tighten the knurled screw
Mega Pixel IP Speed Dome Camera User’s Manual
4.3 Disassembly and installation of Main Body
1 . Quick disassembly design, be easy to maintain and change the main body.
2 . Turn vitreous cover on its axis in CCW (counter clockwise) direction and separate it down.
3 . Then loosen knurled-screw as shown bellow. Hold the drier shelf, look up the dome, revolve
main body CCW (counter clockwise) and fetch it out.
4 . The steps of installation are reverse to those of disassembly.
Counter clockwise
rotate the
transparent cove
Safety bel
Dome Main Body
Figure 9
4.4 Dome Configuration.
Wall Mounting bracket
Ceiling Mounting Flange
Outdoor Cover
Up-shell
Down-shell
Main Body
Vitreous Cover
Figure 10
11
Mega Pixel IP Speed Dome Camera User’s Manual
Appendix A: 24VAC Wire Diameter and Transmission Distance Comparison
Chart While the wire diameter determinate and 24VAC loss rate under 10%, the
longest transmission distance is recommended as following chart.
Wire diameter (mm)
Transmission
Distance
feet(m)
0.8000
1.000
1.250
2.000
Power(VA)
10
283(86)
451(137)
716(218)
1811(551)
20
141(42)
225(68)
358(109)
905(275)
30
94 (28)
150(45)
238(72)
603(183)
40
70 (21)
112(34)
179(54)
452(137)
50
56 (17)
90(27)
143(43)
362(110)
60
47 (14)
75(22)
119(36)
301(91)
70
40 (12)
64(19)
102(31)
258(78)
80
35 (10)
56(17)
89(27)
226(68)
90
31 (9)
50(15)
79(24)
201(61)
100
28 (8)
45(13)
71(21)
181(55)
110
25 (7)
41(12)
65(19)
164(49)
120
23 (7)
37(11)
59(17)
150(45)
130
21 (6)
34(10)
55(16)
139(42)
140
20 (6)
32(9)
51(15)
129(39)
150
18 (5)
30(9)
47(14)
120(36)
160
17 (5)
28(8)
44(13)
113(34)
170
16 (4)
26(7)
42(12)
106(32)
180
15 (4)
25(7)
39(11)
100(30)
190
14 (4)
23(7)
37(11)
95(28)
200
14 (4)
22(6)
35(10)
90(27)
12
Mega Pixel IP Speed Dome Camera User’s Manual
Appendix B: Wire Gauge Conversion Chart
Bare wire diameter
metric size(mm)
Bare wire cross
sectional area(mm2)
AWG
(Approximate)
SWG
(Approximate)
0.050
43
47
0.00196
0.060
42
46
0.00283
0.070
41
45
0.00385
0.080
40
44
0.00503
0.090
39
43
0.00636
0.100
38
42
0.00785
0.110
37
41
0.00950
0.130
36
39
0.01327
0.140
35
0.160
34
0.180
33
0.200
32
0.01539
37
0.02011
35
0.03142
0.04909
0.02545
0.230
31
0.250
30
33
0.290
29
31
0.06605
0.330
28
30
0.08553
0.350
27
29
0.09621
0.400
26
28
0.450
25
0.04115
0.1237
0.1602
0.560
24
24
0.2463
0.600
23
23
0.2827
0.710
22
22
0.3958
0.750
21
0.800
20
21
0.5027
0.900
19
20
0.6362
1.000
18
19
0.7854
1.250
16
18
1.2266
14
3.1420
1.500
15
2.000
12
0.4417
1.7665
2.500
4.9080
3.000
7.0683
13
Mega Pixel IP Speed Dome Camera User’s Manual
Appendix C: Lightning Proof and Surge Signal Proof
The product adopts TVS lightning proof technology to prevent from damage by lightning strike
below 1500 W and impulse signals such as surge; but it is also necessary to abide by the
following precautions to ensure electrical safety based on practical circumstances:
Keep the communication cables at least 50 meters away from high voltage equipment or
cables.
Make outdoor cable laying-out under eaves as possible as you can.
In open area shield cables in steel tube and conduct a single point ground to the tube.
Trolley wire is forbidden in such circumstances.
In strong thunderstorm or high faradic zone (such as high voltage transformer substation),
extra strong lightning proof equipment must be installed.
Take the building lightning proof requirements into account to design the lightning proof and
grounding of outdoor equipment and cable laying-out in accordance with the national and
industrial standards.
The system must be grounded with equal potentials. The earth ground connection must
satisfy the anti-interference and electrical safety requirements and must not be short
connected with high voltage electricity net. When the system is grounded separately, the
resistance of down conductor should be ≤ 4Ω and the sectional area of down conductor
should be ≤ 25mm2 (refer to Figure E.1).
14