1
LARGE CAPACITY TRAY
LT4000
(C563)
15 June 1995
OVERALL MACHINE INFORMATION
1. OVERALL MACHINE INFORMATION
1.1 SPECIFICATIONS
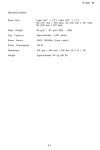
Paper Size:
The following sizes can be placed in the large
capacity tray and the LCT cassette.
A3 M, B4 M, A4 LM, B5 LM, A5 M,
11" x 17" M, 81/2 x 14" M, 81/2" x 11" ML
In addition, the following size can be placed in
the LCT cassette.
A6 M.
Paper Capacity:
LCT: 4,000 sheets (64 g/m2, 17 lb)
3,000 sheets (80 g/m2, 20 lb)
Cassette: 500 sheets (64 g/m2, 17 lb)
400 sheets (80 g/m2, 20 lb)
Copy Paper Weight
47.1 g/m2 to 209.3 g/m2, 12.5 lb to 55.6 lb
Power Source:
(DC) 24 V, 5 V
Power Consumption:
Less than 100W
Weight:
Less than 37 kg, 82 lb
Dimensions:
(W x D x H)
550 x 500 x 688 mm, 21.7" x 19.7" x 27.1"
Image Shifting:
±10 mm (±3 mm if the optional sorter is
installed)
1
OVERALL MACHINE INFORMATION
15 June 1995
1.2 MECHANICAL COMPONENT LAYOUT
1
2
3
4
5
C563V500.wmf
1. Bottom Plate
2. Tray Drive Belt
3. Tray Drive Motor
4. Tray Shift Motor
5. Feed Unit Base
2
15 June 1995
OVERALL MACHINE INFORMATION
1.3 ELECTRICAL COMPONENT DESCRIPTION
Refer to the electrical component layout on the reverse side of the
point-to-point diagram (on the waterproof paper).
Index.
Description
No.
Sensors
1
Cassette Size
3
Paper Length
Maximum Paper Load
5
10
11
12
13
Paper Size 0
Paper Size 1
Paper Size 2
Paper Size 3
Tray Lower limit
9
20
21
17
LCT Paper End
Cassette Paper End
Tray Paper Position
Note
Determines what size paper is in the cassette.
Detects the paper length.
Informs the printer CPU when the LCT bottom
plate is at the lowest position for loading paper,
and that no more can be loaded.
Determines what paper size is in the tray.
Determines what paper size is in the tray.
Determines what paper size is in the tray.
Determines what paper size is in the tray.
Turns off the tray drive motor when the tray
reaches the lowest possible position (for loading
the cassette).
Detects the presence of paper in the LCT.
Detects the presence of paper in the cassette.
Detects the top of the LCT tray or the paper stack
when adding paper.
Switches
2
4
8
14
16
19
Cassette
Cover Open
Rear Shift Limit
Front Shift limit
Tray Down
Image Position
Informs the printer CPU when the cassette is
installed.
Detects if the LCT cover is open or not.
Cuts the line to the tray shift motor when the feed
unit base reaches the rear end.
Cuts the line to the tray shift motor when the feed
unit base reaches the front end.
The LCT bottom plate lowers when the user
presses this.
The tray shift motor moves forward or in reverse
when the user presses this.
Motors
Tray Drive
Cassette Bottom Plate Drive
Lifts the LCT bottom plate to bring paper to the
feed position and and lowers it to allow paper to
be loaded.
Shifts the feed unit base from front to rear to shift
the LCT bottom plate, in order to shift the image
position.
Lifts the cassette bottom plate.
I/O Control
Controls all the LCT operations.
6
Tray Shift
7
18
PCBs
15
3
OVERALL MACHINE INFORMATION
15 June 1995
1.4 BASIC OPERATION
[F]
[G]
[A]
[G, I]
[H]
[B]
[E]
[C]
[D]
[I]
C563V502.wmf
- Overview The LCT bottom plate [A] is lifted up and down by the tray drive motor (a
reversible motor) [B]. Drive from the tray drive motor is transmitted through
the worm gear [C], worm wheel, drive pulley [D] to the drive belts [E]. The
drive belts connect the ends of the LCT bottom plate.
The bottom plate is controlled so that the top of the paper stack is in one of
two basic positions: the paper feed position or the standby position. The
paper feed position is used during printing, and at all other times, the standby
position is used. When the top of the paper stack is in the standby position,
there is enough room for the user to add about 1,000 sheets of paper.
- Power-up When the main switch is turned on, the tray drive motor lifts the LCT bottom
plate until the top of the paper stack is at the standby position. This is the
initialization procedure for the bottom plate position.
The bottom plate is lifted until the top sheet pushes up the feed roller and the
paper table height sensor in the main body is de-actuated (this is the paper
feed position; refer to "Printing" below for more details). Then, the tray drive
motor lowers the bottom plate until the top of the paper stack just passes the
4
15 June 1995
OVERALL MACHINE INFORMATION
tray paper position sensor [F] (a photocoupler), which turns off at this time.
This is the standby position.
If there is no paper or only a small amount of paper on the bottom plate, the
tray paper position sensor turns on then off soon after (because the bottom
plate passes the sensor), before the top sheet pushes up the feed roller.
When this happens, the bottom plate stops rising immediately and is lowered
until the top of the paper stack comes to the standby position (the tray paper
position sensor turns on then back off again). This process allows
initialization to be completed more quickly.
- Printing When the Print Start key is pressed, the bottom plate starts rising from the
standby position. It stops when the top sheet pushes the paper feed roller
and the paper table height sensor in the main body is deactuated (this is the
paper feed position). The machine can now start to feed.
As pages are printed, the top sheet position becomes lower, and eventually
the main body’s paper table height sensor is actuated. When this happens,
the tray drive motor raises the bottom plate until the paper height sensor is
de-actuated again; this keeps the top sheet at the paper feed position.
When a printing job finishes or a paper misfeed occurs, the tray drive motor
slightly lowers the bottom plate (for 500 ms). If the tray paper position sensor
turns off (this is possible when there is only a small amount of paper on the
bottom plate and the paper stack is in between the sensor and the paper
feed roller), the bottom plate moves down until the tray paper position sensor
is just activated by the bottom plate. This is to allow the user to add paper. It
is not possible to add paper by pressing the tray down switch if the tray paper
position sensor remains off (refer to the Adding Paper section below).
Unlike after a normal printing job, after a proof printing job made with the
Proof Printing key finishes (one sheet is fed each time the Proof Printing key
is pressed), the bottom plate is not lowered. This is to save time for the top
sheet to reach the paper feed position when the next job starts.
If paper runs out during printing, the paper end condition is detected by the
LCT paper end sensor (a photocoupler). The bottom plate moves down until
the tray paper position sensor turns on then off (it stops in the standby
position). Then, the user can add some paper.
5
OVERALL MACHINE INFORMATION
15 June 1995
- Adding Paper The bottom plate can be lowered by pressing the tray down switch only when
the tray paper position sensor turns on. This is because if the sensor stays
off, the top of the paper stack (or the bottom plate if there is no paper) is in
the standby position. The user can add paper without lowering the bottom
plate in this case.
When the top of the paper stack is above the tray paper position sensor (the
sensor is On) and the tray down switch is pressed, the tray drive motor
lowers the bottom plate until the top sheet of the remaining paper stack just
passes the tray paper position sensor (the sensor turns off). This gives
enough space for the user to add about 1,000 sheets of paper.
If the tray down switch is then pressed again after adding paper (the tray
paper position sensor comes on), the bottom plate moves down and again
stops once the top sheet just passes the tray paper position sensor. This
operation can be repeated until the maximum paper load sensor [G] is
actuated by the actuator [H] on the bottom plate. Then, the bottom plate
cannot be lowered any more and no more paper can be added.
- Installing the Cassette When the tray down switch is pressed for around 2 seconds (when the user
wants to load the cassette), the bottom plate lowers until the tray lower limit
sensor [I] detects the actuator on bottom plate.
6
15 June 1995
DETAILED SECTION DESCRIPTIONS
2. DETAILED SECTION DESCRIPTIONS
2.1 TRAY SHIFT MECHANISM
[A]
[B]
[C]
c563d500.wmf
[D]
Image shifting is carried out by shifting the LCT unit to the front or to the rear.
When the image position switch [A] is moved to the front, the tray shift motor
(a reversible motor) [B] rotates counterclockwise to rotate the shift shaft [C]
clockwise. The shaft moves the feed unit base [D] of the LCT unit to the rear.
Thus, the image is shifted to the front.
7
DETAILED SECTION DESCRIPTIONS
15 June 1995
2.2 PAPER SIZE DETECTION
[A]
[B]
[D]
[E]
[C]
C563D502.wmf
[G]
[F]
The rear side fence [A] and front side fence [B] can be slid to change the
paper size. This is accomplished by loosening a knob screw and sliding the
rear end fence to another paper size. The rear side fence has an actuator
plate [C] mounted on its underside. There are four sensors
(photo-interrupters: paper size sensor 0 [D], 1 [E], 2 [F], and 3 [G]) on the
bottom shaft for detecting paper width and one sensor (a reflective
photosensor, the paper length sensor) on the bottom plate for detecting the
paper length. The printer CPU determines the paper size by reading the
combination of signals from the sensors.
8
15 June 1995
DETAILED SECTION DESCRIPTIONS
2.3 CASSETTE LOADING MECHANISM
2.3.1 BOTTOM PLATE DOWN
[C]
[A]
[C]
[B]
[D]
C563d501.wmf
When the tray down switch is held down for longer than 2 seconds, the
bottom plate [A] lowers until the tray lower limit sensor detects the actuator
on the bottom plate (refer to "Basic Operation"). When the bottom plate
passes the position of the maximum paper load sensor [B], the side fences
[C] are lowered together with the bottom plate until the tray lower limit sensor
detects the bottom plate. The openings [D] in the side fences allow the
bottom plate to be lowered to the maximum paper load sensor position and
allow the side fences to be lowered together with the bottom plate.
9
DETAILED SECTION DESCRIPTIONS
15 June 1995
2.3.2 CASSETTE LOADING
[A]
[F]
[B]
[D]
[E]
C563d503.wmf
[C]
C563d504.wmf
The printer cpu detects that the cassette is loaded in the printer when the
cassette switch [A] is pressed. When the cassette is loaded and the LCT
cover [B] is closed, the cassette bottom plate drive motor [C] raises the
bottom plate [D] by lifting the bottom plate lever [E] until the top sheet pushes
up the feed roller and the main body’s paper table height sensor is
de-actuated. Then, the cassette bottom plate drive motor stops.
When the LCT cover is opened, the cassette bottom plate drive motor rotates
in reverse for 5 seconds to lower the bottom plate. The cassette size sensor
(composed of 5 photointerrupters) [F] detects the cassette tray paper size.
The cassette size sensor is actuated by a plate on one corner of the
cassette. Each paper size has its own unique combination of notches in the
actuator plate. The CPU reads which photointerrupters have been
deactivated by the actuator plate to determine which paper size has been
loaded in the cassette.
10
15 June 1995
INSTALLATION PROCEDURE
3. INSTALLATION PROCEDURE
If the sorter will be installed on the same visit as the LCT installation, install
the LCT first.
NOTE: The optional table (unit code C564) is necessary to install this LCT.
3.1 ACCESSORY CHECK
Check the accessories in the box against the following list.
1. Installation Procedure................................................... 1
2. Decal Sheet .................................................................. 1
3. Paper Change Decal ................................................... 1
4. Right Paper Guide Plate............................................... 1
5. Left Paper Guide Plate ................................................. 1
6. Paper Feed Small Cover .............................................. 1
7. Positioning Bracket....................................................... 1
8. Short Connector ........................................................... 1
9. Knob Screw .................................................................. 2
10. Nylon Clamp ................................................................. 1
11. Flange Head Screw - M4 x 8 ........................................ 1
12. Philips Screw with Flat Washer - M4 x 6 ...................... 3
13. Cassette ....................................................................... 1
11
INSTALLATION PROCEDURE
15 June 1995
3.2 INSTALLATION PROCEDURE
ICAUTION
Unplug the power cord of the printer before starting the following
procedure.
[A]
[A]
C563I500.wmf
[B]
C563I501.wmf
[C]
1. Remove the strips of tape [A].
2. Put the printer [B] on the table (C564) [C]. Put the shelf in if required by
the user.
3. Remove the following covers from the printer: right front cover, left upper
cover, right cover, and rear cover.
12
15 June 1995
INSTALLATION PROCEDURE
[A]
[B]
C563I502.wmf
[C]
[F]
[E]
[D]
[C]
[G]
C563I503.wmf
4. Remove the main board [A] (8 screws).
5. Remove the actuator bracket [B] for the paper table lower limit sensor (1
screw). (This actuator is not necessary after installing the LCT.)
6. Remove the three screws [C] that hold the paper table drive motor [D]
bracket. Disengage the motor gear from the table drive gear [E] to enable
free movement of the paper table [F].
7. Raise the paper table and disconnect the two connectors [G] at the front.
13
INSTALLATION PROCEDURE
[C]
[D]
15 June 1995
[B]
[A]
[D]
[C]
[H]
[E]
[A]
C563I504.wmf
[G]
[I]
[F]
C563I505.wmf
8. Remove the two screws that hold the grounding wires [A]. (Keep one of
the two screws for installing the grounding wire in step 22).
9. Remove the paper table holder [B] (1 screw). (This is not necessary after
installing the LCT.)
10. Remove the four rack shafts [C] and rollers [D]. (These are not necessary
after installing the LCT.)
11. Remove the paper table [E]. (This table is not necessary after installing
the LCT.)
12. Remove the paper feed bottom plate [F] (4 screws). (This is not
necessary after installing the LCT.)
13. Disconnect the connector [G] of the paper table safety switch and install
the short connector [H] packed with the LCT.
14. Put back the three screws (removed in step 6) to secure the paper table
drive motor bracket [I]. Reinstall the main board.
14
15 June 1995
INSTALLATION PROCEDURE
[H]
[A]
[C]
[B]
C563I506.wmf
[F]
[G]
[D]
C563I507.wmf
[E]
C563I508.wmf
15. Install the positioning bracket [A] from the LCT accessories (2 Philips
screws with flat washers from the LCT accessories). Secure the bracket
to the copier first, then slide it into position until the two spring pins click
into the holes in the cabinet.
16. Position the main body so that the two pins [B] on the bracket fit into the
two openings in the table. Then fix the main body to the table with the two
knob screws [C] (packed with the table).
17. Remove the support bracket/safety switch assembly [D] (4 screws). (This
is not needed after installing the LCT.)
18. Remove the two screws [E] installed on the stay at the back side of the
LCT.
19. Attach the left and right guide plates [F and G] to the LCT (from the LCT
accessories), and secure them with the 2 screws [E].
20. Reinstall the main body’s right cover [H].
15
INSTALLATION PROCEDURE
15 June 1995
[I]
[N]
[K]
[L]
[A]
[J]
C563I509.wmf
[H]
[M]
C563I510.wmf
[E]
[C]
[F]
[B]
[D]
C563I511.wmf
[G]
NOTE: When the sorter is already installed, or will be installed immediately
after LCT installation, carry out step 21.
NOTE: Take care not to damage the connector of the harness where the
front upper cover [N] is connected.
21. a) Remove the upper [I], front lower [J], rear upper [K], rear lower [L],
right [M], and front upper [N] covers of the LCT.
b) Move both switch brackets [A] fully inward and tighten the screws.
c) Put back all the LCT covers except for the front upper cover [N].
22. Pass the LCT connector harness [B] through the bracket cutout as
shown. Connect the 6-pin connector [C] from the LCT to the harness
connector from the printer. Connect the 22-pin connector [D] to the main
board [E]. Attach the grounding wire [F] as shown (1 screw removed in
step 8).
23. Secure the LCT harness with the harness clamper [G] and flange head
screw - M4 x 8 (both from the LCT accessories).
24. Push the LCT against the printer to connect them. Turn the LCT legs [H]
until each leg just contacts the floor.
16
15 June 1995
INSTALLATION PROCEDURE
[A]
[B]
[C]
[E]
[D]
[F]
C563I512.wmf
[G]
[H]
C563I513-1.wmf
25. Attach the LCT position indicator arm [A] to the inside of the printer side
plate (Philips screw with flat washer M4 x 6 [B], packed with the LCT).
NOTE: If the screw cannot be secured, readjust the LCT leg height.
Make sure that the indicator arm and the edge [C] of the printer
side plate are parallel.
26. Secure the LCT to the table with the two knob screws [D] (from the LCT
accessories).
NOTE: Make sure that the positioning pin projects from the opening [E]
between the two knob screws.
27. Remove the magnet [F] (2 screws). Then install the paper feed small
cover [G] in its place with two Philips screws with flat washer M4 x 6 [H]
(all LCT accessories).
NOTE: Push the paper feed small cover to the uppermost position, then
secure it.
17
INSTALLATION PROCEDURE
15 June 1995
[F]
[A]
[C]
[B]
[D]
C563I513-2.wmf
C563I514.wmf
[E]
C563I515.wmf
28. Stick the paper change decal [A] from the accessories on top of the lower
paper table decal [B] (the function of the button has changed).
29. Attach the operation decal [C] just below the decal already attached to
the small cover. (Operation decals for 5 languages are included on the
decal sheet in the accessories; select the appropriate one.)
30. Open the LCT cover [D] and attach the lever position decals [E] as
shown. These decals are included on the decal sheet in the accessories.
31. Put back the printer’s left and right front covers.
32. Reinstall the front upper cover [F] of the LCT and the rear cover of the
printer.
32. Check the LCT’s operation.
18
15 June 1995
SERVICE TABLES
4. SERVICE TABLES
4.1 SERVICE REMARKS
1. When the printer and LCT are moved to another place to comply with a
customer request, remove the LCT from the printer first.
2. If any adjustment or operation check has to be made with exterior covers
off or open, note that the LCT bottom plate may move down and up while
the main switch is turned on. Keep hands away from mechanically driven
components, especially under the LCT bottom plate and the space
between the right cover and LCT bottom plate.
3. Do not raise the LCT bottom plate while the LCT is removed from the
printer and the LCT harness is connected to the printer. Otherwise, the
bottom plate continues to be lifted up and mechanical damage may occur.
4.2 PM TABLE (Every 6 months)
I: Inspect
L: Lubricate
Section
All Sensors &
Switches
bottom Plate
C: Clean
6 Months
I,C
C
Tray Drive Worm
Gear, Wheel
I, L
Tray Shift Shaft
I, L
Bushings
L
Gears
L
Notes
Clean with a blower brush.
Clean with a dry cloth and blower brush.
Grease (Shell Albania No. 2): Lubricate after
cleaning.
Make sure that the bottom plate is lifted up and down
smoothly without abnormal noise.
Oil: Lubricate after cleaning.
Make sure that the LCT is shifted front to rear
smoothly without abnormal noise.
Oil: Lubricate after cleaning.
Grease (Shell Albania No. 2): Lubricate after
cleaning.
19
REPLACEMENT AND ADJUSTMENT
15 June 1995
5. REPLACEMENT AND ADJUSTMENT
5.1 TRAY DRIVE BELT TENSION ADJUSTMENT
[A]
[C]
[B]
C563R500.wmf
1. Remove the LCT from the printer.
2. Loosen the tension plate screws [A].
3. Push the tension plate up, so that the tension shaft [B] contacts the
bottom of the opening [C] and secure the screws.
20
15 June 1995
REPLACEMENT AND ADJUSTMENT
5.2 HORIZONTAL ADJUSTMENT OF THE BOTTOM PLATE
[B]
[A]
[C]
within 1.5mm
C563R501.wmf
[A]
within 1.5mm
C563R502.wmf
1. Remove the paper from the LCT bottom plate.
2. Raise the bottom plate until the tray paper position sensor detects the
bottom plate, then turn off the printer main switch.
3. Remove the LCT from the printer.
4. Confirm that the heights [A] at the three indicated positions are within 1.5
mm.
5. If they are not, loosen the screws [B] on the joints [C] and adjust the joint
positions so that the heights [A] at the three positions are within 1.5 mm.
21
REPLACEMENT AND ADJUSTMENT
15 June 1995
5.3 IMAGE POSITION INDICATOR ADJUSTMENT
[B]
[C]
[A]
C563R503.wmf
NOTE: Take care not to damage the harness in step 1.
1. Using the Image Position switch [A], position the paper tray at the center.
(The paper tray is at the center when the distance between the base and
the front shift limit switch equals the distance between the base and the
rear shift limit switch.)
2. Remove the indicator cover (2 screws and 1 connector).
3. Loosen the screw [B].
4. Adjust the indicator [C] to the center.
5. Re-tighten the screw.
6. Reassemble the machine.
7. Carry out the image center adjustment in the platen mode (SP9-2) and
image center adjustment in the ADF mode (SP9-52).
22
15 June 1995
REPLACEMENT AND ADJUSTMENT
5.4 COVER OPEN SWITCH BRACKET POSITION
ADJUSTMENT
[A]
[C]
[B]
C563R504.wmf
1. Lift up the LCT cover [A] 20 mm as shown. Check whether the cover
open switch has turned off.
2. If it has not, move the bracket [B] by loosening the screw [C].
23