1
User Manual
Series RA
960002E
Rev. 09/07
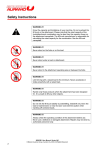
Safety Instructions
WARNING !!!
!
Know the capacity and limitations of your machine. Do not overload the
lift truck or the attachment. Please note that the rated capacity of the
truck/attachment combination may be less than the capacity shown on
the attachment nameplate. The lift truck manufacturer is responsible for
calculating the rated capacity for the combination. See the lift truck
nameplate.
WARNING !!!
Never stand on the forks or on the load
WARNING !!!
Never stand under a load or attachment.
WARNING !!!
Never stand in the attachment operating area or between the forks.
WARNING !!!
Limit driving with a raised load to the minimum. Never accelerate or brake
powerfully with a raised load.
WARNING !!!
Handle only those products which the attachment has been designed for.
It is unsafe to lift any other objects.
WARNING !!!
Do not risk the lift truck stability by sideshifting. Sideshift only when the
load is lowered down or near its seat. Use extreme caution when
handling off-centered loads.
WARNING !!!
Always check the operating condition of the attachment before use.
Never use a defective or damaged attachment. Repairs may be done by
authorized personnel only.
960002E, User Manual, Series RA
© Bolzoni Auramo Group, Auramo Oy, 2007, All Rights Reserved
2
Contents
1. General
4
1.1 Notices
1.2 Safety Instructions
2. Introduction
5
2.1 Bolzoni Auramo Series RA Clamps
2.2 Nameplate
3. Installation Instructions
7
3.1 Truck Requirements
3.2 Handling and Storage
3.3 Installation
3.4 Hose Flush
3.5 Connecting the Hoses
3.6 Air Removal
3.7 Checks Before Operating the Clamp
4. User Instructions
16
4.1 Clamping the Paper Roll
4.2 Rotating the Roll
4.3 Tips for Safe Operation
5. Periodic Maintenance
22
5.1 Daily Checks
5.2 Inspection and Service
5.3 Tightening the Bolts
5.4 Lubricants
6. Trouble Shooting
26
6.1 General
6.2 Safety Warnings
6.3 Hydraulics of the RA-Series
6.4 Trouble Shooting
7. Service and Repairs
32
7.1 General
7.2 Notes on Service Actions
7.3 Service Instructions
8. Spare Parts
38
8.1 Spare Parts Book
8.2 Ordering Spare Parts
960002E, User Manual, Series RA
© Bolzoni Auramo Group, Auramo Oy, 2007, All Rights Reserved
3
1. General
This manual contains installation, maintenance and service instructions
for standard Bolzoni Auramo Series RA clamp attachments.
Please read this manual carefully before using or servicing this
equipment. This will ensure safe and error-free operation of the clamp
attachment right from the start.
Make sure that you know how the clamp works before attempting to use
it.
Every country has its own safety regulations concerning lift trucks and lift
truck attachments. It is the responsibility of the user to know and follow
these regulations. If safety recommendations given in this manual should
differ from local regulations, the local regulations should always be
followed.
1.1 Notices
There are three different levels of notices in this manual:
WARNING !!! - These paragraphs contain information that will help to
prevent injuries.
CAUTION !!! - These paragraphs contain information that will help to
prevent damage to the equipment.
NOTE !!! These paragraphs contain information that will help to service
the equipment.
1.2 Safety Instructions
•
Always check the operating condition of the clamp attachment before
use. Never use a defective or damaged attachment.
•
Never stand under a load or clamp attachment.
•
Never stand in the clamp operating area or between the clamping
surfaces.
•
Handle only those products with the clamp attachment that it has
been designed for. It is unsafe to lift any other objects.
•
Know the capacity and limitations of your machine.
960002E, User Manual, Series RA
© Bolzoni Auramo Group, Auramo Oy, 2007, All Rights Reserved
4
2. Introduction
2.1 Bolzoni Auramo Series RA Clamps
Bolzoni Auramo RA-Series clamp attachments have several different
models that have been designed to handle 1 to 4 paper rolls in weight
ranges between 1000 to 8000 kg (2200 to 17000 lbs.).
All clamps in the Bolzoni Auramo RA-Series have the following properties
in common:
•
Pivoting arm movement. Several different arm and contact pad
options in standard production series.
•
Optional split-arm design on long arms enables simultaneous
handling of two to four paper rolls with different diameters.
•
Thin-arm profile allows tight stacking with excellent visibility and
damage-free handling.
•
Hydraulic positioning of the short arm improves handling.
•
Well-proven, 180-degree rotation, with hydraulic cushioning in the
vertical positions, eliminates the risk of edge damage.
•
Rack-and-pinion drive system, with high rotating torque, ensures fast,
safe handling.
•
Strong lightweight body, with favorable lost-load center, maximizes
the residual capacity of the truck.
1
2
2
1. Clamp body
3
4
2. Long arm (split)
3. Short arm
4. Contact pad
Figure: Main components of the RA-Series clamp attachment
960002E, User Manual, Series RA
© Bolzoni Auramo Group, Auramo Oy, 2007, All Rights Reserved
5
2.2 Nameplate
Every Bolzoni Auramo clamp attachment has a unique serial number.
This and other identification information can be found on the attachment
nameplate, which is fastened to the clamp body.
Serial number and clamp attachment type must always be given when
ordering spare parts or when making inquiries concerning the clamp.
Figure: Nameplate
1.
Clamp attachment type
2.
Serial number, production year
3.
Clamp rated load capacity (= allowed load in kg or lbs. at given
load center)
4.
Clamp weight and center of gravity
5.
Effective thickness
6.
Maximum operating pressure
7.
Roll range (max/min)
Serial number is also marked on the fastening plate of the nameplate.
NOTE !!!
A damaged or lost nameplate should be replaced.
960002E, User Manual, Series RA
© Bolzoni Auramo Group, Auramo Oy, 2007, All Rights Reserved
6
3. Installation Instructions
3.1 Truck Requirements
3.1.1 Clamp Attachment Rated Capacity
Rated Capacity
The rated capacity given for each clamp is a nominal value defined by the
clamp construction and clamping force. Rated capacity does not take into
consideration properties of the load or working conditions.
Therefore, the net working capacity of a truck-clamp combination is not a
fixed value. It is defined by the clamp’s rated capacity and the truck's
rated capacity at certain heights, loads and working conditions.
Net Capacity
The lift-truck dealer or manufacturer must calculate the net working
capacity for truck-clamp combination.
The net capacity can be calculated with a moment calculation method
when dimensions and weights of the truck, clamp and load are known.
WARNING !!!
Clamp attachment decreases lift truck’s rated capacity.
WARNING !!!
The truck is dangerous to the driver and to persons working near the
truck if the driver does not know the net working capacity.
Net capacity information must always be visible from the driver’s seat.
WARNING !!!
The lift truck manufacturer is responsible for giving the final capacity
rating to the forklift/attachment combination.
960002E, User Manual, Series RA
© Bolzoni Auramo Group, Auramo Oy, 2007, All Rights Reserved
7
3.1.2 Hydraulic Pressure
Clamp attachment maximum hydraulic pressure is given on the
attachment nameplate and on the machine card. Rated capacity is
calculated using this pressure. If a lower operating pressure is used, the
clamping force will be smaller (and also the rated capacity).
WARNING !!!
Never exceed the maximum operating pressure.
3.1.3 Oil Flow
The volume of oil that flows to the clamp must be as specified.
Too small a volume will slow down clamp motions. Too large a volume
can cause excessive heating, faulty clamp operation and possible
damage to the clamp or truck hydraulic system.
Recommended oil flow volumes for Bolzoni Auramo RA-Clamps are as
follows:
Clamp capacity
Recommended oil flow rate
-1300 kg
1300-2200 kg
2200 - 3500 kg
3500 - 4500 kg
4500 - 6000 kg
6000 - 8000 kg
20 - 30 l/min
30 - 40 l/min
40 - 50 l/min
40 - 60 l/min
50 - 70 l/min
50 - 90 l/min
3.1.4 Hydraulic Oils
Use petroleum based hydraulic oil as recommended by the truck
manufacturer.
If you wish to use aqueous-based or biohydraulic oils, please contact
Bolzoni Auramo.
3.1.5 Required Hydraulic Functions
Standard Bolzoni Auramo RA-Series clamps require two hydraulic
functions from the truck hydraulic system in order to enable clamping and
rotating motions.
960002E, User Manual, Series RA
© Bolzoni Auramo Group, Auramo Oy, 2007, All Rights Reserved
8
3.2 Handling and Storage
Prior to installation check the clamp carefully for possible damage
occurred during transportation.
3.2.1 Lifting the clamp
If you have to lift the clamp during installation, make sure that the
capacity of your lifting device is adequate.
WARNING !!!
Never go under a hanging load. Beware of load swing when lifting.
WARNING !!!
If the lifting device is attached to one part of a split long arm only, it is
possible that long arms may move when the clamp is lifted (RA-J models
only).
To prevent this movement, attach the lifting device to all long arm parts or
lock all parts together before the lifting operation.
3.2.2 Long Period Storage
If for any reason you have to store the clamp for an extended period,
follow the instructions given below in order to prevent damage caused by
corrosion:
•
Clean the clamp carefully.
•
Lubricate and grease all parts that require lubrication (see Chapter 5
for instructions).
•
Protect all parts that are likely to rust with a suitable corrosion
inhibitor or grease. If possible put protective oil into cylinders.
•
Move arms to a totally open position (so that piston rods are totally in
the cylinders).
•
Protect the clamp from the effects of the weather. Store it inside or
under a proper cover.
•
Check the condition of the clamp during storage and, if possible,
regularly run all hydraulic functions of the clamp several times.
960002E, User Manual, Series RA
© Bolzoni Auramo Group, Auramo Oy, 2007, All Rights Reserved
9
3.3 Installation
Before installation carry out the following:
•
Make sure that the truck fulfills all clamp requirements (Section 3.1).
•
Make sure that the clamp mounting type is the same as the one used
on the truck.
•
Check that the truck's hydraulic oil level is correct.
•
Check that the truck's hosing and fittings are in a good condition.
•
Clean the truck carriage. Make sure that it has no defects or wear
that could prevent installation or use of the clamp.
3.3.1 Installation, Standard Carriages
Installation to the most common standard carriages (types ISO 2328-2,
2328-3, 2328-4) is as follows:
•
Remove clamp's lower mounting hooks. In quick-change models,
open lower mounting hooks.
•
Lift the clamp to the carriage, so that it hangs from the upper
mounting hooks.
•
Center the clamp horizontally on the carriage.
•
Install lower mounting hooks. In quick-change models, close lower
mounting hooks.
•
To prevent the clamp from moving on the carriage, two centering
blocks are to be welded to the upper carriage bar.
•
Centering blocks can also be welded to the upper mounting hooks. In
which case, the block must be positioned so that it is properly
engaged in the mating notch on the truck carriage. In such a case it
might be slightly more difficult to center the clamp. Welding
instructions come supplied with the clamp.
Figure: Positioning centering blocks to the upper mounting hook or to the
upper carriage bar.
960002E, User Manual, Series RA
© Bolzoni Auramo Group, Auramo Oy, 2007, All Rights Reserved
10
WARNING !!!
Upper mounting hooks must be properly engaged to the upper carriage
bar before fastening lower mounting hooks. If not properly engaged, the
clamp might drop.
3.3.2 Installation of Special or Large Mountings
Pin type and hook type mountings that are common in larger clamp
models are normally installed as follows:
•
Remove lower pins.
•
Hang the clamp to the truck carriage from upper hooks or pins.
•
Center the clamp.
•
Attach lower pins and bolt pins.
•
If necessary, weld lower mounting links.
WARNING !!!
Upper mounting hooks must be properly engaged to the upper carriage
bar before fastening lower mounting hooks. If not properly engaged, the
clamp might drop.
Instructions for special mountings can be found in the clamp spare parts
book or in separate mounting instructions.
3.4 Hose Flush
Flush the truck mast hosing before installing the clamp attachment. It is
estimated that up to 80% of all defects in hydraulic systems are caused
by dirty hydraulic oil. Oil from the mast hoses should be run through the
oil filter during the flushing to minimize the amount of debris and dirt in
the hoses.
•
Connect each hose pair with suitable fittings. If needed, use an extra
hose.
•
Turn the truck on and actuate control valves in both directions for
about 40 seconds.
Figure: An example of a hose-flush connection
960002E, User Manual, Series RA
© Bolzoni Auramo Group, Auramo Oy, 2007, All Rights Reserved
11
3.5 Connecting the Hoses
Dimensions of truck hosing and other hydraulic components must be
adequate to meet the needs of a clamp attachment. In this way there are
no excessive power losses or damages caused by oil overheating. Avoid
90-degree fittings as these cause large pressure losses.
For hydraulic connections, standard RA-Clamps have a connection block
in the clamp mounting side. Sizes of the fittings (DIN 2353) are as
follows:
Clamp capacity 0 ... ca. 3500 kg
•
Ø 12 mm (M18x1,5 , 24º)
Clamp capacity 3500 kg and up
•
(0 ... ca. 7,800 lbs.)
(7,800 lbs. and up)
Ø 15 mm (M18x1,5 , 24º)
(In US & Canadian models, JIC-8 fittings are used)
Clamp hose connections are located as follows (seen from driver’s seat):
clamp functions on the right side, rotation functions on the left side.
Figure: Hose connections of the RA-Series clamp
•
Attach hoses to fittings as shown in the figure. Make sure that hoses
do not twist when attaching the fittings.
•
Check that hose lengths are correct. Check that the hoses will not be
pressed during operation.
•
Do not use a smaller hose-bending radius than recommended by the
hose manufacturer.
CAUTION !!!
Do not over-tighten the hose fittings.
960002E, User Manual, Series RA
© Bolzoni Auramo Group, Auramo Oy, 2007, All Rights Reserved
12
Bolzoni Auramo has several hosing accessories that can be supplied on
request. For example, hoses of a certain length and equipped with a
quick-connection coupling, a four-stage pressure-relief valve (manual or
electric) and a magnet valve designed to divide one pressure line
between two functions.
Figure: Different mast hosing systems
3.6 Air Removal
Air in the hydraulic system can cause extra flex or movements in clamp
functions.
•
Remove air by carrying out all movements (clamping and rotation)
several times between respective end positions.
WARNING !!!
Clamp arms can move unpredictably if there is air in the system.
3.7 Checks Before Operating the Clamp
Check the mounting and all functions of the clamp before using it for the
first time.
960002E, User Manual, Series RA
© Bolzoni Auramo Group, Auramo Oy, 2007, All Rights Reserved
13
3.7.1 Mounting and Clamp Mechanics
•
Check all parts of the clamp to see that no damage occurred during
the transportation.
•
Check that there are no loose bolts or joints.
•
Check that installation to the truck is correct.
•
Check that the clamp is centered to the truck.
3.7.2 Hydraulic Parts
•
Wipe clean all hydraulic parts.
•
Run all movements (clamping and rotation) several times between
respective end positions.
•
Check all cylinders, valves, hoses and fittings for leaks.
•
Check that hosing is correct, with and without pressure.
•
Check truck oil level.
•
Check that split long arms move at the same speed (J-models only),
and if necessary adjust the speed (see Section 7.3.5 for instructions).
3.7.3 Clamping Force Test
It is recommended that regular clamping force tests are carried out in
order to minimize the possibility of roll damage.
•
Check the clamping force with a suitable testing device.
•
Check that the clamping force is maintained when clamping for an
extended period of time. Leave the pressure on for 5-10 minutes and
check for the loss of pressure. Clamping force may decrease up to
10% in ten minutes maximum.
3.7.4 Clamp-Action Test
•
If possible test all clamp attachment functions with an actual load.
•
Check that all movements also work when handling a load.
•
Check the hydraulic system for any leaks or other problems.
•
Check that the clamping force is correct for the load.
960002E, User Manual, Series RA
© Bolzoni Auramo Group, Auramo Oy, 2007, All Rights Reserved
14
3.7.5 Operation Times
It is difficult to give exact values for clamping and rotation times because
pump flow volume affects movement speeds. Thus the values given
below should be considered as guidelines only.
Rotation 180º
4-8 seconds, depending on the clamp size
Clamping max-min
4-8 seconds, depending on the clamp size
If measured operation times are much slower than the given values,
check all hydraulic system connections and the pump oil flow volume. If
necessary, contact your Bolzoni Auramo representative.
960002E, User Manual, Series RA
© Bolzoni Auramo Group, Auramo Oy, 2007, All Rights Reserved
15
4. User Instructions
4.1 Clamping the Paper Roll
Using Bolzoni Auramo RA-Series paper-roll clamps it is possible to
position short and long arms separately. Positioning is carried out using
pressure-relief valves that open at different pressure levels, thus only one
hydraulic function is needed.
In the instructions given below, you will find a description of the operation
logic in the opening and clamping operations.
4.1.1 Opening the Arms
The short arm begins to open only after the long arm has been opened
completely. Therefore, before opening the short arm, the long arm must
be open.
•
Open the long arm fully.
•
Continue the opening function until the short arm has opened
enough.
960002E, User Manual, Series RA
© Bolzoni Auramo Group, Auramo Oy, 2007, All Rights Reserved
16
4.1.2 Closing the Arms
The short arm begins to close only after the long arm is fully closed.
Therefore, before closing the short arm, the long arm must be closed.
•
Close the long arm fully.
•
Continue the closing function until the short arm has closed.
4.1.3 Clamping a Vertical Roll
•
Big rolls - Open both arms fully. Drive the truck near the roll into a
position where the short arm just touches the roll and the roll leans
against the clamp body.
•
Small rolls - Close the short arm fully, open the long arms sufficiently.
Drive the truck near the roll into a position where the short arm just
touches the roll.
960002E, User Manual, Series RA
© Bolzoni Auramo Group, Auramo Oy, 2007, All Rights Reserved
17
•
Grip the roll by closing the long arm. Hold on closing for a couple of
seconds to ensure necessary clamping force. Do not pump the valve.
•
Grip big rolls (= max diameter ... max diameter - 10%) in such a way
that the roll touches the clamp body and contact pads.
•
If possible, grip smaller rolls so that the center of the roll would be on
a line that goes through the contact pad center-points.
•
Do not grip the roll too much behind its centerline, as the roll might
easily slip off the clamp. Furthermore, do not grip any roll too far in
front of its centerline, as this could lead to the clamp frame and the
contact pad corners damaging the roll.
•
Always grip the roll so that the clamp attachment is aligned to the roll.
Misalignment easily leads to roll damage. When handling singular
rolls, always grip the roll so that the arms are centered between the
ends of the roll.
•
When handling multiple rolls, always use a clamp attachment having
split clamping arms. Grip rolls in such a way that each roll is clamped
with own contact pad.
960002E, User Manual, Series RA
© Bolzoni Auramo Group, Auramo Oy, 2007, All Rights Reserved
18
4.1.4 Clamping a Horizontal Roll
•
Adjust the opening of the short arm to suit the diameter of the roll.
Open long arm sufficiently. Short arm down, long arm up.
•
Tilt the mast completely forward (ca. 5 - 6 degrees).
•
Carefully adjust the truck so that the clamp is centered to the roll.
•
Slowly lower the clamp until the short arm just touches the floor.
960002E, User Manual, Series RA
© Bolzoni Auramo Group, Auramo Oy, 2007, All Rights Reserved
19
•
Slowly approach the roll and stop when the lower contact pad
touches the roll.
•
Grip the roll with the long arm. Tilt the mast back to the vertical
position.
•
Lift the roll and then rotate it to the vertical position. Take care not to
damage the roll edges during rotation.
WARNING !!!
Never drive with the roll in a horizontal position. Lift the roll high enough
before rotating. Keep the roll approx. 30 cm (1 ft.) above the floor when
driving.
4.2 Rotating the Roll
RA-Clamps have a hydraulic cushioning in the vertical positions of the
rotation mechanism. This reduces forces that are directed to the roll
during rotation.
•
Grip the roll and lift it high enough before rotating.
•
Rotate the roll.
960002E, User Manual, Series RA
© Bolzoni Auramo Group, Auramo Oy, 2007, All Rights Reserved
20
4.3 Tips for Safe Operation
•
Grip the roll correctly.
•
Drive carefully and safely. Avoid strong acceleration and braking.
•
Always drive with the load lowered down and the mast in a vertical or
backward-tilt position. Note that too much tilt backward or forward
increases the risk of roll edge damage.
•
When taking a roll from the stack, back away only so far as to be able
to lower the roll safely. Never accelerate or brake powerfully when
the roll is up, as this can lead to loss of balance.
•
Do not release the roll before it is in its place. Never allow the roll to
fall down.
•
Beware of slackness in the mast chains.
960002E, User Manual, Series RA
© Bolzoni Auramo Group, Auramo Oy, 2007, All Rights Reserved
21
5. Periodic Maintenance
5.1 Daily Checks
Check that there are no leaks, worn hoses or loosened parts in the
clamp. Check the clamp frame and arms for defects or cracks.
Check that there are no sharp edges on such parts that come into contact
with the load. Remove any such edges, for example, by grinding them.
Check all arms and contact pads and clean them if necessary. Contact
pads should move easily when tested by hand.
Check that the clamping force is correct for your load. Use an Bolzoni
Auramo test cylinder if necessary. If needed, adjust clamping pressure to
suit your needs. Never exceed a clamp's maximum operating pressure.
WARNING !!!
Always check the clamp operating condition before you use it. Never use
a defective or damaged clamp.
Never exceed clamp's maximum operating pressure.
5.2 Inspection and Service
Carry out the following checks and services twice a year or every 300
hours (whichever comes first).
WARNING !!!
In the following service actions the clamp is to be moved hydraulically. Do
not leave any body parts between moving clamp attachment parts.
Do not remove pressurized parts.
Beware of part movements when removing hoses or pipes.
Do not climb on the clamp.
•
Clean the clamp
•
Carry out all routine tasks mentioned in Section 5.1
•
Apply grease to the rotation bearing. Remember to rotate the clamp
during this operation.
960002E, User Manual, Series RA
© Bolzoni Auramo Group, Auramo Oy, 2007, All Rights Reserved
22
Figure: Rotation bearing grease nipples
•
Open the cover plate that protects the rotation mechanism.
•
Rotate the clamp to its end positions and wipe all grease and dirt
from the racks and pinion.
•
Apply grease to racks and pinion, remember to rotate the clamp
during the operation. Use brush or an equivalent tool to apply the
grease.
Figure: Greasing points of the rack and pinion mechanism
•
Protect all such moving parts that are susceptible to rust (such as
springs and pull rods). Apply grease to hinge pins. Be careful not to
use too much grease or other lubricants, as these should not be
allowed to touch roll or contact pads.
960002E, User Manual, Series RA
© Bolzoni Auramo Group, Auramo Oy, 2007, All Rights Reserved
23
•
Check the amount of oil in the truck's system, check oil purity and the
condition of the oil filter.
•
Flush mast hoses, see Section 3.4 for instructions.
•
Check the clamp for parts that might become defective or cause
other trouble during the next service interval. Especially check hinge
pins and their bushings, contact pads and wear plates. Replace or
repair all parts showing signs of excessive wear.
In the next section, you will find some guidelines on how to estimate the
amount of wear in some parts.
Arm pivots (pins, bushings and their seats)
When moving arms up and down by hand, the play should be less than 5
mm (0.2 inch) measured from 1000 mm (40-inch) arm length. For longer
(or shorter) arm lengths use the following formula: max. play = Arm
length in mm * 5 / 1000 (or max. play = Arm length in inch * 0.2 / 40). If
the play is greater than this and disturbs normal operations, worn arm
bushings or clamp cylinder bushings must be replaced.
Rotation mechanism (rack and pinion)
The play should be no more than 5 mm (0.2 inch) measured from a 500
mm (20-inch) distance from the torque center. If the play is greater than
this and disturbs normal operations, you have to replace rack and/or
pinion. The best and most durable result would be to replace both.
You can measure the play by gripping a vertical roll and then carefully
(and slowly) trying to rotate it (do not lift the roll in this case). Another
method is to rotate by hand a clamp that has been lifted up.
5.3 Tightening the Bolts
Bolts on Bolzoni Auramo RA-Series clamps are secured using LOCTITE
270. Bolts under high stresses are also tightened to a certain fastening
torque. In normal cases, re-tightening of the bolts is unnecessary.
Should loose bolts be found during daily checks, open them, apply some
LOCTITE 270 to the bolt threads and retighten them. Also remember to
check the tightness of bolts within the immediate area.
960002E, User Manual, Series RA
© Bolzoni Auramo Group, Auramo Oy, 2007, All Rights Reserved
24
The following bolts are to have the specific fastening torque of:
Mounting bolts
M20 torque 540 Nm
(55 kpm / 400 lbs-ft)
Rotation bearing bolts
M16 torque 280 Nm
(29 kpm / 210 lbs-ft)
Pinion bolts
M16 torque 280 Nm
(29 kpm / 210 lbs-ft)
5.4 Lubricants (Greases)
All lubrication points on Bolzoni Auramo RA-Clamps are greased using
following lubricant:
Mobilplex 47 (or equivalent good quality grease)
960002E, User Manual, Series RA
© Bolzoni Auramo Group, Auramo Oy, 2007, All Rights Reserved
25
6. Trouble Shooting
6.1 General
It is estimated that up to 80% of all trouble and defects in hydraulic
systems originate from dirty hydraulic oils.
In most cases, dirty oil is the reason for various valve problems and
excessive wear in seals and o-rings.
Because all clamp attachment hydraulic functions move back and forth, it
is possible that the same debris might be moving in the oil for a very long
time unless special attention is paid to cleanliness.
Bolzoni Auramo strongly recommends that the hydraulic oil and oil filters
are changed regularly.
6.2 Safety Warnings
During all trouble shooting operations, work will be carried out near the
clamp. Always work safely.
WARNING !!!
Do not open pressurized components.
Hydraulic components can be hot. Use suitable protection.
Beware of leaks. High-pressure oil can damage the eyes and skin.
Always wear protection goggles having side-protection.
Do not remove cartridge valves when pressure is on.
Do not put your body parts between or near moving clamp parts.
Do not climb on the clamp.
960002E, User Manual, Series RA
© Bolzoni Auramo Group, Auramo Oy, 2007, All Rights Reserved
26
6.3 Hydraulics of the RA-Series
This section shows only an example of the standard hydraulic system.
Please refer to the spare parts book for actual hydraulic diagrams.
6.3.1 Circuit Schematic
Figure: Circuit Schematic, Standard RA-NJ Series clamps
6.3.2 Hosing Diagram and Valves
In the figure below can be seen the hydraulic components of a standard
RA-NJ Series clamp.
Figure: Hosing Diagram
960002E, User Manual, Series RA
© Bolzoni Auramo Group, Auramo Oy, 2007, All Rights Reserved
27
Part A: Clamping Valve Block
The clamping valve block controls the arm functions. In the figure below,
the main components and functions of a clamping valve are indicated and
described. Numbers in the figure correspond to those in the spare parts
book.
Figure: Clamping Valve Block
Main pressure-relief valve cartridge (1): This valve is used to control the
clamping force of the clamp attachment.
Check-valve cartridge (2 pcs.) (20): One check valve keeps the clamping
pressure on and the other one prevents long arms from closing under
their own weight (during horizontal lifts).
Short-arm pressure-relief valve cartridge (21): This valve also functions
as a check valve. This valve controls short arm movement, it allows short
arms to move only when long arms are totally open.
Part B: Rotating Valve Block
The rotating valve block controls the rotation function. In the figure below
the main components and functions of a rotating valve are indicated and
described. Numbers in the figure correspond to those in the spare parts
book.
Figure: Rotating Valve Block
Flow-control valve cartridge (2 pcs.) (1): Controls the rotating speed of
the clamp.
Counterbalance-valve cartridge (2 pcs.) (3): Prevents the load from
rotating too fast (rushing) during the rotation.
960002E, User Manual, Series RA
© Bolzoni Auramo Group, Auramo Oy, 2007, All Rights Reserved
28
6.4 Trouble Shooting
Problem: No pressure in the clamp
Possible cause: Hose connection between clamp and truck is defective
•
Check all connections. If needed, replace them.
Possible cause: Failure in the truck hydraulic system
•
Check that oil is coming from truck hydraulic system.
Problem: Pressure is on, arms do not move
Possible cause: Incorrect hose connection
•
Check the hoses. Rectify connections if needed.
Possible cause: Dirt in check valve
•
Clean or replace check valves or short-arm pressure-relief valve.
Possible cause: Pressure-relief valve cartridge defective or wrongly set
•
Replace valve or correct the setting.
Possible cause: Leak in pressure cylinders
•
Check and replace seals if needed.
Problem: Pressure is on, rotation does not work
Possible cause: Incorrect hose connection
•
Check the hoses. Rectify connections if needed.
Possible cause: Dirt in flow control valve
•
Clean or replace flow control valves.
Problem: Clamping force too low
Possible cause: Hydraulic pressure is too low
•
Check truck pressure settings. Measure pressure coming from the
truck. Pressure must be the same as, or higher than, what is required
for the clamp.
•
Check oil level.
•
Check for external leaks. If needed, clean components before
checking.
•
Blocked hose or fitting. Repair or replace.
Possible cause: Wrong setting in the main pressure-relief valve
•
Check clamping pressure with the Bolzoni Auramo test cylinder. The
pressure can be adjusted by turning the adjustment screw (clockwise
- pressure increases, counterclockwise - pressure decreases). Never
exceed the maximum operating pressure of the clamp !
960002E, User Manual, Series RA
© Bolzoni Auramo Group, Auramo Oy, 2007, All Rights Reserved
29
Possible cause: Leak in check valve
•
Clean or replace check valves or short-arm pressure-relief valve.
Possible cause: Leak in cylinder seals
•
Replace seals.
Possible cause: Too much pressure in tank line
•
Check hoses and repair if needed.
Problem: Clamping force OK, load falls
Possible cause: Dirty contact pads
•
Clean the contact pads.
Possible cause: Worn or damaged contact pads
•
Replace contact pads or friction surfaces.
Possible cause: Operator error
•
Check that the load is clamped correctly and that there is no
overloading.
Possible cause: Wrong clamp for the load
•
Check if the clamp capacity, opening range and arm/contact pad
models are suitable for the load.
Problem: Loss of clamping force
Possible cause: Leaks in hoses or fittings
•
Check for external leaks. If needed, clean components before
checking.
Possible cause: Leak in check valve
•
Clean or replace check valves or short-arm pressure-relief valve.
Possible cause: Leak in cylinder seals
•
Replace seals.
Problem: Clamp arms close or open too slowly
Possible cause: Oil flow from the pump is too small or much too big
•
Check the pump and replace it if needed. Note flow rate
recommendation (see Section 3.1.3).
Possible cause: Defect in hoses or hoses are too small
•
Repair or replace with correct sizes.
Possible cause: Restrictor valves in the cylinders have wrong setting (Jmodels only).
•
Adjust valves.
960002E, User Manual, Series RA
© Bolzoni Auramo Group, Auramo Oy, 2007, All Rights Reserved
30
Problem: Short arms move simultaneously with long arms
Possible cause: Defect in short arm pressure-relief valve.
•
Change valve. If trouble persists, contact Bolzoni Auramo.
Problem: Short arms do not move
Possible cause: Defect in short-arm pressure-relief valve.
•
Change valve. If trouble persists, contact Bolzoni Auramo.
Problem: Shaking arm movement
Possible cause: Air in the system
•
Remove air by fully opening and closing arms several times.
Possible cause: Dirt in hydraulic system
•
Clean system and change oil and oil filter.
Problem: Split long arms do not move at the same speed (J-models
only)
Possible cause: Dirt between arms and body or uneven wear
•
Clean the clamp. If this does not help, adjust restrictor valves on
cylinders (see Section 7.3.5).
Problem: Rotation end cushioning does not work
Possible cause: Dirt in cushion channel or cushion mechanism
•
Rotate clamp several times back and forth near the end position. If
this does not help, clean cushion channel and mechanism, which are
located at the end of the rotation cylinders. See Section 7.3.3 for
instructions.
Possible cause: Incorrect hose connection
•
Check the hoses. Rectify connections if needed.
Problem: Rotation is too fast or too slow
Possible cause: Counterbalance valves are wrongly set
•
Counterbalance valves can be adjusted using adjustment screws that
are located in the cartridge valve. Clockwise - faster,
counterclockwise - slower. Only screw 1/8-1/4 turns at a time and test
with load after each adjustment. Both valves have to be adjusted
equally.
960002E, User Manual, Series RA
© Bolzoni Auramo Group, Auramo Oy, 2007, All Rights Reserved
31
7. Service and Repairs
7.1 General
Bolzoni Auramo and its authorized representatives are anxious to answer
all customer questions concerning Bolzoni Auramo service and products.
To help us to resolve any problem you may be having as fast and
accurately as possible, please check the following information before
contacting us:
•
Clamp attachment type, serial number and production year. This
information can be found on the clamp nameplate.
•
How and under which operating conditions the trouble occurs.
•
Type of operation, estimated work hours of the clamp.
•
Any other information you think will help us to help you.
7.2 Notes on Service Actions
Clean the clamp carefully before removing or replacing any parts.
Protect the environment. Always put used oil into a proper tank.
Do not let dirt or debris enter into the hydraulic system. Always protect
open fittings with a proper cap. Clean all parts carefully before installing
them onto the clamp.
7.3 Service Instructions
In the following pages you will find instructions on how to perform such
service actions and repairs that are outside the normal maintenance
schedule.
WARNING !!!
Read instructions carefully before you do anything. Repairs done
incorrectly are safety hazards.
Follow all safety instructions given in previous chapters.
960002E, User Manual, Series RA
© Bolzoni Auramo Group, Auramo Oy, 2007, All Rights Reserved
32
7.3.1 Hose Change
•
Clean the clamp carefully before removing or replacing any parts.
•
If the hose leaks from the fitting, first try to tighten the fitting. Change
the hose only if this does not help.
•
Label all hoses before removing them. This makes re-assembly
significally easier.
•
Protect all open fittings with a proper cap.
•
Make sure that hose length is correct before installing it. Always
compare the length of new and old hoses.
•
Make sure that enough play length is left on the hose before
fastening.
•
Do not over-tighten hose fittings. Over-tightening will easily cause
damage to valve blocks or fittings. Make sure that hoses do not twist
when tightening the fittings.
•
Grease the hoses that lie under rack-and-pinion mechanism after
their installation. These hoses are in continuous rubbing motion
against the clamp frame during the rotation.
WARNING !!!
Never remove pressurized parts or hoses.
7.3.2 Seal Change, Clamp Cylinders
•
Remove hoses, protect open fittings with proper caps.
WARNING !!!
Never remove pressurized parts or hoses.
•
Remove the cylinder from the clamp.
Figure: Clamp Cylinder
960002E, User Manual, Series RA
© Bolzoni Auramo Group, Auramo Oy, 2007, All Rights Reserved
33
•
Open the housing (51).
•
Pull the piston assembly and housing (20, 100) out of the cylinder
shell (10).
•
Use blunt screwdriver to take old seals away from the piston (50). If
necessary cut the seals to remove them.
CAUTION !!!
Do not scratch piston surfaces with sharp tools.
Note the direction of the seals.
•
Open the grub screw (53). If necessary, heat the screw before
opening.
•
Unscrew the piston (50) from the piston rod (20).
•
Slide the housing (51) off the piston end of the rod.
•
Remove old seals from housing.
•
Clean and check piston, piston rod, cylinder shell and housing. See if
there are any scratches, wear, corrosion, cracks or other similar
damage that could prevent normal operation of the cylinder.
•
Replace all damaged or worn parts.
•
Install new seals to the housing.
•
Oil seals and piston rod.
•
Slide housing onto the rod from the piston end of the rod.
•
Install the piston back onto the piston rod. Use LOCTITE 542 to
secure the joint.
•
Screw the grub screw back into piston. Use LOCTITE 270 to lock the
screw.
•
Install new seals on the piston.
•
Oil the cylinder shell.
•
Slide piston assembly into the cylinder shell.
•
Screw the housing into the cylinder shell.
•
If possible, test run the cylinder before re-assembling it to the clamp.
Max. test pressure is 22 MPa (220 bar, 3200 psi).
•
Check the condition of pin bushings at both ends of the cylinder and
replace bushings if necessary.
960002E, User Manual, Series RA
© Bolzoni Auramo Group, Auramo Oy, 2007, All Rights Reserved
34
•
Re-install the cylinder to the clamp.
•
Connect hoses.
•
Test run all cylinder functions. Check for leaks.
7.3.3 Seal Change, Rotation Cylinders
Before changing the rotation cylinder seals, the whole rotation cylinder
assembly (both rotation cylinders and their guide parts) must first be
removed.
•
Remove the clamp from the truck and set it to a horizontal position
(mounting side down, arms up).
•
Remove the cover plate.
•
Label all hoses before removing them. This makes re-assembly
significally easier.
•
Remove hoses and pipes, protect open fittings with proper caps.
WARNING !!!
Never remove pressurized parts or hoses.
•
Use a center punch or similar tool to mark the position of adjustment
nuts (40). Hit a mark to every nut and respective position on the
clamp frame. This procedure makes re-assembly easier.
•
Unscrew each adjustment nut slightly less than one turn.
•
Open screws from guide parts.
•
Lift rotation cylinder assembly from the clamp. Use proper lifting
devices only.
•
Slide guide parts off the cylinder shells.
Figure: Rotation cylinder
960002E, User Manual, Series RA
© Bolzoni Auramo Group, Auramo Oy, 2007, All Rights Reserved
35
•
Pull cylinder shell (10/20) off the rack (30).
•
Remove old seals from the rack end.
CAUTION !!!
Do not scratch piston (rack) surfaces with sharp tools.
Note the direction of the seals.
•
Clean and check rack, cylinder shell and guide parts. See if there are
scratches, wear, corrosion, cracks or other similar damage that could
effect normal operation of the cylinder.
•
Replace all damaged or worn parts.
•
Check and clean the cushion bushing in the other end of the rack.
Clean cushion channel from the other end of the cylinder shell.
•
Install new seals onto end of the rack.
•
Apply a thick layer of grease to the rack and seals.
•
Slide cylinder shell onto the rack.
•
If necessary, repeat the operation with the other cylinder shells.
•
Slide guide parts onto cylinder shells.
•
Check the condition of hoses located under the rotation cylinder
assembly. Replace hoses if necessary. Clean and grease these
hoses.
•
Apply a thick layer of grease to the rack-and-pinion teething.
•
Lift rotation cylinder assembly back to the clamp. Note that cylinders
must be in the same position as they were previously. Make sure that
centering marks found on rack-and-pinion teething are in correct
positions, otherwise full 180-degree motion will not be attained !
•
See that holes in cylinder shell ends settle correctly into centering
pins which are located in the clamp frame.
•
Adjust and fasten guide parts. Make sure that guides settle properly
to their seats.
•
Screw cylinder-shell end adjustment nuts back to their original
positions. Use previously made marks to define correct position.
•
Assemble hoses and pipes.
960002E, User Manual, Series RA
© Bolzoni Auramo Group, Auramo Oy, 2007, All Rights Reserved
36
•
Attach the clamp back to the truck. Test all rotation functions. Check
for leaks. Check that the clamp rotates a full 180 degrees. Check that
the rotation end cushioning works.
•
Fasten the cover plate.
7.3.4 Replacement of Wear Plates
The short arms of the RA-Series clamp have wear plates made of special
wear-resistant steel.
The purpose of these plates is to protect the short arms from wearing
during normal operation.
Plates should be replaced before they become totally worn out.
•
Remove the remnants of an old plate by, for example, grinding. Weld
a new plate at the same location.
•
Check also if there is excessive wear to other parts of the clamp and
repair if necessary.
Figure: Wear plates and other typically wearing parts
7.3.5 Split Arm Synchronization
RA-Series clamps with split long arms (J-models) have restrictor valves in
long-arm cylinders. These valves enable arm-movement synchronization.
Restrictor valves are adjusted at our factory but due to operating
conditions or wear it is possible that arms may begin to move with
different speeds. In such cases, valves must be re-adjusted.
•
Open fully adjustment screws of both restrictor valves.
•
Test arm speeds using normal running power.
•
Slightly tighten the adjustment screw of the faster arm. Test the
speed again. Continue adjusting until both arms move at the same
speed.
960002E, User Manual, Series RA
© Bolzoni Auramo Group, Auramo Oy, 2007, All Rights Reserved
37
8. Spare Parts
Bolzoni Auramo and its authorized dealers supply spare parts for all
products manufactured by Bolzoni Auramo.
8.1 Spare Parts Book
A unique Spare Parts Book comes with each clamp attachment. This
book consists of four main parts:
Machine Card
Includes attachment definitions as mentioned in the order. The Machine
Card also contains the same information as the attachment nameplate.
Construction List
The Construction is a list of the main parts of the clamp attachment. It
contains part numbers for sub-construction spare parts.
Spare Parts List
Contains part numbers and part quantities in sub-constructions.
Some parts contain other parts (for example clamp cylinders and valves)
and have their own spare parts lists. These lists are referenced in the
sub-construction spare parts list.
Make sure that correct part numbers are quoted, especially where a part
number is dependent on part dimensions or pressure used in the system
(such as clamp cylinders and valves).
Quality Control Report
Includes results from tests and inspections carried out during the final
check.
8.2 Ordering Spare Parts
In order to ensure a fast and error-free ordering of spare parts, always
include at least the following data with your order:
•
Name
•
Delivery address
•
Possible order number
960002E, User Manual, Series RA
© Bolzoni Auramo Group, Auramo Oy, 2007, All Rights Reserved
38
•
Clamp type and serial number
•
Spare parts number
•
Quantity
•
Delivery type
Unless otherwise specified in the order, Bolzoni Auramo will deliver spare
parts in such a way as it finds suitable.
NOTE !!!
Spare Parts Books are unique for each clamp attachment. Always use
the correct book when ordering spare parts.
Make sure that the serial number in the Spare Parts Book is the same as
the one on the attachment nameplate.
960002E, User Manual, Series RA
© Bolzoni Auramo Group, Auramo Oy, 2007, All Rights Reserved
39
BOLZONI AURAMO BV
Waterbeemd 6a
5705 DN Helmond
Industrieterrein nr. 8955
The Netherlands
Tel: +31-492-50 97 77
Fax: +31-492-38 28 44
E-mail: [email protected]
BOLZONI S.p.A.
29027 Casoni di Podenzano
(Piacenza) Italy
Tel: +39-0523–55 55 11
Fax: +39-0523–52 40 87
Internet: www.bolzoni-auramo.com
E-mail: [email protected]
AURAMO OY
P.O.Box 78 (Valimotie 22)
01511 Vantaa - Finland
Tel: +358-9-82 931
Fax: +358-9-87 01 037
E-mail: [email protected]
BOLZONI AURAMO GmbH
Mühlenstr. 74
41352 Korschenbroich - Germany
Tel: +49-2161-999-36-0
Fax: +49-2161-999-36-99
E-mail: [email protected]
BOLZONI AURAMO SARL
Rue Avogadro
Technopôle de Forbach-Sud
57600 Forbach – France
Tel: +33-3–87 84 65 40
Fax: +33-3-87 84 65 45
E-mail: [email protected]
BOLZONI AURAMO S.L.
Polig. Industrial Riera de Caldes
C/ dels Basters, 12-14 Apdo. 62,
08184 Palau solità i Plegamans
(Barcelona) Spain
Tel: +34-938-648-633
Fax: +34-938-648-350
E-mail: [email protected]
Lisboa Office - Portugal
Tel / Fax: +351-212-902551
Tel móvil: +351-917-884976
E-mail: [email protected]
BOLZONI AURAMO LTD
Unit 10, Taurus Park
Europa Boulevard
West Brook
Warrington Cheshire WA5 7ZT - United
Kingdom
Tel: +44-1925-62 45 70
Fax: +44-1925-62 45 78
E-mail: [email protected]
BOLZONI AURAMO RENTAL LTD
Unit 10, Taurus Park
Europa Boulevard
West Brook
Warrington Cheshire WA5 7ZT - United
Kingdom
Tel: +44-1925-62 45 70
Fax: +44-1925-62 45 79
E-mail: [email protected]
BOLZONI AURAMO AB
P.O.Box 172
80103 Gävle - Sweden
Tel: +46-26-64 72 30
Fax: +46-26-64 72 35
E-mail: [email protected]
BOLZONI AURAMO S.r.l.
S.S. 16 Km 770+580
70052 Bisceglie (BA) Italy
Tel: +39-080-39 51 437
Fax: +39-080-39 51 393
E-mail: [email protected]
BOLZONI AURAMO POLSKA Sp. z.o.o.
Ul. Wojciechowska 5A/7
20-704 Lublin
Poland
Tel: +48-81-44 65 491
Fax: +48-81-44 65 490
E-mail: [email protected]
BRUDI BOLZONI AURAMO INC.
17635 Hoffman Way
Homewood, Illinois 60430 – U.S.A.
Tel: +1-800-358 54 38 (USA only)
Tel: +1-708-957 88 09
Fax: +1-708-957 88 32
E-mail: [email protected]
BRUDI BOLZONI AURAMO Ltd.
90C Brunswick Blvd
Dollard-des-Ormeaux, Quebec H9B 2C5 Canada
Tel: +1-800-685-78 71 (Canada only)
Tel: +1-514-685-78 71
Fax: +1-514-685-52 38
E-mail: [email protected]
BOLZONI AURAMO S.A.
Av.Isidora Goyenechea 2925
Office 103
Las Condes
Santiago - Chile
Tel: +56-2-374 09 99
Fax: +56-2-374 03 68
E-mail: [email protected]
BOLZONI AURAMO (Pty) Ltd.
P.O.Box 7198
Baulkham Hills DC
NSW 2153 - Australia
Tel: +61-2-9659-22 24
Fax: +61-2-9659-22 25
E-mail: [email protected]
BOLZONI AURAMO NEW ZEALAND Ltd.
P.O.Box 34941
Birkenhead
Auckland – New Zealand
Tel: +64-9-570 40 29
Fax: +64-9-570 40 23
E-mail: [email protected]
EUROLIFT Pty. Ltd.
2/81 Harrison Road
Dudley Park 5008
South Australia
Tel: +61-8-83 46 35 55
Fax: +61-8-83 46 94 22
E-mail: [email protected]
INSTANT INDUSTRIES ASIA Pte. Ltd
243 Ubi Avenue 4
Intrepid Warehouse Complex
Singapore 408823
Tel: +65-6745-60 00
Fax: +65-6745-82 22
E-mail: [email protected]
INSTANT MATERIALS HANDLING SDN
BHD
No. 23, 1st Floor Jalan TSB 10A
Taman Industri Sungai Buloh,
47000, Sungai Buloh, Selangor
Malaysia
Tel: +60-3-6157 28 96
Fax: +60-3-6157 07 81
E-mail: [email protected]
ADJL INTERNATIONAL
(TAIWAN) LTD.
4-6Fl., No.28, Sec. 3,
Chung San North Rd.,
Taipei - Taiwan
Tel: +886-2-2668-67 68 / 69 / 70
Fax: +886-2-2668-67 73
E-mail: [email protected]
SHANGHAI SOLID LIFTING
EQUIPMENT Co., Ltd.
No. 108, Lane 7333, Zhongchun Rd.,
Shanghai, 201101
P.R.China
Tel: +86-21-64615027, 64615028
Fax: +86-21-64615026
E-mail: [email protected]
PT AURAMO Mekanika
Tradindo
JL Agung Perkasa 10/11
Sunter Agung Podomoro
Jakarta 14350 - Indonesia
Tel: +62-21-65 21 247
Fax: +62-21-65 12 378
E-mail: [email protected]
BOLZONI AURAMO SOUTH AFRICA
(Pty) Ltd.
P.O. Box 915
Benoni 1500
South Africa
Tel: +27-11-421-07 38
Fax: +27-11-421-52 08
E-mail: [email protected]
AURAMO BALTIC OÜ
Suur-Sõjamäe 10
Tallinn 11415 - Estonia
Tel: +372-6-10 11 14
Fax: +372-6-10 11 58
E-mail: [email protected]
MCGOWAN ENGINEERING LTD
Lightburn Road
Cambuslang – Glasgow G72 7XS Scotland (U.K.)
Tel: +44-141-641-3648 /2359
Fax: +44-141-641-51 47
E-mail: [email protected]
CEMAT s.r.o.
Ul. CSA 196
735 51 Bohumin-Pudlov
Czech Republic
Tel: +42-69-60 13 541-3
Fax: +42-69-60 13 522
E-mail: [email protected]
960002E, User Manual, Series RA
© Bolzoni Auramo Group, Auramo Oy, 2007, All Rights Reserved
40








![English Manual AH-160C [Hardware & Software]](http://vs1.manualzilla.com/store/data/005931679_1-0c77ed47c849260a36e03decc8d56d96-150x150.png)