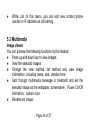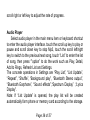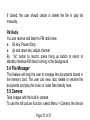
1
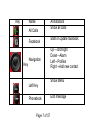
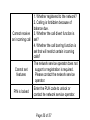
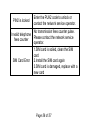
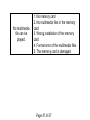
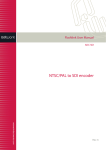
Travel Genie User Guide Content 1 INTRODUCTION ................................................................................................ 2 FOR YOUR SAFETY........................................................................................... 3 ABOUT YOUR DEVICE ...................................................................................... 3.1 3.2 4 FEATURE DESCRIPTION................................................................................... EFFECTIVE DEVICE OPERATION...................................................................... GET STARTED .................................................................................................... 4.1 4.2 SIM CARD INSTALLATION ............................................................................... MEMORY CARD INSTALLATION ........................................................................ Page 1 of 57 4.3 4.4 4.5 4.6 4.7 4.8 4.9 4.10 4.11 5 BATTERY INSTALLATION .................................................................................. BATTERY CHARGING ....................................................................................... CARE AND M AINTENANCE OF THE BATTERY .................................................. SWITCH THE DEVICE ON AND OFF.................................................................... ANSWER A CALL ............................................................................................. END A CALL ..................................................................................................... M AKE A CALL .................................................................................................. CALL WAITING ................................................................................................. WRITE TEXT..................................................................................................... FEATURES ........................................................................................................... 5.1 PHONEBOOK ....................................................................................................... Quick search ........................................................................................................ Search contact..................................................................................................... Add new Contact ................................................................................................. Copy All ................................................................................................................ Delete Call Group ................................................................................................ Page 2 of 57 Extra Numbers .................................................................................................... Settings ................................................................................................................. 5.2 MESSAGE ............................................................................................................ SMS ........................................................….……………………………………… 5.3 MULTIMEDIA ........................................................................................................ IMAGE VIEWER ........................................................................................................... VIDEO RECORDER ..................................................................................................... VIDEO PLAYER...................................................................................... AUDIO PLAYER…………………………………………………………. FM RADIO .................................................................................................................. 5.4 FILE MANAGER ................................................................................................... 5.5 CAMERA .............................................................................................................. 5.6 PROFILES ............................................................................................................ 5.7 SETTINGS ............................................................................................................ PHONE SETUP ........................................................................................................... NETWORK SETUP ...................................................................................................... Security Setup........................................................................................................ Page 3 of 57 Restore Factory Settings .................................................................................... 5.8 CALL CENTER ...................................................................................................... 5.9TOOLS .................................................................................................................. ALARM ......................................................................................................... Calculator ................................................................................................... Calendar ................................................................................................. Er 5.10SNS .................................................................................................................... 5.11 FUN&GAMES..................................................................................................... 6 APPENDIX ............................................................................................................ APPENDIX I ACCESSORIES ..................................................................................... APPENDIX II CARE AND M AINTENANCE .................................................................. APPENDIX III COMMON M ALFUNCTIONS & DIAGNOSIS.......................................... 1 Introduction Thank you for purchasing the Travel Genie mobile telephone, a Page 4 of 57 device of superior design communication technologies. and Page 5 of 57 applying advanced digital Page 6 of 57 Key Name All Calls Facebook Navigation Key Annotations Show all calls Start or update facebook Up→Torchlight Down→Alarm Left→Profiles Right→Add new contact Show Menu Left Key Phonebook Page 7 of 57 Edit message Answer the phone/Sim1 Receive Call Reject or end the call End Call Note: Images illustrated in this user guide are for reference only and may be different from your device. Please make the object as the standard. This user guide contains important information for the device usage and operation. Please read it carefully before using so as to bring out the best performance of your device and prevent it from damage or improper use. Page 8 of 57 Note: Our Company preserves the right to change or improve the product by advanced notification. We also preserve the final interpretation right to the performance of the product. 2 For your safety Read these simple guidelines. Not following them may be dangerous or illegal. Read the complete user guide for further information. Switch on Safety Do not switch the device on when wireless phone use is prohibited or when it may cause interference or danger. Road Safety Page 9 of 57 According to the latest research, it will be harmful to use a mobile phone when driving. Always keep your hands free to operate the vehicle while driving. Please do not put your mobile phone on the panel or near the airbag device of your vehicle. Interference All wireless devices may be susceptible to interference, which could affect performance. Switch off in Hospitals Switch the device off near medical equipment or in hospital (except for the designated use area). Like other common devices, the mobile phone will interfere in the operation of other electrical apparatus, electrical equipments or radio-frequency equipment (such as cardiac pacemaker, hearing aids and etc.). Switch off in Airport Follow any restrictions. Wireless devices can cause interference in aircraft. Page 10 of 57 Switch off in Special Locations Do not use the device at an “explosion site” or a location posted the notice “No Bidirectional Radio” so as to avoid the interference in explosion operation. Do not use the device at a refueling point. Do not use near fuel or chemicals. Accessories and Batteries Please use the batteries and accessories designated by the original manufacturers so as to avoid the damage to the device. Please ensure that the device is switched off when remove the battery. Proper Use Use only in the normal position as explained in the product documentation. Do not touch the antenna unnecessarily. Keep small children from using the device when there is no adult’s supervision. Your device is not water-resistant. Keep it dry. Page 11 of 57 Emergency call (for example, 112) can be made when the device switched on and in service. Data Storage Media The device offers two data storage medias: the storage space in the device and the storage space in the storage card. The following features in this device may share memory: contact, short message, and tool Box. Files in the document archives and camera are stored in the memory card. If the space of your device memory is full, please delete some information or content before continuing other operations. Page 12 of 57 3 About Your Device 3.1Feature Description In addition to the normal communication Features, the device offers a wide range of other practical Features such as camera, video camera, recorder, music player, mobile TV, calendar, clock, alarm clock, label, calculator, world time, document management, number grouping, making your use of the device easy all the time. Please refer to the use guide of each chapter for the detailed introduction of each Feature. 3.2Effective Device Operation Please pay attention to the following items in order to achieve the best Page 13 of 57 performance of the device under lowest power consumption: Hold the device when taking via the device. Talk directly to the microphone with the antenna upward. The device is required to be held above the shoulders. Please do not hold the antenna when using the mobile device. In such manner, not only the conversation quality but also the power consumption will be negatively impacted, therefore, the duration of conversation and standby will be reduced. Continuous exposure to high volume may damage your hearing. You are suggested not to adjust the volume close to your ear. Pay attention to adjust the music and the volume at conversation at a moderate level. Pay attention to the volume when you are listening to music outside. Please make sure that you can be aware of the surrounding circumstances and situations. Special attention shall be paid to when you are crossing a road. Page 14 of 57 4 Get Started Please switch off the device and cut the connection between the device and the charger or other connecting equipment when remove the outside shell. Please install the shell when the device is in storage or use. 4.1 SIM Card Installation SIM card, also called intelligent card or user ID card, is provided by GSM system service vendor. GSM digital mobile telephone can only be used when SIM card is properly installed. Please contact Page 15 of 57 your SIM card provider to learn if SIM service and other usages are provided. SIM card provider may be a service operator, network operator or other business operator. Warning: Do not bend or scratch a SIM card, or make it exposure to static, dust or water. 1. Press the upper part of the back cover and slide it downward to remove the back cover. Please remove the battery if the battery is installed. 2. Ensure the SIM card cut is in the same direction with the SIM card slot and make sure that the gold-colored contact surface is facing down into the holder. 4.2 Memory Card Installation Use the memory card to store multimedia files (such as images, Page 16 of 57 music, video files and etc.) 1. Press the upper part of the back cover and slide it downward to remove the back cover. Please remove the battery if the battery is installed. 2. Ensure the memory card cut is in the same direction with the memory card slot and make sure that the gold-colored contact surface is facing down into the holder. Note: Please switch off the device before inserting or removing a SIM card. The SIM card and its contacts can be easily damaged by scratches or bending, so be careful when handling, inserting, or removing the card. Do not insert and remove the SIM card frequently. Keep the SIM card out of reach by small children. Page 17 of 57 4.3 Battery Installation Only the original batteries and accessories are suitable to your device. Keep your device in dry condition when you will not use it for a long time. Do not keep your device exposure to sunlight. The battery type of your device is: Nokia BL-5B. 1. Press the upper part of the back cover and slide it downward to remove the back cover. 2. Observe the battery contacts and match the contacts to the corresponding parts in the battery cabin. Put the other side into the cabin and push the battery till it is completely fitted. 3. Slide the back cover into its place firmly. 4.4 Battery Charging The new battery is not fully charged. You need to install and charge the battery before using the device. In general conditions, the new Page 18 of 57 battery will work under best condition after several times of charge and discharge. Connect the plug of the charger to the charger connector of the device. Connect the other plug of the charger to the proper power supply socket. When the display shows “charge complete”, pull out the plug of the charger from the charger connector of the device and pull out the other plug of the charger from the power supply socket. 4.5 Care and Maintenance of the Battery This device is powered by a lithium battery. Please choose the batteries and chargers designated by manufacturer. In order extend the lifetime of the battery, please charge the Page 19 of 57 battery for at least 8 hours at the firt time when the batter is low power. Please disconnect the charge with the power when it is idle. Do not connect the battery with the charger longer than 1 week. Overly charging will reduce the lifetime of the battery. Do not use any damaged charger or battery. The battery will discharge after a certain time if a fully charged battery is not in use. The battery can be charged and discharged hundreds of times, but it will eventually wear out. When the talk and standby times are noticeably shorter than normal, replace the battery. Leaving the battery in hot or cold places, such as in a closed car in summer or winter conditions, will reduce the capacity and lifetime of the battery. A device with a hot or cold battery may not work temporarily, even when the battery is fully charged. Battery performance is particularly limited in Page 20 of 57 temperatures well below freezing. Do not dispose of batteries in a fire as they may explode! Dispose of batteries according to local regulations. Do not dispose as household waste. Do not short-circuit the battery. Accidental short-circuiting can occur when a metallic object such as a coin, clip, or pen causes direct connection of the positive (+) and negative (-) terminals of the battery. This might happen, for example, when you carry a spare battery in your pocket or purse. Chargers do not recommend using voltage 8V. 4.6 Switch the device on and off Please ensure that your location is allowed for using phones and the battery with sufficient power is properly installed before switching on your device. Press the power key for a while. During Page 21 of 57 the switch-on process, the phone will play switch-on music and display switch-on animation. If the PIN code of SIM card is turned Note:on, then PIN code will be requested at the time of switch-on. If the SIM card lock is turned on, then the SIM card lock password will be requested when the phone is switched on after SIM card change. Press the power key for a while to switch off the phone. 4.7 Answer a Call The device will ring and display when receiving an incoming call. If the caller can be recognized, his/her number will be displayed in the screen (or stored in the name list of directory). Press the Call 1 key or Call 2 key to answer the call. 4.8 End a Call Two modes to end a call: press the End key to end a call; press the Page 22 of 57 end key to end a call. 4.9 Make a Call Press the call key to call the number. Press the right selection key to delete the wrong character one by one in the number. For international calls, press * twice for the international prefix (the + character replaces the international access code), enter the country code, the area code without the leading 0, if necessary, and the phone number. You can search for a name or phone number that you have saved in Contacts which are stored in the SIM card or the phone memory. To call the number, select a number or name, and press the call key. During making a call, the phone will have a corresponding display. Page 23 of 57 4.10 Call Waiting If your SIM card supports the supplemental service “Call Waiting”, you can set the function in Conversation Setting>Call Waiting. After you phone is successfully initiated “Call Waiting” service, you will hear the prompt tone “Di, Di” when there is a second incoming call during a conversation. The screen will shift to the “Call Waiting” interface and display the number of the second incoming call. This call is called “Call Waiting”. You can press left selection key to answer the call and the first call will automatically stay at holding-on status, or you can press right selection key to reject the second call and continue the first conversation. Page 24 of 57 4.11 Write Text You can input English letter or number by using the keypad. For example, you need to write text when storing names in the contact, writing text information, creating personal Greeting Text or input items in your agenda. This device supports both Chinese and English input methods. Press the key to shift between the two methods. Press the right selection key to clear the text. Input Method In this mode, The screen will displace ABC,abc,123,ES and es icon can change English,Spalish Input Method and Number Input Method. Page 25 of 57 5 Features 5.1 Phonebook You can store the name and telephone number in the phone memory or the SIM card. Up to 200 pairs of numbers and names can be stored in the phone memory. The storage capacity of the SIM card is determined by the type of the card. Quick search contact In the Phonebook Screen , enter the initial number or the initial English letter of the needed name to find one by one,Input and then press OK. To change the character case, press #. Page 26 of 57 Add new Contact The mobile telephone provides two modes for add new entries: Select Personal Information Management > Contacts > Add new contact; press ↑ key and ↓ key to choose the group; enter the name and telephone number of the contact in the editing interface, and press the right selection key to save. Enter the telephone number from the readiness interface, press the left selection key to save options, confirm the saved number, and then enter the add contact interface of Contacts. Group selection can help you to identify the saved location of new business cards, viz. SIM cards to copy to my phonebook.Or Phonebook to SIM card or add to default group Default in the division are family, friend, office and others. Copy You can use this function to copy names and telephone numbers from the mobile phone to the SIM card or from the SIM card to the Page 27 of 57 mobile phone. The humanized interface ensures that you can easily complete the copy through ↑ key, ↓ key, and OK. Delete 1. Select Menu > Contacts > Delete. 2. Choose the deleting location: SIM card or the phone, and delete one by one. Select the SIM Card or the mobile phone, the phone will provide a clew: accept or cancel. the phone will automatically delete the number of the selected item. Settings Memory Status The humanized interface shows the storage status of the SIM Page 28 of 57 card and the mobile phone. Preferred Storage This function can set the default storage location. Choose SIM1, SIM2 or the mobile phone by pressing ↑ key and ↓ key and press the left selection key to confirm. My number:show user’s number Speed dial:switch on or off the function.If on,you can set several numbers as speed dial numbers. Copy contacts:Copy contacts from phone to SIM card,or from SIM card to phone. Move contacts:Move contacts from phone to SIM card,or from SIM card to phone. Delete all contacts:Delete all SIM cards contacts and phone contacts. Page 29 of 57 5.2 Message SMS This device can send and receive a number of normal text messages. Short message is a network service. SMS center number of the corresponding network operator is required to use the service. The storage of short messages depends on the storage space in the SIM card and the phone memory. The screen will display the amount and indication signal when new message is received. Write a message • Use the keyboard to input the message, while use ← key and → key to change the character case. You can input 160 bytes each time. • Press the left selection key to enter the Options after completing the message. Use ↑ key and ↓ key to enter the SIM Options, and then put up the following operations: Page 30 of 57 Send: Enter the telephone number or find the number in Contacts, and send to the receiving user. Send & Save: Send the SMS and save it as draft. SIM1 or SIM2 Options can be selected. Group Send:Group send means to synchronously send the message to the contacts of the group. Add preset SMS: Access the using template menu, and press ↑ key and ↓ key to choose the needed SMS. File format: This function can change the letter size and form and edit text. Enter objects: This function is to choose pictures, flashes or ring tones to enter. Enter names and numbers: This function is to choose names and numbers in Contacts. The names and numbers will automatically enter the editing box after Page 31 of 57 the confirmation. Enter bookmark: Choose the bookmarks you like to enter. Input Method:Select the Input Method. Quit: After completing the above operations, you can quit and establish a new SMS. Inbox Read or view the received short messages in SIM card. You can delete, reply, forward, edit and dial .use items or use connection at your choice. Outbox The function of this option is to save the setting information. The saved information comes from the saved information of new information and the information of the in-box. Page 32 of 57 Multimedia settings Profile settings:Four system profiles could be chosen Common settings:delivery report reply path and save sent message Preferred connectivity: Prefer GPRS and DSM you can choose Calculate data and select preferred storage and memory status Service message Enable limited messages :enable push,enable sevice loading,enable white list. Enable Push:accept all,accept authenticated or trusted or disabled. Enable service loading:Prompt and auto launch or disable. Enable white list: When unmatched,dicard or notify are chose. Page 33 of 57 White List :In this menu ,you can edit new contact phone number or IP address as call barring. 5.3 Multimedia Image viewer You can achieve the following functions by this feature: Press up and down key to view images. View the selected images Change the view method, list method and view image information, including name, size, creation time Sent through multimedia message or bluetooth and set the selected image as the wallpaper, screensaver,Power On/Off Animation,cartoon icon. Rename an image. Page 34 of 57 Delete the selected image Delete all images. Sort the images according to name, type, time and size Save Directory,change the storage directory for taking images. Video Recorder Access this option, you can make a recording. Record: Press the left selection key to begin and press the right selection key to stop. The file will be automatically saved. Press the end key to quit without the recording file saved. Recording list: Broadcast, edit, add, rename, delete and send the saved recording files. Video Player Access the menu, you can enter film list and touch “option” to choose a movie clip to play, send, rename, delete, delete all files, and sort by. While playing, press scroll up or down key to adjust play speed, Page 35 of 57 scroll right or left key to adjust the rate of progress. Audio Player Select audio player in the main menu item or keyboard shortcut to enter the audio player interface. touch the scroll up key to play or pause and scroll down key to stop Mp3, touch the scroll left/right key to switch to the previous/next song, touch “List” to enter the list of song, then press “”option” to do the work such as Play, Detail, Add to Rings, Refresh List and Settings. The concrete operations in Settings are “Play List”, “List Update”, “Repeat”, “Shuffle”, “Background play”, “Bluetooth Stereo output”, “Bluetooth Earphone”, “Sound effects”,“Spectrum Display” ,“Lyrics Display”. Note: If “List Update” is opened, the play list will be created automatically form phone or memory card according to the storage. Page 36 of 57 If closed, the user should create or delete the file in play list manually. FM Radio You can receive and listen to FM radio here. Ok key: Pause /Stop Up and down key: adjust channel By "ok" button to record, press hang up button to return to standby interface FM direct running in the background. 5.4 File Manager This feature will help the user to manage the documents stored in the memory card. The user can view, add, delete or rename the documents and play the music or video files directly here. 5.5 Camera Take images with the built-in camera. To use the still picture function, select Menu > Camera; the device Page 37 of 57 is on image-taking preview mode. Press OK key to take images. Press left selection key to enter the option menu. Press right selection key to return back to the upper menu. You can choose either the front lens or the back lens. The preview mode is the default. Zoom up and down arrow keys, left and right arrow keys to adjust the exposure, "1" key to adjust effects, "2" key to adjust white balance, "3" key on / off LED highlight, "4" key to adjust the time delay in filming, "5" key to adjust Continuous number of sheets, "6" key to adjust shooting mode, "7" adjust photo quality, "8" photo size adjustment, "#" key on / off-screen icon. Note: When taking images or using albums, obey all laws and respect local customs, privacy and legitimate rights of others, including copyrights. Option Page 38 of 57 • Photos Present you with a list for viewing images. • Camera Setting By this feature, you can set LED highlight, the sound of shutter and exposure compensation, defer the shooting and set nonstop shot. • Image Setting Set the size and resolution of image. • Sensor Switch • You can switch sensor1 and sensor 2. • White Balancing Set the ray when using the phone to take images. Options include automatic, sunlight, tungsten filament light, daylight lamp, overcast and candescent light. • Scenario Mode Select Options to set Night mode on if the lighting is dim. Page 39 of 57 • • • Effect Setting Set the special effects when taking images. Storage Set the storage directory after taking images. Restore default Restore settings to the default. 5.6 Profiles The user can switch from one mode to another according to different occasions. The phone offers:Standard Mode, Meeting Mode, Outdoor Mode, mute Mode as well as customized mode. The user can also reset individualized modes by pressing the left selection key to enter the option interface. 5.7 Settings Phone Setup Display Setup Page 40 of 57 Language Set the display language of the phone. Display characteristics Set the backlight, wallpaper, greeting note and date time display, whether to show the time. Clock Setup This feature is to set Date& Time , date & time format and date separator Keypad Lock Setup Set the time of Keypad Locking settings Network Setup This feature is to set the network searching mode and new network searching of SIM Card. Network Searching Mode: Automatic Mode and Manual Mode. Set the phone and select an accessible network according to the cellular condition of the region, or you can select Page 41 of 57 the network manually. Security Setup Use the keypad lock can prevent accidental key presses. PIN PIN (Personal Identity Number), usually provided to a SIM Card by the network operator. If you enter the wrong PIN three times in a row, it will be locked. You need to enter your PUK (Personal Unblocking Key) number to unlock. Please contact your network operator for more information. PIN2 PIN2 is provided to some SIM. If you enter the wrong PIN three times in a row, it will be locked. You need to enter your PUK2 to unlock. Please contact your network operator for more information. PUK PUK (Personal Unblocking Key) is used to unblock the PIN. PUK is Page 42 of 57 provided to a SIM card. If you lose or forget the password, contact your network operator. Phone code Protects your phone against unauthorized use. You can turn on the Phone code for your personal security use. Restore Factory Settings Use this feature to restore all the system data. The menu settings of the phone will be restored to their original values. All the user data stored in the phone will be deleted. Default password for the 1122 phone Note: Please use this feature with great care. Please backup the data store in your phone before using this feature. 5.8 Call center The call center records information of your missed, received, and Page 43 of 57 dialed calls and the accurate duration of each call. Notification: if there is any missed call, the “Missed Call” dialogue will linger on the screen to help you know the number of missed calls. The “Missed Call” icon will be displayed on the top of the screen when the dialogue disappears. The setting of SIM 1 and SIM 2 are the same. Call History Missed calls: record the number of missed calls. Dialed calls: record the number of dialed numbers. Received calls: record the number of received calls. Up to 100 entries can be recorded in the “missed calls, received calls and dial numbers” menu. Delete call log: delete the entire previous call log. Call settings:Two menus are provided .One is the card which you insert ,the other is advanced settings.In normal ,call Page 44 of 57 waiting,call divert and call barring are included . Call waiting:Activate when you are on the phone,another one is coming. Call divert:Divert when incident occur. Some submenus you can choose.Such as divert all voice call, divert if unreachable,divert when no answer,divert if busy ,divert all data calls and cancel all data calls Call barring:Forbide outgoing calls,incoming calls ,cancel all or change barring password to release barring. 5.9Tools Alarm This device offers five alarm clock time settings. Turn On: Turn on or off the alarm clock. You can enter the designed alarm clock time via keypad or handwriting and press Page 45 of 57 the right selection key to confirm. Time Setting: Set the alarm time. Ringing Setting: Set the times of ringing; once, everyday or user-defined. Ring-tone Setting: Choose the tone mode from the rings and FM radio. Snooze Time-out: You can set the snooze time-out with a minute as the basic unit. The alarm will resume after the time-out if no operation is placed after the alarm is ringing. Ringing Mode: Choose the ring tone, or vibration, or vibration + ring tone for your alarm clock Calculator The calculator in your device provides basic arithmetic Features. Press number key 0 to 9 to enter number. Enter the mathematical symbols by using keys. Press # for a Page 46 of 57 decimal point. Press the left selection key to confirm the entering. Repeat the operation when required. Press OK Key for the calculation result. Calendar In this feature, you can view the calendar and add appointment or other operations. Unit Conversion Weight: the weight of units including kg <-> pounds and kilograms <-> ounces conversion. Edit in the appropriate box, enter the required conversion of the figure, pen touch the left soft key, would be in another edit box shows the value you want. -> miles meter <-> code, meter <-> feet, cm <-> inch conversion four. Edit in the appropriate box, enter the required conversion of the figure, pen touch the left Page 47 of 57 soft key, would be in another edit box shows the value you want. 5.10SNS Facebook,Twitter,yahoo,MSN are backed up here. 5.11 Fun&Games Some small games are provided with the system.Such as Copter , Monkey and UFO. 6 Appendix Appendix I Accessories We have provided you with a wide range of accessories. You can choose the proper accessories according your own communication requirements. Page 48 of 57 Charger Standard Battery Data Package/CD Headset Appendix II Care and Maintenance Your device is a product of superior design and craftsmanship and should be treated with care. The following suggestions will help you protect your warranty coverage: Keep the device dry. Precipitation, humidity, and all types of liquids or moisture can contain minerals that will corrode electronic circuits. If your device does get wet, remove the battery, and allow the device to dry completely before replacing it. Do not use or store the device in dusty, dirty areas. Its moving Page 49 of 57 parts and electronic components can be damaged. Do not store the device in hot areas. High temperatures can shorten the life of electronic devices, damage batteries, and warp or melt certain plastics. Do not store the device in cold areas. When the device returns to its normal temperature, moisture can form inside the device and damage electronic circuit boards. Do not drop, knock, or shake the device. Rough handling can break internal circuit boards and fine mechanics. Do not use harsh chemicals, cleaning solvents, or strong detergents to clean the device. Do not paint the device. Paint can clog the moving parts and prevent proper operation. Use a soft, clean, dry cloth to clean any lenses, such as camera, proximity sensor, and light sensor lenses. Use chargers indoors. Page 50 of 57 Always create a backup of data you want to keep, such as contacts and calendar notes. To reset the device from time to time for optimum performance, power off the device and remove the battery. These suggestions apply equally to your device, battery, charger, or any enhancement. If any device is not working properly, take it to the nearest authorized service facility for service. Page 51 of 57 Appendix III Common Malfunctions & Diagnosis Malfunction Possible Diagnosis Description The phone 1. whether the battery is charged cannot be 2. whether the battery is placed switched on properly 1. Whether the charger is properly The battery connected to the device cannot be 2. Whether the battery is usable. The charged performance of a battery will be reduced after a few years’ use. Page 52 of 57 Cannot be registered to the network 1.The signal is too weak or there is interference by surrounding radio. Look at the signal status on the screen to make a judgment. 2. Whether the SIM card is installed properly, or well contacted? Whether the SIM card is damaged?(Please contact the network service operator if the SIM card is damaged) Page 53 of 57 Cannot make a call 1. Whether registered to the network? Look at the screen to see if there is the name of a network service operator? 2. Whether the call barring function is set? 3. Whether service is forbidden because of balance due? 4. Whether the fixed dialing function is set? 5. Whether “no transmission of “My Phone” number” is set so as to be rejected by the network? Page 54 of 57 Cannot receive an incoming call Cannot set features PIN is locked 1. Whether registered to the network? 2. Calling is forbidden because of balance due. 3. Whether the call divert function is set? 4. Whether the call barring function is set that will restrict certain incoming calls? The network service operator does not support or registration is required. Please contact the network service operator. Enter the PUK code to unlock or contact he network service operator. Page 55 of 57 PIN2 is locked Invalid telephone fees counter SIM Card Error Enter the PUK2 code to unlock or contact the network service operator. No transmission fees counter pulse. Please contact the network service operator. 1.SIM card is soiled, clean the SIM card 2.Install the SIM card again 3.SIM card is damaged, replace with a new card Page 56 of 57 No multimedia file can be played. 1. No memory card 2. No multimedia files in the memory card 3. Wrong installation of the memory card 4. Format error of the multimedia files 5. The memory card is damaged Page 57 of 57