1
USER’S MANUAL
Most Cost-effective Scouting Trail Camera
Contents
1.
Introduction.......................................................................................................... - 1 1.1 Fully Functionality Introduction .......................................................................... - 1 1.2 Application ....................................................................................................... - 1 1.3 Power Supply.................................................................................................... - 1 1.4 Attention .......................................................................................................... - 1 1.5 Key Features ..................................................................................................... - 2 -
2.
Whole View and Details of Camera ........................................................................ - 3 2.1 Figure 1: Front View of Camera; ......................................................................... - 3 2.2 Figure 3.2: Bottom View of Camera; .................................................................... - 3 2.3 Figure 3.3: Side View of Camera. ........................................................................ - 4 2.4 Figure 3.4: Internal View of Camera .................................................................... - 5 -
3.
2.5 Function Keys & Other Details............................................................................ - 6 Quick Start ........................................................................................................... - 6 -
4.
3.1 How to start the camera? .................................................................................... - 6 3.2 How to set the functions?.................................................................................... - 6 Operation List....................................................................................................... - 7 4.1 Video/Photo Playback ........................................................................................ - 7 4.2 Delete: ............................................................................................................. - 7 -
5.
6.
4.3 Format of SD Card ............................................................................................ - 7 4.4 Operation Menu ................................................................................................ - 7 Specification ......................................................................................................... - 9 Upgrade to GPRS Model by Inserting GPRS Module ............................................ - 10 -
7.
8.
MMS, SMS, SMTP, FTP, TCP/UDP Functions of GPRS Model(2.6CM)................. - 10 SD Cards Selection and Battery Life Test Report .................................................. - 10 -
9.
8.1 SD Card Selection ........................................................................................... - 10 8.2 Battery Life Test Report for Reference ............................................................... - 11 Trouble Shooting................................................................................................. - 11 9.1 Photos Do Not Capture Subject of Interest .......................................................... - 11 9.2 Camera stops taking images or won’t take images................................................ - 11 -
9.3 GPRS version camera stops sending photos to email or mobiles............................. - 12 10. Warranty ............................................................................................................ - 12 11. Plan for Upgrade 3G/Wifi Digital Camera ............................................................ - 12 -
1. Introduction
Thank you for choosing one of our easy operation highly qualified products. You now
may enjoy the excellences reflected on this series product. This 12MP HD digital
camera was totally R&D by our diligent and smart engineers based on feedbacks and
requirements from customers globally. May you also enjoy and adore this product as
we do. And our company is always open-minded with willing to adopt creative ideas
from you.
1.1 Fully Functionality Introduction
Besides all the functions you may experience from any other similar product;
This digital camera is aimed to offer user the most easy to use experience with
gradually grow functions added; i.e.: GPRS model, SMS remote control, to configure
camera various settings and enable camera to shoot a photo and send back instantly;
etc. Follow up with possible upgrade unique features as 3G & Wifi.
1.2 Application
This digital camera is an ideal product for housing security, warehouse
surveillance, and monitoring wild animals with its camouflage appearance and nice
shape. It is convenient to install or fasten, could be used to take photographs
manually and carry on long-time videos in Test mode.
a. Instant surveillance camera for home, office, construction site, and warehouse,
etc.;
b. Motion-triggered infra-red night vision surveillance;
c. Animal observation and hunting;
1.3 Power Supply
A. AA Alkaline Batteries
This camera can either work with 4 or 8 AA Alkaline batteries. Pls note that the
voltage of rechargeable AA batteries (1.2V) is insufficient to power this device.
Batteries should be inserted as indicated inside the battery case. Upside down
batteries electrode may cause device malfunction. Also, we strongly recommend
changing the batteries when power icon on camera screen is empty or when you
receive lower battery SMS alert (GPRS Model only).
B. Solar Panel
To bring users better using experience, our engineers designed this camera to be
able to work with most standard 6~12V lithium battery build-in solar panels.
C. Power Adaptor—Security Surveillance Purpose
This camera can also be powered by an external 6~12V DC adapter. Recommend
to remove the alkaline batteries when power adapter is used, to avoid surcharging.
Electrical power is recommended for security purposes.
1.4 Attention
1. Insert the SD memory card correctly, camera does not support SD card hot swap
-1-
(insertion).
2. Please use AA battery with good quality in order to prevent battery cells from
corrosion of leaked acid.
3. Use right adaptor (6V/1A or 2A) of this camera to supply power, and do not invert
the electrode when put in batteries.
4. In Test mode, camera will automatically power off in 1min without any operations.
Please manually turn ON it as if you want to use it again.
5. Don’t interrupt power supply during system upgrade, please deliver it back to
factory if the device doesn’t work after upgrading.
6. Do not frequently insert or pull out SD card and battery or plug in and out the
adaptor when the camera is on.
7. Do not have any floating objects, such as leaves, strings, or ribbons in the 3M
motion detection zone of cameras, to avoid mistaking photograph or videos.
8. Do not keep camera next to hot irrelevant objects, air conditioner exhaust vents,
and light, etc. to avoid mistaking photos or videos.
1.5 Key Features
a.
b.
c.
d.
e.
f.
g.
h.
i.
j.
k.
l.
m.
n.
o.
p.
q.
r.
Programmable 5/8/12 Megapixel high-quality resolution;
Especially designed function buttons for user’s conveniences;
Optional to turn on/off camera speaker;
40 pcs IR LEDs for flash range as 20 meters;
Adjustable PIR sensitivity;
Multi-shot pictures (up to 7 pics per trigger);
Impressive quick trigger time: 0.8-1s (GPRS trigger time is 1.2s);
Support standard 6~12V solar panel;
Color pictures during day; black and white at night.
Adjustable delay between motions;
With 8 AA alkaline batteries, the longest standby time is up to 6 months;
Available operation temperature: -20℃ to 60℃;
Time Lapse for automatically and constantly shooting of pictures/videos at preset
interval;
With specified Timer, camera can be programmed to work only during preset
time period every day;
Stamp of USER LABEL, date, time, temperature and moon phase on every picture
enables you to identify where and when the camera shot photos;
Built-in 2.0" TFT color screen to review photos and videos in camera.
Audio Recording brings you heart pumping like ever before;
Two different TV OUT settings help you review photos/videos even from
Television.
Below are for GPRS Model only
s. With SMS/MMS/GPRS/SMTP/HTTP function, camera can transmit photos to 1-4
settled mobile phones and 1-4 email accounts according to set intervals
constantly at lower battery consumption.
-2-
t.
u.
v.
w.
SMS alert when battery is low;
SMS to realize various configurations;
SMS to enable camera to shoot a photo and send back instantly;
Support most 2G and most 3G SIM cards to get real-time photos;
2. Whole View and Details of Camera
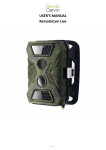
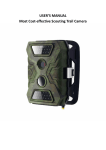
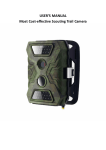
2.1 Figure 1: Front View of Camera;
2.2 Figure 3.2: Bottom View of Camera;
-3-
2.3 Figure 3.3: Side View of Camera.
-4-
2.4 Figure 3.4: Internal View of Camera
Introduction of each button
a) Press Buttons
01: Menu; 02/ 03/ 04/ 05: navigation arrow buttons; 06: OK
b) Switch Buttons
07: Power Switch; 08: Camera/Video Switch; 09: IR LEDs Group Switch; 10: GPRS
Switch
c) Interfaces
11: 12V DC in; 12: USB Port; 13: SD Card Slot; 14: TV Out.
-5-
2.5 Function Keys & Other Details
A. Switch Buttons
Power Switch
Video/Photo
Switch
IR LEDs Group
Switch
GPRS Switch
Switch up: Power On—PIR intelligent automatically monitoring;
light sensor flashes 5 times before entering Mode “Power On”
Switch “On”, press “OK” once to wake up camera LCD screen to
enter TEST Mode; Press and hold button “OK” for 5 sec to get
back to mode “Power On”
Switch down: OFF—Camera stops working.
Switch up: Pic—Photographing
Switch down: Video—Video Recording
Switch up: 19—up side 19 pcs IR LEDs work
Switch down: 40—all 40 IR LEDs work
Switch up: On—GPRS function enabled;
Switch down: Off—GPRS function disabled.
B. Navigation buttons
a) Power Switch by “On”, press “OK” once to wake up camera LCD screen to enter
TEST Mode;
b) Test mode, Press “Menu” once to enter camera setting menu; Press “OK” to
shoot photo(s) or video clips.
c) To navigate the interface by pressing “←”, “↑”, “→”, or “↓”, press “OK” for
selection. To modify the selection, press “↑” and “↓”again and press “OK” to
confirm. To return to the previous menu, press “Menu”.
d) Press and hold button “OK” for 5 sec to get back to mode “Power On”
3. Quick Start
3.1 How to start the camera?
Switch button ⑦ to “ON”, press button ⑥ “OK” once to wake up camera LCD
screen (to enter TEST Mode.)
3.2 How to set the functions?
C. Test mode, Press button ① “Menu” once to enter camera setting menu;
D. To navigate menu interface by pressing “←”, “↑”, “→”, or “↓”, press “OK” for
selection. To modify the selection, press “↑” and “↓”again and press “OK” to
confirm. To return to the previous menu, press “Menu”.
E. Exit Menu, then press button ⑥ “OK” for 5 sec to enable camera to work
automatically by itself.
F. Switch button ⑧ to switch “Photographing”/ “Video Recording”;
-6-
G. Switch button ⑨ to turn on 19 IR LEDs or whole 40 IR LEDs.
H. Switch button ⑩ to turn on/off GPRS function.
4. Operation List
4.1 Video/Photo Playback
In Test Mode without pressing button “Menu”: press arrow button “↑” to enter
Playback; press “←” and “→” for selection, “OK” to play photo/video. Press button
“↑” again to return. Press “Menu” button to initiate Deletion of files or Format of SD
card.
4.2 Delete:
a. Delete one: delete selected photo/video;
b. Delete All.
press“↑” and “↓”for selection, “OK” to confirm, “menu” return back to previous
interface.
4.3 Format of SD Card
a. No
b. Yes: to format SD card via camera.
press“↑” and “↓”for selection, “OK” to confirm, “menu” return back to previous
interface.
4.4 Operation Menu
Test mode, Press “Menu” once to enter camera setting menu; to navigate setting
interface by pressing “←”, “↑”, “→”, or “↓”, press “OK” for selection, and “Menu” to
-7-
return back to previous menu.
Main Menu
Default Setting
1. User Label
OFF
2. Camera + Video
OFF
3. Multi-Shot
1P
4. Image Size
5MP
5. Video Size
6. Video Frame
7. Digital Zoom
8. Video Length
640
30FPS
NO
5 Sec
9. PIR Sensitivity
Middle
10. Timer
OFF
11. Time Lapse
OFF
12. Delay
OFF
Functions Description
Select “ON” to set 4 digits/ alphabets for
each camera. Such function can help user
to identify photos are from where and
which camera.
Select “ON”, camera shoots photo(s) first,
then video upon same trigger event based
on Video Length and Multi-shot user
configured.
Optional 1/2/3/4/5/6/7 photos per trigger
12MP/8MP/5MP
4000x3000, 3264x2448, 2592x1944
HD/640/320: 1080x720/640x480/320x160
30fps/15fps, programmable
Lens focus room in 2/ 3/ 4 times.
5-60s video clips
High/ Middle/ Low;
Higher sensitivity is 1) more sensitive to
movements by smaller subjects; 2) longer
detection distance; 3) easier for sensor to
detect difference between body heat and
outdoor temperature; 4) easier to trigger
camera to record. In high temperature
environment, body heat of subjects and
environment temperature is hard to tell by
camera, suggest set High.
Select “ON”, to set the beginning time and
end time (hour/minute); camera will only
work during the time user set.
Select “ON”, to set the interval; PIR sensor
of camera will be turned off; camera will
shoot pics or video clips automatically
upon the interval user set.
Configurable interval: 5 seconds to 24
hours.
The pre-set time interval you desire
between photo/video recordings upon
motion. This option prevents from taking
too many photos or videos.
Example: Camera will wait 1 minute
between
photo/video recordings with motion
Configurable delay time: 5 seconds to 2
-8-
13. Audio Recording
14. TV Out
ON
N
15. Stamp
ON
16. Frequency
50Hz
17. Language
19. Camera Sound
English
01/ 01/ 2011
12: 00
ON
20. Cycle Recording
OFF
21. Password
OFF
22. Reset
No
18. Time/Date
hours.
Select “ON”, audio available in video clips.
NTSC/PAL
To select or cancel imprinting of
programmed user label, moon phase,
temperature, date, and time on photos.
Improper setting may cause camera screen
flicker
English…
Date/Time; Date: “month/ date/ year”;
Time: “hour/minute”
Select “OFF” to turn off camera speaker.
Select “ON”, camera will continue to record
photos/videos by deleting earliest photos
or video clips recorded in SD card.
Select “ON” to enable password protection
for your camera; support totally 6 digits/
alphabets long password access.
Select “Yes” to reset camera back to
factory default setting.
5. Specification
Image Sensor
Effective Pixels
Day/Night Mode
IR arrange
IR Setting
Memory
Operating keys
Lens
LCD Screen
PIR Sensitivity
PIR distance
PIR Angle
Picture size
Picture Format
Video resolution
Video Format
Video Length
Shooting Numbers
Trigger Time
Trigger Interval
5 / 8 / 12 Mega Pixels Color CMOS
2560x1920
Yes
20m
Top: 19 LED, Foot: 21LED
SD Card (8MB – 32 GB)
10
F=3.0; FOV=52°; Auto IR-Cut-Remove (at night)
2” TFT, RGB, 262k
3 sensitive levels: High / Normal / Low
12m – 15m
60°
5MP/8MP/12MP
2592x1944/3264x2448/4000x3000
JPEG
720P (1280x720), 640x320, 320x160
AVI
1-60sec. programmable
1-7
0.8-1s
2s-5s
-9-
=
Camera + Video
Playback Zoom in
Device Serial No.
Time Lapse
Beep Sound
SD Card cycle
Operation Power
Battery Type
External DC
Stand-by Current
Stand-by Time
Power Consumption
Low battery Alert
Interface
Mounting
Operating Temperature
Yes
2x, 3x, 4x
Yes
Yes
ON/OFF
ON/OFF
Battery: 6V; DC: 12V
8AA
12V
0.15mA
4~6 months (4×AA~8×AA)
auto switch to mode “ON” in 60s without any
operations
150mA (+650mA when whole 40 IR LEDs light up)
4.8V (4.8V: alert; 4.6V: power off)
TV out/USB/SD Card/DC Port
Strap; Tripod
-25°C to 60°C
Storage temperature
Operation Humidity
Waterproof spec
Dimensions
-30 °C to 70°C
5%-90%
IP54
131.42 x98.72 x77.44mm
Auto Power Off
- 10 -