1
rono_GB_03-13_1.indd 1
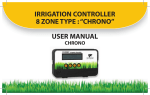
IRRIGATION CONTROLLER
4/6/8 ZONE TYPE : “CHRONO”
USER MANUAL
CHRONO
18/03/13 16.5
IRRIGATION CONTROLER 4/6/8 ZONE TYPE:
“CHRONO ”
INSTRUCTION MANUAL
Summary
INSTRUCTION MANUAL.....................................................................................2
1. GENERAL DESCRIPTION...............................................................................3
SOLENOID VALVE CONNECTION TO THE CONTROL UNIT...........................4
2. USER INTERFACE..........................................................................................6
3. PROGRAMS..................................................................................................34
PROGRAM TRACKING FORM..........................................................................36
NB: this manual is valid for all CHRONO 9V battery operated controllers (8 zones, 6 zones,
4 zones) and for all CHRONO 24VAC controllers (8 zones, 6 zones, 4 zones).
rono_GB_03-13_1.indd 2
2
18/03/13 16.5
1. GENERAL DESCRIPTION
1.1 - CONTROLLER SPECIFICATIONS
The controller Chrono is able to switch the irrigation cycles for a maximum of 8 (or 6 or 4,
depending on the control unit chosen) stations on a weekly-basis. Watering times range
from a minimum of 1 second to a maximum of 9 hours (8 hours : 59 minutes : 59 seconds)
with up to 16 events per day. Manual override is also possible.
1.2 - SYSTEM CHARACTERISTICS
•Power supply: 9V alkaline battery or 24VAC transformer
•Battery Life: 1 year
•Operation: 9V latching solenoid or 24VAC solenoids
•Programs: up to 4 for each area
•Solenoid valve manual override
•Installation: wall mounted
•Inputs: for rain, humidity, wind, & temperature sensors
•Memory: non-volatile. Removal of the battery from the unit will not erase the programs
•Output: Optional with a pump control latching relay or master valve
•Safety features: battery charge control and irrigation prevention when battery is low
3
rono_GB_03-13_1.indd 3
18/03/13 16.5
rono_GB_03-13_1.indd 4
4
18/03/13 16.5
Only 9 volt latching solenoid
Master valve
230 V
Pump relay
Pump
SOLENOID VALVE CONNECTION
TO THE CONTROL UNIT
9V VERSION
Climatic sensor
5
rono_GB_03-13_1.indd 5
18/03/13 16.5
Master valve
Transformer
230V
24V
230V
24V
Relay 24vac
230V
Pump relay
Pump
Climatic sensor
SOLENOID VALVE CONNECTION
TO THE CONTROL UNIT
24V VERSION
2. USER INTERFACE
2.1 - USER INTERFACE
The CHRONO user interface consists of an LCD display and 4 function keys that
allow both the creation and modification of irrigation programs (4 programs) and the
management of manual overrides.
The display turns off automatically if no keys are pressed for more than two minutes.
To reactivate the display press one of the four function keys. The LCD display will then
display the status page. (display 5 - paragraph 2.1.5).
NOTE FOR 24 VAC VERSION
1) With the unit powered by the external adapter 24 VAC, the display remains lit.
2) In case the 24V external power is not available the system will continue to operate with
the internal 9V battery: after two minutes, the display will turn off and the unit switches
to energy-saving mode. To turn the display press and hold any of the four function
keys.
3) If a programmed watering cycle or manual mode is running and the external 24 VAC
power network shuts down, the cycle is not interrupted. The solenoid valves are not
powered but the internal battery allows the cycle to continue running and after power is
restored the cycle is restored too.
rono_GB_03-13_1.indd 6
6
18/03/13 16.5
2.1.1 - SCREEN AT POWER ON (display 1)
When switched on the following will be shown:
For 9V version
CHRONO X ZONE
WWW.RPESRL.IT
For 24V version
CHRONO xZ 24 VAC
WWW.RPESRL.IT
After 5 seconds the controller switches to basic settings:
• selection of default language (paragraph 2.1.2)
• setting day of the week (paragraph 2.1.3)
• setting the Clock (paragraph 2.1.4)
7
rono_GB_03-13_1.indd 7
18/03/13 16.5
2.1.2 - SELECTING THE DEFAULT LANGUAGE (display 2)
Row 1: Current default language.
Row 2: Options available
Default : ITA
ENG
ITA
Function key definition:
F1
rono_GB_03-13_1.indd 8
F2
F3
F4
F1 - Select English language.
F2 - --F3 - Select Italian language.
F4 - ---.
8
18/03/13 16.5
2.1.3 - SETTING THE DAY OF THE WEEK (display 3)
Row 1: Day of the week.
Set Day: xxx
(+) (-) OK
F1
F2
F3
Function key definition:
F4
F1 - No function.
F2 [+] - Day selection
(xxx = Mon, Tue, Wed, Thu, Fry, Sat, Sun).
F3 [-] - Day selection
(xxx = Mon, Tue, Wed, Thu, Fry, Sat, Sun).
F4 [OK] - Confirm and advance to clock preset
page.
2.1.4 - SETTING THE CLOCK (display 4)
hh: mm : ss
HOURMINSEC
F1
F2
F3
Row 1: Hour, min, sec.
OK
F4
Function key definition:
F1 [HOUR] - Hour setting.
F2 [MIN] - Minutes setting.
F3 [SEC] - Seconds setting.
F4 [OK] - Confirm setting and advance to main
menu.
9
rono_GB_03-13_1.indd 9
18/03/13 16.5
2.1.5 - STATUS PAGE [RUN] (display 5)
Status page is displayed when unit is reactivated from standby, or selecting [RUN].
Row 1: Day of week, time and method of irrigation (xxx)
Mon
hh : mm : ss
xxx
MENU EV : 1 2 3 4 5 6 7 8
F1
F2
rono_GB_03-13_1.indd 10
F3
F4
Irrigation methods are indicated as follows:
MAN = Manual irrigation.
P.A = Irrigation program “A” running.
P.B = Irrigation program “B” running.
P.C = Irrigation program “C” running.
P.D = Irrigation program “D” running.
Row 2: Operating status of the irrigation areas [EV].
The number of open area flashes (active irrigation)
Function key definition:
F1 - Advance to MENU programming.
F2 - No function.
F3 - No function.
F4 - No function.
10
18/03/13 16.5
2.1.6 - MAIN MENU PROGRAMMING (display 6)
Bat : OK
Rain : ON
RUN TIME PRGMAN
F1
F2
F3
F4
Row 1: Battery charge [Bat] and rain sensor status
[Rain]
Bat
Rain
:OK - Battery charged (steady light)
: KO - Low battery (flashing)
:ON - Dry terrain (sensor closed)
: OFF - Wet terrain (sensor open)
Row 2: Function key definition:
F1 [RUN] - Return to status page (paragraph 2.1.4) .
F2 [TIME] - Setting the clock (paragraph 2.1.2).
F3 [PRG] - Create irrigation schemes (paragraph
2.2.0).
F4 [MAN] - Manual function (paragraph 2.3.0).
11
rono_GB_03-13_1.indd 11
18/03/13 16.5
2.2 - CREATION / MODIFICATION OF IRRIGATION PROGRAMS [PRG]
Press F3 [PRG] from the main menu to create or modify irrigation programs.
Procedure for creating programs include the following steps:
2.2.1 Enabling programs set or to be set (on-off)
2.2.2 Enabling rain sensor (on-off)
2.2.3 Selection letter / program name (a-b-c-d)
2.2.4 Frequency setting, or day of week of irrigation
2.2.5 Selection of start number (1-2-3-4)
2.2.6 Time setting for each start
2.2.7 Zone selection to be irrigated
2.2.8 Setting the time of irrigation for each zone
2.2.9 Program save
The programing process is shown below in the “STANDARD PROGRAMMING”
rono_GB_03-13_1.indd 12
12
18/03/13 16.5
STANDARD PROGRAMMING
Main menu
Display 6
(Par. 2.1.6)
Bat : OK
Programs enabling
Display 7
(Par. 2.2.1)
Enable PRG :
Rain sensor enabling
Display 8
(Par. 2.2.2)
Rain Sensor :
Programming
Rain : ON
RUNHOUR PRGMAN
OK
OK
Beginning of
programming
xxx
On OffEXIT
Programs
enabling (On / Off)
xxx
On OffEXIT
Rain sensor
enabling (On / Off)
Program: A
SETCAL PRG EXIT
3 2
1
4
13
rono_GB_03-13_1.indd 13
18/03/13 16.5
1
rono_GB_03-13_1.indd 14
Program selection
Display 9
(Par. 2.2.3)
Program: A
SETCAL PRG EXIT
1
Program
selection:
A, B, C, D
14
18/03/13 16.5
2
Calendar setting
Display 10
(Par. 2.2.4)
Program: A
SETCAL PRG EXIT
2
Frequency
setting
24h = NO
(+)(-) SET OK
Setting frequency / calendar:
24h,48h,72h,96h,
Mon,Tue,Wed,Thu,Fry,Sat Sun
15
rono_GB_03-13_1.indd 15
18/03/13 16.5
rono_GB_03-13_1.indd 16
Starts setting
Time of starting
setting
Enabling (ON)
Disabling (OFF)
Start = Disabled
OK OFF HOURMIN
Chose
start:
1, 2, 3, 4
Start time: 1
SET (+) (-)OK
Starting selection
Display 11
(Par. 2.2.5)
Setting of duration of irrigation of the
selected area (hours, minutes, seconds)
Run Time: 0:00:00
HOURMIN SEC OK
Zones selection: Da 1 a 8
Station: 1
SET(+) (-)EXIT
3
Program: A
SETCAL PRG EXIT
3
16
18/03/13 16.5
4
Program save
Display 15
(Par. 2.2.9)
Program: A
SETCAL PRG EXIT
4
Save
programs
17
rono_GB_03-13_1.indd 17
18/03/13 16.5
2.2.1 - ENABLING OR DISABLING THE PROGRAMS (display 7)
Enable PRG : xxx
OK ON OFFEXIT
Row 1: Enabling program state xxx:
ON (enabled);
OFF (disabled)
Row 2: Function key definition:
F1
F2
F3
F4
F1 [OK] - Confirms selection and moves to
“managing the rain sensor”.
F2 [ON] - Enables programs (programs ON).
F3 [OFF] - Disables controller and programs
(programs OFF).
F4 [EXIT] - Return to main menu (display 6)
If the programs are disabled when an irrigation cycle is running, the valves are
immediately closed and system does not run any other pre-set irrigation programs.
F1 [OK] confirms selection and advances display to the rain sensor setting.
rono_GB_03-13_1.indd 18
18
18/03/13 16.5
2.2.2 - ENABLING OR DISABLING THE RAIN SENSOR (display 8)
Rain Sensor : xxx
OKOn Off EXIT
F1
F2
F3
F4
Row 1: Enabling rain sensor state xxx:
ON (enabled); OFF (disabled)
Row 2: Function key definition:
F1 [OK] - Confirms selection and moves to
“program selection”.
F2 [ON] - Enables rain sensor.
F3 [OFF] - Disables rain sensor.
F4 [EXIT]- Return to main menu (display 6) .
F1 [OK] confirms the selection and advances to program number setting.
19
rono_GB_03-13_1.indd 19
18/03/13 16.5
2.2.3 - SELECTION OF PROGRAM NUMBER (A-B-C-D) (display 9)
Row 1: Program selected (x = A-B-C-D).
Program: x
SETCAL PRG EXIT
F1
F2
F3
F4
Row 2: Function key definition:
F1 [SET] - Start & irrigation time setting (display 11)
F2 [CAL] - Calendar or frequency of irrigation
setting (display 10)
F3 [PRG] - Program number selection (program
A-B-C-D)
F4 [EXIT] - Return to main menu (display 6).
Key F3 [PRG] selects the active program (A, B, C, D)
rono_GB_03-13_1.indd 20
20
18/03/13 16.5
2.2.4 - CALENDAR OR IRRIGATION FREQUENCY SETTING (display 10)
Selecting F2 [CAL] from display 9 advances into weekly calendar setting and/or irrigation
frequency times.
Pressing F1 [+] or F2 [-]irrigation frequency or day of week is selected (the selection is
shown in the data field XXX).
F3 [SET] enables or disables day or frequency setting (the selection is showed in data
field YYY).
xxx = yyy
(+) (-) SETOK
F1
F2
F3
F4
Row 1: xxx displays the day of week or irrigation
frequency.
yyy displays operating state enabling or disabling
(ON/ OFF) day or frequency displayed in the field
xxx.
Data field xxx
Programmable irrigation frequency:
24h : Irrigation enabled every day (24 hours).
48h : Irrigation enabled every 2 days (48 hours).
72h : Irrigation enabled every 3 days (72 hours).
96h : Irrigation enabled every 4 days (96 hours).
21
rono_GB_03-13_1.indd 21
18/03/13 16.5
rono_GB_03-13_1.indd 22
Weekly calendar
Mon :
Enabling on Monday.
Tue :
Enabling on Tuesday.
Wed :
Enabling on Wednesday.
Thu :
Enabling on Thursday.
Fri :
Enabling on Friday.
Sat :
Enabling on Saturday.
Sun :
Enabling on Sunday.
Data field yyy
Enabling or disabling:
YES :
Irrigation enabled.
NO :
Irrigation disabled.
Row 2: Function key definition:
F1 [+] - Increases day or frequency.
F2 [- ] - Decreases day or frequency.
F3 [SET]- Enables irrigation on selected day (ON/OFF).
F4 [OK] - Confirmation and return to programming main page (n.9).
22
18/03/13 16.5
F4 [OK] to confirm selection and return to first page for programming (Display 9) to move
to number of starts to be programmed.
NOTE: If a fixed frequency is chosen (e.g. 24 hours), the calendar is automatically
excluded (and vice versa).
23
rono_GB_03-13_1.indd 23
18/03/13 16.5
2.2.5 - SELECTION OF START PROGRAM NUMBER (display 11 )
Keys F2 [+] and F3 [-] select the start program number(1-2-3-4)
Row 1: Start number to be programmed (x =
1-2-3-4).
Start time: x
SET(+) (-) OK
F1
F2
F3
F4
Row 2: Function key definition:
F1 [SET] - Sets selected starting hour (display12).
F2 [+] - Selects start program number (x = 1-2-3-4).
F3 [-] - Selects start program number (x = 4-3-2-1).
F4 [OK] - Confirms selection and advances to time
programming for irrigation of the zones (display 13).
F1 [SET] advance to selection of the hour of start programming (display 12)
F4 [OK] advances directly to zone programming (display 13).
rono_GB_03-13_1.indd 24
24
18/03/13 16.5
2.2.6 - ENABLES START AND PROGRAMMING HOUR START(display 12)
F2 [ON] enables and disables [OFF] the management of the start program or to be
programmed.
If the start is disabled [OFF] the following screen is shown:
Row 1: Starting state disabled.
Start = Disabled
OK OFFHOURMIN
F1
F2
F3
F4
Row 2: Function key definition:
F1 [OK] - Confirms the selection and
back to previous page (display 11).
F2 [OFF] - Enables start and advances
to ON mode.
F3 [ORA] - No function key when in
OFF mode.
F4 [MIN] - No function key when in
OFF mode.
25
rono_GB_03-13_1.indd 25
18/03/13 16.5
F2 [ON] enables start and the hour setting to be activated.
Row 1: Start time in hours (hh) and minutes (mm).
Start = hh : mm
OK ON HOURMIN
F1
F2
F3
F4
Row 2: Function key definition:
F1 [OK] - Confirms selection and back to start
selection (display 11).
F2 [ON] - Disables start and goes into OFF mode.
F3 [ORA] - Start hour programming.
F4 [MIN] - Minutes programming.
F3 [HOUR] and F4 [MIN] start time setting in hours and minutes.
F1 [OK] to confirm data programmed and return to the page of starts selection (display 11).
rono_GB_03-13_1.indd 26
26
18/03/13 16.5
2.2.7 - SELECTION OF IRRIGATION ZONE (display 13)
F2 [+] and F3 [-] selects the zone to be programmed.
Station: x
Row 1: Zone number (x = 1,2,3,4,5,6,7,8).
SET(+) (-) EXIT
Row 2: Function key definition:
F1
F1 [SET] - Programs time for irrigation (display 14).
F2 [+] - Selects zone program number.
F3 [-] - Selects zone program number.
F4 [EXIT] - Confirms and returns to page for
program number selection (display 9).
F2
F3
F4
F1 [SET] advances to the duration of the irrigation program.
F4 [EXIT] to confirm selection and return to the first page of programming “program
number selection” (display 9).
27
rono_GB_03-13_1.indd 27
18/03/13 16.5
2.2.8 - SETTING THE IRRIGATION TIME (display 14)
F1, F2, F3 sets hours, minutes and seconds from a minimum of 1 second to a maximum
of 9 hours (8 hours : 59 minutes : 59 seconds).
Run Time: hh : mm : ss
HOURMIN
F1
F2
SEC
F3
OK
F4
Row 1: Irrigation duration in hours, minutes and
seconds (hh:mm:ss).
Row 2: Function key definition:
F1 [HOUR] - Sets irrigation duration (hours).
F2 [MIN] - Sets irrigation duration (minutes).
F3 [SEC] - Sets irrigation duration (seconds).
F4 [OK] - Confirms selection and returns to zone
selection page.
F4 [OK] confirms selection and returns to previous page (display 13) for the selection of
another zone or to abandon irrigation time programming procedure.
From display 13, pressing F4 twice (EXIT – EXIT) set programs are saved and
programming procedure is finished.
rono_GB_03-13_1.indd 28
28
18/03/13 16.5
2.2.9 - SAVING PROGRAMS AND EXITING FROM THE
PROGRAMMING SYSTEM (display 15)
On the first page of programming (display 9) select F4 [EXIT] to exit from the
programming procedure: before returning to the main menu (display 6) the following
message is shown:
Function key definition:
SAVE
F1 - No function associated with the key.
F2 - No function associated with the key.
F3 - No function associated with the key.
F4 - No function associated with the key.
PROGRAMS
F1
F2
F3
F4
On each exit from the programming system all data is saved in the non-volatile controller
memory. This prevents programs being lost if the battery is disconnected. Data will be
restored when the system is switched on again.
29
rono_GB_03-13_1.indd 29
18/03/13 16.5
2.3 - PROGRAMS CANCELLATION (display 16)
To delete a program press F3 [PRG] and hold for 5 seconds on the main menu page
(display 6 paragraph 2.1.6) until the following message is displayed:
The first row is displayed in a flashing message
asking for a cancellation of programs.
DELETE PROGRAMS?
OK
F1
F2
EXIT
F3
Function key definition:
F4
F1 [OK] - Confirmation and cancellation of
programs.
F2 - No function associated with key.
F3 - No function associated with key.
F4 [EXIT] - Abandonment of procedure and return
to main menu (display 6).
F4 [EXIT] to abandon the deletion process and return to main menu (display 6 paragraph 2.1.6).
F1 [OK] to confirm the cancellation of all programs in memory: “ERASE PROGRAMS”
message is displayed.
The programs are cancelled, and after two seconds the display returns to the main
programming menu. (Display 6)
rono_GB_03-13_1.indd 30
30
18/03/13 16.5
2.4 - MANUAL OVERRIDE
The manual override allows the operator to drive (open / close) independently each of the
eight zones (or 6 or 4, depending on the control unit chosen): this allows the possibility to
overlap at will the opening or closing of the solenoid valves.
To access the management procedure of manual override functions, press F4 [MAN] in
the main menu (display 6 paragraph 2.1.6).
31
rono_GB_03-13_1.indd 31
18/03/13 16.5
2.4.1 - MANAGEMENT OF MANUAL OVERRIDE FUNCTIONS (display 17)
F1, F2, F3 to set hours, minutes and seconds from a minimum of 1 second up to a
maximum of 9 hours (8 hours: 59 minutes: 59 seconds).
Row 1: Number of zone (x = 1,2,3,4,5,6,7,8) and
operative state of valve (yyy = ON or OFF).
Station : x = yyy
SET(+) (-) EXIT
F1
F2
rono_GB_03-13_1.indd 32
F3
F4
Row 2: Function key definition:
F1 [SET] - Opening (ON) or closed (OFF) of
selected area.
F2 [+] - Select area to be managed manually (x =
1,2,3,4,5,6,7,8).
F3 [-] - Select area to be managed manually (x =
1,2,3,4,5,6,7,8).
F4 [EXIT] - Return to Main Menu programming
(Display 6).
32
18/03/13 16.5
F1 [SET] to open (ON) or close (OFF) in manual mode the selected area by pressing F2
[+] and F3 [-].
The number of selected area is indicated in the data field x, while the operating state in
the currently selected zone (ON or OFF) is indicated in data field yyy.
F4 [EXIT] to confirm selection and return to main menu page. (Display 6).
Manual opening of zones can be used at any time but it is not accessible if there is an
ongoing programmed watering cycle.
If a solenoid valve is manually opened a programmed watering cycle starts (PA, PB,
PC or PD), at the end of the run time set in the program, the solenoid valve closes and
terminates either the automatic or manual cycle.
33
rono_GB_03-13_1.indd 33
18/03/13 16.5
3. PROGRAMS
3.1- PROGRAM MANAGEMENT
The programming procedure allows four start points to be set as, defined by the time
clock system, for each of the four programs covered (PA, PB, PC, PD).
For each start is also possible to adjust the irrigation time of the zones which are
activated sequentially from first to last: To bypass a zone program set the run time to zero;
depending on the control unit chosen, 4 or 6 or 8 zones can be controlled.
The watering cycles can be defined for each program, by frequency mode or by
programming the weekly calendar.
PROGRAMS
PROGRAM
“A”
rono_GB_03-13_1.indd 34
IRRIGATION MODE
FOR EACH PROGRAM
FREQUENCY
(24H, 48H, 72H, 96H)
or
WEEKLY CALENDAR
START TIMES
PROGRAMMABLE
FOR EACH PROGRAM
IRRIGATION TIMES
PROGRAMMABLE FOR EACH
START
STARTING TIME N.1
STARTING TIME N.2
STARTING TIME N.3
STARTING TIME N.4
IRRIGATION TIME ZONE 1
IRRIGATION TIME ZONE 2
IRRIGATION TIME ZONE 3
IRRIGATION TIME ZONE 4
IRRIGATION TIME ZONE 5
IRRIGATION TIME ZONE 6
IRRIGATION TIME ZONE 7
IRRIGATION TIME ZONE 8
NOTES
34
18/03/13 16.5
PROGRAM
“B”
FREQUENCY
(24H, 48H, 72H, 96H)
or
WEEKLY CALENDAR
PROGRAM
“C”
FREQUENCY
(24H, 48H, 72H, 96H)
or
WEEKLY CALENDAR
PROGRAM
“D”
FREQUENCY
(24H, 48H, 72H, 96H)
or
WEEKLY CALENDAR
STARTING TIME N.1
STARTING TIME N.2
STARTING TIME N.3
STARTING TIME N.4
IRRIGATION TIME ZONE 1
IRRIGATION TIME ZONE 2
IRRIGATION TIME ZONE 3
IRRIGATION TIME ZONE 4
IRRIGATION TIME ZONE 5
IRRIGATION TIME ZONE 6
IRRIGATION TIME ZONE 7
IRRIGATION TIME ZONE 8
STARTING TIME N.1
STARTING TIME N.2
STARTING TIME N.3
STARTING TIME N.4
IRRIGATION TIME ZONE 1
IRRIGATION TIME ZONE 2
IRRIGATION TIME ZONE 3
IRRIGATION TIME ZONE 4
IRRIGATION TIME ZONE 5
IRRIGATION TIME ZONE 6
IRRIGATION TIME ZONE 7
IRRIGATION TIME ZONE 8
STARTING TIME N.1
STARTING TIME N.2
STARTING TIME N.3
STARTING TIME N.4
IRRIGATION TIME ZONE 1
IRRIGATION TIME ZONE 2
IRRIGATION TIME ZONE 3
IRRIGATION TIME ZONE 4
IRRIGATION TIME ZONE 5
IRRIGATION TIME ZONE 6
IRRIGATION TIME ZONE 7
IRRIGATION TIME ZONE 8
35
rono_GB_03-13_1.indd 35
18/03/13 16.5
PROGRAM TRACKING FORM
To be completed and kept in order to trace the setting stored in the controller.
PROGRAM NAME
rono_GB_03-13_1.indd 36
IRRIGATION START TIME
ZONE
IRRIGATION
DURATION
DAYS ENABLED or FREQUENCY
1
2
3
4
5
6
7
8
36
18/03/13 16.5
PROGRAM NAME
IRRIGATION START TIME
ZONE
IRRIGATION
DURATION
DAYS ENABLED or FREQUENCY
IRRIGATION
DURATION
DAYS ENABLED or FREQUENCY
1
2
3
4
5
6
7
8
PROGRAM NAME
IRRIGATION START TIME
ZONE
1
2
3
4
5
6
7
8
37
rono_GB_03-13_1.indd 37
18/03/13 16.5
PROGRAM NAME
IRRIGATION START TIME
ZONE
IRRIGATION
DURATION
DAYS ENABLED or FREQUENCY
IRRIGATION
DURATION
DAYS ENABLED or FREQUENCY
1
2
3
4
5
6
7
8
PROGRAM NAME
rono_GB_03-13_1.indd 38
IRRIGATION START TIME
ZONE
1
2
3
4
5
6
7
8
38
18/03/13 16.5
PROGRAM NAME
IRRIGATION START TIME
ZONE
IRRIGATION
DURATION
DAYS ENABLED or FREQUENCY
IRRIGATION
DURATION
DAYS ENABLED or FREQUENCY
1
2
3
4
5
6
7
8
PROGRAM NAME
IRRIGATION START TIME
ZONE
1
2
3
4
5
6
7
8
39
rono_GB_03-13_1.indd 39
18/03/13 16.5
rono_GB_03-13_1.indd 40
IRRIGATION CONTROLLER 4/6/8 ZONE TYPE:
“CHRONO”
Rev. 2
RPE S.r.l.
Via Sant’Ambrogio, 3 - 22070 Carbonate (CO) - Italy
Tel. +39 0331 832515 - Fax +39 0331 832501
[email protected] - www.rpesrl.it
MADE IN ITALY
Do not dispose with normal household waste
40
18/03/13 16.5