1
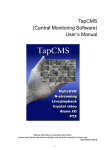
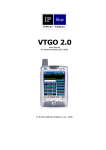
TapCMS/TapCMSHD for iPhone/iPad
(Central Monitoring Software)
User’s Manual
Before attempting to operate this product,
please read these instructions carefully and save this manual for future use.
TapCMS-M10400E
-1-
Table of Contents
1. Product Overview………………….……………………….……... 3
1.1 Features…………………..…….…………..…………………... 3
2. Download From Apple Store…….…….…………………….…… 3
3. Operations…….…….………………………………………….…… 4
-2-
1. Product Overview
The TapCMS (Central Monitoring Software) for iPhone (iPhone 3 or above) and
TapCMSHD for iPad are designed to be installed in iPhone/iPad for use with DVRs
(Digital Video/Audio Recorders). With state-of-the-art CMS technology for
iPhone/iPad, virtually unlimited number of DVRs can be monitored and controlled.
1.1 Features
Remote monitoring and control for virtually unlimited number of DVRs
H.264 decode capability
Dual-streaming video
Two-way audio
Remote video, audio, and alarm input monitoring
Remote alarm output control
Remote PTZ control
Versatile live/playback display formats: 1, 4, 9, and 16 split windows
Remote playback search by time or event (alarm, motion, & video loss)
Playback operations: Play, Pause, Fast Forward, Fast Backward, Single Step, etc.
Remote log display
Snapshot live or recorded video
Password to access DVRs
2. Download From Apple Store
In iPhone/iPad, please tap App Store icon
(
) to run App Store. In App Store,
please tap Search icon to display Search
Menu as shown. Please enter TapCMS
in the Search Text Field, and then tap
Search button (
) to search and
display TapCMS/TapCMSHD.
Please follow the instructions on the
screen to install TapCMS in your iPhone
or TapCMSHD in your iPad.
-3-
3. Operations
Run
Tap TapCMS/TapCMSHD icon (
)
to run the TapCMS/TapCMSHD in your
iPhone/iPad. The Device List display will
be shown.
In Device List display, if a DVR is connected,
icon will be shown on the left;
the
otherwise, the
icon will be shown.
** For older iPhone OS, if there’s problem
for network connection, please run
Safari first to enable network
connection, close Safari, and then run
TapCMS again.
Configure (DVR) Device List
Add / Modify
Tap
button to add a DVR in the
Device List, or tap
icon to modify
the device properties of the corresponding
DVR. The Detailed Device Properties
display will be shown.
exit and save, or
Tap
to
to exit without
saving.
The user may tap
button to reboot the DVR remotely.
Following is a brief description for each
item:
Device Name – any meaningful
name for the (DVR) device.
Address
–
IP
address
(EX.
-4-
210.242.162.30) or URL domain name of the (DVR) device. It should be
the same as the IP address or URL in Network Setup for the (DVR) device.
Control Port – the control port of the (DVR) device.
Data Port – the data port of the (DVR) device.
User Name – the login user name for the (DVR) device. It must be in the
list in Password Setup of the (DVR) device. Please note that different levels
of users have different available operations in Mobile CMS. Please refer
to Password Setup in the manual for the DVR for the available operations of
each level.
Password – the corresponding password for the login user name for the
(DVR) device.
Video Stream – “Record” – live video same as recording stream, or
“Extra” – extra network stream if dual streaming is supported for the (DVR)
device.
Auto Connection – whether the user wants to connect automatically to this
(DVR) device when the TapCMS/TapCMSHD is running.
Delete
Tap
button,
icon, and then
device from the device list.
Tap
button to delete the selected
button when you’re done.
Change Order
Tap
device.
button, and then drag
Tap
icon to change the order of the selected
button when you’re done.
-5-
Split Window Display
In Device List, tap the DVR name,
and the split-window display of the
corresponding DVR will be shown.
In split-window display, the user
may
rotate
iPhone/iPad
for
Landscape display.
The operations are as below:
button
Tap this button to escape from this
screen, and return to Device List
display.
DVR
Name
button
(EX.
)
Tap this button to display the available
DVRs. Please select one of the DVRs
in the DVR picker, and then tap DVR
Name button again to switch to the split-window display of the selected DVR,
or tap the other area to cancel.
button
Tap this button to (1) switch to 1-W display of the selected channel if there’s no
focus window, or (2) change the channel of the focus window. The user may
also tap twice on the display window to switch to its 1-W display.
button
Tap this button to select the split-window display (1-W, 4-W#1, 4-W#2, 4-W#3,
4-W#4, 9-W, or 16-W). For software version 1.02 or above, scroll view is
supported for 1-W display.
button
Tap this button to enable/disable the Audio input of the iPhone/iPad. The DVR
will be able to hear the iPhone/iPad if Audio-In is enabled (button down).
button
Tap this button to enable/disable the Audio output of the iPhone/iPad. The user
will be able to hear the audio of the focus camera of the DVR if Audio-Out is
enabled (button down).
button
-6-
Tap this button to Snapshot the video.
“Photo” of the iPhone/iPad.
The snapshot picture will be saved in
button
Tap this button to display the “Search
By Time” dialog.
Please select the time (Year, Month,
Date, Hour, and Minute), and then tap
button to search for playback, or
tap
button to return to
split-window display without playback.
button
Tap this button to display the “Search
By Event” dialog.
For Alarm/Motion/Video events, the
display format of each event is
“Camera ID – Source ID – HDD ID”
“Date” “Time” “Event Type”; for
System events, the display format of
each event is “Date” “Time” “Details”.
Tap Refresh button(
button(
(
), Page Up
), or Page Down button
) to update the event logs.
Alarm icon(
), Motion icon(
Tap
),
and/or Video Loss icon(
) to
uncheck/check the corresponding event
type. Tap System icon(
) to
check system event and uncheck the other event types, or uncheck system event
and check the other event types. Tap the desired event log for playback, or tap
-7-
button to return to split-window display without playback.
button
Tap this button to display the “Alarm
I/O” dialog.
The alarm inputs (row 1 : 1-4, 5-8,
row-2 : 9-12, 13-16) and alarm outputs
(1-4) of the DVR will be shown.
Please note that the actual number of
input/output may be less. The user
may tap the Alarm Out switch to
On/OFF the corresponding alarm output.
Tap
button
split-window display.
to
return
to
Playback Operations
At playback mode, the playback buttons
will be shown on the lower corner. The
user may tap
button to display the
main operation buttons. (Please note that
the user must be at least Supervisor level
to be able to playback DVR video.)
button
Tap this button to play the recorded
video/audio at forward speed 1X, or
pause the playback. If the playback is
paused, tap this button again to resume
playing. Note that audio can only be
played at forward speed 1X.
button
Tap this button to stop playing. The
split-window display will return to live monitoring mode.
button
-8-
Tap this button for fast forward playback at 2X speed.
button
Tap this button for fast backward playback at 2X speed.
button
Tap this button to play the recorded images frame by frame.
PTZ Operations
In 1-W live display, if the camera is a PTZ camera, the user may tap
display the PTZ operation buttons.
button to
In PTZ operation mode, the user may tap
button to display the main operation buttons, or tap
button to display the other
PTZ operation buttons. The detailed operations are as below:
▲▼
Press in the upper/lower area of the video window to tilt up/down the camera,
release to stop.
◄►
Press in the left/right area of the video window to pan left/right the camera,
release to stop.
button
Press these buttons to zoom out/in the camera.
Release these buttons to stop.
button
Tap this button to move the camera to the preset position. Tap numeric buttons
0-5 to move the camera to the corresponding preset position, or tap More
button(
) to call up Goto dialog, and then enter the preset position (0-99).
button
Tap this button to start/stop Auto Pan.
button
Tap this button to start/stop PTZ SEQ mode. If SEQ mode is on, the camera
will go to available preset positions 0-9 (or 1-10) sequentially.
button
Press these buttons to focus near/far the camera, release to stop.
-9-
button
Press these buttons to decrease/increase iris of the camera, release to stop.
- 10 -
TapCMS for Android
(Central Monitoring Software)
User’s Manual
Before attempting to operate this product,
please read these instructions carefully and save this manual for future use.
TapCMS-Android-M10200E
- 11 -
Table of Contents
1. Product Overview………………….……………………….……... 3
1.2 Features…………………..…….…………..…………………... 3
2. Download From Android Market .…….…………………….…… 3
3. Operations…….…….………………………………………….…… 4
- 12 -
1. Product Overview
The TapCMS (Central Monitoring Software) for Android (Android SDK 2.1 or
above) is designed to be installed in Android mobile phone for use with DVRs
(Digital Video/Audio Recorders). With state-of-the-art CMS technology for
Android, virtually unlimited number of DVRs can be monitored and controlled.
1.1 Features
Remote monitoring and control for virtually unlimited number of DVRs
H.264 decode capability
Dual-streaming video
Two-way audio
Remote video, audio, and alarm input monitoring
Remote alarm output control
Remote PTZ control
Versatile live/playback display formats: 1, 4, 9, and 16 split windows
Remote playback search by time or event (alarm, motion, & video loss)
Playback operations: Play, Pause, Fast Forward, Fast Backward, Single Step, etc.
Remote log display
Snapshot live or recorded video
Password to access DVRs
2. Download From Android Market
In Android mobile phone, please tap Market icon
(
) to run Android Market.
In Android
Market, please tap Search icon (
), and then
enter TapCMS in the Search Text Field to search
and display TapCMS.
Please follow the instructions on the screen to
install TapCMS in your Android mobile phone.
- 13 -
3. Operations
Run
Tap TapCMS icon (
) to run the
TapCMS in your Android mobile phone. The
Device List display will be shown.
In Device List display, if a DVR is connected, the
icon will be shown on the left;
otherwise, the
icon will be shown.
Configure (DVR) Device List
Add / Modify
Tap
button to add a DVR in the
Device List, or tap
icon to modify the
device properties of the corresponding DVR.
The Detailed Device Properties display will
be shown.
Tap
to exit and save, or
to exit without saving.
may tap
remotely.
The user
button to reboot the DVR
Following is a brief description for each
item:
Device Name – any meaningful name
for the (DVR) device.
Address
–
IP
address
(EX.
210.242.162.30) or URL domain name of
the (DVR) device. It should be the
- 14 -
same as the IP address or URL in Network Setup for the (DVR) device.
Control Port – the control port of the (DVR) device.
Data Port – the data port of the (DVR) device.
User Name – the login user name for the (DVR) device. It must be in the
list in Password Setup of the (DVR) device. Please note that different levels
of users have different available operations in Mobile CMS. Please refer
to Password Setup in the manual for the DVR for the available operations of
each level.
Password – the corresponding password for the login user name for the
(DVR) device.
Video Stream – “Record” – live video same as recording stream, or
“Extra” – extra network stream if dual streaming is supported for the (DVR)
device.
Auto Connection – whether the user wants to connect automatically to this
(DVR) device when the TapCMS is running.
Delete
Tap
button,
icon, and then
device from the device list.
Tap
button to delete the selected
button when you’re done.
Change Order
Tap
button, and then tap
icon to
select the device and display the Insert After
dialog as shown. Tap a device to insert the
formerly selected device after the latter selected
device.
Tap
button when you’re done.
- 15 -
Split Window Display
In Device List, tap the DVR name, and
the split-window display of the
corresponding DVR will be shown. In
split-window display, the user may
rotate Android mobile phobe for
Landscape display.
The operations are as below:
button
Tap this button to escape from this screen,
and return to Device List display.
DVR
Name
button
(EX.
)
Tap this button to display the available
DVRs. Please select one of the DVRs in
the DVR picker to switch to the
split-window display of the selected DVR.
button
Tap this button to (1) switch to 1-W display of the selected channel if there’s no
focus window, or (2) change the channel of the focus window. The user may
also tap twice on the display window to switch to its 1-W display.
button
Tap this button to select the split-window display (1-W, 4-W#1, 4-W#2, 4-W#3,
4-W#4, 9-W, or 16-W). Please note that scroll view is supported for 1-W
display.
button
Tap this button to enable/disable the Audio input of the Android mobile phone.
The DVR will be able to hear the Android mobile phone if Audio-In is enabled
(button down).
button
Tap this button to enable/disable the Audio output of the Android mobile phone.
The user will be able to hear the audio of the focus camera of the DVR if
Audio-Out is enabled (button down).
button
- 16 -
Tap this button to Snapshot the video.
“Photo” of the Android mobile phone.
The snapshot picture will be saved in
button
Tap this button to display the “Search By
Time” dialog.
Please select the time (Year, Month, Date, Hour,
and Minute), and then tap
button to
search for playback, or tap
button to
return to split-window display without
playback.
button
Tap this button to display the “Search By
Event” dialog.
For Alarm/Motion/Video events, the display
format of each event is “Camera ID – Source
ID – HDD ID” “Date” “Time” “Event Type”;
for System events, the display format of each
event is “Date” “Time” “Details”.
Tap
Refresh button(
), Page Up button(
or Page Down button (
event logs.
),
) to update the
Tap Alarm icon(
), Motion
icon(
), and/or Video Loss icon(
) to
uncheck/check the corresponding event type.
Tap System icon(
) to check system event
and uncheck the other event types, or uncheck
system event and check the other event types.
Tap the desired event log for playback, or tap
split-window display without playback.
- 17 -
button to return to
button
Tap this button to display the “Alarm I/O”
dialog.
The alarm inputs (row 1 : 1-4, 5-8, row-2 :
9-12, 13-16) and alarm outputs (1-4) of the
DVR will be shown. Please note that the
actual number of input/output may be less.
The user may tap the Alarm Out switch to
On/OFF the corresponding alarm output.
Tap
display.
button to return to split-window
Playback Operations
At playback mode, the playback buttons will be
shown on the lower corner. The user may tap
button to display the main operation buttons.
(Please note that the user must be at least
Supervisor level to be able to playback DVR
video.)
button
Tap this button to play the recorded
video/audio at forward speed 1X, or pause the
playback. If the playback is paused, tap this
button again to resume playing. Note that
audio can only be played at forward speed
1X.
button
Tap this button to stop playing. The
split-window display will return to live
monitoring mode.
- 18 -
button
Tap this button for fast forward playback at 2X speed.
button
Tap this button for fast backward playback at 2X speed.
button
Tap this button to play the recorded images frame by frame.
PTZ Operations
In 1-W live display, if the camera is a PTZ
camera, the user may tap
the PTZ operation buttons.
button to display
In PTZ operation
mode, the user may tap
button to display
the main operation buttons, or tap
button to
display the other PTZ operation buttons. The
detailed operations are as below:
▲▼
Press in the upper/lower area of the video
window to tilt up/down the camera, release
to stop.
◄►
Press in the left/right area of the video
window to pan left/right the camera, release
to stop.
button
Press these buttons to zoom out/in the camera.
Release these buttons to stop.
button
Tap this button to move the camera to the preset position. Tap numeric buttons
0-5 to move the camera to the corresponding preset position, or tap More
button(
) to call up Goto dialog, and then enter the preset position.
button
Tap this button to start/stop Auto Pan.
button
- 19 -
Tap this button to start/stop PTZ SEQ mode. If SEQ mode is on, the camera
will go to available preset positions 0-9 (or 1-10) sequentially.
button
Press these buttons to focus near/far the camera, release to stop.
button
Press these buttons to decrease/increase iris of the camera, release to stop.
- 20 -