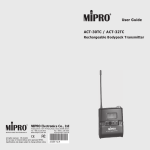
1
Disposal
Dispose of any unusable devices or batteries responsibly and in
accordance with any applicable regulations.
Disposing of used batteries with domestic waste is to be avoided!
2005-08-13
Batteries / NiCad cells often contain heavy metals such as
cadmium(Cd), mercury(Hg) and lead(Pb) that makes them unsuitable
for disposal with domestic waste. You may return spent batteries/
accumulators free of charge to recycling centres or anywhere else
batteries/accumulators are sold.
ACT-8H / ACT-8T
DIGITAL WIRELESS MICROPHONE SYSTEMS
By doing so, you contribute to the conservation of our environment!
User Guide
Electronics Co., Ltd.
Headquarters: 814 Pei-Kang Road, Chiayi, 60096, Taiwan.
Taipei office: 5, Lane 118, Sung-teh Road, 10075, Taipei, Taiwan.
http://www.mipro.com.tw
E-mail: [email protected]
2 CE2 6 3
Design & specifications are subject to change without prior notice
C
AS090715
WARNING
IMPORTANT SAFETY INSTRUCTIONS
1.
Read these instructions.
2.
Keep these instructions.
3.
Heed all warnings.
4.
Follow all instructions.
5.
Do not use this apparatus near water.
6.
Clean only with a dry cloth.
7.
Do not block any ventilation openings. Install in accordance with the
manufacturer's instructions.
8.
Do not install near any heat sources such as radiators, heat registers,
stoves, or other apparatus (including amplifiers) that produce heat.
9.
Do not defeat the safety purpose of the polarised or ground plug: A
polarised plug has two blades with one wider than the other. The wide blade
is provided for your safety. When the provided plug does not fit into your
outlet, consult an electrician for replacement of the obsolete outlet.
1.
FOR OUTDOOR USE:
TO REDUCE THE RISK OF FIRE OR ELECTRIC SHOCK, DO NOT EXPOSE THIS
APPARATUS TO RAIN OR MOISTURE.
2.
UNDER WET LOCATION:
Apparatus should not be exposed to dripping or splashing and no objects
filled with liquids, such as vases should be placed on the apparatus.
3.
SERVICE INSTRUCTIONS:
CAUTION - These servicing instructions are for use by qualified service
personnel only. To reduce the risk of electric shock, do not perform any
servicing other than that contained in the operating instructions unless you
are qualified to do so.
This symbol indicates that dangerous voltage constituting a risk of electric shock is present
within this unit.
10. Protect the power cord from being walked on or pinched particularly at plug,
convenience receptacles, and the point where they exit from the apparatus.
This symbol indicates that there are important operating and maintenance instructions in the
literature accompanying this unit.
11. Only use attachments/accessories specified by the manufacturer.
12. Use only with a cart, stand, tripod, bracket, or table specified
by the manufacturer, or sold with the apparatus. When a cart
is used, use caution when moving the cart/apparatus
combination to avoid injury from tip-over.
13. Unplug this apparatus during lightning storms or when unused
for long periods of time.
FCC Caution: To assure continued compliance, any changes or modifications not
expressly approved by the party responsible for compliance could void the user's
authority to operate this equipment. (Example - use only shielded interface
cables when connecting to computer or peripheral devices).
This device complies with Part 74 of the FCC Rules. Operation is subject to the
following two conditions:
14. Refer all servicing to qualified service personnel. Servicing is required
when the apparatus has been damaged in any way, such as power-supply
cord or plug is damaged, liquid has been spilled or objects have fallen into
the apparatus, the apparatus has been exposed to rain or moisture, does not
operate normally, or has been dropped.
(1) This device may not cause harmful interference, and (2) This device must
accept any interference received, including interference that may cause undesired
operation.
15. To reduce the risk of fire or electric shock, do not expose this apparatus to
rain or moisture.
IC
16. Apparatus should not be exposed to dripping or splashing and no objects
filled with liquids should be placed on the apparatus.
The user manual for the LPD shall contain the following or equivalent statements
in a conspicuous position:
17. Use only with the battery specified by the manufacturer.
"Operation is subject to the following two conditions: (1) this device may not
cause interference, and (2) this device must accept any interference, including
interference that may cause undesired operation of the device."
18. The power supply cord set is to be the mains disconnect device.
Contents
Handheld Wireless Microphone
HANDHELD WIRELESS MICROPHONE
KEY FEATURES
ACT-8H DIGITAL WIRELESS HANDHELD MICROPHONE
1
PART NAMES AND FUNCTIONS
2
BATTERY REMOVAL AND INSTALLATION
3
PROPRIETARY DESIGN TO AVOID ACCIDENTAL POWER ON/OFF
4
TRANSMITTER LCD INTERFACE
5
WARNINGS
12
BODYPACK TRANSMITTER
KEY FEATURES
13
PART NAMES AND FUNCTIONS
14
BATTERY REMOVAL AND INSTALLATION
15
TRANSMITTER LCD INTERFACE
16
WARNINGS
24
AF 4-PIN INPUT PIN CONFIGURATION
25
HIGH FREQUENCY BYPASS
26
KEY FEATURES:
24-bit audio quality and digital RF transmission.
Proprietary encryption offers secure audio transmission, preventing unauthorised
listening.
Durable, rugged magnesium alloy housing.
Anti-roll & anti-pop microphone capsule module with extremely low handling noise
characteristics.
LITHIUM-POLYMER BATTERY CHARGER
Optional interchangeable microphone capsule modules available.
PART NAMES AND FUNCTIONS
27
Bright LCD display shows working channel, battery status, input level and error codes.
BATTERY CHARGER INSTRUCTIONS
28
WARNINGS
28
Integrated antenna provides maximum transmission efficiency and the patented coloured
rear caps protect the on/off switch and allow easy visual channel identification.
Built-in, detachable lithium-polymer (Li-Poly) battery pack can be recharged alone or
together with the transmitter. The transmitter can be used continuously for up to 8
hours - the longest operational time of any digital series product on the market.
Includes MIPRO's patented industry-standard ACT (Automatic Channel Targeting)
channel set-up technology.
0
1
Handheld Wireless Microphone
Handheld Wireless Microphone
PART NAMES AND FUNCTIONS
1
BATTERY REMOVAL AND INSTALLATION
3
2
REMOVAL
4
(Figure 2)
5
Remove
Insert
1. Power off the transmitter.
2. Remove the microphone capsule
assembly 1 by unscrewing it in an
anti-clockwise direction.
3. Rotate the rechargeable battery
module 5 anti-clockwise to release it.
4. Gently pull out the battery module.
5. Insert the battery module into the
battery charger for recharging.
INSTALLATION
5
1. Insert the battery module 5 gently
into the housing
2. Turn clockwise slowly until the battery
module drops down into the housing.
3. When the battery drops down, turn
the battery clockwise a little more to
line up the dot on the module with
the cut-out in the housing. This will
lock the battery in place.
4. Replace the microphone capsule
assembly 1
OFF
SET
MODE
6
10
7
8
11
9
NOTE: The battery will not make proper
(Figure 1)
contact internally if it is not securely locked in
place. Incorrect insertion may result in inability
to turn the transmitter on.
1
Top Grille: Protects detachable microphone capsule module and internal foam
minimises breath, wind and POP noise.
2
Microphone Capsule Module: Detachable microphone capsule.
3
Housing: Houses transmitter PCB and battery compartment.
4
LCD Screen: Displays group, channel, gain, battery status, input SPL, other
parameters and error codes.
5
Rechargeable Battery Module: Detachable Lithium-Polymer (Li-Poly) battery
modules can be recharged individually or whilst fitted to the transmitter.
6
Power On-off Switch: Slide the power switch to the “ON” position for use or to the
“OFF” position when not in use.
7
MODE: Function select button.
Move dot on battery away from cutout
on housing to remove battery module
8
SET: Parameter select button.
9
Colour Coded Protection Cap: Protects against accidental power on/off. Available in
different colours for easy visual channel identification.
10
ACT Infrared (IR) Port: Receives setup data from the receiver to synchronise
transmitter to receiver.
11
Battery Charging Contacts: Align correctly when placing transmitter into charging
station.
2
Turn dot to align it with cutout on
housing to secure battery module
NOTE: When microphone is not in use, ensure it is switched off. The battery module can be
recharged inside the transmitter or can be removed from the transmitter and charged
stand-alone.
3
Handheld Wireless Microphone
Handheld Wireless Microphone
PROPRIETARY DESIGN TO AVOID ACCIDENTAL POWER ON/OFF
TRANSMITTER LCD INTERFACE
The patented rear protective cap serves two purposes: to provide easy visual channel
identification and to protect accidental operation of the on/off switch by the user.
Fully Lit LCD Display
RF
A
AF
B BT
To remove Protective Cap:
1.
Power OFF the transmitter.
2.
Firmly grasp the cap and pull straight back. Do not rock the cap side to side when
pulling it off.
Parameter Display
MODE button: Accesses 7 different parameters
The LCD screen can display 7 transmitter parameters:
Pull and remove rear cap
GR--CH
FREQ
LOW--CU
AF--SEN
LIMIT
ENCRYP
POWER
Install Protective Cap:
1.
Power ON the transmitter.
2.
Turn the cap 180 degrees and slide the cap back against the lower housing.
3.
Make sure the cap covers the On/Off switch.
4.
Caps are available in different colours for visual channel identification.
Setup Instructions
Press and release the MODE button 7 to select the required function. Press again for the next etc.
Parameter value starts to flash once it is selected. Press the SET button 8 to modify the parameter
value whilst it is flashing. To confirm the change, do not press any button for 5 seconds. When flashing
stops, the parameter is saved and stored into memory.
Turn rear cap 180 degrees
and re-install the cap
GR-CH Displays Group and Channel
GR-CH text & numerics flash alternately
NOTE: MIPRO recommends that the protective cap is always in place during use.
RF
RF
AF
BT
BT
AF
Flashing stops when no buttons are pressed for 5 seconds.
MODE
4
5
GR--CH
Handheld Wireless Microphone
Handheld Wireless Microphone
Instructions:
LOW-CU
1. Press ''MODE'' button until “GR---CH” parameter appears. It displays and flashes the
currently programmed Group and Channel. Flashing stops after 5 seconds.
2. The Group and Channel can only be indicated. Group and Channel cannot be changed
on the transmitter, only from the receiver via ACT.
Low Frequency Cut-Off
Screen flashing alternately
NOTE: If a new frequency is programmed into the transmitter using the PC Software package, the
display will flash alternately “GR- -CH / **- -**” as shown below. Actual Group and Channel
numbers will not appear as the selected frequency is not part of the preset frequency set
programmed into the transmitter.
RF
RF
AF
Press "SET" for "OFF" or "ON”
BT
RF
BT
AF
AF
BT
Flashing stops when no button is pressed for 5 seconds.
GR- -CH & **- -** Flashes alternately
AF
OFF
RF
RF
BT
MODE
BT
AF
LOW--CU
ON
SET
Instructions:
FREQ
Displays Transmitter Frequency
1. Press ''MODE'' button until “LOW-CU” parameter appears. It displays and flashes the
currently programmed “ON” or “OFF” setting.
2. Press the “SET” button to change setting. Setting is changed and saved automatically
after 5 seconds.
Flashes alternately
AF
NOTE: The Low Cut-off is set by default in the “OFF” position. When turned “ON'', the frequency
response below 100Hz will decrease about 4dB with a slope of -6dB/Octave.
RF
RF
BT
BT
AF
(The listed frequency is shown in ''MHz'')
MODE
FREQ
Instructions:
1. Press the ''MODE'' button until “FREQ” parameter appears. It displays and flashes
“FREQ” and the currently programmed actual working frequency. Flashing stops after 5
seconds.
2. The frequency can only be indicated. Frequency cannot be changed on the transmitter,
only from the receiver using via ACT.
NOTE: Transmitter frequency is synced automatically via the receiver by pressing the “ACT” button.
6
7
Handheld Wireless Microphone
AF-SEN
Handheld Wireless Microphone
Input Audio Sensitivity
LIMIT
Screen flashing alternately
Input Limiter
Screen flashing alternately
Press "SET" to select
gain in 6dB steps
RF
RF
RF
RF
RF
RF
AF
BT
AF
Press "SET" for "OFF" or "ON”
BT
AF
BT
BT
AF
AF
BT
BT
AF
Flashing stops when no button is pressed for 5 seconds.
Flashing stops when no button is pressed for 5 seconds.
OFF
MODE
MODE
AF--SEN
0 DB
6 DB
12 DB
SET
SET
SET
LIMIT
ON
SET
Instructions:
Instructions:
1. Press “MODE” until “AF--SEN” function appears; the display showing the current status
will be flashing and is ready to be modified.
2. Each press of the ''SET'' button increases the dB value by 6dB to a maximum of 12dB
(then reverts back to 0dB). Setting is changed and saved automatically after 5 seconds.
0 DB
6 DB
1. Press ''MODE'' button until “LIMIT” parameter appears. It displays and flashes the
currently programmed “ON” or “OFF” setting.
2. Press the “SET” button to change the setting. Setting is changed and saved
automatically after 5 seconds.
NOTE: Default factory setting is “OFF”. When ''ON'', the maximum output of the receiver is limited
to 1 Volt.
12 DB
ENCRYP
ENCRYPTION
ON
NOTE: 1. Default factory setting is “0dB”.
2. The higher the gain setting, the lower the dynamic range for signal input. At higher
settings the unit can be more susceptible to audio noise interference.
3. 0dB or 6dB is the general setting.
4. At 0dB, 125dB maximum SPL can be input to the transmitter.
MODE
ENCRYP
OFF
Instructions:
1. Press ''MODE'' button until “ENCRYP” parameter appears. It displays and flashes the
currently programmed “ON” or “OFF” setting.
NOTE: The encryption setting can only be indicated. Encryption cannot be changed on the
transmitter, only from the receiver and synced using the ACT button.
8
9
Handheld Wireless Microphone
POWER
Handheld Wireless Microphone
ERR Message:
POWER SELECTION
Screen flashing alternately
Press SET button once for POW-LO: Power Low
Press SET button again for POW-HI: Power High
RF
RF
BT
AF
When "ERR" appears in the display it indicates that an operational error has occurred.
Please refer to the following codes to diagnose which error you are experiencing.
ROM-ER
Transmitter does not have the initial data, thus it is completely dead and
cannot be programmed. Refer to your dealer.
ERROR1
RF circuitry failure. Frequency cannot be programmed. Refer to your
dealer.
NO----OR3
The frequency you want to program is above the switching bandwidth of
the transmitter. Use a receiver with an appropriate, matching frequency
band. (Whilst the error message is showing, the microphone is still
operating and its frequency remains unchanged. To clear the displayed
“ERR“ message, switch the handheld transmitter off and on again.)
NO----OR4
The frequency you want to program is below the switching bandwidth of
the transmitter. Use a receiver with an appropriate, matching frequency
band. (Whilst the error message is showing, the microphone is still
operating and its frequency remains unchanged. To clear the displayed
“ERR“ message, switch the handheld transmitter off and on again.)
RF
BT
AF
BT
AF
Flashing stops when no button is pressed for 5 seconds.
POW--HI
MODE
POWER
POW--LO
Instructions:
1. Press ''MODE'' button until “POWER” parameter appears. It displays and flashes the
currently programmed “POW-HI” or “POW-LO” setting.
2. Press the “SET” button to change the setting. Setting is changed and saved
automatically after 5 seconds.
NOTE: POW-HI selects 50mW transmitter power output. POW-LO selects 10mW transmitter power
output. Set appropriate power to meet local regulations. Use the lower power setting to conserve
batteries. Where possible always use low power for hand held transmitters. The low power setting
will result in less intermodulation issues when using multiple hand helds in larger systems.
BT
PO-OFF
When the power switch is moved to the “Off” position, the LCD will show "PO-OFF" (for
Power Off) first and then the system will shut down and no further messages will be
displayed.
TRANSMITTER BATTERY METER
BT
BT
100% 90%
BT
BT
BT
BT
80%
40%
10%
0%
The LCD battery meter is shown only when the transmitter is powered on. The meter gives
a percentage (%) indication of remaining battery life, as shown above. Replace with a new,
fully charged battery module (or place the mic into the charging station) when battery
meter indication falls to 10% (1 level remaining). If an under voltage condition continues,
the LCD will show "PO-OFF" and the system will shut down to prevent the battery becoming
overly discharged.
10
Power Off :
11
Handheld Wireless Microphone
Bodypack Transmitter
WARNINGS
1.
MIPRO recommends inserting the complete wireless transmitter into the battery
charger for charging. Charging the battery module by always removing it is not
recommended. In-situ charging will also prolong the life of the contact springs on the
battery module.
2.
The ACT-8H has an integrated antenna at the end of the rear housing (covered by the
coloured protective cap). Performers should avoid holding the microphone over or
near the antenna area as this will degrade transmission efficiency. Severe degradation
will occur if the performer directly covers up the antenna section with both hands.
3.
4.
ACT- 8T DIGITAL WIRELESS BODYPACK TRANSMITTER
KEY FEATURES:
24-bit audio quality and digital RF
transmission.
Many performers tend to hold the microphone by the top grille. Unfortunately, this
position seriously degrades both the sound quality and directionality of the
microphone capsule. Even the most expensive microphones will have their original
sound quality compromised by this method. Grabbing a microphone by the grille will
isolate the capsule's acoustic resonance circuit and may change the capsule's resonant
frequency. This results in inferior performance in both frequency response and
directionality. In addition, a palm's sound-focusing effect will tend to strengthen
resonances in certain frequencies and make the microphone sound bad.
Proprietary encryption offers secure audio
transmission, preventing unauthorised
listening.
Rugged, lightweight magnesium-alloy
housing.
Proper technique is necessary when using directional microphones because the
distance between the microphone and the mouth has a significant impact on
sensitivity and performance. There is an inverse relationship between microphone
sensitivity and the distance from the mouth to the microphone. Consequently,
performers with a ''weaker'' voice cannot expect to hold the microphone too far away
from their mouth and compensate by turning up the amplifier volume to increase the
sound level as this can easily cause premature feedback. In contrast, performers with
a ''stronger' voice should not hold the microphone too close as this can result in
distortion by causing the input gain stage to overload.
Removable, flexible antenna, toggle power
switch and XLR input connector.
Bright LCD display shows working channel,
battery status, input level, setup parameters
and error codes.
Detachable lithium-polymer (Li-Poly) battery
pack can be recharged alone or together
with the transmitter. The transmitter can be
used continuously for up to 8 hours --- the
longest operational time of any digital series
of products on the market.
Furthermore, a large-diaphragm directional microphone has a very distinct proximity
effect. When the microphone is close to the mouth, bass response increases as the
distance from the mouth to the mic reduces. Therefore, if a performer's voice is low in
bass, they can hold the microphone closer and use the proximity effect to help
compensate for the lower bass level. Conversely, if a performer's voice is too heavy in
the bass register, increasing the distance between the microphone and their mouth
will decrease the proximity effect and reduce the bass response, thus making their
voice become clearer and brighter.
5.
Reversible belt clip enables normal or
upside-down wearing position to suit user¡¦
s
preference.
Includes MIPRO's patented industry-standard
ACT (Automatic Channel Targeting) channel
set-up technology.
It is recommended to keep the grille and sponge windscreen clean to avoid any
substance affecting the proximity effect of the microphone.
FCC ID: M5X-ACT8H
THIS DEVICE COMPLIES WITH PART 74 OF THE FCC RULES AND RSS-123 Issue1 OF CANADA.
OPERATION IS SUBJECT TO THE FOLLOWING TWO CONDITIONS:
(1) This device may not cause interference.
(2) This device must accept any interference, including interference that may cause undesired operation of
the device. This equipment complies with FCC RF radiation exposure limits set forth for an uncontrolled
environment.
12
13
Bodypack Transmitter
PART NAMES AND FUNCTIONS
Bodypack Transmitter
BATTERY REMOVAL AND INSTALLATION
REMOVAL
Press the battery retainer
to release the battery pack
1
2
Push downward
3
4
9
10
5
Push outward
6
Step 1
7
11
12
8
AF Input Socket: Connects to Lavalier, headset microphone or to guitar cable. (See
5 different pin configurations for the 4-pin TA4F, mini-XLR AF input connector on page
25).
2
Power On-off Switch: Slide the power switch to the •gON•h position for use or to the
•gOFF•h position when not in use.
3
Transmitting Antenna:Detachable
1/4λ
antenna.
4
ACT Infrared (IR) Port: Receives setup data from receiver to synchronise
transmitter to receiver.
5
LCD Screen: Displays group, channel, gain, battery status, input SPL, other
parameters and error codes.
SET: Parameter select button.
7
MODE: Function select button.
Step 3
1.
Power off the transmitter.
2.
Remove the belt clip
3.
Press the battery retainer with one finger, then pull down gently with other hand to
remove the battery module.
4.
Insert the battery module into the battery charger for recharging.
(Figure 1)
1
6
Step 2
8
Housing: Houses transmitter PCB and battery compartment.
9
Battery Module Retainer/Release: Press firmly to release battery module.
INSTALLATION
Place battery pack
and align with
guide rails
Step 1
Push upward
Step 2
Step 3
10
Rechargeable Battery Module: Detachable Lithium-Polymer (Li-Poly) battery
module can be recharged alone or together with the transmitter.
2.
Push the battery pack upwards until a ¡§click¡¨
is heard.
11
Belt clip: Reversible. Can be worn normally or upside-down.
3.
Check that the battery is locked firmly in place then re-attach the belt clip.
12
Battery Charging Contacts: Align correctly when placing transmitter into charging
station.
14
15
1.
Locate the battery pack back on the transmitter.
Bodypack Transmitter
Bodypack Transmitter
TRANSMITTER LCD INTERFACE
Instructions:
Fully Lit LCD Display
1. Press ''MODE'' button until “GR---CH” parameter appears. It displays and flashes the
currently programmed Group and Channel. Flashing stops after 5 seconds.
2. The Group and Channel can only be indicated. Group and Channel cannot be changed
on the transmitter, only from the receiver via ACT.
RF
A
AF
B BT
NOTE: If a new frequency is programmed into the transmitter using the PC Software package, the
display will flash alternately “GR- -CH / **- -**” as shown below. Actual Group and Channel
numbers will not appear as the selected frequency is not part of the preset frequency set
programmed into the transmitter.
GR- -CH & **- -** Flashes alternately
Parameter Displays
MODE button: access to 9 different parameters
RF
RF
The LCD screen displays 9 transmitter parameters.
AF
GR--CH
FREQ
LOCK
AF--SEN
PHASE
LOW--CU
POWER
BT
BT
AF
LIMIT
FREQ
ENCRYP
Displays Transmitter Frequency
Flashes alternately
Setting Instructions
Press and release the MODE button 7 to select the required function. Press again for the next etc.
Parameter value starts to flash once it is selected. Press the SET button 8 to modify the parameter
value whilst it is flashing. To confirm the change, do not press any button for 5 seconds. When flashing
stops, the parameter is saved and stored into memory.
RF
RF
AF
BT
BT
AF
(The listed frequency is shown in ''MHz'')
GR-CH Displays Group and Channel
GR-CH text & numerics flash alternately
MODE
FREQ
RF
RF
Instructions:
AF
BT
BT
AF
1. Press the ''MODE'' button until “FREQ” parameter appears. It displays and flashes
“FREQ” and the currently programmed actual working frequency. Flashing stops after 5
seconds.
2. The frequency can only be indicated. Frequency cannot be changed on the transmitter,
only from the receiver using via ACT.
Flashing stops when no buttons are pressed for 5 seconds.
MODE
GR--CH
NOTE: Transmitter frequency is synced automatically via the receiver by pressing the “ACT” button.
16
17
Bodypack Transmitter
LOW-CU
Low Frequency Cut-Off
BT
Screen flashing alternately
Press "SET" for "OFF" or "ON”
RF
RF
BT
AF
BT
AF
BT
AF
Instructions:
OFF
LOW--CU
RF
Flashing stops when no button is pressed for 5 seconds.
Flashing stops when no button is pressed for 5 seconds.
MODE
BT
AF
BT
Press "SET" to select
gain in 10dB steps
RF
RF
RF
AF
Input Audio Sensitivity
AF-SEN
Screen flashing alternately
AF
Bodypack Transmitter
1. 1.Press “MODE” until “AF--SEN” function appears; the display showing the current
status will be flashing and is ready to be modified.
2. Each press of the ''SET'' button increases the gain in 10dB steps to a maximum of 30dB
(then reverts back to 0dB).
ON
SET
Instructions:
1. Press ''MODE'' button until “LOW-CU” parameter appears. It displays and flashes the
currently programmed “ON” or “OFF” setting.
2. Press the “SET” button to change setting. Setting is changed and saved automatically
after 5 seconds.
MODE
AF--SEN
0 DB
10 DB
20 DB
30 DB
SET
SET
SET
SET
NOTE: The Low Cut-off is set by default in the “OFF” position. When turned “ON'', the frequency
response below 100Hz will decrease about 4dB with a slope of -6dB/Octave.
NOTE: Default factory setting of input sensitivity is 0dB.
The higher the gain setting, the lower the dynamic range available and consequently will
also lower the signal to noise ratio.
At 0dB, the maximum input signal is 1Vrms; thus, do not exceed this level.
18
19
Bodypack Transmitter
LIMIT
Bodypack Transmitter
Input Limiter
POWER
Screen flashing alternately
Screen flashing alternately
Press "SET" for "OFF" or "ON”
RF
RF
POWER SELECTION
RF
RF
RF
AF
BT
Press SET button once for POW-LO: Power Low
Press SET button again for POW-HI: Power High
BT
AF
AF
RF
BT
BT
AF
Flashing stops when no button is pressed for 5 seconds.
BT
AF
BT
AF
Flashing stops when no button is pressed for 5 seconds.
OFF
POW--HI
MODE
LIMIT
MODE
ON
POWER
POW--LO
SET
Instructions:
Instructions:
1. Press ''MODE'' button until “POWER” parameter appears. It displays and flashes the
currently programmed “POW-HI” or “POW-LO” setting.
2. Press the “SET” button to change the setting. Setting is changed and saved
automatically after 5 seconds.
1. Press ''MODE'' button until “LIMIT” parameter appears. It displays and flashes the
currently programmed “ON” or “OFF” setting.
2. Press the “SET” button to change the setting. Setting is changed and saved
automatically after 5 seconds.
NOTE: POW-HI selects 50mW transmitter power output. POW-LO selects 10mW transmitter power
output. Set appropriate power to meet local regulations. Use the lower power setting to conserve
batteries. However, it is normal to use the higher power setting for body packs due to the
degradation of signal power caused by antenna proximity to the body. For body packs, best
performance is achieved using the high power setting unlike the hand held where the lower power
setting generally yields better results.
NOTE: Default factory setting is “OFF”. When ''ON'', the maximum output of the receiver is limited
to 1 Volt.
ENCRYP
ENCRYPTION
PHASE
Press SET button once for AF-NEG
Press SET button once for AF-POS
Screen flashing alternately
ON
MODE
AF INPUT PHASE
ENCRYP
RF
RF
OFF
AF
Instructions:
BT
RF
BT
AF
AF
BT
Flashing stops when no button is pressed for 5 seconds.
1. Press ''MODE'' button until “ENCRYP” parameter appears. It displays and flashes the
currently programmed “ON” or “OFF” setting.
NOTE: The encryption setting can only be indicated. Encryption cannot be changed on the
transmitter, only from the receiver and synced using the ACT button.
MODE
20
21
AF--POS
AF has positive phase
AF--NEG
AF has negative phase
PHASE
Bodypack Transmitter
Bodypack Transmitter
Instructions:
BT
TRANSMITTER BATTERY METER
1. Press ''MODE'' button until “PHASE” parameter appears. It displays and flashes the
currently programmed “AF-POS” or “AF-NEG” setting.
2. Press the “SET” button to change setting. Setting is changed and saved automatically
after 5 seconds.
BT
NOTE: The Phase function provides users with an audio phase reversal option. The normal setting
is AF-POS. When using 2-wire condenser microphones it is sometimes necessary to invert the audio
phase to ensure proper alignment with other mics in the system.
LOCK
Screen flashing alternately
AF
AF
BT
BT
BT
40%
10%
0%
Press SET for YES or NO
RF
BT
BT
80%
The LCD battery meter is shown only when the transmitter is powered on. The meter gives
a percentage (%) indication of remaining battery life, as shown above. Replace with a new,
fully charged battery module (or place the mic into the charging station) when battery
meter indication falls to 10% (1 level remaining). If an under voltage condition continues,
the LCD will show "PO-OFF" and the system will shut down to prevent the battery becoming
overly discharged.
PARAMETER LOCK
RF
BT
100% 90%
ERR Message:
RF
BT
AF
When "ERR" appears in the display it indicates that an operational error has occurred.
Please refer to the following codes to diagnose which error you are experiencing.
BT
Flashing stops when no button is pressed for 5 seconds.
ROM-ER
Transmitter does not have the initial data, thus it is completely dead and
cannot be programmed. Refer to your dealer.
ERROR1
RF circuitry failure. Frequency cannot be programmed. Refer to your
dealer.
NO----OR3
The frequency you want to program is above the switching bandwidth of
the transmitter. Use a receiver with an appropriate, matching frequency
band. (Whilst the error message is showing, the microphone is still
operating and its frequency remains unchanged. To clear the displayed
“ERR“ message, switch the handheld transmitter off and on again.)
NO----OR4
The frequency you want to program is below the switching bandwidth of
the transmitter. Use a receiver with an appropriate, matching frequency
band. (Whilst the error message is showing, the microphone is still
operating and its frequency remains unchanged. To clear the displayed
“ERR“ message, switch the handheld transmitter off and on again.)
Instructions:
1. Press ''MODE'' button until “LOCK” parameter appears. It displays and flashes the
currently programmed “NO” or “YES” setting.
2. Press the “SET” button to change setting. Setting is changed and saved automatically
after 5 seconds.
NOTE: When in LOCK mode, all parameters are locked and cannot be changed including powering
on & off. The “MODE” button is still able to select parameters but no changes will be possible (other
than selecting LOCK and then using SET again to unlock the device). To power off the transmitter
when the LOCK function is enabled, the LOCK setting needs to be reset to the “NO” position. Note
that a sudden loss of power (such as a battery becoming completely discharged or removal of the
battery) will de-activate the LOCK function.
PO-OFF
Power Off :
When the power switch is moved to the “Off” position, the LCD will show "PO-OFF" (for
Power Off) first and then the system will shut down and no further messages will be
displayed.
22
23
Bodypack Transmitter
Bodypack Transmitter
WARNINGS
AF 4-PIN INPUT PIN CONFIGURATION
1.
Adjust the pack input gain to the appropriate input level (The body pack gain needs to
be set to 0dB when using an electric guitar).
2.
4-pin Connector: Before making any connections power down the transmitter to
prevent damage to the transmitter, receiver or speaker system. Carefully align and
insert the 4-pin plug into the connector according to the instructions below and tighten
the locking ring (on Mipro mini-XLR only) in a clockwise direction as illustrated in
Figure 2. Then power the unit up again.
3.
If the transmitter is on with nothing connected to the AF input socket, the system may
generate unwanted noise. Always ensure the input cable is connected before turning
the pack on.
4.
Power off the transmitter before disconnecting the input cable.
2-Wire Electret Condenser Microphone Capsule
AUDIO
Headset
2
4
1
3
2
3
4
3-Wire Electret Condenser Microphone Capsule
SHIELD
Capsule Connector
PIN
1
SHIELD
The cutout on the
connector must match
the indentation on the
socket when inserting.
PIN
1
2
AUDIO
4
1
3
BIAS
3
2
4
Lavalier
Dynamic Microphone
2
1
SHIELD
PIN
1
3
2
AUDIO
4
1
3
2
3
4
Electric Guitar
SHIELD
PIN
1
2
AUDIO
4
1
3
2
3
4
(Figure 2)
Line-in (impedance 8KΩ attenuation 10dB)
SHIELD
AUDIO
PIN
1
2
3
4
24
25
4
1
3
2
MP-8 Lithium-polymer Battery Charger
Bodypack Transmitter
HIGH FREQUENCY BYPASS
1.
PART NAMES AND FUNCTIONS
When other microphones are in use, some changes may be needed to another
microphone before adding it to the system in order to avoid high frequency instability.
Refer to the diagrams below.
2
3
2.
When high frequency radio waves get into the audio path they can sometimes cause
interference. The effect of this is generally persistent noise or degradation of the
overall frequency response. In an effort to prevent these external factors affecting
audio quality, a 330pF bypass capacitor can be added to the capsule as shown in
diagrams (1) and (2). If this method is not possible, another option is to add a
bypass capacitor on the 4-pin mini-XLR connector as shown in diagrams (3) and (4).
1
4
5
6
7
(Figure 1)
**The Best Method
(1) Connect to two-wire condenser capsule
Add 330pF bypass capacitor
(2) Connect to three-wire condenser capsule
Add 330pF bypass capacitor
1
Power Indicator: Green light illuminated indicates DC power is on.
2
Transmitter Charger Slot: Charges one handheld or one body pack transmitter.
Note that when a transmitter is charging you may also charge a battery pack (either
handheld or body pack type) at the same time in the front slot. (See Figure 2)
3
Transmitter Charging Indicator:
(a) Red light illuminated indicates battery is charging.
(b) Green light illuminated indicates transmitter battery is fully charged (1~ 4 hours).
4
Battery Pack Charger Slot: Charges one handheld or one body pack transmitter
battery. (See Figure 3)
5
Battery Module Charging Indicator:
(a) Red light illuminated indicates battery is charging.
(b) Green light illuminated indicates battery is fully charged (1~ 4 hours).
**Alternate Method
(3) Connect to two-wire condenser capsule
(4) Connect to three-wire condenser capsule
Add 330pF bypass capacitor
2
4
1
DC power supply input (12V DC 1.25A).
4
1
3
(Figure 2)
3
3
2
3
Housing keyways allow two battery chargers to be mechanically connected together.
7
PIN
1
PIN
1
2
6
(Figure 3)
2
4
4
Add 330pF bypass capacitor
FCC ID: M5X-ACT8T
THIS DEVICE COMPLIES WITH PART 74 OF THE FCC RULES AND RSS-123 Issue1 OF CANADA.
OPERATION IS SUBJECT TO THE FOLLOWING TWO CONDITIONS:
(1) This device may not cause interference.
(2) This device must accept any interference, including interference that may cause undesired operation of
the device. This equipment complies with FCC RF radiation exposure limits set forth for an uncontrolled
environment.
Transmitter Charging
26
27
Module Charging
MP-8 Lithium-polymer Battery Charger
Note
BATTERY CHARGER INSTRUCTIONS
1.
Plug the provided DC power supply into an AC outlet (100-240VAC) and attach the
4.
battery charging station as shown in figure
.
2.
Insert the transmitter or battery module into the appropriate charging slot observing
correct polarity.
(Figure 4)
WARNINGS
1.
Use only the supplied MIPRO power supply with the charging station to avoid voltage
problems. If the voltage to the charger is too high, it may damage the charger,
rechargeable batteries or any connected transmitters! MIPRO recommend a 12V
regulated 1.25A DC power supply.
2.
The transmitter must be switched off when it is charging.
3.
For safety reasons, do not use any other type of battery charger.
28
29