1
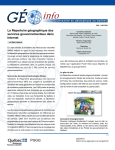
THE MAPINFO USER GUIDE
Push'n'See
The MapInfo User Guide
2
Push'n'See
The MapInfo User Guide
INTRODUCTION
Here are a few recommendations addressing the MapInfo user and regarding the proper organization of a
workspace1 to be published with Push’n’See. While MapXreme Java and the Push’n’See application do not yet
support every MapInfo option and function, this document will guide the MapInfo user (Push’n’See Author) to work
more efficiently and avoid a certain number of problems.
These recommendations concern three aspects of a MapInfo work session : the tables (formats and content), the
windows (map windows, graph windows, browser windows, layout windows and legends) and the map itself
(layers, thematics and labels). We invite you to follow these recommendations in order to optimize your project's
performances and ensure the intergrity of your MapInfo® workspace
1.
Avoid the use of spaces, accented or particular characters in file names;
2.
Use native MapInfo tables or Vertical Mapper grids, no selections or dynamic links;
3.
Use properly registered raster images;
4.
Display a map window which dimensions correspond as closely as possible to the application’s, to preserve
your map's interactivity;
5.
Use tables of point, line or region objects;
6.
Preferably use fonts delivered with MapInfo Professional® or refer to the documentation for proper use of
custom ones;
7.
Avoid storing important information in the cosmetic layer. Save it to a MapInfo native table instead;
8.
Use these thematic mapping methods:
Individual values;
Ranges;
Graduated Symbols;
Pie Charts;
Bar Charts.
9.
Make effective use of zoom layering on layers and labels;
10. Use automatic labeling, based on a single field, and avoid expressions;
1
The word “workspace” designates a MapInfo work session, i.e. the .WOR file containing the description of the work session,
including each opened table or window along with their dispay attributes and layout settings.
3
Push'n'See
The MapInfo User Guide
4
Push'n'See
The MapInfo User Guide
TABLE OF CONTENT
INTRODUCTION....................................................................................................................................... 3
1. TABLES ................................................................................................................................................ 7
1.1 Formats and Data Sources ..................................................................................................................... 7
1.2 Content ............................................................................................................................................... 7
1.2.1 Table Names .................................................................................................................................. 7
1.2.2 Field Types .................................................................................................................................... 7
1.2.3 Index ............................................................................................................................................ 7
1.2.4 Seamless Tables ............................................................................................................................. 8
1.2.5 Selections and Dynamic Joins........................................................................................................... 8
1.3 Projections........................................................................................................................................... 9
2. WINDOWS ......................................................................................................................................... 11
2.1
2.2
2.3
2.4
2.5
2.6
Map Windows ..................................................................................................................................... 11
Legend Windows................................................................................................................................. 12
Layout Windows ................................................................................................................................. 12
Graph Windows .................................................................................................................................. 12
Browser Windows ............................................................................................................................... 12
Redistrict Windows.............................................................................................................................. 12
3. MAPS ................................................................................................................................................. 13
3.1 Layers Content ................................................................................................................................... 13
3.2 Layer Control Options.......................................................................................................................... 17
3.2.1 Cosmetic Layer............................................................................................................................. 17
3.2.2 Layer’s Visibility............................................................................................................................ 17
3.2.3 Edition Mode ................................................................................................................................ 17
3.2.4 Selection Mode ............................................................................................................................. 17
3.2.5 Automatic Labels .......................................................................................................................... 18
3.2.6 Display Options ............................................................................................................................ 18
3.3 Thematics.......................................................................................................................................... 19
3.3.1 Representations............................................................................................................................ 19
3.3.2 Source Data ................................................................................................................................. 19
3.3.3 Objects Style................................................................................................................................ 20
3.3.4 Style and Settings Options ............................................................................................................. 20
3.3.5 Legend Options ............................................................................................................................ 23
3.4 Labels ............................................................................................................................................... 24
3.4.1 Source ........................................................................................................................................ 24
3.4.2 Display ........................................................................................................................................ 24
3.4.3 Text Styles .................................................................................................................................. 25
3.5 Projections......................................................................................................................................... 26
4. SPECIFIC FUNCTIONS ....................................................................................................................... 27
4.1 Hotlinks............................................................................................................................................. 27
4.2 Send a Workspace to Push’n’See .......................................................................................................... 29
4.2.1 Send the Map Window to Push’n’See ............................................................................................... 29
4.2.2 Publication Process ....................................................................................................................... 30
5
Push'n'See
The MapInfo User Guide
6
Push'n'See
The MapInfo User Guide
1. TABLES
Tables opened and used by the workspace must absolutely follow these few rules:
1.1 Formats and Data Sources
•
If vectorials, the tables should be composed of .tab, .map, .id and .dat (or .dbf) files, with or without an .ind
(index) file. Only .dat and .dbf descriptive data file formats should be used. Other formats such as .txt, .wk1,
.xls or .mdb should never be associated with the workspace. Although they would be transfered during
publication of the workspace, the data they contain would not be displayed in the map while MapXtreme Java
can not read these file formats;
•
MapInfo version 2.x format is supported;
•
Raster tables should be composed of a .tab file AND either a .jpg, .gif, .bmp or a 256 indexed colors .tiff.
For better performance, the use of 256 indexed colors .tiff is recommended;
•
Vertical Mapper numerical and classified grids are supported (.GRD and .GRC);
•
References to an ODBC (Open Data Base Connexion) have no effect in the application. They will not be
preseved.
1.2 Content
1.2.1 Table Names
As usual, file names should not contain any special character or accent. It should also never start with a number or
be composed of too many characters (A maximum of 31 characters).
1.2.2 Field Types
Logical Fields
Although a workspace containing one or many fields of logical type can be published without problem, you should
know that such a type of data should not serve as base data for a MapInfo thematic map. They would not be
displayed. On the other hand, such fields can be used to create a thematic online (Push’n’See’s Thematic Map
Wizard).
1.2.3 Index
It is important to index the fields that may be used for either the Geo Search or Join Data functions. In the case of
the Geo Search, one will only be able to perform a search on a table'S indexed fields. As for the Join Data function,
the join itself can only be performed using an indexed field. In consequence of which, your table's unique identifier
(Geographic identifer) must reside in an indexed field;
On the other hand, it is not recommanded to index too many fields. The .IND file can rapidly become very heavy
and thus significantly increase the publication time, as well as take up valuable space on the server. Then it is best
to only index fields which are necessary to the above mentioned functions.
7
Push'n'See
The MapInfo User Guide
1.2.4 Seamless Tables
In the case of a workspace using seamless tables, the base tables forming it should be opened in a No View mode
and saved with the workspace. They will not be visible in the Layer Control, but it will be possible to query them at
any time ( ). Push’n’See will be unable to use a seamless table if its base tables are not present in the
workspace. Moreover, the tables on which the seamless table is based must be located in the exact same directory
as the seamless table itself, and the "No Path" option must absolutely be checked in the Seamless Tables
Preferences.
1.2.5 Selections and Dynamic Joins
•
SQL queries are not supported. To be preserved, they should be saved in a MapInfo native format (*.TAB).
Use MapInfo’s File/Save Copy As option.
•
A table must not contain any column resulting from a dynamic join between tables or fields. Such a column is
only temporary and cannot be used by Push’n’See. When using the Table/Update Column/Join function,
make sure to update a pre-existing column and to save the resulting information with the table before leaving
MapInfo (File/Save Table or Save Copy As).
Not
supported
8
Push'n'See
The MapInfo User Guide
1.3 Projections
It is important to reduce the number of different projections used for the various tables layered in a map. The more
different projections are used, the more time will be necessary to display and redraw the map. Moreover, the use
of too many projections can, at greater scale, resduce the display precision. This can be observed both in MapInfo
and Push'n'See.
Also note that the Non-Earth category is to be avoided while it is not an actual projection.
9
Push'n'See
The MapInfo User Guide
10
Push'n'See
The MapInfo User Guide
2. WINDOWS
It is important that only one map window be opened at a time in the workspace while the application will recall only
one. In the case where there would be more than one opened window, the application would only read the settings
of the first map window it encounters in the .wor file. Also note that Push’n’See considers as opened even a
reduced window (
).
2.1 Map Windows
To assure preserving the appearence of your MapInfo map, you must make sure that your map window’s width and
height correspond to Push’n’See’s map window’s size as defined during configuration of the application (mapWidth
= xxx et mapHeight = xxx). You should always keep in mind that the view you have in your map window when
saving the workspace will be the initial view at startup in Push’n’See. Although Push’n’See remembers the MapInfo
view settings (zoom level and x,y center coordinates), these parameters are related to the window’s size. In
consequence of which, the effect will not be the same if the window’s size is different and your project’s initial view
might be entirely different. In order to avoid this, make sure to adjust your MapInfo map window’s size to the
Push’n’See parameters.
To adjust with precision your map window’s width and height, you can type a line of command of this form in your
MapBasic window :
Set Window FrontWindow() Width x Units "pt"
Set Window FrontWindow() Height x Units "pt"
(Point units quite resemble pixel units as used in Push’n’See)
button in the toolbar can both allow you to set the desired zoom
The Map/Change view option and the
level, scale and x,y center of your map window.
11
Push'n'See
The MapInfo User Guide
2.2 Legend Windows
Both the cartographic and thematic legend are supported by the application. You will need to specify which your
workspace (Project) is using in the Design / Map Properties section of the Project Module.
2.3 Layout Windows
Layout windows are not supported by the application.
2.4 Graph Windows
Graph windows are not supported by the application.
2.5 Browser Windows
Browser windows are not supported by the application.
2.6 Redistrict Windows
Redistrict windows are not supported by the application.
12
Push'n'See
The MapInfo User Guide
3. MAPS
3.1 Layers Content
•
, lines
Layers can contain any type of points (symbols)
regarding their display attributes. See further sections for details.
•
The tables should contain no text object
•
Collection objects:
or regions
. Restrictions may apply
. This, of course, does not apply to automatic labelling.
Supported
Combination of polygons/regions
X
Combination of lines/polylines
X
Not supported
Combination of points
X
Combination of different types of objects
X
3.1.1 Symbols
Symbols Types
•
All MapInfo Symbols are supported;
•
Custom Symbols (MapInfo’s or your own) can be used by the application only if they are applied in the
workspace as Style Override (Menu Map > Layer Control > Display > Style Override) or by way of a thematic
(Menu Map > Create Thematic Map). Make sure they have been uploaded on the server in a .gif or .jpg
format. Ask the System Administrator;
Symbols Style
•
Backgrounds are supported only if applied as an override (Map menu > Layer Control > Display > Style
Override) or by way of a thematic (Map menu > Create Thematic Map);
•
These visual effects are not supported:
Rotation angle;
Drop shadow;
Bold;
13
Push'n'See
The MapInfo User Guide
Font:
All MapInfo fonts supported
Rotation angle:
Not supported
Visual Effects:
Not supported
Background Options:
Supported only if applied
as an override or by way
of a thematic.
3.1.2 Lines
Lines Style
Linear objects can be of any color and width. All styles are not supported.
All line styles are not
supported, see bottom
of page for details.
Interleaved effect
not supported.
All colors supported.
It is recommanded to
vary a line width
using pixels rather
than points.
14
Push'n'See
The MapInfo User Guide
For a line width of 1 the designated line styles are not supported. Warning: The more complex a line gets, the
more chances it will loose display quality as the width of the line increases.
Legend:
: Unsupported line style
3.1.3 Regions/Polygons
Regions Geometry
The more complex a region (polygon) gets the more it can cause undetermined effects to the display quality and
lengthen the display delay. The use of MapInfo 6.5 Generalize function or of the MapLogix topological map editing
utility can be a solution to simplifying polygonal objects.
Regions Style
•
All fill patterns and colors are supported.
•
Border styles follow the same restrictions as line styles (See previous page).
•
Full transparency is supported if applied to a layer as an override or by way of a thematic. Transparency
applied directly to the objects themselves is not supported.
•
Some restrictions apply if transparency is applied as a pattern’s background (No background color). In order to
be fully effective, the effect must be applied to the objects themselves. If applied as an override or by way of a
thematic, the foreground color will automatically revert to black.
15
Push'n'See
The MapInfo User Guide
Fill patterns and
colors: Supported.
Restrictions apply to the
use of transparency (No
background color) as
described above.
Border styles follow
the same rules as the
linear object styles.
See corresponding
section for details.
16
Push'n'See
The MapInfo User Guide
3.2 Layer Control Options
Cosmetic Layer:
Not supported, objects
will not be displayed.
Display and Label
options: Supported,
under the conditions
mentionned in
corresponding sections.
Hotlink options:
Supported. For more
precision on the use of
this option, see the
corresponding section of
this guide.
3.2.1 Cosmetic Layer
The cosmetic layer is not supported by the application. Any objects it may contain will not be drawn in the map.
Hence the importance of keeping it clear of any information which might be of some importance for your project.
3.2.2 Layer’s Visibility
Layer’s visibility will remain as defined in the MapInfo workspace and will respect the zoom layering settings.
Proper use of zoom layering will increase the performances of a cartographic project (Display time).
3.2.3 Edition Mode
The edition mode is not available within the application.
3.2.4 Selection Mode
This option is supported and the parameters will remain as defined in the MapInfo workspace. The following
Push’n’See tools require layers to be selectable:
Information;
Drilldown;
Hotlink;
Selections.
17
Push'n'See
The MapInfo User Guide
If planning to use any of these tools, make sure to set the appropriate layers selectable.
3.2.5 Automatic Labels
Automatic Labels are supported and will respect the labels parameters under the further mentionned conditions.
See the corresponding section of this guide.
3.2.6 Display Options
Style override options:
Supported, under the
further mentionned
restrictions, according to
each object type.
Zoom layering:
Supported
Show line direction,
nodes and centroids:
Options not supported
18
Push'n'See
The MapInfo User Guide
3.3 Thematics
3.3.1 Representations
Push’n’See supports the following types of thematic representations:
Ranges;
Graphiques en barres;
Graphiques en secteurs;
Graduated Symbols;
Individual Values;
Grid.
3.3.2 Source Data
•
Logical fields must not be used in the creation of any kind of MapInfo thematic maps. It would not be displayed
in Push'n'See. On the other hand, one will be able to create an on-line thematic using the Push'n'See Thematic
Map Wizard.
•
A thematic should not refer to anything else but a unique field. Operations between tables or fields
(Expression… or Join…) are not recognized by the application.
•
References to an ODBC (Open Data Base Connexion) have no effect in the application. They will not be
preseved.
•
Bivaried thematics are not supported by the application.
19
Push'n'See
The MapInfo User Guide
3.3.3 Objects Style
Symbols:
The same restrictions apply as described in the previous section.
Lines :
The same restrictions apply as described in the previous section.
Regions :
The same restrictions apply as described in the previous section.
3.3.4 Style and Settings Options
Ranges
*Note: Options are supported unless indicated otherwise.
Style options:
Supported under conditions
mentionned in this guide’s
corresponding section.
Apply Color Only:
Option not supported
20
Push'n'See
The MapInfo User Guide
Bar Charts
*Note: Options are supported unless indicated otherwise.
Region style options:
Supported, under
conditions mentionned in
corresponding section.
Données empilées
(Stacked) : option
non supportée.
Pen and brush
style: Options
not supported.
Échelles
indépendantes :
option non supportée.
Logarithmic
Transformation:
Option not
supported.
Pie Charts
*Note: Options are supported unless indicated otherwise.
Region style options:
Supported, under
conditions mentionned in
corresponding section.
Border style:
Option not
supported.
Half Pies:
Option not
supported.
Logarithmic
Transformation:
Option not
supported.
21
Push'n'See
The MapInfo User Guide
Graduated Symbols
*Note: Options are supported unless indicated otherwise.
Symbol style
options: Supported
under conditions
mentionned in the
corresponding section.
For better
performance, the use
of MapInfo symbols is
recommended.
Logarithmic
Transformation:
Option not
supported.
Individual Values
*Note: Options are supported unless indicated otherwise.
Style options:
Supported, under conditions
mentionned in corresponding
section of this guide.
Apply Color Only:
Option not supported
22
Push'n'See
The MapInfo User Guide
Grid
This type of thematic representation works according to a different logic and using it implies a few restrictions: You
must absolutely use the original .GRID file created during interpolation. This file only is read by the Push’n’See
server and any modifications made using the Modify Thematic Map option and written in the .WOR file will be
ignored. To make any modifications to your thematic you must actually recreate a new .GRID file by starting over
with the whole interpolation process.
Also, note that the legend of a thematic grid will not be displayed.
3.3.5 Legend Options
Label Font:
Option not
supported.
Title Font:
Option not
supported.
Subtitle Font:
Option not
supported.
Border Style:
Option not
supported.
Show this
Range / Show
Record Count:
Options not
supported.
23
Push'n'See
The MapInfo User Guide
3.4 Labels
3.4.1 Source
Only a single field can be used as the information source for labeling. It is not possible to label with any kind of
expression.
Expression:
Option not
supported.
3.4.2 Display
These label’s attributes are not supported by the application:
Maximum labels;
Label partial segments;
Label Lines.
Label Partial Objects and
Maximum Labels:
Options not supported.
Text Style: Restrictions
apply, as mentionned in
the following section.
Label Lines:
Options not
supported.
24
Push'n'See
The MapInfo User Guide
3.4.3 Text Styles
These visual effects are not supported by the application:
All caps;
Expanded;
Box;
Shadow.
Box:
Option not
supported.
Shadow, All Caps,
Expanded: Options
not supported.
25
Push'n'See
The MapInfo User Guide
3.5 Projections
The projection used to display your map (Map > Options > Projections) should as much as possible correspond to
the projection of the tables. As mentionned in a previous section, the more different projections are used, the more
time will be necessary to display and redraw the map. Moreover, the use of too many projections can, at greater
scale, resduce the display precision. This can be observed both in MapInfo and Push'n'See.
Also note that the Non-Earth category is to be avoided while it is not an actual projection.
26
Push'n'See
The MapInfo User Guide
4. SPECIFIC FUNCTIONS
4.1 Hotlinks
For the application to be able to read MapInfo’s hotlink function’s parameters the following conditions must be
observed:
1.
Activate the function on objetcs only.
2.
Check the Save options to table metadata option. This way, MapInfo will write the Hotlink parameters into the
table’s .TAB file hence allowing the application to read the necessary information.
1.
2.
However MapInfo will not keep more then one hotlink definition. To work around this limitation, proceed in the
following manner:
1.
Activate the Hotlink function on a first field, as indicated here above.
2.
Open your table’s .TAB file in any text editor, such as WordPad. The hotlink is defined in four lines under the
metadata section as underlined in the following example.
!table
!version 300
!charset WindowsLatin1
Definition Table
Type NATIVE Charset "WindowsLatin1"
Fields 3
Bureau Char (20) Index 1 ;
Adresse Char (120) ;
WEB Char (120) ;
ReadOnly
begin_metadata
"\ActiveObject" = ""
"\ActiveObject\Expr" = "URL"
"\ActiveObject\Mode" = "HOTLINK_MODE_OBJ"
"\ActiveObject\Relative" = "FALSE"
"\IsReadOnly" = "FALSE"
end_metadata
27
Push'n'See
3.
The MapInfo User Guide
Cut and paste these four lines as many times as you have hotlinks to be defined.
!table
!version 300
!charset WindowsLatin1
Definition Table
Type NATIVE Charset "WindowsLatin1"
Fields 3
Bureau Char (20) Index 1 ;
Adresse Char (120) ;
WEB Char (120) ;
ReadOnly
begin_metadata
"\ActiveObject" = ""
"\ActiveObject\Expr" = "URL"
"\ActiveObject\Mode" = "HOTLINK_MODE_OBJ"
"\ActiveObject\Relative" = "FALSE"
"\ActiveObject" = ""
"\ActiveObject\Expr" = "URL"
"\ActiveObject\Mode" = "HOTLINK_MODE_OBJ"
"\ActiveObject\Relative" = "FALSE"
"\ActiveObject" = ""
"\ActiveObject\Expr" = "URL"
"\ActiveObject\Mode" = "HOTLINK_MODE_OBJ"
"\ActiveObject\Relative" = "FALSE"
"\IsReadOnly" = "FALSE"
end_metadata
4.
For each Hotlink, modify the following two elements:
The Hotlink identifier, define by the \ActiveObject\ string:
For the application to differenciate each hotlink, the identifiers must be unique. In the following example
each hotlink definition is identified by a number: ActiveObject1, ActiveObject2, ActiveObject3.
For each Hotlink definition, make sure to modify all corresponding four lines.
Example:
"\ActiveObject1" = ""
"\ActiveObject1\Expr" = "URL"
"\ActiveObject1\Mode" = "HOTLINK_MODE_OBJ"
"\ActiveObject1\Relative" = "FALSE"
"\ActiveObject2" = ""
"\ActiveObject2\Expr" = "URL"
"\ActiveObject2\Mode" = "HOTLINK_MODE_OBJ"
"\ActiveObject2\Relative" = "FALSE"
"\ActiveObject3" = ""
"\ActiveObject3\Expr" = "URL"
"\ActiveObject3\Mode" = "HOTLINK_MODE_OBJ"
"\ActiveObject3\Relative" = "FALSE"
The hotlink field’s name, i.e. the name of the field containing the Hotlink reference (URL) and defined
as follows: "\ActiveObject \Expr’’=’’URL_1’’, where “URL_1” is the name of the field. In the following
example, URL_1, URL_2 and URL_3 each identifies a hotlink field.
Example:
"\ActiveObject1" = ""
"\ActiveObject1\Expr" = "URL_1"
"\ActiveObject1\Mode" = "HOTLINK_MODE_OBJ"
"\ActiveObject1\Relative" = "FALSE"
"\ActiveObject2" = ""
"\ActiveObject2\Expr" = "URL_2"
"\ActiveObject2\Mode" = "HOTLINK_MODE_OBJ"
"\ActiveObject2\Relative" = "FALSE"
"\ActiveObject3" = ""
28
Push'n'See
The MapInfo User Guide
"\ActiveObject3\Expr" = "URL_3"
"\ActiveObject3\Mode" = "HOTLINK_MODE_OBJ"
"\ActiveObject3\Relative" = "FALSE"
5.
Save the table and proceed as for a regular publication.
4.2 Send a Workspace to Push’n’See
The « Send Map Window to Push’n’See » function allows the MapInfo user to send (Publish) his workspace directly
from MapInfo to Push’n’See. It also integrates a workspace analysis tool which will help th user to confirm that the
content and properties of his workspace are compatible with the application, and thus ensure a successful
publication.
Prior to using this function, make sure of two things :
1.
2.
That the application Scan_PNS_en.MBX is installed in the same directory as the “Send to Push’n’See”
(pns.mbx) application.
That only one map window is opened.
4.2.1 Send the Map Window to Push’n’See
The image below shows how to access the application from within the MapInfo environment: Map > Send To >
Send MapWindow to Push’n’See.
29
Push'n'See
The MapInfo User Guide
When launching the application, the following window appears:
A user with an access to a Push’n’See server will be able to immediately use the full version of the application. By
checking the “Don’t display anymore” option, he will prevent from displaying this page in further uses of the
application. He will then be redirected to the main publication page, as described below. The “Continue” button will
lead him to the first step of the publication process.
A user without an access code to Push’n’See will have to use the evaluation version. By clicking on the “Evaluate
during 30 days” button he will be redirected to a registration form. When completed, the user will receive a
temporary user name and password from KOREM’s support team. These will allow him to proceed with the
publication of his MapInfo workspace, this time using the full version of the application. The process is then exactly
the same as for the regular user. The temporary user name and password are valid for a duration of thirty (30)
days.
4.2.2 Publication Process
To launch the publication process, click on the “Continue” button in the here above window. Five easy steps are to
be taken:
1.
2.
3.
4.
5.
30
Push'n'See
The MapInfo User Guide
1. Push’n’See server configuration
To connect to a Push’n’See server, the user must first define the following three parameters:
The Push’n’See server itself;
The user name to access Push’n’See;
The password to access Push’n’See.
The « Add » button will allow to create a new server configuration.
To configure a server, the user must know the complete address to the Push’n’See publication module
(URL) and own a valid user name and password. To each configured server, a name can be attributed to
facilitate identification.
The URL address must have the following form:
http://ServerName or IPaddress:Port/Context/publisher
It is important not to forget the « publisher » string which designates the publication module.
The user name and password corresponding to the Push’n’See server will have been given to you by the
system administrator or, if evaluating the application, by e-mail from KOREM’s support team.
When all fields are filled up approprietly, make sure to click on the “Save” button for the parameters to be
preserved. You will NOT need to reconfigure the server at each use of this application.
From the « Publish to Push’n’See » interface, the user will be able at any time to:
Configure a new Push’n’See server (« Add » button)
Modify an existing configuration (« Modify » button)
Delete an existing configuration (« Delete » button)
2.
Publication of a MapWindow
Two choices are offered:
Publish a new map: creation of a new Push’n’See project based on the current map window.
Update an existing project: selection of an existing project to be updated based on the current map
window.
Select the appropriate option.
3.
Data license agreement
By checking this option the user accept the conditions as described in the dialog box. Publication can only
proceed if the option is checked.
4.
Analyse of the workspace
Check this option for the workspace to be analysed prior to publication. This allow the user to confirm that
its properties and content are compatible with the application. The analysis will be launched as soon as the
“Publish” button is clicked. The user will be asked to save the analysis report to the desired directory, then
the analysis itself will be carried out. Once completed, the user will be able to consult the result by either
reading the content of the MapInfo message window or consulting the saved report. After the analysis the
user will have the possibility to carry on with the publication or to cancel the process to bring modifications
to the workspace.
31
Push'n'See
5.
The MapInfo User Guide
Publish
If you have chosen to continue with the publication process, you will be redirected to the corresponding
window of either of the regular publication or update process. Proceed as for a standard publication or
update.
32