1
2.4. Electric requirement
WARNING
Install at a place that can withstand the weight of the outdoor units and install positively
so that the units will not topple or fall.
• Electric wire size and fuse capacity:
2
Power supply cable (mm )
Connection cable (mm2)
MAX.
MIN.
MAX.
MIN.
4.0
3.5
2.5
1.5
Fuse capacity (A)
CAUTION
20
• Use conformed cable with Type245 IEC57.
• Install all electrical works in accordance to the national standard.
• Install the disconnect device with a contact gap of at least 3 mm in all poles nearby the
units. (Both indoor unit and outdoor unit)
• Install the circuit breaker nearby the units.
Do not install where there is the danger of combustible gas leakage.
Do not install near heat sources.
If children under 10 years old may approach the unit, take preventive measures so that
they cannot reach the unit.
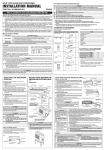
4. INSTALLATION DIAGRAM
2.5. Operating range
INDOOR UNIT
Outdoor
Cooling / Dry Mode
Heating Mode
Temperature
About -10 to 46 ˚C
About -15 to 24 ˚C
Connection Cord
Conform to Type245 IEC57
[OUTDOOR UNIT]
10 cm or over
60 cm or over
2.6. Additional charge
Refrigerant suitable for a piping length of 15 m is charged in the outdoor unit at the factory.
When the piping is longer than 15 m, additional charging is necessary.
Between 15 m and 25 m, when using a connection pipe other than that in the table, charge
additional refrigerant with 20 g/1 m as the criteria.
For the additional amount, see the table below.
Pipe length
Additional refrigerant
15 m
None
20 m
+100 g
25 m
+200 g
Rate
20 g/m
10 cm or over
30 cm or
over
30 cm or over
CAUTION
When adding refrigerant, add the refrigerant from the charging port at the completion
of work.
The maximum length of the piping is 25 m. If the units are further apart than this, correct
operation can not be guaranteed.
5 cm or over
• Do not directly install it on the
ground, otherwise it will cause
failure.
• To obtain better operation efficiency, when the outdoor unit
is installed, be sure to open the
front and left side.
2.7. Accessories
The following installation accessories are supplied.
Use them as required.
Installation manual
1
1
One set of following parts are necessary installation of this product.
Outdoor
unit bottom
54 cm
32 cm
Drain pipe
Drain hose
Name
Connection pipe assembly
Connection cable
Wall pipe
Decorative tape
Vinyl tape
Wall cap
Saddle
Drain hose
Tapping screws
Sealant
CAUTION
When the outdoor temperature is 0 ˚C or less, do not use the accessory drain pipe
and drain cap. If the drain pipe and drain cap are used, the drain water in the pipe may
freeze in extreme cold weather. (Reverse cycle model only)
In the area with heavy snowfall, if the intake and outlet of outdoor unit is blocked with
snow, it might become difficult to get warm and it is likely to cause of the breakdown.
Please construct a canopy and a pedestal or place the unit on a high stand (local
configured).
3. SELECTING THE MOUNTING POSITION
• Decide the mounting position with the customer as follows.
• Do not set to a place where there is oily smoke, oil is used in the factory, the unit can
contact sea breeze, sulfide gases will be generated in the hot spring area, corrosive
gases will be generated, animal may urine on the unit and ammonia will be generated
and a dusty place.
3.1. Outdoor unit
(1) If possible, do not install the unit where it will be exposed to direct sunlight.
(If necessary, Install a blind that does not interfere with the air flow.)
(2) Do not install the unit where a strong wind blows or where it is very dusty.
(3) Do not install the unit where people pass.
(4) Take you neighbors into consideration so that they are not disturbed by air blowing into their
windows or by noise.
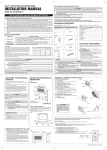
(5) Provide the space shown in figure so that the airflow is not blocked. Also for efficient
operation, leave open three of the four directions front, rear, and both sides.
(6) Install the unit where keep away more than 3 m from the antenna of TV set and Radio.
(7) Outdoor unit should be set to a place where both drainage and itself will not be
affected when heating.
En-2
9377863119_IM.indb 2
1/20/2011 6:09:05 PM