1
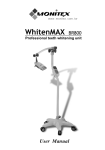
TM
BT-150
The innovative corded LED curing light
User Manual
Table of Contents
PREFACE ------------------------------------------------------- 1
DISCLAIMER -------------------------------------------------- 2
SAFETY PRECAUTIONS ------------------------------------- 2
PARTS AND FUNCTIONS ------------------------------------ 3
GENERAL INSTALLATION ---------------------------------- 4
OPERATION ---------------------------------------------------- 4
COOLING SYSTEM ------------------------------------------ 6
TROUBLE SHOOTING TIPS --------------------------------- 7
SPECIFICATION ------------------------------------------------ 7
PREFACE
1. Thank you for choosing Monitex Product for your advance integration.
Prior to using the Digital X-Ray Film Scanner, please read this User
Manual carefully and keep this manual well preserved for future reference.
2. Please contact your local dealer if any damage or problem occurs.
Attempt to try and repair this unit by unauthorized technician personnel
WILL automatically lead to the forfeit and negation of the warranty
agreement.
3. The specifications are subject to change and revision without prior notice.
1
DISCLAIMER
1. Monitex shall not assume any responsibility if any malfunction or
damage was caused by improper operation, removal, modification
or maintenance.
2. We shall not assume any responsibility if any malfunction or damage
was caused by operating under unsuited environment.
3. We shall not assume any responsibility if any malfunction or damage
was caused by forceful majeure.
4. We reserve the right to explain for the given cause of the Defective
products which might have been caused by natural disasters or
abnormal temperature, humidity that is inconcurrent to the guidance
instructed in this manual.
SAFETY PRECAUTION
Please follow instruction steps in this manual for correct and safe
operations of the device. Pay special attention to the following warning
signs beside the operation descriptions where applicable
Warning: Beware of high temperature and strong light.
DO NOT look directly into the light source which might cause
bodily harm to one’s eyes.
1. Danger-This message appears where the operation may potentially
cause severe injury if instruction not followed correctly.
2. Warning-This message appears where the operation may cause
serious damage or defect to other objects.
3. Caution-This message appears where the operation may cause slight
damage to other objects or slight bodily harm if operation not properly
conducted.
4. Important-This message appears where the operation may involve
risk of defecting the device itself if not properly conducted.
2
Sterilization for Fiber-Optic Tip:
After operation on each patient, the fiber-optic tip should be disinfected
or sterilized. Please autoclave the tip to 134˚C/75 psi for maximum
cleansing result. The sterilization time at 134˚C should be 5 minutes.
Note: Please disconnect the fiber-optic tip off the handpiece and
autoclave it by itself.
Product Cleansing:
If there is any dirt or stains on the surface of control panel or handpiece,
please use cloth to wipe & clean. If the stain is serious, then please use a
neutral cleaning agent.
Note: Never use a solvent or volatile oil for cleaning. This can lead
to fading in the fiber optic shades.
PARTS & FUNCTIONS
Three modes
setting button:
M1 - Full Power
M2 - Ramp
M3 - Pulse
Time setting button
3
ON/
OFF/
SET
GENERAL INSTALLATION
** Please follow the instructions below carefully to ensure proper
function of the device.
1. Insert the fiber optic probe into the handpiece and make sure it is
securely installed at the fixed position.
2. Connect the power cable and plug to an electric outlet.
3. Put on the anti-glare cone and the protective shield and adjust the
cone and shield position according to the dentist’s preference.
OPERATION
Thermometer:
The thermometer sign will blink after continuous usage
of 30 consecutive sessions with each session lasts for 30
seconds. This function will shut off the unit to prevent
the device from over-heating.
MODES:
There are 3 modes
at your choice.
The working time
of each mode can
be reset according
to Dentist’s preference.
Timer.
4
Mode:
Mode 1: Full power
Default Time: 8 seconds with optional
time setting to Doctor’s preference.
Mode 2 : Ramp Power
Default Time: 15 seconds with optional
time setting to Doctor’s preference.
Mode 3 : Pulse mode
Full Power 1 second on, 1 second off.
Default Time: 20 seconds with optional
time setting to Doctor’s preference.
Time Setting:
1. Once the user sets the mode ( M1 or M3), please press the TIME
button continuously for longer than 2 seconds ( till the number
shown in the LCD panel starts to blink), and press again to change
time, a second per push.
2. Operating time will start add up after one second if the user pushes
the TIME button continuously.
3. Press the ON/OFF/SET button to set the timer according to users’
preference.
5
Operation :
1. After setting up the MODE selection and operating time, please
press the ON/OFF/SET button to start.
2. Press again to stop operation at any time.
3. Auto Power Saving Mode: the device will turn off automatically if
it is left idled for longer than 90 seconds. Operation restarts once
the user presses the trigger.
4. Under “M1, 8 seconds” setting, the device can be continuously
utilized for approximately 30 curing sessions.
Caution:
Operating BT-150 at Mode 1, 8 seconds for more than 30 cycles
continuously could result in high temperature accumulation, which
is hazardous to the health of patient’s teeth.
Cooling System:
BlueLEX GT-1500 is equipped with a special built-in magnetic fan
motor to prevent over-heating and to prolong the light emitting time.
IMPORTANT:
>The cooling system will be activated with
the motor fan starts turning when the heat
starts to accumulate.
>The Thermometer Sign will start to blink
and shut off the system for complete
cooling and for protection purpose.
6
TROUBLE SHOOTING TIPS
CAUTION :
When failure or error occurs, please refer to following solutions to check
the device. If problem remains, please contact your nearest local dealer
for repair or maintenance.
DESCRIPTIONS
FAILURE
LCD device is
unable to light up
CAUSE
SOLUTION
Defect in LCD
device or pc board
Return for repair
Defect in main IC board
Poor connection of the
cable or plug
LED lamp is unable Defect in IC board or
to emit
LED module
No activation
Return for repair
Check the connection
Return for repair
SPECIFICATIONS
CURING HANDPIECE :
LED lamp: 5 Watt
Voltage: AC 100V~240V 50/60 Hz
Weight: Approx. 203 g
2
Light Intensity: up to 1,000 mW/cm
Wavelength: 450 ~ 470 nm
Dimesion: Approx. 19.75x4.24x7.7cm
7
ADAPTER :
Input: AC100V~240V 50/60 HZ
Output: DC9V
Current: 1.3A(TYPICAL)
LIGHT GUIDE :
Fiber optic with tapered tip
( 10mm taper to 8mm)
Weight: Approx. 25g
Autoclavable up to 134℃