1
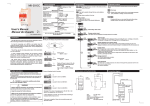
USER MANUAL MEMORY KEYER designed by HA7CR FOREWORD The electronic keyer I had been using for 15 years went dead after a power supply fault in 2004. The components of that old keyer were items of the 1970s, and my quest of finding spare parts looked futile. Therefore I decided to design and build a newkeyer which would better suit today’s needs. I studied the features of elkeys on the market and tried to incorporate as much of these functionalities into my keyer as possible. Handling of this resulting keyer is significantly different from the old one, especially because instead of the multitude of dedicated controls, there is now a limited number of multi-functional buttons and a knob. I do not deny that I took the inspiration from modern transceivers with their multifunctional buttons and context sensitive LCD messages. I suggest the reading of the manual before starting to use the keyer and setting its parameters, memories and operating mode (however, I know from my own experience that reading the manual is usually the last straw if all else has failed…) SPECIFICATIONS The keyer is based upon a PIC16F648 microprocessor. Handling and programming of the unit can be done using the menus and options appearing on the 2-line, 16 character LCD. Changing between the menus is possible using the selector knob to the right of the display, while entering and leaving the menus is possible by pressing the buttons below the display. The currect function of the buttons is always displayed in the lower line of the LCD (context sensitive button-assignment). Inside selected sub-menus, options are normally set by pushing the arm(s) of the keypad in the appropriate direction (see description under each menu item.) The keyer can be powered from two sources: an internal 9V battery, or an external power supply (maximum 13.8 V) . If using external power, the backlight of the LCD is automatically turned on. The keyer can be directly connected to the key input of standard 13,8V POSITIVE voltage transceivers (this should be true of 28V transceivers as well, but I have not yet had the possibility to test it; the PTT is the open drain of a FET on a BS170 switch.) Power consumption: - 4-5 mA from internal 9V battery (without LCD backlight) - 80-100 mA from external supply (with LCD backlight on) CW speed range: 8-50 WPM (adjustable in 1 WPM steps within the 16-34 WPM range, and 2 WPM steps in the 8-14 and 36-50 WPM ranges.) Personal data can be programmed or changed (callsign, name, QTH, Locator) to best suit the specific use, eg. portable, contest, QRP. Saving of data is automatic. The keyer has 3 independent, freely programmable memories (length of text is 74, 59 and 14 characters respectively.) The first two memories can be reached directly from the buttons of the keyer, the contents of the third memory can be built into the reports. As default, memories are empty. The contents of all three memories can be saved, therefore they remain accessible even after switching the unit off and on. In contrast to user data (callsign, name, QTH, locator), the saving of memories is NOT automatic, you can save the contents of the memories from the menu. FUNCTIONS OF THE UNIT All the functions of the unit are menu-driven. Main menu options are as follows: TRANSMITTER TUNING ON / OFF ACTIVE / PASSIVE mode, see explanation later CQ / CQ DX in normal mode RST / MEMORY2 assigned to middle button HF / VHF mode (in normal and contest mode) CONTEST / NORMAL mode CONTEST NUMBER (setting, increase, decrease) CONTEST NUMBER RESET to 0 ELKEY TONE ON / OFF DIT-DASH RATIO DIT-DASH MEMORY ON/OFF WORD SPACING MEMORY ON/OFF DIT-DASH REVERSAL PADDLE /STRAIGHT KEY (memory functions can still be used with straight key) MEMORY PROGRAMMING (separate menus for the 3 memories) SAVING OF MEMORIES CALLSIGN / QTH / LOC / NAME in separate menus. Operation parameters (speed, dit-dash memory, word spacing memory, contest number, contest mode, user parameters) are stored in EEPROM, so that these settings remain active after power-off. Contents of memories are only saved manually using the „SAVE” menu function. After a power-off/on saved settings and parameters are automatically loaded back, so there is no need to carry out the settings every time it is used. Two-arm paddles can be used either in iambimatic and normal mode without any need of configuration. OPERATING CONTROLS Keys [A,B,C] (their use is always shown above the keys on the second line of the D display [E] Knob (digital encoder) [D] Your Morse-paddle * Memory Keyer * Func 1 Func 2 Func 3 E A B C MENU SYSTEM After switch-on, LCD will show „* Memory Keyer *”. The menu can be reached by pressing the button labelled „Menu”. Menu can be left by pressign the „Exit” button. Main menu options are the following: Select Tune = TRANSMITTER TUNING This menu option switches transmitter tuning on/off. You can enter this menu by pressing „Enter”. While in this menu, you can switch your radios PTT ON by moving the paddle arm left, or PTT OFF by moving the paddle arm right. You can exit the menu be pressing „Exit”. Select A-P = ACTIVE/PASSIVE MODE Choose between active and passive operation modes. „Active mode” is in which you are the station calling CQ, „passive mode” is when you are replying to other people calling CQ. See more detailed explanation later. Select C-DX = CQ / CQ DX This option lets you choose if you want to call CQ or CQ DX when in normal (noncontest) mode. Select C-M1 = CQ or MEMORY1 ON LEFT BUTTON This lets you choose if you want to use the left button to send CQ or the contents of Memory1. Select R-M2 = REPORT or MEMORY2 ON MIDDLE BUTTON This lets you choose if you want to use the middle button to send Report, or if you want to use the middle button to send the contest of Memory2. Select H-VH = HF/VHF mode This option lets you select between HF and VHF type of operation. In VHF mode, Report contains the QTH locator. Select Cont = CONTEST / NORMAL mode This option lets you choose between contest and normal mode. Select SetN = SET SERIAL NUMBER Sets contest serial number by increasing and decreasing it. Paddle key left and right increases and decreases the number by one. Select DelN = RESET SERIAL Resets contest serial number to 0. Select FixN = CONSTANT SERIAL NUMBER Sets the serial number constant. Select Tone = SOUND ON/OFF Sets the unit’s sound on/off. Select Rat = DIT-DASH RATIO The standard 1:3 dit-dash ratio can be modified up to 1:6.5 in 0.5 steps. The ratio can be changed using the paddle keys. Select KStr = DIT-DASH MEMORY You can turn the dit-dash memory on/off. Select Aspc = WORD SPACING MEMORY You can set the word spacing memory on/off. SelectRev = REVERSE KEYS You can reverse the dit-dash direction of the paddle without re-wiring it. Select Man = PADDLE/STRAIGHT KEY If you want to use a straight key, you can still use the memory options of the keyer. Select M1Wr = WRITING MEMORY1 Upon entering the menu, you can select the desired character using the knob, then press the Next button. After 16 characters the top line of the display gets blanked; you can continue writing, but before the next character you have to press the Next key twice. After you are finished with the last character, use the Save button. Warning! The contents of the memory are NOT saved into EEPROM until you choose the Select Save menu and press Enter. If you ignore this step, the contents of the memory will be lost upon switching the unit off. Memory1 can store up to 74 characters. You have to be careful about the length yourself, the unit does NOT check the number of characters while programming. Select M2Wr = WRITING MEMORY2 The procedure is the same as with memory1. Maximum length of text is 59 characters. Select M3Wr = WRITING MEMORY3 The procedure is the same as with memory1. Maximum length of text is 14 characters. Select Save = STORING MEMORY CONTENTS INTO EEPROM Pressing the Enter button saves all three memories. Changing the contents of any of the memories does not affect the other two memories, but saving writes all three memories into the EEPROM. Select Call = ENTERING YOUR CALLSIGN You can set your callsign. Use the knob to select the characters. To advance and set the next character, press Next. When the full callsign is entered, press the Save button to store the callsign. The callsign can be up to 10 characters long, and can contain any characters. If you make a mistake, press Save, then go back to this menu and start again from start. By pressing the Save button, the callsign is saved into the EEPROM automatically. After the 10th character, the unit will not allow you to enter further characters. Select QTH = ENTERING YOUR QTH You can set your QTH. Follow the same procedure as described with the callsign, but the QTH memory allows insertion of spaces (e.g. „NR BUDAPEST”). The space character can also be selected by using the knob. The maximum length of the QTH memory is 14 characters. Select Loc = ENTERING YOUR QTH LOCATOR You can set your grid locator. This memory can also be used to store any set of characters which is part of QSO exchange, for example you can store county abbreviation, zone number or membership number for HF contests. Maximum length is 6 characters. Select Name = ENTERING YOUR NAME You can set your operator’s name. This memory can contain up to 9 characters. SUMMARY Entering the menu system of the unit is done by pressing the Menu button. The menu options can be selected by using the knob and pressing the Enter key. Inside menu options you can select the desired function by left or right movement of your CW paddle. You can leave any menu option by pressing Exit. Exceptions are the Call, QTH, Loc. Name, M*Wr menus, which can only be abandoned by using Save. The menu system of the unit is context sensitive. The function of the 3 buttons under the LCD depends on which menu you are in. The functions of the buttons are always displayed in the bottom line of the LCD. DIRECTLY AVAILABLE FUNCTIONS The most frequently used functions of the elkey can be reached directly, without entering the menu system. These functions are: Setting speed. Clockwise movement of the knob increases, while anti-clockwise movement decreases the speed. The speed is displayed n the top line of the LCD in the format: Speed xx WPM. While transmitting manually, the speed can be adjusted any time, but you cannot adjust it while transmitting from any memory. Call. The left button can be used to make a call. The function depends on the operating mode. This button can have the following Call labels: TstCQ CQ Contest CQ CQ normal QSO-ing CQ-DX CQ DX Call in passive mode it only sends the callsign Mem1 sends contents of memory 1 if you select Memory in the Select C-M1 menu. Report. According to the defined operating mode, the middle button can be used to send a report/exchange. Labels of the button can be: HFTRp HF Test Report. In active mode it sends „5NN number BK”, in passive mode it sends „CFM 5NN number BK”. The LCD shows the last given serial number in the format„HF: Report 052” VHFTRp. VHF Test Report. „5NN number Loc BK” or „CFM 5NN Loc BK” depending on whether using the passive or active mode. Because the Loc memory can also be used to store virtually any set of characters (up to 6), this button can be used in HF contesting to send exchanges like „5NN number RSGB BK” or „5NN number DIG-number BK” The Loc memory can store separation characters, e.g. „/”. This makes it possible to send exchanges like „5NN number/DIG-number BK”. HFRp. HF report. Sends QTH and Name if normal mode is chosen. VHFRp. VHF report. Sends the report with Loca and Name if normal mode is chosen. Mem2. Sends contents of memory 2, if Memory function of Select R-M2 is chosen. ACTIVE MODE Active mode can be selected by entering the Select A-P menu. Active mode has the following the functionality in contest and normal modes: 1. Pressing the TstCQ button send the „TEST DE callsign callsign TEST K” message. Your partner transmits his callsign. 2. You send the partners callsign manually, using your paddle, then you press the HFTR por VHFTRp button (depending whether you have chosen HF or VHF operating mode of the unit). Your elkey will transmit the report. If you have to repeat the exchange, you simply press the HFTRp or VHFTRp button. WARNING: If there is a serial number in the contest exchange, you have to re-transmit it manually! 3. In normal mode, pressing the CQ button sends „CQ DE callsign..”, CQDX sends „CQ DX DE callsign”. The HFRp button transmits a HF report (QTH, Name, Mem3), while VHFRp sends a VHF report (Loc, Name, Mem3). PASSIVE MODE 1. You hear somebody calling CQ. You press the Call button. The your elkey sends your callsign. Your partner answers in the „your callsign, 5NN number BK” format. 2. You transmit your partner’s callsign, then press the HFTRp (or VHFTRp) button to transmit „CFM 5NN number Mem2 BK” (In VHF mode: „CFM 5NN number Loc Mem2 BK”) confirming the received report. Use the Call button the call the next station. 3. In normal mode the Call button replies the CQ-ing station with your own callsign. The format of the report is the same in active and passive modes. COMMON FEATURES OF ACTIVE AND PASSIVE MODES: - Less important portions of text (TEST, DE, 5NN, BK, CFM) are transitted using a speed accelerated about 30%. Your callsign, serial number, Loc are transmitted using the default speed. Accelerated speed works only in Contest mode. - When sending an exchange, the LCD will display the last given serial number in he „[V]HF Report: xxxx” format. The serial number can be a maximum of 4 digits. If the first digit is 0, it will be ignored (i.e. instead of „0952” it will only transmit „952”.) - „0” characters in the serial number are always replaced by „T” (i.e. „5NN 005” is replaced by „5NN TT5”). - Serial numbers are displayed continuosly - While transmitting from memory, you can break-in using the paddle between characters. This ensures a smooth switch between sending from memory and manual transmission. Warning! You can only break-in between characters, if a character is being sent, you have to wait for its transmission to be finished. A contest report from memory can NOT be stopped, otherwise it would corrupt the serial number! Info: the elkey uses a 16-bit internal counter, therefore numbering works in the 065535 range. Underflow of the serial (further decrease from zero) causes the display to show 5535 (the last 4 digits of 65535). In case of underflow, increasing the number mends the „problem”. USING MEMORIES Using of Memory 1 is the easiest. After entering its contents, you have to choose the Memory option in the C-M1 menu to enable the Mem1 button. Once it is done, pressing Mem1 activates the memory. As Memory 1 can contain up to 74 characters, it makes it possible to use special callsigns, such as „CQ DX DE HB0/HA2004EU/QRP…” Using Memory2 and Memory3 are more complex as they are used for sending reports/exchanges. In active mode, the contents of these memories are added to the text of the report. This makes it possible to expand the report/exchange with things like “HW? BK” or “QSL via…” etc. It is also possible to use Memory2 from a dedicated button using the Memory function of the R1-M2 menu. Using these two memories require thinking and sometimes you have to delete their contents if you use the elkey for normal QSO-ing or contesting. The contents of all memories can be deleted by entering the M1Wr, M2Wr ot M3Wr menus and placing a hash-mark (#) as the first character, then pressing Save. Do not forget to save the contents of the memories in the EEPROM by “Select Save”. USING FOR THE FIRST TIME Before using the unit for the first time, you are advised to program your data (callsign, QTH, Loc, Name) according to the instructions in this manual. As default, the unit contains “nocall”, “noqth”, “noloc” and “noname” for these parameters. User memories are empty as per default. If you want to use them, you have to program them. You can store the contents of the M1, M2 and M3 memories using a separate menu (Select Save). You have to set the following parameters to suit your needs: (dit-dash memory, word spacing memory, tone on/off, etc.) You only have to set these parameters once, they are stored in EEPROM for future use. USAGE HINTS Before contest you have to set up the keyer for the specific contest (e.g. HF/VHF mode, resetting contest serial number, etc.) Some examples: In contests like DIG, where you have to send your membership number, use the SelectLOC (QTH-locator) menu to store this number. You can always use M1 memory to contain any text. (Select M1 in the C-M1 menu.) You can always use M2 memory to contain any text (choose M2 in R-M2 menu.) It is recommended to use the keyer from an external 13,5V power supply wherever available. During expeditions and field days, the 9V battery can provide a good lifetime, but the backlight will automatically be switched off. Check the length of the texts to be stored in M1-M3 before entering, because their lengths are limited. If you do not save these memories (using the Save menu), their contents will be lost upon power off. Temporary deletion of the three menus are possible by entering a # as the first character. If you save it via the Save menu, memories will be deleted until next entering them. REMARKS The elkey menus are based on the English language. The software of the elkey was developed under Linux (gpasm, pikdev, gpsim environment). Hardware was designed based upon manufacturers’ description found on the Internet. Thanks are due to HA5PT for his help with the processor. Programming of the processor was done usig a home brew programming kit. Mechanical construction was done by HA5KJ, HA5MA and HA7XL. I would like to thank the following radio ameteurs for their support and their testing comments: HA5KJ, HA5MA, HA5PT, HA7XL, HA5LV, HA5BDU. The arrangement of the software makes modification of the program relatively easy for specific needs (e.g. leaving specific menu options, changing their order, etc.) The program code is about 4000 lines. Despite all the extensive testing there can still be bugs. I was not able to make the program freeze. Should that arise, I recommend switching on-and-off (I hope it is not a Microsoft patent…) I wish you lots of fun an success with the elkey! If you have any questions or suggestions, you can always send me an e-mail. The latest documentation can be found at: http://ha7cr.homelinux.net/elkey where you can also find some pictures.