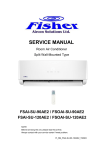
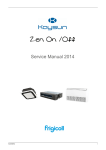
1
Service Manual SUPER DC INVERTER LCAC SERIES /Energy Related Products/ CASSETTE FSKIF-120AE2-EU FSKIF-181AE2 FSKIF-241AE2 FSKIF-300AE2 FSKIF-361AE2 Duct FSLIF-181AE2 FSLIF-241AE2 FSLIF-300AE2 FSLIF-361AE2 ceiling /floor FSPIF-181AE2 FSPIF-241AE2 FSPIF-300AE2 FSPIF-361AE2 Console FSFIF-120AE2 NOTE: Before servicing the unit, please read this at first. Always contact with your service center if meet problem. FI_SM_ FSKIF_FSLIF_FSPIF_FSFIF--AE2_2014 Part 1 General Information .................................................................................................... 1 Part 2 Indoor Units ................................................................................................................. 5 Part 3 Outdoor Units............................................................................................................. 63 Part 4 Installation.................................................................................................................. 72 Part 5 Electrical Control System ....................................................................................... 103 ※The specifications, designs, and information in this book are subject to change without notice for product improvement. General Information Part 1 General Information 1. Model Lists .................................................................................................. 2 2. External Appearance .................................................................................. 3 2.1 Indoor Units............................................................................................................ 3 2.2 Outdoor Units......................................................................................................... 3 3. Features ....................................................................................................... 4 General Information 1 Model Lists 1. Model Lists 1.1 Indoor Units R410A (capacity multiplied by 1000Btu/h) Type Function Super slim cassette Duct 12 18 24 30 36 Cooling and heating ● ● ● ● Cooling and heating ● ● ● ● Ceiling-floor Cooling and heating ● ● ● ● Four-way cassette(compact) Cooling and heating ● Console Cooling and heating ● 1.2 Outdoor Units 2 Universal Outdoor unit Model Compressor type Compressor Brand Matched indoor units FSOIF-120AE2 Rotary GMCC FSKIF-120AE2-EU FSFIF-120AE2 FSOIF-181AE2 Rotary GMCC FSKIF-181AE2 FSLIF-181AE2 FSPIF-181AE2 FSOIF-241AE2 Rotary GMCC FSKIF-241AE2 FSLIF-241AE2 FSPIF-241AE2 FSOIF-300AE2 Rotary GMCC FSKIF-300AE2 FSLIF-300AE2 FSPIF-300AE2 FSOIF-361AE2-3F Rotary Mitsubishi FSKIF-361AE2 FSLIF-361AE2 FSPIF-361AE2 General Information External Appearance 2. External Appearance 2.1 Indoor Units Super slim cassette Duct Ceiling-Floor Compact Four-way cassette Console 2.2 Outdoor Units Single fan outdoor unit General Information 3 Features 3. Features 4.1. To meet Europe A level, actual EER/COP of new product with BLDC motors of indoor & outdoor unit and DC compressor will be higher than 3.4. 4.2. Low ambient kit is standard for outdoor units 4.3. Network control function is standard for the indoor units. 4.4. Standard auto restart function and follow me function. 4.5. Slim cassette with standard remote controller, wire controller for optional. Duct with standard wired controller, remote controller for optional. 4.6. Standard anti-cold air function. 4.7. Standard auto defrosting function. 4.8. Standard self-diagnose function. 4.9. Standard timer function and sleep mode function controlled by controller. 4 General Information Indoor Units Part 2 Indoor Units Super Slim Cassette Type ................................................. 6 Duct Type ......................................................................... 19 Ceiling & Floor Type ........................................................ 33 New Four-way Cassette Type (Compact) ........................ 42 Console Type ................................................................... 51 Indoor Units 5 Indoor Units Super Slim Cassette Type 1. Features ................................................................................ 7 2. Dimensions ......................................................................... 11 3. Service Space ..................................................................... 12 4. Wiring Diagrams ................................................................ 13 5. Electric Characteristics ..................................................... 14 6. Sound Levels...................................................................... 15 7. Accessories ........................................................................ 16 8. The Specification of Power ............................................... 17 9. Field Wiring ........................................................................ 18 6 Indoor Units Features 1. Features 1.1 Overview Compact design, super slim body size, less space requiring in installation Each louver can be separately controlled, more comfort air blowing is possible. Auto-lifting panel design, more convenient to clean and maintain the filter. (optional) 18K-24K 30K 36K Old Cassette New Slim Cassette 840*230*840 840*300*840 840*300*840 840*205*840 840*205*840 840*245*840 1.2 Fresh air intake function Fresh air fulfills air quality more healthy and comfortable. Ventilation motor is optional to increase the effect of fresh air. Indoor Units 7 Features New air-intake 1.3 Optional ionizer generator Ionizer generator is optional to get refreshing air to your room. Ionizer generator connector 8 Ventilation m otor connector Ionizer can be switched on or off by remote controller. When pressing the Clean Air button on the remote controller, Ionizer will work and the indicator light on display board will shine. Indoor Units Features 1.4 External air duct design Reserve external air duct, more flexible for the air supply. 1.5 Built-in draining pump Due to the improvement of structure, more convenient to repair or replace the draining pump. Draining Pump Built-in draining pump to make sure condensed water drain out reliably. Indoor Units 9 Features 1.6 Terminals for alarm lamp and long-distance on-off controller(Window contact) connection are standard Reserve terminals for the connection of alarm lamp and long-distance on-off controller, more human control. Alarm lamp Long-distance on-off controller 1.7 1.8 Optional wired controller Twins Combination(18k-30k) The units can be installed as Twin systems: one outdoor unit can connect with two indoor units. The indoor units can be combined in any of the different available ratings. 10 Indoor Units Dimensions 2. Dimensions Model FSKIF-181AE2 FSKIF-241AE2 FSKIF-300AE2 FSKIF-361AE2 Indoor Units A 205 245 245 245 H >235 >275 >275 >275 11 Service Space >1000m m >1000m m 12 >1000mm 3. Service Space >1000mm Indoor Units Wiring Diagrams 4. Wiring Diagrams FSKIF-181AE2 FSKIF-241AE2 FSKIF-300AE2 Indoor Units FSKIF-361AE2 13 Electric Characteristics 5. Electric Characteristics Indoor Unit Model FSKIF-181AE2 FSKIF-241AE2 FSKIF-300AE2 FSKIF-361AE2 Hz 50 50 50 50 Voltage 220-240 220-240 220-240 220-240 Min 198 198 198 198 Max 254 254 254 254 Power Supply MFA 10 10 10 10 Notes: MFA: Max. Fuse Amps. (A) 14 Indoor Units Sound Levels 6. Sound Levels 1.4m Microphone Noise level dB(A) Model Noise Power dB(A) H M L FSKIF-181AE2 59 49 44 39 FSKIF-241AE2 62 50 47 42 FSKIF-300AE2 62 52 49 46 FSKIF-361AE2 65 52 49 46 Indoor Units 15 Accessories 7. Accessories Name Shape Quantity Installation Fittings Installation paper board 1 Tubing & Fittings Soundproof / insulation sheath 1 Out-let pipe sheath 1 Out-let pipe clasp 1 Drain joint 1 Seal ring 1 Remote controller & Its Frame 1 Remote controller holder 1 Mounting screw(ST2.9×10-C-H) 2 Remote controller manual 1 Alkaline dry batteries (AM4) 2 Owner's manual 1 Installation manual 1 Expansible hook 4 Installation hook 4 Orifice 1 Drainpipe Fittings Remote controller & Its Frame(The product you have might not be provided the following accessories) Others Installation accessory (The product you have might not be provided the following accessories 16 Indoor Units The Specification of Power 8. The Specification of Power Model INDOOR UNIT POWER Phase Frequency and Voltage POWER WIRING (mm2) Fuse (A) Phase Frequency and Voltage OUTDOOR UNIT POWER POWER WIRING (mm2) Fuse (A) Indoor/Outdoor Connecting Wiring 2 (Weak Electric Signal) (mm ) Indoor Units 18000-24000Btu/h 30000 Btu/h 36000 Btu/h 1-phase 1-phase 1-phase 220-240V, 50Hz 220-240V, 50Hz 220-240V, 50Hz 3×1.5 3×1.5 3×1.5 C10 C10 C10 1-phase 1-phase 3-phase 220-240V, 50Hz 220-240V, 50Hz 380-420V, 50Hz 3×2.5 3×2.5 5×2.5 C16 C20 3xC16 3×0.5 shielded 3×0.5 shielded 3×0.5 shielded 17 Field Wiring 9. Field Wiring 18 Indoor Units Duct Type Duct Type 1. Features .............................................................................. 20 2. Dimensions ......................................................................... 23 3. Service Space ..................................................................... 24 4. Wiring Diagrams ................................................................ 25 5. Static Pressure ................................................................... 27 6. Electric Characteristics ..................................................... 28 7. Sound Levels...................................................................... 29 8. Accessories ........................................................................ 30 9. The Specification of Power ............................................... 31 10. Field Wiring ...................................................................... 32 Indoor Units 19 Features 1. Features 1.1 Installation accessories: (Optional) Front Board, Filter, Panel for easy installation Front Board Canvas Air Passage Filter Panel 1.2 Easy Installation: Two air inlet styles (Bottom side or Rear side) Air inlet from rear is standard for all capacity; air inlet from bottom is optional. The size of air inlet frame from rear and bottom is same, it’s very easy to move the cover from bottom to rear side, or from rear to the bottom, in order to matching the installation condition. Air intake from rear (Standard) Air intake from bottom (Optional) 1.3 Fresh air intake function(Optional for 18~60k) Install one duct from the reserved fresh-air intake to outdoor. Continually inhale the fresh air to improve the quality of the indoor air, fulfills air quality more healthy and comfortable. 1.4 Easy maintenance Clean the filter (Optional, standard product without filter) It is easy to draw out the filter from the indoor unit for cleaning, even the filter is installed in rear side or bottom side. 20 Indoor Units Features Replace the motor or centrifugal fan Remove the ventilated panel firstly. Remove a half of blower housing and take out the motor with centrifugal fan. Directly remove two bolts, and then replace the motor or centrifugal fan easily. Motor Blower Housing Ventilated Panel 1.5 Reserved remote on-off (Window contact)and central control ports Reserved remote on-off ports and central control ports, can connect the cable of an on-off controller or a central controller to realize remote on-off control function or group control function. Remote on-off ports Central control ports 1.6 Built-in drain pump (Optional): Built-in drain pump can lift the water to 750mm upmost. It’s convenient to install drainage piping under most space condition. Indoor Units 21 750mm upmost Features 1.7 Built-in display board The standard indoor unit can be controlled by wired controller. There is a display board with a receiver in the E-box. Move out the display, and fix it in other place, even in the distance of 10m. The unit will realized remoter control. The wired controller and the display board can display the error code or production code when the chips detect some failure. Wired Controller (Standard) Remote Controller (Optional) Display 1.8 Twins Combination The units can be installed as Twin systems: one outdoor unit can connect with two indoor units. The indoor units can be combined in any of the different available ratings. 22 Indoor Units Dimensions B H G 2. Dimensions E D C M F A L Capacity (KBtu) 18/24 30 36 Indoor Units Outline dimension(mm) Air outlet opening size Air return opening size A 920 1140 1200 E 65 65 80 I 815 1035 1094 B 270 270 300 C 635 775 865 D 570 710 800 F 713 933 968 G 35 35 40 H 179 179 204 J 260 260 288 K 20 20 45 Size of outline dimension mounted plug L M 960 350 1180 490 1240 500 23 Service Space 3. Service Space Ensure enough space required for installation and maintenance. All the indoor units reserve the hole to joint the fresh air pipe. The hole size as following: 24 Indoor Units Wiring Diagrams 4. Wiring Diagrams FSLIF-181AE2 FSLIF-241AE2 FSLIF-300AE2 FSLIF-361AE2 Indoor Units 25 Wiring Diagrams 26 Indoor Units Static Pressure 5. Static Pressure 18,000Btu/h 24,000Btu/h Pa Pa 90 90 80 Super high speed 70 60 High speed 50 40 Mid speed 30 Low speed 20 10 External static pressure (Pa) External static pressure (Pa) 80 70 Super high speed 60 50 High speed 40 Mid speed 30 Low speed 20 10 200 300 400 500 600 700 800 900 1000 1100 1200 Air volume(m3/h) 700 30,000Btu/h 800 900 1000 1100 1200 1300 1400 1500 Air volume(m3/h) 36,000Btu/h 36K Pa 90 External static pressure (Pa) 80 70 60 Super high speed High speed 50 40 30 Mid speed Low speed 20 10 1100 1200 1400 1600 1800 2000 2200 2400 Air volume(m3/h) Indoor Units 27 Electric Characteristics 6. Electric Characteristics Model Indoor Unit Power Supply Hz Voltage Min. Max. MFA FSLIF-181AE2 50 220-240 198 254 10 FSLIF-241AE2 50 220-240 198 254 10 FSLIF-300AE2 50 220-240 198 254 10 FSLIF-361AE2 50 220-240 198 254 10 Note: MFA: Max. Fuse Amps. (A) 28 Indoor Units Sound Levels 7. Sound Levels Concealed Duct Type Discharge Suction Duct Duct 1.4m Microphone Indoor Units Noise level dB(A) Model Sound Power dB(A) H M L FSLIF-181AE2 59 45 42 40 FSLIF-241AE2 63 46 42 39 FSLIF-300AE2 65 50 46 41 FSLIF-361AE2 64 43 41 40 29 Accessories 8. Accessories Name Tubing & Fittings Shape Quantity Soundproof / insulation sheath 2 Binding tape 1 Seal sponge 1 Drain joint 1 Seal ring 1 Wired controller 1 Drainpipe Fittings (for cooling & heating) Wired controller & Its Frame , Owner s manual 1 Installation manual 1 Magnetic ring (twist the electric wires L and N around it to five circles) 1 Others EMS & It’s fitting 30 Indoor Units The Specification of Power 9. The Specification of Power Model INDOOR UNIT POWER Phase Frequency and Voltage POWER WIRING (mm2) Fuse (A) Phase Frequency and Voltage OUTDOOR UNIT POWER POWER WIRING (mm2) Fuse (A) Indoor/Outdoor Connecting Wiring 2 (Weak Electric Signal) (mm ) Indoor Units 18000-24000Btu/h 30000 Btu/h 36000 Btu/h 1-phase 1-phase 1-phase 220-240V, 50Hz 220-240V, 50Hz 220-240V, 50Hz 3×1.5 3×1.5 3×1.5 C10 C10 C10 1-phase 1-phase 3-phase 220-240V, 50Hz 220-240V, 50Hz 380-420V, 50Hz 3×2.5 3×2.5 5×2.5 C16 C20 3xC16 3×0.5 shielded 3×0.5 shielded 3×0.5 shielded 31 Field Wiring 10. Field Wiring FSLIF-181AE2 FSLIF-241AE2 FSLIF-300AE2 32 FSLIF-361AE2 Indoor Units Ceiling & Floor Type Ceiling & Floor Type 1. Features ................................................................... 34 2. Dimensions .............................................................. 35 3. Service Space........................................................... 36 4. Wiring Diagrams ...................................................... 37 5. Electric Characteristics ........................................... 39 6. Sound Levels ........................................................... 39 7. Accessories.............................................................. 40 8. The Specification of Power...................................... 40 9. Field Wiring .............................................................. 41 Indoor Units 33 Features 1. Features 1.1. New design, more modern and elegant appearance. 1.2. Convenient installation --The ceiling type can be easily installed into a corner of the ceiling even if the ceiling is very narrow --It is especially useful when installation of an air conditioner in the center of the ceiling is impossible due to a structure such as one lighting. 1.3. Two direction auto swing (vertical & horizontal) and wide angle air flow, --Air flow directional control minimizes the air resistance and produces wilder air flow to vertical direction. --The range of horizontal air discharge is widened which secures wider air flow distribution to provide more comfortable air circulation no matter where the unit is set up 1.4. Three level fan speed, more humanism design, meets different air-supply requirement. 1.5. New foam drain pan with plastic-spraying inner surface 1.6. Easy operation. 1.7. Remote control and optional wired control method. 34 Indoor Units Dimensions 2. Dimensions Indoor Units Capacity (Btu/h) A B C D E 18K, 24K 1068 675 235 983 220 30K, 36K 1285 675 235 1200 220 35 Service Space 3. Service Space 36 Indoor Units Wiring Diagrams 4. Wiring Diagrams FSPIF-181AE2 FSPIF-241AE2 FSPIF-300AE2 FSPIF-361AE2 Indoor Units 37 Wiring Diagrams 38 Indoor Units Electric Characteristics 5. Electric Characteristics Indoor Units Model Power Supply Hz Voltage Min. Max. MFA FSPIF-181AE2 50 220-240 198 254 10 FSPIF-241AE2 50 220-240 198 254 10 FSPIF-300AE2 50 220-240 198 254 10 FSPIF-361AE2 50 220-240 198 254 10 Note: MFA: Max. Fuse Amps. (A) 6. Sound Levels Microphone 1m 1m Air outlet side 1.5m 1m Microphone Ceiling Floor Noise level dB(A) Model Sound Power dB (A) H M L FSPIF-181AE2 60 46 43 40 FSPIF-241AE2 63 55 53 49 FSPIF-300AE2 64 55 50 46 FSPIF-361AE2 65 55 50 45 Indoor Units 39 Accessories 7. Accessories Name Remote controller & Its holder(The product you have might not be provided the following accessories) Others Shape Quantity 1. Remote controller 1 2. Remote controller holder 1 3. Mounting screw (ST2.9×10-C-H) 2 4. Alkaline dry batteries (AM4) 2 5. Owner's manual 1 6. Installation manual 1 7. Remote controller manual 1 8. The Specification of Power Model INDOOR UNIT POWER Phase Frequency and Voltage POWER WIRING 2 (mm ) Fuse (A) Phase Frequency and Voltage OUTDOOR UNIT POWER POWER WIRING (mm2) Fuse (A) Indoor/Outdoor Connecting Wiring (Weak Electric Signal) (mm2) 40 18000-24000Btu/h 30000 Btu/h 36000 Btu/h 1-phase 1-phase 1-phase 220-240V, 50Hz 220-240V, 50Hz 220-240V, 50Hz 3×1.5 3×1.5 3×1.5 C10 C10 C10 1-phase 1-phase 3-phase 220-240V, 50Hz 220-240V, 50Hz 380-420V, 50Hz 3×2.5 3×2.5 5×2.5 C16 C20 3xC16 3×0.5 shielded 3×0.5 shielded 3×0.5 shielded Indoor Units Field Wiring 9. Field Wiring Indoor Units 41 Field Wiring New Four-way Cassette Type (Compact) 1. Features ............................................................................................ 43 2. Dimensions ....................................................................................... 44 3. Service Space ................................................................................... 45 4. Wiring Diagrams ............................................................................... 46 5. Air Velocity and Temperature Distributions(Reference Data) ......... 47 6. Electric Characteristics .................................................................... 48 7. Sound Levels .................................................................................... 48 8. Accessories ...................................................................................... 49 9. The Specification of Power .............................................................. 49 10. Field Wiring ..................................................................................... 50 42 Indoor Units Features 1. Features 1.1 New panel 360°surrounding air outlet design, affords comfortable feeling 1.2 Compact design The body size is 570×260×570mm, it’s just smaller than the ceiling board, so it’s very easy for installation and will not damage the decoration. The panel size is 647×50×647mm. The hooks are designed in the four corners of the body, which can save installation space. 1.3 Electric control box built-in design The E-box is simply and safely built inside the indoor unit. It’s convenient for installation and maintenance. Can check the control part easily, you only need to open the air return grille. 1.4 Air passage function Reserves the space for air outlet from the side of indoor unit; It’s availed to connect air duct from the two sides to the nearby small rooms. Indoor Units 43 Dimensions 2. Dimensions 44 Indoor Units Service Space 3. Service Space Indoor Units 45 Wiring Diagrams 4. Wiring Diagrams FSKIF-120AE2-EU 46 Indoor Units Air Velocity and Temperature Distributions(Reference Data) 5. Air Velocity and Temperature Distributions(Reference Data) Airflow velocity Temperature Indoor Units 47 Electric Characteristics 6. Electric Characteristics Indoor Units Model FSKIF-120AE2-EU Power Supply Hz Voltage Min. Max. MFA 50 220-240 198 254 20 Notes: MFA: Max. Fuse Amps. (A) 7. Sound Levels 1.4m Microphone 48 Model Noise Power dB(A) FSKIF-120AE2-EU 54 Noise level dB(A) H M L 47 45 41 Indoor Units Accessories 8. Accessories Name Shape Quantity Installation Fittings Installation paper board 1 Tubing & Fittings Soundproof / insulation sheath 1 Out-let pipe sheath 1 Out-let pipe clasp 1 Drain joint 1 Seal ring 1 Remote controller & Its Frame 1 Remote controller holder 1 Mounting screw(ST2.9×10-C-H) 2 Remote controller manual 1 Alkaline dry batteries (AM4) 2 Owner's manual 1 Installation manual 1 Expansible hook 4 Installation hook 4 Orifice 1 Drainpipe Fittings Remote controller & Its Frame(The product you have might not be provided the following accessories) Others Installation accessory (The product you have might not be provided the following accessories 9. The Specification of Power MODEL 12000 Btu/h Phase 1-phase Frequency and Voltage 220-240V, 50Hz Power Fuse (A) C16 Indoor Unit Power Wiring (mm2) Indoor/Outdoor Connecting Wiring (mm2) Ground Wiring 2.5 Outdoor Unit Power Wiring 3×2.5 Strong Electric Signal 4×1.5 Weak Electric Signal Indoor Units 49 Field Wiring 10. Field Wiring FSKIF-120AE2-EU 50 Indoor Units Console Type Console Type 1. Features ............................................................................................ 53 2. Dimensions ....................................................................................... 55 3. Service Space ................................................................................... 56 4. Wiring Diagrams ............................................................................... 57 5. Air Velocity and Temperature Distributions(Reference Data) ......... 58 6. Electric Characteristics .................................................................... 59 7. Sound Levels .................................................................................... 60 8. Accessories ...................................................................................... 61 9. The Specification of Power .............................................................. 61 10. Field Wiring ..................................................................................... 62 Console Type 51 Features 1. Features 1.1. Modern and elegant appearance The simple and stylish designs can nicely harmonies with your living space. 1.2. Two air-outlet ways Cooling mode Quick Cooling To maintain room temp Air outlet from top and bottom to make quick cooling ------When the A/C is just switched on, or room temp. is still high, cold air will be blown out from top and bottom air outlet to cool down the room quickly Air outlet from top to maintain room temp. ----When the room has been cooled down, or the A/C has been opened over 1 hour, cold air only from the top outlet to keep constant room temp Heating mode Anti-cold air ------When the AC is just turn on, temperature of evaporator is very low, in this case, in order to prevent cold air direct blowing, only the upper louver is opened in a high position, the lower louver closed. Console Type 53 Console Type 1.3. Four air inlets 1.4. Low noise DC indoor fan motor, which has five speeds. Low noise and energy saving. Advanced centrifugal fan technology makes a fast airflow and reduces the indoor noise lower to 28dB. 1.5. Active carbon filter is standard 54 Console Type 2. Dimensions FSFIF-120AE2 Console Type 55 3. Service Space 56 Console Type 4. Wiring Diagrams FSFIF-120AE2 Console Type 57 5. Air Velocity and Temperature Distributions(Reference Data) Discharge angle 60 Airflow velocity Temperature 58 Console Type 6. Electric Characteristics Model FSFIF-120AE2 Console Type Indoor Units Power Supply Hz Voltage Min. Max. MFA 50 220-240 198 254 16 59 7. Sound Levels 1m Microphone 1.5m 60 Noise level dB(A) Model Noise Power dB(A) Higher H M L FSFIF-120AE2 57 47 44 40 37 Console Type 8. Accessories Name Installation fittings Remote controller & Its Frame Shape Hook 2 Remote controller 1 Frame 1 Mounting screw(ST2.9×10-C-H) 2 Alkaline dry batteries (AM4) Installation manual Owner's manual Others Quantity / / 2 1 1 9. The Specification of Power MODEL 12000 Btu/h Phase 1-phase Frequency and Voltage 220-240V, 50Hz Power Circuit Breaker/ Fuse (A) C16 Indoor Unit Power Wiring (mm2) Indoor/Outdoor Connecting Wiring (mm2) Ground Wiring 2.5 Outdoor Unit Power Wiring 3×2.5 Strong Electric Signal 4×1.5 Weak Electric Signal Console Type 61 10. Field Wiring FSFIF-120AE2 62 Outdoor Units Part 3 Outdoor Units 1. Dimensions .................................................................................................... 64 2. Service Space ................................................................................................ 65 3. Piping Diagrams ............................................................................................ 66 4. Wiring Diagrams ........................................................................................... 67 5. Electric Characteristics ................................................................................ 69 6. Operation Limits ........................................................................................... 70 7. Sound Levels ................................................................................................. 71 Outdoor Units 63 Dimensions 1. Dimensions Model 64 Unit:mm A B C D E F H FSOIF-120AE2 FSOIF-181AE2 760 530 290 315 270 285 590 845 560 335 360 312 320 700 FSOIF-241AE2 900 590 333 355 302 315 860 FSOIF-300AE2 900 590 333 355 302 315 860 FSOIF-361AE2-3F 990 624 366 396 340 345 965 Outdoor Units Service Space 2. Service Space (Wall or obstacle) Air inlet More than 30cm Air inlet More than 60cm Maintain channel More than 60cm Air outlet Outdoor Units More than 30cm More than 200cm 65 Piping Diagrams 3. Piping Diagrams FSOIF-120AE2 FSOIF-181AE2 FSOIF-241AE2 FSOIF-300AE2 INDOOR OUTDOOR Electronic expansion valve CAPILIARY TUBE LIQUID SIDE 2-WAY VALVE T3 Condenser temp. sensor HEAT EXCHANGE (EVAPORATOR) T2B Evaporator temp. sensor outlet HEAT EXCHANGE (CONDENSER) T4 Ambient temp. sensor T1 Room temp. sensor T2 Evaporator temp. sensor middle GAS SIDE 4-WAY VALVE 3-WAY VALVE Accumulator Low pressure switch High pressure switch T5 Discharge temp. sensor COOLING Compressor HEATING FSOIF-361AE2-3F INDOOR OUTDOOR CAPILIARY TUBE LIQUID SIDE Electronic expansion valve 2-WAY VALVE T3 Condenser temp. sensor HEAT EXCHANGE (EVAPORATOR) T2 Evaporator temp. sensor middle T2B Evaporator temp. sensor outlet HEAT EXCHANGE (CONDENSER) T4 Ambient temp. sensor T1 Room temp. sensor GAS SIDE 4-WAY VALVE 3-WAY VALVE Accumulator Compressor Low pressure switch COOLING Oil return Capillary 66 High pressure switch T5 Discharge temp. sensor Oil separator HEATING Outdoor Units Wiring Diagrams 4. Wiring Diagrams FSOIF-120AE2 Outdoor Units 67 Wiring Diagrams FSOIF-181AE2 FSOIF-241AE2 FSOIF-300AE2 FSOIF-361AE2-3F 68 Outdoor Units Electric Characteristics 5. Electric Characteristics Model Outdoor Unit Hz Voltage Min. Max. FSOIF-120AE2 50 220-240V 198V 254V FSOIF-181AE2 50 220-240V 198V 254V FSOIF-241AE2 50 220-240V 198V 254V FSOIF-300AE2 50 220-240V 198V 254V FSOIF-361AE2-3F 50 380-415V 342V 440V Outdoor Units 69 Operation Limits 6. Operation Limits Temperature Mode Room temperature Outdoor temperature Cooling operation Heating operation 17℃~32°C 0°C~30℃ -15℃~50℃ -15℃~24℃ CAUTION: 1. If the air conditioner is used beyond the above conditions, certain safety protection features may come into operation and cause the unit to operate abnormally. 2. The room relative humidity should be less than 80%. If the air conditioner operates beyond this figure, the surface of the air conditioner may attract condensation. Please set the vertical air flow louver to its maximum angle (vertically to the floor), and set HIGH fan mode. 3. The optimum performance will be achieved during this operating temperature zone. 70 Outdoor Units Sound Levels 7. Sound Levels Outdoor Unit Microphone H 1.0m Note: H= 0.5 × height of outdoor unit Model Noise Power dB(A) Noise level dB(A) FSOIF-120AE2 61 58 FSOIF-181AE2 65 60 FSOIF-241AE2 69 60 FSOIF-300AE2 70 61 FSOIF-361AE2-3F 70 63 Outdoor Units 71 Installation Part 4 Installation 1. Installation Procedure...................................................... 73 2. Location selection ............................................................ 74 3. Indoor unit installation..................................................... 75 4. Outdoor unit installation (Side Discharge Unit) ............ 89 5. Refrigerant pipe installation ............................................ 90 6. Drainage pipe installation................................................ 94 7. Vacuum Drying and Leakage Checking ......................... 98 8. Additional refrigerant charge .......................................... 99 9. Engineering of insulation .............................................. 100 10. Engineering of electrical wiring .................................... 101 11. Test operation ................................................................. 102 72 Installation Installation Procedure 1. Installation Procedure Indoor unit installation location selection Outdoor unit installation location selection Indoor unit installation Outdoor unit installation Refrigerant pipe installation and insulation Refrigerant pipe installation and insulation Drainage pipe installation and insulation Drainage pipe installation and insulation Vacuum drying and leakage checking Additional refrigerant charge Insulation the joint part of refrigerant pipe Wiring connection and electric safety checking Test operation Installation 73 Location selection 2. Location selection 2.1 Indoor unit location selection The place shall easily support the indoor unit’s weight. The place can ensure the indoor unit installation and inspection. The place can ensure the indoor unit horizontally installed. The place shall allow easy water drainage. The place shall easily connect with the outdoor unit. The place where air circulation in the room should be good. There should not be any heat source or steam near the unit. There should not be any oil gas near the unit There should not be any corrosive gas near the unit There should not be any salty air neat the unit There should not be strong electromagnetic wave near the unit There should not be inflammable materials or gas near the unit There should not be strong voltage vibration. 2.2 Outdoor unit location selection The place shall easily support the outdoor unit’s weight. Locate the outdoor unit as close to indoor unit as possible The piping length and height drop can not exceed the allowable value. The place where the noise, vibration and outlet air do not disturb the neighbors. There is enough room for installation and maintenance. The air outlet and the air inlet are not impeded, and not face the strong wind. It is easy to install the connecting pipes and cables. There is no danger of fire due to leakage of inflammable gas. It should be a dry and well ventilation place The support should be flat and horizontal Do not install the outdoor unit in a dirty or severely polluted place, so as to avoid blockage of the heat exchanger in the outdoor unit. If is built over the unit to prevent direct sunlight, rain exposure, direct strong wend, snow and other scraps accumulation, make sure that heat radiation from the condenser is not restricted. More than 30cm More than 60cm (Service space) More than 30cm Fe n ob ce o sta r cle s More than 60cm More than 200cm 74 Installation Indoor unit installation 3. Indoor unit installation 3.1 Super slim cassette indoor unit installation 3.1.1 Service space for indoor unit Model 18-30 36 A 205 245 H >235 >275 R410A R410A Remark Cooling / Cooling & Heating Cooling / Cooling & Heating 3.1.2 Bolt pitch 3.1.3 Install the pendant bolt Select the position of installation hooks according to the hook holes positions showed in upper picture. Installation 75 Indoor unit installation Drill four holes of Ø12mm, 45~50mm deep at the selected positions on the ceiling. Then embed the expansible hooks (fittings). 3.1.4 Install the main body Make the 4 suspender through the 4 hanger of the main body to suspend it. Adjust the hexangular nuts on the four installation hooks evenly, to ensure the balance of the body. Use a leveling instrument to make sure the levelness of the main body is within ±1°. Adjust the position to ensure the gaps between the body and the four sides of ceiling are even. The body's lower part should sink into the ceiling for 10~12 mm. In general, L is half of the screw length of the installation hook. Locate the air conditioner firmly by wrenching the nuts after having adjusted the body's position well. 76 Installation Indoor unit installation 3.1.5 Install the panel Remove the grille Remove the 4 corner covers. Hang the panel to the hooks on the mainbody. If the panel is with auto-lift grille, please watch the ropes lifing the grille, DO NOT make the ropes enwinded or blocked. Installation 77 Indoor unit installation Tighten the screws under the panel hooks till the panel closely stick on the ceiling to avoid condensate water. Hang the air-in grill to the panel, then connect the lead terminator of the swing motor and that of the control box with corresponding terminators on the body respectively. Install the 4 corner covers back. Note: The panel shall be installed after the wiring connected. 78 Installation Indoor unit installation 3.2 Duct indoor unit installation 3.2.1 Service space for indoor unit 3.2.2 Bolt pitch Capacity(KBtu) Size of outline dimension mounted plug L M 18/24 960 350 30 1180 490 36 1240 500 3.2.3 Install the pendant bolt Select the position of installation hooks according to the hook holes positions showed in upper picture. Drill four holes of Ø12mm, 45~50mm deep at the selected positions on the ceiling. Then embed the expansible hooks (fittings). Installation 79 Indoor unit installation 3.2.4 Install the main body Make the 4 suspender through the 4 hanger of the main body to suspend it. Adjust the hexangular nuts on the four installation hooks evenly, to ensure the balance of the body. Use a leveling instrument to make sure the levelness of the main body is within ±1°. 3.2.5 Install the air filter Insert the air filter through the filter slot and fix it with 2 screws. 3.2.6 Install the air duct Please design the air duct as below recommended picture 80 Installation Indoor unit installation 3.2.7 Change the air inlet direction ① Take off ventilation panel and flange, cut off the staples at side rail. ② Stick the attached seal sponge as per the indicating place in the following fig, and then change the mounting positions of air return panel and air return flange . ③ When install the filter mesh, please plug it into flange inclined from air return opening, and then push up. ④ The installation has finish, upon filter mesh which fixing blocks have been insert to the flange positional holes. Installation 81 Indoor unit installation 3.3 Ceiling & floor indoor unit installation 3.3.1 Service space for indoor unit 3.3.2 Bolt pitch ① Ceiling installation Capacity (Btu/h) D E 18K, 24K 983 220 36K 1200 220 ② Wall-mounted installation 3.3.3 Install the pendant bolt 82 Installation Indoor unit installation ① Ceiling installation Select the position of installation hooks according to the hook holes positions showed in upper picture. Drill four holes of Ø12mm, 45~50mm deep at the selected positions on the ceiling. Then embed the expansible hooks (fittings). ② Wall-mounted installation Install the tapping screws onto the wall.(Refer to picture below) 3.3.4 Install the main body ① Ceiling installation (The only installation method for the unit with drain pump) Remove the side board and the grille. Locate the hanging arm on the hanging screw bolt. Prepare the mounting bolts on the unit. Installation 83 Indoor unit installation Put the side panels and grilles back. ② Wall-mounted installation Hang the indoor unit by insert the tapping screws into the hanging arms on the main unit. (The bottom of body can touch with floor or suspended, but the body must install vertically.) 84 Installation Indoor unit installation 3.4 Compact cassette indoor unit installation 3.4.1 Service space for indoor unit 3.4.2 Bolt pitch 3.4.3 Install the pendant bolt Select the position of installation hooks according to the hook holes positions showed in upper picture. Drill four holes of Ø12mm, 45~50mm deep at the selected positions on the ceiling. Then embed the expansible hooks (fittings). Installation 85 Indoor unit installation Face the concave side of the installation hooks toward the expansible hooks. Determine the length of the installation hooks from the height of ceiling, then cut off the unnecessary part. If the ceiling is extremely high, please determine the length of the installation hook depending on the real situation. 3.4.4 Install the main body Make the 4 suspender through the 4 hanger of the main body to suspend it. Adjust the hexangular nuts on the four installation hooks evenly, to ensure the balance of the body. Use a leveling instrument to make sure the levelness of the main body is within ±1°. Adjust the position to ensure the gaps between the body and the four sides of ceiling are even. The body's lower part should sink into the ceiling for 10~12 mm. In general, L is half of the screw length of the installation hook. Locate the air conditioner firmly by wrenching the nuts after having adjusted the body's position well. 3.4.5 Install the panel Remove the grille 86 Installation Indoor unit installation Hang the panel to the hooks on the mainbody. Tighten the screws under the panel hooks till the panel closely stick on the ceiling to avoid condensate water. Hang the air-in grill to the panel, then connect the lead terminator of the swing motor and that of the control box with corresponding terminators on the body respectively. Note: The panel shall be installed after the wiring connected. Installation 87 Indoor unit installation 3.5 Console indoor unit installation 3.5.1 Service space for indoor unit 3.5.2 Install the main body Fix the hook with tapping screw onto the wall Hang the indoor unit on the hook. (The bottom of body can touch with floor or suspended, but the body must install vertically.) 88 Installation Outdoor unit installation (Side Discharge Unit) 4. Outdoor unit installation (Side Discharge Unit) 4.1 Service space for outdoor unit (Wall or obstacle) Air inlet More than 30cm More than 30cm More than 60cm Maintain channel Air inlet More than 60cm Air outlet More than 200cm 4.2 Bolt pitch Model FSOIF-120AE2 FSOIF-181AE2 FSOIF-241AE2 FSOIF-300AE2 FSOIF-361AE2-3F B 530 560 C 290 335 D 315 360 590 333 355 624 366 396 4.3 Install the Unit Since the gravity center of the unit is not at its physical center, so please be careful when lifting it with a sling. Never hold the inlet of the outdoor unit to prevent it from deforming. Do not touch the fan with hands or other objects. Do not lean it more than 45, and do not lay it sidelong. Make concrete foundation according to the specifications of the outdoor units. Fasten the feet of this unit with bolts firmly to prevent it from collapsing in case of earthquake or strong wind. Installation 89 Refrigerant pipe installation 5. Refrigerant pipe installation 5.1 Maximum pipe length and height drop Considering the allowable pipe length and height drop to decide the installation position. Make sure the distance and height drop between indoor and outdoor unit not exceeded the date in the following table. Model Max. Length Max. Elevation 12,000Btu/h 20m 10m 18,000Btu/h 30m 20m 24,000Btu/h~30,000Btu/h 50m 25m 36,000Btu/h 65m 30m 5.2 The procedure of connecting pipes 90 o 5.2.1 Choose the pipe size according to the specification table. 5.2.2 Confirm the cross way of the pipes. 5.2.3 Measure the necessary pipe length. 5.2.4 Cut the selected pipe with pipe cutter Make the section flat and smooth. Lean Crude Burr 5.2.5 Insulate the copper pipe Before test operation, the joint parts should not be heat insulated. 5.2.6 Flare the pipe Insert a flare nut into the pipe before flaring the pipe According to the following table to flare the pipe 90 Installation Refrigerant pipe installation Flare dimension A (mm) Pipe diameter 1/4" (6.35) Flare shape Min Max 8.3 8.7 +- 4 90° 45¡ 3/8" (9.52) 12.0 12.4 1/2" (12.7) 15.4 15.8 5/8" (15.9) 18.6 19.1 3/4" (19) 22.9 23.3 ã A R0.4~0.8 After flared the pipe, the opening part must be seal by end cover or adhesive tape to avoid duct or exogenous impurity come into the pipe. 5.2.7 Drill holes if the pipes need to pass the wall. 5.2.8 According to the field condition to bend the pipes so that it can pass the wall smoothly. 5.2.9 Bind and wrap the wire together with the insulated pipe if necessary. 5.2.10 Set the wall conduit 5.2.11 Set the supporter for the pipe. 5.2.12 Locate the pipe and fix it by supporter For horizontal refrigerant pipe, the distance between supporters should not be exceed 1m. For vertical refrigerant pipe, the distance between supporters should not be exceed 1.5m. 5.2.13 Connect the pipe to indoor unit and outdoor unit by using two spanners. Be sure to use two spanners and proper torque to fasten the nut, too large torque will damage the bellmouthing, and too small torque may cause leakage. Refer the following table for different pipe connection. Torque Sketch map Pipe Diameter (kgf.cm) (N.cm) 1/4" (6.35) 144~176 1420~1720 3/8" (9.52) 333~407 3270~3990 1/2" (12.7) 504~616 4950~6030 5/8" (15.9) 630~770 6180~7540 3/4" (19) 990~1210 9270~11860 5.3 For Units with Twins Function 5.3.1 Length and drop height permitted of the refrigerant piping Note: Reduced length of the branching tube is the 0.5m of the equivalent length of the pipe. Installation 91 Refrigerant pipe installation Drop Height Pipe Length Note: All used branch pipe must be produced by the factory, otherwise it causes malfunction. The indoor units should be installed equivalently at the both side of the U type branch pipe. Total pipe length (Actual) Max. branch pipe length Max. branch pipe length difference Max. height difference between indoor unit and outdoor unit Max. height difference between indoor units Permitted Value 18K+18K 30m 24K+24K 50m 30K+30K 50m 15m 10m Piping L+L1+L2 L1, L2 L1-L2 20m H1 0.5m H2 5.3.2 Size of joint pipes for indoor unit (R410a) 5.3.3 Size of joint pipes for outdoor unit (R410a) 5.3.4 The branching pipe must be installed horizontally, error angle of it should not large than 10°. Otherwise, malfunction will be caused. 92 Installation Refrigerant pipe installation Installation 93 Drainage pipe installation 6. Drainage pipe installation Install the drainage pipe as shown below and take measures against condensation. Improperly installation could lead to leakage and eventually wet furniture and belongings. 6.1 Installation principle Ensure at least 1/100 slope of the drainage pipe Adopt suitable pipe diameter Adopt nearby condensate water discharge 6.2 Key points of drainage water pipe installation 6.2.1 Considering the pipeline route and elevation Before installing condensate water pipeline, determine its route and elevation to avoid intersection with other pipelines and ensure slope is straight. 6.2.2 Drainage pipe selection The drainage pipe diameter shall not small than the drain hose of indoor unit According to the water flowrate and drainage pipe slope to choose the suitable pipe, the water flowrate is decided by the capacity of indoor unit. Relationship between water flowrate and capacity of indoor unit Capacity (x1000Btu) Water flowrate (l/h) 12 2.4 18 4 24 6 30 7 36 8 42 10 48 12 60 14 According to the above table to calculate the total water flowrate for the confluence pipe selection. For horizontal drainage pipe (The following table is for reference) PVC pipe Reference value of inner diameter of pipe (mm) PVC25 PVC32 Allowable maximum water flowrate (l/h) Slope 1/50 Slope 1/100 20 39 27 25 70 50 PVC40 31 125 88 PVC50 40 247 175 PVC63 51 473 334 Remark For branch pipe Could be used for confluence pipe Attention: Adopt PVC40 or bigger pipe to be the main pipe. For Vertical drainage pipe (The following table is for reference) PVC25 Reference value of inner diameter of pipe (mm) 20 PVC32 25 410 PVC40 31 730 PVC50 40 1440 PVC63 51 2760 PVC75 67 5710 PVC90 77 8280 PVC pipe Allowable maximum water flowrate (l/h) 220 Remark For branch pipe Could be used for confluence pipe Attention: Adopt PVC40 or bigger pipe to be the main pipe. 94 Installation Drainage pipe installation 6.2.3 Individual design of drainage pipe system The drainage pipe of air conditioner shall be installed separately with other sewage pipe, rainwater pipe and drainage pipe in building. The drainage pipe of the indoor unit with water pump should be apart from the one without water pump. 6.2.4 Supporter gap of drainage pipe In general, the supporter gap of the drainage pipe horizontal pipe and vertical pipe is respectively 1m~1.5m and 1.5m~2.0m. Each vertical pipe shall be equipped with not less than two hangers. Overlarge hanger gap for horizontal pipe shall create bending, thus leading to air block. Too long distance Gas bag 6.2.5 The horizontal pipe layout should avoid converse flow or bad flow Drainage pipe Drainage pipe Water flow Water flow Water flow Drain tee Drain tee Water flow Drain tee Water flow Water flow Water flow Water flow Water flow Water flow Branch pipe Drainage pipe Gas Gas Water flow Keep a certain degree Main pipe Main pipe Branch pipe The correct installation will not cause converse water flow and the slope of the branch pipes can be adjusted freely The false installation will cause converse water flow and the slope of the branch pipe can not be adjusted. 6.2.6 Water storage pipe setting If the indoor unit has high extra static pressure and without water pump to elevate the condensate water, such as high extra static pressure duct unit , the water storage pipe should be set to avoid converse flow or blow water phenomena. Installation 95 Drainage pipe installation Indoor unit More than 50mm Plug More than 25mm Water storage pipe 6.2.7 Lifting pipe setting of indoor unit with water pump The length of lifting pipe should not exceed the pump head of indoor unit water pump. Pump head of big four way cassette: 750mm Pump head of compact four way cassette: 500mm The drainage pipe should be set down inclined after the lifting pipe immediately to avoid wrong operation of water level switch. Refer the following picture for installation reference. Hanger A B Down incline pipe A:Length of horizontal pipe ≤150mm B: Lift height≤the pump head of water pump Flexible pipe 300mm 6.2.8 Blowhole setting For the concentrated drainage pipe system, there should design a blowhole at the highest point of main pipe to ensure the condensate water discharge smoothly. The air outlet shall face down to prevent dirt entering pipe. Each indoor unit of the system should be installed it. The installation should be considering the convenience for future cleaning. Blowhole Indoor unit Plug Indoor unit Plug 6.2.9 The end of drainage pipe shall not contact with ground directly. 96 Installation Drainage pipe installation 6.3 Drainage test 6.3.1 Water leakage test After finishing the construction of drainage pipe system, fill the pipe with water and keep it for 24 hours to check whether there is leakage at joint section. 6.3.2 Water discharge test 1. Natural drainage mode(the indoor unit with outdoor drainage pump) Infuse above 600ml water through water test hole slowly into the water collector, observe whether the water can discharge through the transparent hard pipe at drainage outlet. 2. Pump drainage mode 2.1 Disconnect the plug of water level switch, remove the cover of water test hole and slowly infuse about 2000ml water through the water test hole, be sure that the water will not touch the motor of drainage pump. 2.2 Power on and let the air conditioner operate for cooling. Check operation status of drainage pump, and then connect the plug of water level switch, check the operation sound of water pump and observe whether the water can discharge through the transparent hard pipe at drainage outlet. (In light of the length of drainage pipe, water shall be discharged about 1 minute delayed) 2.3 Stop the operation of air conditioner, power off the power supply and put the cover of water test hole back to the original place. a. After stopped the air conditioner 3 minutes, check whether there is anything abnormal. If drainage pipes have not been distributed properly, over back-flow water shall cause the flashing of alarm indicator at remote-controlled receiving board and even water shall run over the water collector. b. Continuously infusing water until water level alarmed, check whether the drainage pump could discharge water at once. If water level does not decline under warning water level 3 minutes later, it shall cause shutdown of unit. When this situation happens, the normal startup only can be recovered by turning down power supply and eliminating accumulated water. Note: Drain plug at the main water-containing plate is used for eliminating accumulated water in water-containing plate when maintaining air conditioner fault. During normal operation, the plug shall be filled in to prevent leakage. 6.4 Insulation work of drainage pipe Refer the introduction to the insulation engineering parts. Installation 97 Vacuum Drying and Leakage Checking 7. Vacuum Drying and Leakage Checking 7.1 Purpose of vacuum drying Eliminating moisture in system to prevent the phenomena of ice-blockage and copper oxidation. Ice-blockage shall cause abnormal operation of system, while copper oxide shall damage compressor. Eliminating the non-condensable gas (air) in system to prevent the components oxidizing, pressure fluctuation and bad heat exchange during the operation of system. 7.2 Selection of vacuum pump The ultimate vacuum degree of vacuum pump shall be -756mmHg or above. Precision of vacuum pump shall reach 0.02mmHg or above. 7.3 Operation procedure for vacuum drying Due to different construction environment, two kinds of vacuum drying ways could be chosen, namely ordinary vacuum drying and special vacuum drying. 7.3.1 Ordinary vacuum drying 1. When conduct first vacuum drying, connect pressure gauge to the infusing mouth of gas pipe and liquid pipe, and keep vacuum pump running for 1hour (vacuum degree of vacuum pump shall be reached -755mmHg). 2 If the vacuum degree of vacuum pump could not reach -755mmHg after 1 hour of drying, it indicates that there is moisture or leakage in pipeline system and need to go on with drying for half an hour. 3 If the vacuum degree of vacuum pump still could not reach -755mmHg after 1.5 hours of drying, check whether there is leakage source. 4 Leakage test: After the vacuum degree reaches -755mmHg, stop vacuum drying and keep the pressure for 1 hour. If the indicator of vacuum gauge does not go up, it is qualified. If going up, it indicates that there is moisture or leak source. 7.3.2 Special vacuum drying The special vacuum drying method shall be adopted when: 1. Finding moisture during flushing refrigerant pipe. 2. Conducting construction on rainy day, because rain water might penetrated into pipeline. 3. Construction period is long, and rain water might penetrated into pipeline. 4. Rain water might penetrate into pipeline during construction. Procedures of special vacuum drying are as follows: 1. Vacuum drying for 1 hour. 2. Vacuum damage, filling nitrogen to reach 0.5Kgf/cm2 . Because nitrogen is dry gas, vacuum damage could achieve the effect of vacuum drying, but this method could not achieve drying thoroughly when there is too much moisture. Therefore, special attention shall be drawn to prevent the entering of water and the formation of condensate water. 3. Vacuum drying again for half an hour. If the pressure reached -755mmHg, start to pressure leakage test. If it cannot reached the value, repeat vacuum damage and vacuum drying again for 1 hour. 4 Leakage test: After the vacuum degree reaches -755mmHg, stop vacuum drying and keep the pressure for 1 hour. If the indicator of vacuum gauge does not go up, it is qualified. If going up, it indicates that there is moisture or leak source. 98 Installation Additional refrigerant charge 8. Additional refrigerant charge After the vacuum drying process is carried out, the additional refrigerant charge process need to be performed. The outdoor unit is factory charged with refrigerant. The additional refrigerant charge volume is decided by the diameter and length of the liquid pipe between indoor and outdoor unit. Refer the following formula to calculate the charge volume. Diameter of liquid pipe (mm) Formula Φ6.35 Φ9.52 V=11g/m×(L-5) V=30g/m×(L-5) V: Additional refrigerant charge volume (g). L : The length of the liquid pipe (m). Note: Refrigerant may only be charged after performed the vacuum drying process. Always use gloves and glasses to protect your hands and eyes during the charge work. Use electronic scale or fluid infusion apparatus to weight refrigerant to be recharged. Be sure to avoid extra refrigerant charged, it may cause liquid hammer of the compressor or protections. Use supplementing flexible pipe to connect refrigerant cylinder, pressure gauge and outdoor unit. And The refrigerant should be charged in liquid state. Before recharging, The air in the flexible pipe and manifold gauge should be exhausted. After finished refrigerant recharge process, check whether there is refrigerant leakage at the connection joint part.(Using gas leakage detector or soap water to detect). Installation 99 Engineering of insulation 9. Engineering of insulation 9.1 Insulation of refrigerant pipe 9.1.1 Operational procedure of refrigerant pipe insulation Cut the suitable pipe → insulation (except joint section) → flare the pipe → piping layout and connection→ vacuum drying → insulate the joint parts 9.1.2 Purpose of refrigerant pipe insulation During operation, temperature of gas pipe and liquid pipe shall be over-heating or over-cooling extremely. Therefore, it is necessary to carry out insulation; otherwise it shall debase the performance of unit and burn compressor. Gas pipe temperature is very low during cooling. If insulation is not enough, it shall form dew and cause leakage. Temperature of gas pipe is very high (generally 50-100℃) during heating. Insulation work must be carried out to prevent hurt by carelessness touching. 9.1.3 Insulation material selection for refrigerant pipe The burning performance should over 120℃ According to the local law to choose insulation materials The thickness of insulation layer shall be above 10mm.If in hot or wet environment place, the layer of insulation should be thicker accordingly. 9.1.4 Installation highlights of insulation construction Gas pipe and liquid pipe shall be insulated separately, if the gas pipe and liquid pipe were insulated together; it will decrease the performance of air conditioner. Liquid pipe Insulation meterial Gas pipe The insulation material at the joint pipe shall be 5~10cm longer than the gap of the insulation material. The insulation material at the joint pipe shall be inserted into the gap of the insulation material. The insulation material at the joint pipe shall be banded to the gap pipe and liquid pipe tightly. The linking part should be use glue to paste together Be sure not bind the insulation material over-tight, it may extrude out the air in the material to cause bad insulation and cause easy aging of the material. 9.2 Insulation of drainage pipe 9.2.1 Operational procedure of refrigerant pipe insulation Select the suitable pipe → insulation (except joint section) → piping layout and connection→ drainage test→ insulate the joint parts 9.2.2 Purpose of drainage pipe insulation The temperature of condensate drainage water is very low. If insulation is not enough, it shall form dew and cause leakage to damage the house decoration. 100 Installation Engineering of electrical wiring 9.2.3 Insulation material selection for drainage pipe The insulation material should be flame retardant material, the flame retardancy of the material should be selected according to the local law. Thickness of insulation layer is usually above 10mm. Use specific glue to paste the seam of insulation material, and then bind with adhesive tape. The width of tape shall not be less than 5cm. Make sure it is firm and avoid dew. 9.2.4 Installation and highlights of insulation construction The single pipe should be insulated before connecting to another pipe, the joint part should be insulated after the drainage test. There should be no insulation gap between the insulation material. 10. Engineering of electrical wiring 10.1 Highlights of electrical wiring installation All field wiring construction should be finished by qualified electrician. Air conditioning equipment should be grounded according to the local electrical regulations. Current leakage protection switch should be installed. Do not connect the power wire to the terminal of signal wire. When power wire is parallel with signal wire, put wires to their own wire tube and remain at least 300mm gap. According to table in indoor part named “the specification of the power” to choose the wiring, make sure the selected wiring not small than the date showing in the table. Select different colors for different wire according to relevant regulations. Do not use metal wire tube at the place with acid or alkali corrosion, adopt plastic wire tube to replace it. There must be not wire connect joint in the wire tube If joint is a must, set a connection box at the place. The wiring with different voltage should not be in one wire tube. Ensure that the color of the wires of outdoor and the terminal No. are same as those of indoor unit respectively. Installation 101 Test operation 11. Test operation 11.1 The test operation must be carried out after the entire installation has been completed. 11.2 Please confirm the following points before the test operation. The indoor unit and outdoor unit are installed properly. Tubing and wiring are correctly completed. The refrigerant pipe system is leakage-checked. The drainage is unimpeded. The ground wiring is connected correctly. The length of the tubing and the added stow capacity of the refrigerant have been recorded. The power voltage fits the rated voltage of the air conditioner. There is no obstacle at the outlet and inlet of the outdoor and indoor units. The gas-side and liquid-side stop values are both opened. The air conditioner is pre-heated by turning on the power. 11.3 Test operation Set the air conditioner under the mode of "COOLING" by remote controller, and check the following points. Indoor unit Whether the switch on the remote controller works well. Whether the buttons on the remote controller works well. Whether the air flow louver moves normally. Whether the room temperature is adjusted well. Whether the indicator lights normally. Whether the temporary buttons works well. Whether the drainage is normal. Whether there is vibration or abnormal noise during operation. Outdoor unit Whether there is vibration or abnormal noise during operation. Whether the generated wind, noise, or condensed of by the air conditioner have influenced your neighborhood. Whether any of the refrigerant is leaked. 102 Installation Electrical Control System Part 5 Electrical Control System 1. Electrical Control Function ................................... 104 2. Troubleshooting .................................................... 118 3. Controller ............................................................... 150 Electrical Control System 103 Electrical Control Function 1. Electrical Control Function 1.1 Definition T1: Indoor room temperature T2: Coil temperature of indoor heat exchanger middle. T2B: Coil temperature of indoor heat exchanger outlet. T3: Coil temperature of condenser T4: Outdoor ambient temperature T5: Compressor discharge temperature 1.2 Main Protection 1.2.1 Time delay at restart for compressor. 1.2.2 Temperature protection of compressor top The unit will stop working when the compressor top temp. protector cut off, and will restart after the compressor top temp. protector restart. 1.2.3 Temperature protection of compressor discharge For 12K units: When the compressor discharge temp. is getting higher, the running frequency will be limited as below rules: ---Compressor discharge temp. T5>115℃ for 5s, compressor stops and restarts up till T5<90℃ ---110<T5<115℃, decrease the frequency to the lower level every 2 minutes. ---105<T5<110℃, keep running at the current frequency. ----T5<105℃, no limit for frequency. For other units: When the compressor discharge temp. is getting higher, the running frequency will be limited as below rules: ----If 102℃<T5<115℃, decrease the frequency to the lower level every 2 minutes till to F1. ---If T5>115℃ for 10 seconds, the compressor will stop and restart till T5<90℃. 1.2.4 Sensor protection at open circuit and breaking disconnection. 1.2.5 Indoor fan delayed open function For M floor-standing: When the unit starts up, the louver will be active immediately and the indoor fan will open 5s later. If the unit runs in heating mode, the indoor fan will be also controlled by anti-cold wind function. For other models: When the unit starts up, the louver will be active immediately and the indoor fan will open 10s later. If the unit runs in heating mode, the indoor fan will be also controlled by anti-cold wind function. 1.2.6 Fan Speed is out of control(for units used DC motor) For super slim cassette: When indoor fan speed keeps too low (lower than 200RPM) for 50s, the unit will stop and the LED will display the failure. For M floor-standing: When indoor fan speed keeps too low (lower than 300RPM) for 10s, the unit will stop and the LED will display the failure. For other models: When indoor fan speed keeps too low (lower than 300RPM) for 50s, the indoor fan will shut off and restart 30s later, if protection happened 3 times when fan motor restart continuously, the unit will stop and the LED will display the failure. 104 Electrical Control System Electrical Control Function 1.3 Operation Modes and Functions 1.3.1 Fan mode (1) Outdoor fan and compressor stop. (2) Temperature setting function is disabled, and no setting temperature is displayed. (3) For Console& Compact cassette(12K): Indoor fan can be set to high/med/low/ breeze, for other models: Indoor fan can be set to high/(med)/low/auto; (4) The louver operates same as in cooling mode. (5) Auto fan: For Console: T 1 -2 4 H 6 .0 a 5 .0 (H -L )* 0 .7 5 + L (H -L )* 0 .5 + L (H -L )* 0 .2 5 + L L b 4 .0 c d e 2 .5 1 .0 For Compact cassette(12K)、A5(12K) 3.5 High 3.0 1.5 Medium 1.0 Low Ts=24 For other models: 5.0 High 4.0 3.0 Medium 2.0 Low Ts=24 1.3.2 Cooling Mode 1.3.2.1 Outdoor PMW open angle control The unit is working in cooling mode with the EXV open 300P(For 12K, it is 220P) for 3 minutes, then adjusting PMW open angle according to the temperature of compressor discharge every 2 minutes. Electrical Control System 105 Electrical Control Function 1.3.2.2 Outdoor fan running rules T4 28℃ A DC_FAN_HI_SPD_ADD B DC_FAN_MID_SPD_ADD C DC_FAN_MIN_SPD_ADD D DC_FAN_SLOW_SPD_ADD E DC_FAN_SSLOW_SPD_ADD 26℃ 25℃ 23℃ 22℃ 20℃ 19℃ 17℃ 1.3.2.3 Indoor fan running rules For Console(12K): In cooling mode, indoor fan runs all the time and the speed can be selected as high, medium, low, auto and silent. When the compressor is running, the indoor fan is controlled as below: The auto fan acts as below rules: T1-Ts 6.0 5.0 4.0 2.5 1.0 106 H a b c d e (H -L)*0.75+L (H -L)*0.5+L (H -L)*0.25+L L Electrical Control System Electrical Control Function For Compact cassette(12K) In cooling mode, indoor fan runs all the time and the speed can be selected as high, medium, low, auto and silent. The auto fan: 3.5 High 3.0 Medium 1.5 1.0 Low For other models: 5.0 High 4.0 3.0 Medium 2.0 Low 1.3.2.4 Evaporator low temperature T2 protection. For 12K models: ---T2<0℃, the compressor will stop and restart when T2>=5℃. ---0℃≦T2<4℃, the compressor frequency will be limited and decreased to the lower level ---4℃≤T2<7℃, the compressor will keep the current frequency. ---T2>7℃, the compressor frequency will not be limited. For other models: When T2<2°C and lasts for 3 minutes, the indoor has no capacity demand and resume till T2≥7°C. 1.3.2.5 Condenser high temperature T3 protection For 12K models : ---55℃<T3<60℃, the compressor frequency will decrease to the lower level until to F1 and then runs at F1.If T3<55℃, the compressor will keep running at the current frequency. ---T3<52℃, the compressor will not limit the frequency and resume to the former frequency. ---T3>60℃ for 5 seconds, the compressor will stop until T3<52℃. For other models: When T3≥65℃ for 3 seconds, the compressor will shut off. When T3<52,the compressor will restart. Electrical Control System 107 Electrical Control Function 1.3.3 Heating Mode 1.3.2.1 Outdoor PMW open angle control The unit is working in heating mode with the EXV open 300P(For 12K,it is 480P) for 3 minutes, then adjusting PMW open angle according to the temperature of compressor discharge every 2 minutes. 1.3.3.2 Outdoor fan running rules: T4 21℃ E DC_FAN_SSLOW_SPD_ADD D DC_FAN_SLOW_SPD_ADD C DC_FAN_MIN_SPD_ADD B DC_FAN_MID_SPD_ADD A DC_FAN_HI_SPD_ADD 19℃ 18℃ 16℃ 15℃ 13℃ 12℃ 10℃ 1.3.3.3 Indoor fan running rules: For Console(12K): In heating mode, indoor fan can be selected as high, medium, low, auto and silent. The anti-cold- wind function has the priority. When the compressor is running, the indoor fan is controlled as below: If the compressor stops caused by the room temperature rising, the indoor fan will be forced to run 127 seconds with breeze. During this period, the anti-cold-wind is disabled. Auto fan action in heating mode: 108 Electrical Control System Electrical Control Function T1-Ts+¦ ¤ T 0.0 -1.0 L (H+-L)*0.2+L (H+-L)*0.4+L -2.0 -3.0 (H+-L)*0.6+L -4.0 -5.0 -6.0 (H+-L)*0.6+L (H+-L)*0.8+L -6.5 H+ For Compact cassette(12K): When the compressor is on, the indoor fan can be set to high, medium, low, auto and silent. And the anti-cold wind function has the priority. Auto fan action: T1-Ts-¦ ¤T Low -3.5 -4 Medium -4.5 -5 High For other models: When the compressor is on, the indoor fan can be set to high/medium/low/auto. And the anti-cold wind function has the priority. Auto fan action: ¤ T1-Ts-¦ T Low -2 -3 Medium -4 -5 Electrical Control System High 109 Electrical Control Function 1.3.3.4 Defrosting mode: For 12K models: Condition of defrosting: If any one of the following items is satisfied, AC will enter the defrosting mode. After the compressor starts up and keeps running, mark the minimum value of T3 from the 10th minutes to 15th minutes as T30. 1)If the compressor cumulate running time is up to 29 minutes and T3< TCDI1, T3+T30SUBT3ONE≦T30. 2)If the compressor cumulate running time is up to 35 minutes and T3< TCDI2, T3+T30SUBT3TWO≦T30. 3)If the compressor cumulate running time is up to 29 minutes and T3< TCDI3 for 3 minutes. 4)If the compressor cumulate running time is up to 120 minutes and T3<-15℃. Condition of ending defrosting: If any one of the following items is satisfied, the defrosting will finish and the machine will turn to normal heating mode. ----T3 rises to be higher than TCDE1℃. ----T3 keeps to be higher than TCDE2℃ for 80 seconds. ----The machine has run for 10 minutes in defrosting mode. Defrosting action: Frequency F3 FrequencyF16 on Compressor 4-way valve Outdoor fan Indoor fan off on off on off on off Indoor fan breeze(10s) 10s xx 10s no longer than 10m 30s xx=90 110 Electrical Control System Electrical Control Function The other models: Condition of defrosting: T4 Time1 3℃ Time2 Time conditions: time1 Time conditions(Meet the following conditions) 1.Running in heating mode 2. T4≥3℃ 3. Compressor is on 4. T3≤TempEnterDefrost_ADD ℃ Cleared conditions (Meet any one of the following conditions) 1. Compressor is off. 2. T3>TempEnterDefrost_ADD ℃ Time2 Time conditions(Meet the following conditions) 1.Running in heating mode 2. T4<3℃ 3. Compressor is on 4. T3≤TempEnterDefrost_ADD ℃ Cleared conditions (Meet any one of the following conditions) 1. Compressor is off and T3>TempEnterDefrost_ADD +2℃ last for 20 minutes 2. Running in cooling mode. 3. Compressor is off for 1 hour. Condition of entry defrosting: time1+ time2≥40 minutes, When defrosting is end,time1 and time2 are cleared. Condition of ending defrosting: If any one of following items is satisfied, defrosting will stop and the machine will turn to normal heating mode. ① The defrosting time achieves 10min; ② T3 ≥15℃; ③ T3 ≥7℃ for 60seconds. Electrical Control System 111 Electrical Control Function Defrosting action: 4-Way valve no longer than 10min Compressor Indoor fan TimeA 10S 10S 30S Outdoor fan PMV running 8 mins with 300P PMV 480P 112 Electrical Control System Electrical Control Function 1.3.3.5 High evaporator coil temp.T2 protection: For 12K models: T2 Off TEstop Decrease TEdown Hold TEnorm Resume Off: Compressor stops. Decrease: Decrease the running frequency to the lower level. Hold: Keep the current frequency. Resume: No limitation for frequency. For other models:T2>60℃, the compressor will stop and restart when T2≤54℃. 1.3.4 Auto-mode This mode can be chosen with remote controller and the setting temperature can be changed between 17~30℃. In auto mode, the machine will choose cooling, heating or fan-only mode according to ΔT (ΔT =T1-Ts). For 12K models: ΔT=T1-Ts Running mode ΔT>1℃ Cooling -1<ΔT≤1℃ Fan-only ΔT≤-1℃ Heating ΔT=T1-Ts Running mode ΔT≥2℃ Cooling -1≤ΔT<2℃ Fan-only ΔT<-1℃ Heating For other models: Indoor fan will run at auto fan of the relevant mode. The louver operates same as in relevant mode. If the machine switches mode between heating and cooling, the compressor will keep stopping for 15 minutes and then choose mode according to T1-Ts. If the setting temperature is modified, the machine will choose running function again. Electrical Control System 113 Electrical Control Function 1.3.5 Drying mode For 12K models: Indoor fan speed is fixed at breeze and can’t be changed. The louver angle is the same as in cooling mode. Low indoor room temperature protection In drying mode, if room temperature is lower than 10℃, the compressor will stop and not resume until room temperature exceeds 12℃. All protections are active and the same as that in cooling mode. For other models: Drying mode works the same as cooling mode in low speed. All protections are active and the same as that in cooling mode. 1.3.6 Timer function 1.3.6.1 Timing range is 24 hours. 1.3.6.2 Timer on. The machine will turn on automatically when reaching the setting time. 1.3.6.3 Timer off. The machine will turn off automatically when reaching the setting time. 1.3.6.4 Timer on/off. The machine will turn on automatically when reaching the setting “on” time, and then turn off automatically when reaching the setting “off” time. 1.3.6.5 Timer off/on. The machine will turn off automatically when reaching the setting “off” time, and then turn on automatically when reaching the setting “on” time. 1.3.6.6 The timer function will not change the AC current operation mode. Suppose AC is off now, it will not start up firstly after setting the “timer off” function. And when reaching the setting time, the timer LED will be off and the AC running mode has not been changed. 1.3.6.7 The setting time is relative time. 1.3.7 Economy function 1.3.7.1 The sleep function is available in cooling, heating or auto mode. 1.3.7.2. Operation process in sleep mode is as follow: When cooling, the setting temperature rises 1℃ (be lower than 30℃) every one hour, 2 hours later the setting temperature stops rising and the indoor fan is fixed at low speed. When heating, the setting temperature decreases 1℃ (be higher than 17℃) every one hour, 2 hours later the setting temperature stops rising and indoor fan is fixed at low speed. (Anti-cold wind function has the priority). 1.3.7.3 Operation time in sleep mode is 7 hours. After 7 hours the AC quits this mode but doesn’t turns off, but for console, the unit will turn off. 1.3.7.4 Timer setting is available 1.3.8 Auto-Restart function The indoor unit is equipped with auto-restart function, which is carried out through an auto-restart module. In case of a sudden power failure, the module memorizes the setting conditions before the power failure. The unit will resume the previous operation setting (not including Swing function) automatically after 3 minutes when power returns. 114 Electrical Control System Electrical Control Function 1.3.9 Drain pump control (For Cassette) Adopt the water-level switch to control the action of drain pump. Main action under different condition :( every 5 seconds the system will check the water level one time) 1. When the A/C operates with cooling (including auto cooling) and forced cooling mode, the pump will start running immediately and continuously, till stop cooling. 2. Once the water level increase and up to the control point, LED will alarm and the drain pump open and continue checking the water level. If the water level fall down and LED disalarmed (drain pump delay close 1 minute) and operate with the last mode. Otherwise the entire system stop operating ( including the pump) and LED remain alarming after 3 minutes. 1.3.10 Follow me 1) If the indoor PCB receives the signal which results from pressing the FOLLOW ME button on remote controller, the buzzer will emit a sound and this indicates the follow me function is initiated. But when the indoor PCB receives signal which sent from remote controller every 3 minutes, the buzzer will not respond. When the unit is running with follow-me function, the PCB will control the unit according to the temperature from follow-me signal, and the temperature collection function of room temperature sensor will be shielded. 2) When the follow-me function is available, the PCB will not respond according to the setting temperature from follow-me signal every 3 minutes. 3) The PCB will take action to the mode change information from remote controller signal, and the follow-me function will be turned off. (if the wired remote controller does not initiate follow me function). 4) When the unit is running with follow-me function, if the PCB doesn’t receive any signal from remote controller for 7 minutes or pressing FOLLOW ME button again, the follow-me function will be turned off automatically, and the temperature collection function of room temperature sensor will be available, the PCB will control the unit according to the room temperature detected from its own room temperature sensor and setting temperature. 5) When the indoor PCB receives the follow-me signal from wired remote controller, the control is the same as that from wireless remote controller, but buzzer will not respond. When the PCB receives turning-off follow-me signal from wired remote controller, the unit will quit follow-me function at once. The follow-me function controlled by wired remote controller prevails that by wireless remote controller. Electrical Control System 115 Electrical Control Function 1.3.11 Point Check Function(Excluding 12K) There is a check switch in outdoor PCB. Press the switch SW1 to check the states of unit when the unit is running. Press the switch N times it will display the content corresponding to No. N. After getting into the check function, it will display No. N with 1.5s, meanwhile the low bit decimal of digit display flashing, indicated to get into the check function display. After 1.5s, it will display the content corresponding to No. N. the digital display tube will display the follow procedure when push SW1 each time. N Display Remark 00 Normal display 01 Indoor unit capacity demand code 02 04 Amendatory capacity demand code The frequency after the capacity requirement transfer The frequency after the frequency limit 05 The frequency of sending to 341 06 Indoor unit evaporator outlet temp.(heating T2, cooling T2B) 07 Condenser pipe temp.(T3) 08 Outdoor ambient temp.(T4) 09 Compressor discharge temp.(T5) 10 AD value of current 11 AD value of voltage 12 Indoor unit running mode code Off:0, Fan only 1,Cooling:2, Heating:3 13 Outdoor unit running mode code 14 EXV open angle 15 Frequency limit symbol Off:0, Fan only 1,Cooling:2, Heating:3, Forced cooling:4 Actual data/4. If the value is higher than 99, the digital display tube will show single digit and tens digit. For example ,the digital display tube show “2.0”,it means the EXV open angle is 120×4=480p.) Frequency limit Bit7 caused by IGBT radiator Frequency limit Bit6 caused by PFC The display value is hex Frequency limit Bit5 number. For example, caused by T4. the digital display tube Frequency limit Bit4 show 2A,then Bit5=1, caused by T2. Bit3=1, Bit1=1. Frequency limit It means frequency limit Bit3 caused by T3. caused by T4,T3 and Frequency limit current. Bit2 caused by T5. Frequency limit Bit1 caused by current Frequency limit Bit0 caused by voltage 16 DC fan motor speed 17 IGBT radiator temp. 03 116 Display running frequency, running state or malfunction code Actual data*HP*10 If capacity demand code is higher than 99, the digital display tube will show single digit and tens digit. (For example, the digital display tube show “5.0”,it means the capacity demand is 15. the digital display tube show “60”,it means the capacity demand is 6.0) If the temp. is lower than 0 degree, the digital display tube will show “0”.If the temp. is higher than 70 degree, the digital display tube will show “70”. If the temp. is lower than -9 degree, the digital display tube will show “-9”.If the temp. is higher than 70 degree, the digital display tube will show “70”. If the indoor unit is not connected, the digital display tube will show: “――” The display value is between 13~129 degree. If the temp. is lower than 13 degree, the digital display tube will show “13”.If the temp. is higher than 99 degree, the digital display tube will show single digit and tens digit. (For example, the digital display tube show “0.5”,it means the compressor discharge temp. is 105 degree. the digital display tube show “1.6”,it means the compressor discharge temp. is 116 degree) The display value is hex number. The display value is between 30~120 degree. If the temp. is Electrical Control System Electrical Control Function 18 Indoor unit number lower than 30 degree, the digital display tube will show “30”.If the temp. is higher than 99 degree, the digital display tube will show single digit and tens digit. (For example, the digital display tube show “0.5”,it means the IGBT radiator temp. is 105 degree. the digital display tube show “1.6”,it means the IGBT radiator temp. is 116 degree) The indoor unit can communicate with outdoor unit well. 19 Condenser pipe temp. of 1# indoor unit If the temp. is lower than 0 degree, the digital display tube will 20 Condenser pipe temp. of 2# indoor unit show “0”.If the temp. is higher than 70 degree, the digital display tube will show “70”. If the capacity demand is 0, , the 21 Condenser pipe temp. of 3# indoor unit 22 1# Indoor unit capacity demand code 23 2# Indoor unit capacity demand code 24 3# Indoor unit capacity demand code Electrical Control System digital display tube will show “0. If the indoor unit is not connected, the digital display tube will show: “――”(heating T2,cooling T2B) Actual data*HP*10 If capacity demand code is higher than 99, the digital display tube will show single digit and tens digit. (For example, the digital display tube show “5.0”,it means the capacity demand is 15. the digital display tube show “60”,it means the capacity demand is 6.0). If the indoor unit is not connected, the digital display tube will show: “――” 117 Troubleshooting 2. Troubleshooting 2.1 Display board 2.1.1 Icon explanation on indoor display board (Super slim cassette). 2.1.2 Icon explanation on indoor display board ( Duct) PRE-DEF indicator(cooling and heating type) or fan only indicator(cooling only type) Timer indicator Alarm indicator Operation lamp Infrared signal receiver Display digital tube Temporary button MANUAL OPERATION TIMER DEF./FAN ALARM 2.1.3 Display board of Ceiling-floor indoor unit 118 Electrical Control System Troubleshooting 2.1.4 Icon explanation on indoor display board (Compact cassette). 2.1.5 Icon explanation on indoor display board (Console) Electrical Control System 119 Troubleshooting 2.2 Indoor unit malfunction For Console(12K) NO. Malfunction Running lamp Timer lamp Defrosting lamp 1 Refrigerant Leakage Detection ☆ ☆ ◎ 2 Open or short circuit of T1 temperature sensor ☆ X X 3 Open or short circuit of T2 temperature sensor X X ☆ 4 Indoor / outdoor units communication error X ☆ X 5 Outdoor fan speed has been out of control X ☆ O 6 Indoor EEPROM malfunction ☆ ☆ X 7 IPM module protection ☆ X ☆ 8 Open or short circuit of T3 or T4 temperature sensor or Outdoor unit EEPROM parameter error ☆ ☆ ☆ 9 Over voltage or over low voltage protection ☆ ☆ O 10 Top temperature protection of compressor ☆ O X 11 Inverter compressor drive protection ☆ ◎ X 12 Indoor fan speed has been out of control. ☆ O ☆ O(light) X(off) ☆(flash at 5Hz) ◎(flash at 0.5Hz) For Compact cassette(12K): NO. Malfunction Defrosting lamp Alarm lamp Running lamp Timer lamp Display(digital tube) 1 Open or short circuit of T1 temperature sensor X X ☆ X E0 2 Open or short circuit of T2 temperature sensor ☆ X X X E1 3 Indoor / outdoor units communication error X X X ☆ E2 4 Full-water malfunction X ☆ X X E3 5 Indoor EEPROM malfunction X X ☆ ☆ E4 6 IPM module protection X O ☆ X E5 7 Open or short circuit of T3 or T4 temperature sensor or Outdoor unit EEPROM parameter error X X ☆ O E6 8 Outdoor fan speed has been out of control ☆ X ☆ O E7 9 Refrigerant Leakage Detection ☆ ☆ O X EC 10 Over voltage or over low voltage protection X O ☆ O P0 11 Top temperature protection of compressor O X ☆ X P1 12 Outdoor current protection ☆ X ☆ ☆ P2 13 Inverter compressor drive error X ◎ X X P4 14 Indoor fan Speed has been out of control. O X ☆ O F5 O (on) 120 X(off) ☆(flash at 5Hz) ◎(flash at 0.5Hz) Electrical Control System Troubleshooting For other models: NO. Malfunction Defrosting lamp Alarm lamp Running lamp Timer lamp Display(digital tube) 1 Indoor / outdoor units communication error X X X ☆ E1 2 Open or short circuit of T1 temperature sensor X X ☆ X E2 3 Open or short circuit of T2 temperature sensor X X ☆ X E3 4 Open or short circuit of T2B temperature sensor X X ☆ X E4 5 Indoor EEPROM malfunction ☆ X X X E7 6 Indoor fan speed is out of control ☆ ☆ X X E8 7 Refrigerant Leakage Detection ☆ ☆ O X EC 8 Outdoor unit malfunction X ◎ X X Ed 9 Full-water malfunction X ☆ X X EE 10 Communication malfunction between main PCB and up-down panel PCB ☆ ☆ ☆ X F0 11 Up-down panel malfunction ☆ ☆ X ☆ F1 12 Up-down panel is not closed ☆ ☆ X O F2 13 Communication malfunction between master unit and slave unit X ☆ X ☆ F3 14 Other malfunction of master unit or slave unit X ☆ ☆ X F4 O (on) X(off) ☆(flash at 5Hz) ◎(flash at 0.5Hz) F0,F1,F2 are only available for super-slim cassette F3,F4 are only available for the unit with TWINS function Note: Digital display is only available for super slim cassette & duct type. Electrical Control System 121 Troubleshooting 2.3 Outdoor unit malfunction 18~36k Display Malfunction or Protection E0 Outdoor EEPROM malfunction E2 Indoor / outdoor units communication error E3 Communication malfunction between IPM board and outdoor main board E4 Open or short circuit of T3 or T4 temperature sensor E5 Voltage protection of compressor E6 PFC module protection (For 36K 1-Phase models) E8 Outdoor fan speed is out of control P0 Top temperature protection of compressor P1 High pressure protection (For 36k models) P2 Low pressure protection(For 36k models) P3 Current protection of compressor P4 Discharge temperature protection of compressor P5 High temperature protection of condenser P6 IPM module protection P7 High temperature protection of evaporator In low ambient cooling mode, the LED displays“LC” or alternative displays between running frequency and “LC”(each displays 0.5s) 122 Electrical Control System Troubleshooting 2.4 Solving steps for typical malfunction 2.4.1 For the indoor unit 2.4.1.1 Open or short circuit of temperature sensor Electrical Control System 123 Troubleshooting 2.4.1.2. Outdoor unit malfunction 124 Electrical Control System Troubleshooting 2.4.1.3. Indoor EEPROM malfunction 2.4.1.4. Full-water malfunction Electrical Control System 125 Troubleshooting 2.4.1.5. Indoor fan speed has been out of control. Index 1: 1.Indoor DC fan motor(control chip is inside fan motor) Measure the resistance value of each winding by using the tester. If any resistance value is zero, the fan motor must have problems and need to be replaced. For other models: 126 Electrical Control System Troubleshooting NO. 1 2 3 4 5 6 Color Red --Black White Yellow Blue For console: 5 4 6 3 1 2 NO. Color 1 Red 2 --- 3 White 4 Blue 5 Yellow 6 Black 2.Indoor DC Fan Motor(control chip is in outdoor PCB) NO. Color Signal 1 Orange Hu 2 Grey Hv 3 White Hw Color Signal Red W Blue V Yellow U 4 Pink Vcc 5 Black GND 1) Release the UVW connector. Measure the resistance of U-V, U-W, V-W. If the resistance is not equal to each other, the fan motor must has problems and need to be replaced. Otherwise, go to step 2. 2) Power on and when the unit is in standby, measure the voltage of pin4-5 in feedback signal connector. If Electrical Control System 127 Troubleshooting the value is not 5V, change the PCB. Otherwise, go to step 3. 3) Rotate the fan by hand, measure the voltage of pin1-5, pin 2-5 and pin 3-5 in feedback signal connector. If any voltage is not positive voltage fluctuation, the fan motor must has problems and need to be replaced. Index2: 1. Indoor DC fan motor(control chip is inside fan motor) Power on and when the unit is in standby, measure the voltage of pin1-pin3, pin4-pin3 in fan motor connector. If the value of the voltage is not in the range showing in below table, the PCB must have problems and need to be replaced. For other models: DC motor voltage input and output NO. Color 1 Red 2 --3 Black 4 White 5 Yellow 6 Blue For console: Signal Vs/Vm --GND Vcc Vsp FG Voltage 192V~380V --0V 13.5-16.5V 0~6.5V 15V 5 4 6 3 1 2 DC motor voltage input and output NO. 128 Color Signal Voltage 1 Red VDC 310V 2 --- --- --- 3 White Vcc 15V 4 Blue FG 15V 5 Yellow Vsp 0-7.5V 6 Black GND 0V Electrical Control System Troubleshooting 2.4.1.6. Refrigerant Leakage Detection Electrical Control System 129 Troubleshooting 2.4.3 For the unit with TWINS function(For the super-slim cassette & duct) 2.4.3.1 Communication malfunction between master unit and indoor unit 2.4.3.2 Other malfunction between master unit and indoor unit One indoor unit displays ”F4”, which means another indoor unit is faulty. Check another indoor unit’s error code and then follow the appropriate solutions to solve the malfunction. 130 Electrical Control System Troubleshooting 2.4.4 For the outdoor unit 2.4.4.1. E0 malfunction E0 display Outdoor EEPROM malfunction Yes If the EEPROM chip is welded on PCB, replace the PCB directly. Otherwise, check whether the EEPROM chip plugged in PCB well? No Insert the EEPROM well Yes Replace the outdoor main board Electrical Control System 131 Troubleshooting 2.4.4.2. E2 malfunction E2 display Indoor / outdoor units communication error Power off, then turn on the unit 5 seconds later(reconnect the power wire).Is the error still displaying after several minutes? Yes Check whether there’s any interference. Such as too many lamps, power transformers? Or the signal wire is too long? Yes Remove interference. Increase the capacity of antiinterference No Adopt shield cable/Shield cable earthing. No Check whether the signal wire is shield cable or whether the shield cable is earthing? Yes Check whether the wire is correct polarity? P to P, Q to Q, E to E? No Correct the connection. Yes Replace the signal wire. No Pull out and insert back. Yes Check whether the signal wire is broken? No Check whether the signal wires insert on PCB well? Yes Replace indoor PCB, is the error distinguished? No Replace the outdoor PCB. 132 Electrical Control System Troubleshooting 2.4.4.3. E3 malfunction Electrical Control System 133 Troubleshooting 2.4.4.4. E4 malfunction 134 Electrical Control System Troubleshooting 2.4.4.5. E5 malfunction (For single phase models) E5 display Voltage protection Check the voltage of outdoor unit power supply, whether the voltage between L(1) and N is about 220~240VAC No Check the power supply Yes Replace the power board, then check whether the system can run normally No Check whether the voltage of IPM board P and N is normal? DC277-356V for 18K/24K/30KBtu/h; DC277410V for 36K/48KBtu/h Yes No Replace bridge rectifiers, and then check whether the system can run normally Yes Yes No Replace IPM board, and then check whether the system can run normally Yes No Replace outdoor main board Electrical Control System Trouble is solved 135 Troubleshooting 2.4.4.6. E5 malfunction (For three phases models) E5 display Voltage protection Check whether the voltage range of P-N on IPM module is normal? DC277-356V for 18K/ 24KBtu/h; DC277-410V for 36KBtu/h No Check the power supply Yes Replace the power board, then check whether the system can run normally No Check whether the voltage range of P-N on IPM module is normal? DC 350-650V Yes No Replace bridge rectifiers, and then check whether the system can run normally Yes Yes No Replace IPM board, and then check whether the system can run normally Yes No Replace outdoor main board 136 Trouble is solved Electrical Control System Troubleshooting 2.4.4.7. E6 malfunction (For 36K 1-phase models) E6 display PFC module protection Check whether the connecting line between main board and the PFC module is connected tightly Yes Check whether the voltage range of P-N on IPM module is normal? DC277- No Connect it tightly, check normal or not No Yes Replace the outdoor main board No Replace the inductance Yes 410V No Check whether the inductance of PFC module is good? If the inductance is good, the resistance of the two ports is 0 Yes Replace the PFC module Electrical Control System Trouble is solved 137 Troubleshooting 2.4.4.8. E8 malfunction DC motor voltage input and output NO. Color Signal Voltage 1 Red Vs/Vm 2 --- --- 140~380V --- 3 Black GND 0V 4 White Vcc 13.5~16.5V 5 Yellow Vsp 0~6.5V 6 Blue FG 15V 138 Electrical Control System Troubleshooting 2.4.4.8. P0 malfunction Electrical Control System 139 Troubleshooting 2.4.4.9. P1 malfunction (For 36k models) 140 Electrical Control System Troubleshooting 2.4.4.10. P2 malfunction (For 36k models) Electrical Control System 141 Troubleshooting 2.4.4.11. P3 malfunction 142 Electrical Control System Troubleshooting 2.4.4.12. P4 malfunction When compressor discharge temperature is higher than 115°C, the unit will stop, and unit runs again when compressor discharge temperature is lower than 90°C. P4 display Temperature protection of compressor discharge Check whether the compressor discharge temp. is more than 115°C ? Check whether the refrigerant is leak Yes Yes Stop leaking and add refrigerant No Check whether the wiring connection is right between compressor discharge temp. sensor and PCB according to wiring diagrams? No Correct the wiring connection Yes Judge: The discharge temp. sensor is broken Method: Check whether the resistance of compressor discharge temp. sensor is right refer to the Appendix 2 No Replace the compressor discharge temp. sensor Yes Replace outdoor main board Electrical Control System Trouble is solved 143 Troubleshooting 2.4.4.13. P5 malfunction When condenser high temp. is more than 65°C, the unit will stop, and unit runs again when outdoor pipe temp. less than 52°C. 144 Electrical Control System Troubleshooting 2.4.4.14. P6 malfunction (For single phase models) At first test the resistance between every two ports of U, V, W of IPM and P, N. If any result of them is 0 or close to 0, the IPM is defective. Otherwise, please follow the procedure below: Electrical Control System 145 Troubleshooting 2.4.4.15. P6 malfunction (For three phases models) At first test the resistance between every two ports of U, V, W of IPM and P, N. If any result of them is 0 or close to 0, the IPM is defective. Otherwise, please follow the procedure below: P6 display IPM module protection Check whether the voltage range of P-N on IPM module is normal? DC 350-650V Check whether the input power supply is correct? 380-415V, 3N, 50Hz No Regulate it to correct, then check whether the system can work normally? No Yes No Yes Check whether the connecting line between main board and the IPM module is connected tightly No Connect it tightly, check ok or not? Check whether the power supply line is connected correctly and tightly Connect it correctly and tightly, check ok or not? No Yes No Check whether the connecting line of the compressor is connected correctly or tightly No Yes Connect it well, check ok or not? No Check whether the lines in E-part box are connected tightly No Connect it tightly, check ok or not? Yes No Yes Replace the IPM module, check whether the system can work normally? No Check whether the bridge rectifiers are normal? Use the multimeter to measure the resistance between each two terminals, check whether there is the condition that value of resistance is 0 No No Yes Replace the main board; check whether the system can work normally? Yes Yes Replace the bridge rectifiers Check whether the 3300µF/400V electrolytic capacitor is normal? No Replace the compressor, check whether the system can work normally? No Replace this electrolytic capacitor Yes Trouble is solved Yes 146 Electrical Control System Troubleshooting 2.4.4.16. P7 malfunction P7 display High temperature protection of evaporator Whether compressor operates? No Whether the connection is good? Yes Yes Check whether the heat exchanger is dirty, the airoutlet is blocked and the indoor fan is running normal? Check the resistance value of the sensor via Appendix 1,Is it normal? No Reconnect and retest No Replace the temperature sensor No Clean the heat exchanger and the air-outlet Yes Whether the indoor PCB is normal? No Replace the indoor PCB Check whether the indoor fan is running normal No Check refrigerant system (such as clogging of capillary etc.) Electrical Control System 147 Troubleshooting Appendix 1 Temperature Sensor Resistance Value Table (℃--K) 148 ℃ K Ohm ℃ -20 20 K Ohm 12.6431 60 K Ohm 2.35774 100 K Ohm 0.62973 -19 115.266 108.146 ℃ ℃ 21 12.0561 61 2.27249 101 0.61148 -18 101.517 22 11.5000 62 2.19073 102 0.59386 -17 96.3423 23 10.9731 63 2.11241 103 0.57683 -16 89.5865 24 10.4736 64 2.03732 104 0.56038 -15 84.2190 25 10.000 65 1.96532 105 0.54448 -14 79.3110 26 9.55074 66 1.89627 106 0.52912 -13 74.5360 27 9.12445 67 1.83003 107 0.51426 -12 70.1698 28 8.71983 68 1.76647 108 0.49989 -11 66.0898 29 8.33566 69 1.70547 109 0.48600 -10 62.2756 30 7.97078 70 1.64691 110 0.47256 -9 58.7079 31 7.62411 71 1.59068 111 0.45957 -8 56.3694 32 7.29464 72 1.53668 112 0.44699 -7 52.2438 33 6.98142 73 1.48481 113 0.43482 -6 49.3161 34 6.68355 74 1.43498 114 0.42304 -5 46.5725 35 6.40021 75 1.38703 115 0.41164 -4 44.0000 36 6.13059 76 1.34105 116 0.40060 -3 41.5878 37 5.87359 77 1.29078 117 0.38991 -2 39.8239 38 5.62961 78 1.25423 118 0.37956 -1 37.1988 39 5.39689 79 1.21330 119 0.36954 0 35.2024 40 5.17519 80 1.17393 120 0.35982 1 33.3269 41 4.96392 81 1.13604 121 0.35042 2 31.5635 42 4.76253 82 1.09958 122 0.3413 3 29.9058 43 4.57050 83 1.06448 123 0.33246 4 28.3459 44 4.38736 84 1.03069 124 0.32390 5 26.8778 45 4.21263 85 0.99815 125 0.31559 6 25.4954 46 4.04589 86 0.96681 126 0.30754 7 24.1932 47 3.88673 87 0.93662 127 0.29974 8 22.5662 48 3.73476 88 0.90753 128 0.29216 9 21.8094 49 3.58962 89 0.87950 129 0.28482 10 20.7184 50 3.45097 90 0.85248 130 0.27770 11 19.6891 51 3.31847 91 0.82643 131 0.27078 12 18.7177 52 3.19183 92 0.80132 132 0.26408 13 17.8005 53 3.07075 93 0.77709 133 0.25757 14 16.9341 54 2.95896 94 0.75373 134 0.25125 15 16.1156 55 2.84421 95 0.73119 135 0.24512 16 15.3418 56 2.73823 96 0.70944 136 0.23916 17 14.6181 57 2.63682 97 0.68844 137 0.23338 18 13.9180 58 2.53973 98 0.66818 138 0.22776 19 13.2631 59 2.44677 99 0.64862 139 0.22231 Electrical Control System Troubleshooting Appendix 2 Unit: ℃---K Discharge temp. sensor table -20 542.7 20 68.66 60 13.59 100 3.702 -19 511.9 21 65.62 61 13.11 101 3.595 -18 483 22 62.73 62 12.65 102 3.492 -17 455.9 23 59.98 63 12.21 103 3.392 -16 430.5 24 57.37 64 11.79 104 3.296 -15 406.7 25 54.89 65 11.38 105 3.203 -14 384.3 26 52.53 66 10.99 106 3.113 -13 363.3 27 50.28 67 10.61 107 3.025 -12 343.6 28 48.14 68 10.25 108 2.941 -11 325.1 29 46.11 69 9.902 109 2.86 -10 307.7 30 44.17 70 9.569 110 2.781 -9 291.3 31 42.33 71 9.248 111 2.704 -8 275.9 32 40.57 72 8.94 112 2.63 -7 261.4 33 38.89 73 8.643 113 2.559 -6 247.8 34 37.3 74 8.358 114 2.489 -5 234.9 35 35.78 75 8.084 115 2.422 -4 222.8 36 34.32 76 7.82 116 2.357 -3 211.4 37 32.94 77 7.566 117 2.294 -2 200.7 38 31.62 78 7.321 118 2.233 -1 190.5 39 30.36 79 7.086 119 2.174 0 180.9 40 29.15 80 6.859 120 2.117 1 171.9 41 28 81 6.641 121 2.061 2 163.3 42 26.9 82 6.43 122 2.007 3 155.2 43 25.86 83 6.228 123 1.955 4 147.6 44 24.85 84 6.033 124 1.905 5 140.4 45 23.89 85 5.844 125 1.856 6 133.5 46 22.89 86 5.663 126 1.808 7 127.1 47 22.1 87 5.488 127 1.762 8 121 48 21.26 88 5.32 128 1.717 9 115.2 49 20.46 89 5.157 129 1.674 10 109.8 50 19.69 90 5 130 1.632 11 104.6 51 18.96 91 4.849 12 99.69 52 18.26 92 4.703 13 95.05 53 17.58 93 4.562 14 90.66 54 16.94 94 4.426 15 86.49 55 16.32 95 4.294 16 82.54 56 15.73 96 4.167 17 78.79 57 15.16 97 4.045 18 75.24 58 14.62 98 3.927 19 71.86 59 14.09 99 3.812 Electrical Control System B(25/50)=3950K R(90℃)=5KΩ±3% 149 Controller 3. Controller 3.1Wireless Remote Controller 3.1.1RG36C2/BGE 150 Electrical Control System Controller Electrical Control System 151 Controller 152 Electrical Control System Controller 3.2 Wired Remote Controller (for Duct type unit) 3.2.1 KJR-12B Name and functions of buttons on the wire controller 1. Mode button: When press this button, the operation mode change as the following sequence: AUTO 2. 3. 4. 5. 6. 7. COOL DRY HEAT FAN Remark: For the cooling only model, the heating mode is skipped. Timer on button: Press this button, timer on function is active. Then every press, the time increase 0.5h, after 10h, 1h increasement after each press. If cancel this Function, just set it to "0.0" Timer off button: Press this button, timer off function is active. Then every press, the time increase 0.5h, after 10h, 1h increasement after each press. If cancel this function, just set it to "0.0" . Follow me button: When under cool, heat and auto mode, press this button, follow me function is active. Press again, this function is ineffective. Electrical heater button: If press this button in heat mode, electrical heater function become ineffective. Reset button (hidden): Use a 1mm stick to press in the little hole , then the current setting is canceled . The wire controllers enter into original state. ON/OFF button: When in off state, press this button, the indicator is on, the wire controller enter into on state, and send setting information to indoor PCB. When in on state, press this button, the indicator is off, and send instruction. If timer on or timer off has been set, it cancel this setting then send instruction to stop the machine. Electrical Control System 153 Controller 8. Adjust button: Set indoor temperature up. If press and hold on, it will increase at 1degree per 0.5 second. 9. Adjust button: Set indoor temperature down. if press and hold on, it will decrease at 1degree per 0.5 Second. 10. Swing button: First press, start swing function; second press, stop swing. (Match to some model with swing function). 11. Economy operation button: press this button, the indoor unit operates in economy mode, press again, exit this mode (it may be ineffective for some models) 12. Fan speed button: press this button consecutively; the fan speed will circle as follow: 13. Lock button (hidden): When you push the LOCK button, all current settings are locked in and the wire controller does not accept any operation except that of the LOCK button. Use the lock mode when you want to prevent setting from being changed accidentally or play fully. Push the LOCK button again when you want to cancel the LOCK mode. Name and function of LCD on the wire controller 1. 2. 3. 4 5. 6. 7. Operation mode indication: When press” MODE” button, the following mode can be selected in circle. Auto Cool Dry Heat Fan only Auto. Auto→ Cool→ Dry →Heat→ Fan only →Auto For cooling only model, heat mode is skipped. Timer: When adjust setting on time or only on time is set, the “ON” is lighted. When adjust setting off time or only off time is set, the” OFF" is lighted. If on and off timer are both set, the “ON” and “OFF” are both lighted. Follow me function: There is a temperature sensor inside the wire controller, after setting temperature, it will compare the two temperatures, and the space of wire controller will be the same as setting temperature. It is available under cooling, heating, auto mode. ON/OFF indication: When it is on, the icon display, otherwise it is extinguished. Fan speed indication: There are four fan modes: low, middle, high, auto. For some models, no middle fan then the middle fan is seen as high speed. Lock: When the "LOCK" button is pressed, the icon appears and other buttons is unable, press again, the icon disappears. Temperature display zone: Generally it displays setting temperature; it can be adjusted by press temperature button▲and▼ .But in fan mode, no display here. Remark: 154 Electrical Control System Controller The wired controller will reset to factory setting with auto mode, auto fan and 24℃ setting temperature when the air conditioner restarts after power failure. And this may cause inconsistent displays on the wired controller and on the air conditioner. You need to readjust the running status through the wired controller. Installation Installation Notice: When the air conditioner needs the constant frequency wire controller, be sure adding a wire joint with 5 terminal named A, B, C, D, E in indoor unit, and fixing an infrared emitter whose anode and cathode connecting with A and B near the receiver in the indoor unit switch board, then connecting the terminal +5v, GND, Run in the switch board to C,D,E respectively. NOTE ●The connecting wire should be a little longer as to take away the switch board easily for maintenance. ●The connecting wire should be a little longer as to take away the controller easily for maintenance. Electrical Control System 155 Controller LFIS-B-1401 156 Electrical Control System