1
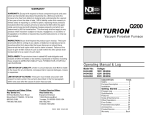
VSTP & CONNECT Platform User Manual
Version: v1.1
Date: 20/10/2008
Author: Intrasoft International SA
CONNECT Platform
User Manual
Connect Platform – User Manual
Page 1 of 1
VSTP & CONNECT Platform User Manual
Version: v1.1
Date: 20/10/2008
Author: Intrasoft International SA
Glossary
Table 1. Glossary of commonly used terms
Terms
Rules
Actions
Conditions
Durations
Placeholder
Object
Reference Image
Simple Content
Phenomena
Representations
Variable
Representations
Educator
Learner
Explanation
A complete set of properties describing interactivity. It is
composed of: placeholder, object, actions and duration.
Actions refer to the actions of a mobile AR unit user which
activate the display of an object in the mobile AR unit view
Conditions are the situation which when true will cause the
appearance of an Object to appear.
Duration is the part of a rule which specifies the time period
(in seconds) an object will remain in the view of the mobile
AR unit from the moment it appears regardless of whether the
action which was triggered is true or not.
Placeholders are called the boxes on the picture of the exhibit
held in the Canvas window, which indicate the approximate
position of the object in space as well as the way it shown.
Objects are containers of multimedia content. Valid media
objects include: images, text, audio, video and 3D objects (3D
shapes).
This image displayed in the Preview Canvas Window offers a
workspace context for the placement of media objects and
serves as a static preview.
Simple content are images, text, audio and video. They are
two-dimensional, static and allow no interaction with the
student. The Teacher provides them during design time.
Phenomena representations are 3-D objects, which show
visually the phenomenon and its mechanics being examined.
They are dynamic in that they change with the changing state
of the exhibit.
Variable representations are meters showing the value of
exhibit variables. These magnitudes are showing through
arrows (vectors), cylinders (bars) and numerically (through
text).
Any person taking it upon themselves to teach science to a
learner
The learner is the person being taught via the EXPLOAR
pedagogical process.
Abbreviations
Table 2. List of abbreviations
Acronyms
CVD
Aug.
VTSP
AR
CP
EP
Explanation
CONNECT Visual Designer
Augmentation
Virtual Thematic Science Park
Augmented Reality
CONNECT Platform
Educational Pathway
Connect Platform – User Manual
Page 2 of 2
VSTP & CONNECT Platform User Manual
Version: v1.1
Date: 20/10/2008
Author: Intrasoft International SA
RR
CP
Research Report
CONNECT Platform
Common Conventions
Table 3. List of common conventions used throughout the documentation
Symbols
Control Label
Control 1 Æ Control 2
Explanation
The labels of Visual Designer’s controls are printed
in italics
Æ Indicates a sequence of controls, which have to be,
used in a particular order. In this case the user has to
activate first Control 1 and then Control 2.
Warning, please pay attention. Important information
follows to the right.
At this stage this functionality has not been
implemented yet.
This is note.
For proper use make sure you pay attention to abbreviations, glossary and common
conventions as mentioned
Connect Platform – User Manual
Page 3 of 3
VSTP & CONNECT Platform User Manual
Version: v1.1
Date: 20/10/2008
Author: Intrasoft International SA
Information for the General Use of the CONNECT Platform
This section of the User Guide (UG) provides general information regarding the CONNECT Platform (CP) as
well as an introduction to the documentation.
The current CP release is available on the Internet at the following address: http://connect.iisa-innov.com. In
order to use the CP, the user must utilize MS Internet Explorer 6.0 or later, Java VM, and sufficient Internet
bandwidth (equal or more to 2 Mbps).
This manual assumes familiarity with basic computer / Internet usage. No advanced knowledge is necessary for
basic operation. Manipulation of media, such as documents, image or video editing for media upload is not
covered in this documentation. Users should consult the software manuals of their preferred document, image
or video editor software. Moreover, the present documentation does not explain in detail the use of standard
tools such as chat, forums or e-mail. This documentation focuses on the execution of educational activities
using the CP through the use of pathways.
The remaining sections describe CP functionality in a task-oriented manner. It is not an exhaustive inventory of
all available functionality. It aims to explain to the user how to specify the most fundamental components of an
AR Scenario in a complete and detailed manner. The entire process is broken in smaller groups of activities
accomplishing specific tasks. Images showing the tool’s interface at its different stages accompany the task
descriptions. Follow these guidelines for fast and satisfactory results.
Please take note that this platform is under constant development. We will always work hard to keep the
documentation accompanying the CP up to date and complete. However, at the time you read this manual parts
may be outdated or work differently than described herein. You will always be able to access Online Help to
get the latest user information on changes, which have occurred since the writing of this manual.
In the event, you find a something not working as it is supposed or it does not meet your expectations please
help us address it. Send e-mail to [email protected] explaining in what state was the
system when you performed the action, what you did and then what was results. We will try to deal with issues
as quickly as possible.
With kind regards,
The EXPLOAR Team
Connect Platform – User Manual
Page 4 of 4
VSTP & CONNECT Platform User Manual
Version: v1.1
Date: 20/10/2008
Author: Intrasoft International SA
1
CONNECT Platform Introduction
The EXPLOAR project demonstrates an innovative approach that involves visitors of science
museums and science centers in extended episodes of playful learning using advanced ICT. These
advanced ICT tools are the mobile AR unit and the CONNECT Platform. The advanced learning
strategies are explained in the pedagogical report while a chapter is dedicated to the mobile AR unit in
this booklet. This document the focus is on how to use these tools that comprise the CP.
The CP is a web based application whose aim is twofold. It distributes information and organizes
educational activities. It coordinates teachers, students and museum staff in the use of the innovative
technology. This advanced learning environment is termed the CONNECT Virtual Science Thematic
park (VSTP). The CP supports the mobile’s AR system specifications and functionalities as well as
materializes the VSTP’s requirements and procedures by providing the following services over the
web:
1.
2.
3.
4.
5.
6.
Registration and authentication services
Personalization services
Collaborative activities for on-line users
Advanced Messaging Services and Interactive activities
Content Management
Learning Systems Management
In the following sections, the document will provide general context in which the CP operates in and
introduce its components. The following sections provide specific instructions for the operation of the
VSTP and CP. There is a third section which addresses specifically the CVD which is part of the
CONNECT Platform, since this is a major component of the CP.
1.1 CP Context
CP is an application and as such it operates within a certain process, which sets the context for the
application and justifies its features. This section describes the business process in which the CP was
designed to operate in. Moreover, we will attempt to briefly connect its features and modules to the
needs of the project.
The process within which the CP operates starts with anyone waiting to teach science the “EXPLOAR
way”. This person is referred to as the Educator. The Educator can be any person. The project
focuses on connecting formal curricula and informal learning, which places special attention on the K12 teacher; hence in many cases Educator and Teacher become equivalent. Similarly, Learner is the
person receiving the benefits of the education but for our purposes they are equivalent to K-12
students.
The Teacher’s decision to utilize a novel teaching method to teach science in the classroom sets off the
processes. They learn about EXPLOAR, how to use it pedagogically, what it can offer them, what
museums and exhibits are available. If this informational part is successful, the educator will become
excited for the process and will decide to use it. This is the VSTP module for the CP.
Connect Platform – User Manual
Page 5 of 5
VSTP & CONNECT Platform User Manual
Version: v1.1
Date: 20/10/2008
Author: Intrasoft International SA
Once, the educator decides to use the system, they have to register with the system and acquire
credentials. Upon, log in to the CP, they have entered the CP. The CP provides two types of facilities:
the workspace and the toolbox. The workspace helps the educator to manage and guide through the
education processes. The toolbox is a collection of tools provided to facilitate the educational process.
It contains tools for managing the learners and their access rights, content search facilities,
communication facilities (chat, forums and mail) and so on.
The educational process resembles a path called Educational Pathway (EP). Each EP is separated into
four phases Preparatory, Pre-Visit, Visit and Post Visit. The educator’s first task is to prepare the EP,
which occurs in the Preparatory Phase. During this phase the educator creates user accounts for the
learners, assigns them to the specific PE, uploading material for them as well as set up the following
phases.
During the preparatory phase, the educator prepares a lesson plan and specifies the AR experience for
their learners before they got to the museum. The lesson plan is just that a plan which describes what
the educator will do in order to teach the specific scientific phenomenon or subject. Then, they
prepare the AR experience for their students. These experiences are targeted to specific exhibits thus
the educators will have to have made their decision regarding which exhibit at which museum to use
before specifying the learner’s AR experience. The decision will be based on two types of information
provided by the CP:
• The presentation of the exhibits which appears during the creation of a pathway.
• The ability to read through the lesson plans, AR experience videos and educator reports of
other educators who create pathways through the CP.
The CONNECT Visual Designer (CVD) provides the capability of designing the AR Scenario. It
represents a novel approach to the specification of augmented reality experiences. It supplies a large
amount of functionality, thus it is not in this manual. The specification produced with this tool is
transferred to the mobile AR unit, which will reproduce the experience during the visit of the learner at
the museum.
In the Pre-Visit Phase, the educator prepares the learners. They log in to the CP in order to
communicate, share, explore and learn about the educational domain. Through research and
communication, they are to develop ideas about how the phenomena they study work. The platform
serves as a medium to this purpose.
During the Visit Phase, the learners visit the museum. The museum staff who administers the CVD at
that particular museum will load the AR Scenario, the educator prepared in the preparatory phase, on
the mobile AR unit. A learner will wear the mobile AR unit and go to the exhibit for which the AR
scenario was developed. They interact with the exhibit and experience the AR scenario in order to test
their ideas about the phenomena examined. They will collect measurements and pictures in order to
substantiate their claims as well as communicates with learners in remote locations. The CONNECT
platform grants the ability to remote classrooms to see what the learner wearing the mobile AR unit
experiences.
During Post-Visit phase the learner will write a report. The platform will make available the data
collected during the museum visit to the learners. They will include them into their final reports.
Connect Platform – User Manual
Page 6 of 6
VSTP & CONNECT Platform User Manual
Version: v1.1
Date: 20/10/2008
Author: Intrasoft International SA
The figure below demonstrates the above discussion at a conceptual level.
Educator
VSTP
-
Get information on CONNECT
CONNECT Platform
-
Learn about the Exhibits read sample reports and video of the AR options the
exhibit
Read the lesson plans and final reports
View video of past museum visits
Construct Educational Pathways (Define Preparatory, Pre-Visit, Visit and PostVisit activities)
Upload, remove, share and view educational content
Manage student accounts
Communicate using Chat, Forums and E-mail to communicate
CVD
-
Specify an AR Scenario
Upload Simple Content
Define Conditions
Open, edit and delete AR Scenarios
Publish AR Scenarios as well as send them to the mobile AR unit
Connect Platform – User Manual
Page 7 of 7
VSTP & CONNECT Platform User Manual
Version: v1.1
Date: 20/10/2008
Author: Intrasoft International SA
The discussion so far has revolved around the main users of the CP: the educator and the learner. The
system however requires users responsible for the maintenance and proper operation of the system.
This is especially needed since CP is deployed in several locations which co-operated with each other.
These users are the Administrators and their responsibilities include:
• Installation of the CP
• Educator account management and registration
• Making more exhibits available for AR Scenario authoring through the CVD
• Updating the content
• Issuance and collection of the mobile AR unit at the museums
• Upload of the captured data on to the platform
• And may be even content development
This document does not explain the CP features geared towards the administrator.
2
VSTP Tutorial Section
The VSTP is in an eye-catching interface, which introduces the features of the project to perspective
users. It is divided into 3 areas. The interface is shown below.
Figure 1. VSTP interface
On the left hand side, there are five links:
• Overview: This is an introduction to the educational objectives of the EXPLOAR project.
• About the Project…: The information here introduces the main work carried out within the
framework of EXPLOAR project
• Teacher Registration: Potential users enter their information here in order to register
themselves with the CP and receive a username and password.
Connect Platform – User Manual
Page 8 of 8
VSTP & CONNECT Platform User Manual
Version: v1.1
Date: 20/10/2008
Author: Intrasoft International SA
Figure 2. CP registration
•
Login: users who already have credentials enter the system here.
Figure 3. CP Log in interface
•
EXPLOAR Project Website: Directs the user to the EXPLOAR Dissemination site.
Connect Platform – User Manual
Page 9 of 9
VSTP & CONNECT Platform User Manual
Version: v1.1
Date: 20/10/2008
Author: Intrasoft International SA
The four buttons on the bottom right corner of the interface contain information regarding each of the
4 exhibits included into the system. These are:
• Airfoil at @Bristol
• Hot air balloon at HEURIKA
• Air track at Eugenidis Foundation
• Bio tube at Vajxo
Each of these buttons when clicked present information regarding the specific exhibit. These
descriptions are available via clicking on the part of the image above depicting each of the exhibits.
Connect Platform – User Manual
Page 10 of 10
VSTP & CONNECT Platform User Manual
Version: v1.1
Date: 20/10/2008
Author: Intrasoft International SA
3
CONNECT Platform Tutorial
The CP has been implemented to support the educator in setting up innovative educational pathways
educational pathways (please also refer to scenario deliverable). In particularly, the software is
modelled around “standard visit pathway” that any visitor may perform during a science museum
visit and it is flexible in accommodating the “remote visit pathway pattern” which is one of the main
implementation scenarios of the EXPLOAR project. This tutorial walks the educator through setting
up a standard visit pathway.
We will start with a brief introduction to the organization of the activities necessary to set up an
educational pathway. It will include the explanation of concepts to aid understanding. Then, the steps
of the procedure will be described along with clarifying notes, cautions and warnings.
3.2.1 Pre-requisites
Before, we begin make sure your computer has Internet browser installed and has access to the
internet. If your browser blocks pop-up windows, you will need to allow them when working with the
CP. It is recommended that your display’s resolution is adjusted to 1152x864. Basic familiarity with
computers and how to browse the Internet will be adequate for completing this tutorial. However, it
is strongly recommended you review the pedagogical reports accompanying this project and follow
the recommendation therein.
3.2.2 Entering the CONNECT Platform
If you are ready lets proceed:
1. Make sure you are connected to the Internet.
2. Open Internet explorer.
Remember to access the tool with IE 6.0 +, enable pop-ups and
have Java installed.
3. Direct your browser to http://connect.iisa-innov.com/.
The browser should load the following screen in Figure 3. CP Log in interface. A username
and password will be provided to you upon request but for the purposes of this training
exercise we will use a default account “teacher” with password “123” (remove the quotations
when typing in the username and password).
3.2.3 Introduction to the CP Interface
After entering in CP, the first screen encountered is the following.
Connect Platform – User Manual
Page 11 of 11
VSTP & CONNECT Platform User Manual
Version: v1.1
Date: 20/10/2008
Author: Intrasoft International SA
User
information
Pathway
Management
Tools
available to
the user.
Individual
Pathway
Phases
Work area
Last Login
information
Figure 4. CONNECT Platform Interface Introduction
Upon entering in the CP, the system provides the user with a number of status information.
• Firstly, the “Title” field informs you in which mode the system is in. On the top left hand
corner notice the label “Connect@ Educator” informing that the user entered as in the
educator’s i.e. Teacher’s role.
• In the line below, the platform informs the user of the account name with which they are
currently logged into the system.
• The “User Name” display is followed on the right by the Settings button, which allows the
Teacher to personalize the tools and manage their own profile.
• The users can logout of the CP by clicking the Logout button at the end of the same line.
• At the bottom left of the window the user can view the last time s/he logged. This information
may help the user identify authorized access to the CP with their credentials.
Further down, the screen is divided into three sections. The middle area, which is by far the largest,
serves as a work area, while the areas to the left and to the right provide access to tools. On the left,
the user can find a workspace assisting to set up a pedagogical pathway (see sections 1.1.4-8). On the
opposite side (on the right), the platform makes available communication, collaboration and AR
scenario tools used in conducting the pathway.
Connect Platform – User Manual
Page 12 of 12
VSTP & CONNECT Platform User Manual
Version: v1.1
Date: 20/10/2008
Author: Intrasoft International SA
3.2.4 Manage a Educational Pathways
Every time, you would like to create another educational experience through EXPLOAR, you will
have to create another Educational Pathway (EP). This concept is central in the CP because it
organizes all information relating to the learners’ educational experience. For example, it is used to
group multiple participating students as well as relevant educational material. An EP consists of four
phases, which occur sequentially: Preparatory, Pre-Visit, Visit and Post-Visit Phase. An educator can
have multiple EPs running concurrently at differing phases.
Now, we will discuss how to create, delete, edit and navigate between multiple EPs.
To create a new EPs simply click on the New Pathway button. You will be asked to enter the
following information:
1. Exhibit: You can choose the exhibit on which this EP relates to for the list of available exhibits
as soon in the figure below:
Download of
visit video
Download of
sample lesson
plans.
Figure 5. Exhibit selection
For each exhibit, the system provides videos of the AR experience which can accommodated
by the system and the exhibit. Additionally, sample lesson plans are available for the teachers
in order to understand what teaching options the exhibit offers.
Connect Platform – User Manual
Page 13 of 13
VSTP & CONNECT Platform User Manual
Version: v1.1
Date: 20/10/2008
Author: Intrasoft International SA
Check the option on the left and click on Next at the bottom in order to confirm the exhibit
selection.
The user can see which exhibit was selected and then they have to enter the following
2. Title: This is a simple pathway name.
3. Date of Visit: This is the date the learners are expected to visit the museum and have their AR
experience.
4. Description: Here, a short description of the pathway is entered.
The VSTP will assist you with the determining the visit day while
arranging for a visit to the museum is to be done entirely outside the
platform. Also note, the CONNECT platform is oblivious of the phase
pathway is actually on.
After entering the above information, click on the Save button to save or the Cancel button to cancel
the creation of the pathway.
To navigate to an EP, you only need to use the drop down in Educational Pathway Management. The
drop down allows you to select from the pathways available the one to make active. The pathway’s
summary will be brought to the screen.
Connect Platform – User Manual
Page 14 of 14
VSTP & CONNECT Platform User Manual
Version: v1.1
Date: 20/10/2008
Author: Intrasoft International SA
Having selected an EP, you can delete it by clicking on the Delete Current Pathway. The system will
inform you when it is deleted.
Selecting a pathway and then clicking on View Current Pathway’s Details will generate a summary of
rights and content per phase relating the selected pathway.
Finally, you can edit the pathway selected by clicking on Edit Current Pathways. This action will
bring you to the same dialogue with the one presented during the new pathway creation process. The
fields this time are populated and the information is editable. Pressing the Save button will save the
changes while the cancel button will simply discarded them.
3.2.5 Preparatory Phase
Having created a EP in section 3.2.4, you have taken the first step in establishing an educational
pathway. Currently, you are at the preparatory phase of EP. In this phase, as the educator you will
need to:
1. View prior EPs, lesson plans, task reports and learning material associated with this type of EP.
To do this navigate to the Workspace on the left and click on the Preparatory Phase bar to
open it, if it is not already open. The first icon reads Infomation click on it.
Link to
Educational
pathway
information
including lesson
plans
Link to previous
pathway Lesson
Plans, Video and
Reports.
Link to
previous Task
Reports from
other EPs
which have
occurred
Figure 6. Screen for Preparatory Phase -> Info
Connect Platform – User Manual
Page 15 of 15
Link to
additional
learning
material which
have been used
in other EPs
VSTP & CONNECT Platform User Manual
Version: v1.1
Date: 20/10/2008
Author: Intrasoft International SA
During this stage of the Preparatory Phase, you are expected to research information regarding
previous EPs, in order to develop a pathway fitting your students.
The figure below shows the CP display on previous pathway Lesson plans, videos from visits
and educator reports.
Figure 7. Overview of other pathways
These are documents uploaded by the educator on the CP. In the figure, many of these reports
are missing because they were not requesting in the past. Moreover, they are not mandatory
now. The educator is responsible to enter this information as the pathway proceeds. If a lesson
plan, video or report has not been uploaded the entry on the table reports Not Filed and in
parenthesis upload. Clicking on upload it will bring up the dialogue below which will ask you
for the location of the lesson plan, its title and a description. In this case, you want to answer
the questions “Is this the lesson plan” with a yes as shown below.
Connect Platform – User Manual
Page 16 of 16
VSTP & CONNECT Platform User Manual
Version: v1.1
Date: 20/10/2008
Author: Intrasoft International SA
Figure 8. Uploading a lesson plan
2. Having researched Educational Pathway and evaluated its appropriateness for your own
students, you will have to assign the students who will be participating in your EP. To do this
click on the icon below the Info icon termed Learners.
Connect Platform – User Manual
Page 17 of 17
VSTP & CONNECT Platform User Manual
Version: v1.1
Date: 20/10/2008
Author: Intrasoft International SA
Figure 9. Screen for Preparatory Phase -> Learners
As you can see there are two lists of users the “Learners” and the “Assigned Learners”. The list of
“Learners” contain all learners you have created accounts for into platform. You can select them and
using the “>>” and “<<” buttons you can assign them to the current EP.
To add a new learner simply press the Add button. A dialogue will appear asking for the new
learners first and last name (see figure 5).
Connect Platform – User Manual
Page 18 of 18
VSTP & CONNECT Platform User Manual
Version: v1.1
Date: 20/10/2008
Author: Intrasoft International SA
Figure 10. Preparatory Phase-. Users-> Add User
When you input their names press Add Learner to add the user or Close to cancel the process.
In the event, you have a number of learners that you need to enter the system allows you to
create them all at once by inputting in a text box comma separated pairs of last and first names.
You probably have noticed that some learners’ names are followed by a “(not registered)”
label. These learners have been inputted into the platform but since they have not attempted to
enter the platform they have not registered and their accounts have not been activated.
In order to make any changes in the first or last name of a user you have just created, you only
need to select their name form the “Learners” list and press the Edit button. An interface
similar to the one in figure 5 will appear which will allow you to edit the user’s names.
To delete a learner, select them from the learner’s list box and press the Delete button. You
will be prompted for conformation, press OK to delete and Cancel to cancel.
After, you have compiled the desired list of participants; press Save to save your selections.
3. Now, it is time to prepare the Pre-Visit phase. Click on the icon below the Learners icon
called Pre-Visit. The figure below shows your current work area.
Connect Platform – User Manual
Page 19 of 19
VSTP & CONNECT Platform User Manual
Version: v1.1
Date: 20/10/2008
Author: Intrasoft International SA
Figure 11. Screen for Preparatory Phase->Pre-Visit
There are four activities which you in the role of the educator can use to ready the Pre-Visit phase.
From Figure 11it can be seen they are:
1. “Pre-Visit Introductory Text”: Here, the platform makes available to you an editor where you
enter and format text which will be presented to the learners assigned to the EP when the Pre-Visit
phase is entered.
You type in the message, you want them to see and save it pressing the Save button.
2. “Related Documents”: The educator can add documents or files they want their learners to see
during this phase. In the figure below, you can see the work area for this option.
Connect Platform – User Manual
Page 20 of 20
VSTP & CONNECT Platform User Manual
Version: v1.1
Date: 20/10/2008
Author: Intrasoft International SA
Figure 12. Preparatory->Pre-Visit-> Uploaded Documents
On the list box on the left, you can see the files uploaded on the CP and ready to be used.
Selecting any of those files and using the “>>” and “<<” buttons will move them into the
list box in the middle which shows the files selected to be shown to the learners during the
Pre-Visit phase. Selecting a file in these list boxes will show you its name, title and
description on the right.
If you want to include a file, which is not present in the list box in the left (show files
available on the platform), pressing the Upload New File button. It will bring up a
dialogue box allowing you to associate a title and a description with a new file and upload
it on the platform.
In the dialogue which can be seen at the bottom right of Figure 12, it
should be noted that in this case the answer to the question “Is this the
Lesson Plan?” is “No”. Selecting “yes” here will lead to storing the
uploaded file as a lesson plan.
Once, you have selected all appropriate files for this phase, you can save your choices
through the Save button at the end of the page.
Connect Platform – User Manual
Page 21 of 21
VSTP & CONNECT Platform User Manual
Version: v1.1
Date: 20/10/2008
Author: Intrasoft International SA
3. “Allowed Collaboration”: Provides a way for the educator to limit the learners’
communication options as well as sources of information. The scope of these limitations is
bound to the current phase. The available communication options are:
a. Task
b. Chat
c. Forums
d. E-mail to Student
e. E-mail to Teacher
f. E-mail to Expert
Check the options you would like to allow and press Save.
This is part of the platform is under construction.
4. “Web Sites”: At this location, the educator can add links for his/her learners to visit. The
links added here will be presented to the learners assigned to the current EP when the
pathway enters this phase. Pressing the Add Web Site will bring up a dialogue that will
allow you to enter the URL, its title and save it.
At this point, you completed all tasks necessary in order to prepare the Pre-Visit phase of an EP. To
complete the preparation of the entire EP, you will have to conclude the preparation for the remaining
phases. The activities and interfaces for following phases are the same with the above descriptions.
3.2.6 Pre-Visit Phase
The preparation for the pathway has been completed. You assigned the participating learners and have
informed them of their user names and passwords. The learners take over. They start exchanging
information, collaborating, researching, learning always working towards producing their research
plan. They will be uploading versions of those documents plus other content on the CP as they
progress towards a final idea of what they will have to do in front of the exhibit wearing the mobile
AR unit.
Upon entering the pre-visit phase, the reminder below appears:
Connect Platform – User Manual
Page 22 of 22
VSTP & CONNECT Platform User Manual
Version: v1.1
Date: 20/10/2008
Author: Intrasoft International SA
Figure 13. Entering Pre-visit Phase
This is to remind the educator that even though they are already entering the actual pre-visit phase they
have upload their lesson plan. Clicking OK will lead to the upload dialogue. Cancelling will have no
effect the educator can come back later and upload their lesson plan.
The platform makes the learner-uploaded files for the current pathway available to you, the educator.
Navigate to the workspace tool bar Pre-Visit->Research Plans. The next figure shows the interface:
Connect Platform – User Manual
Page 23 of 23
VSTP & CONNECT Platform User Manual
Version: v1.1
Date: 20/10/2008
Author: Intrasoft International SA
Figure 14. Pre-Visit Phase->Research Plans
All content listed for you in the work area with the following information about them:
1. Set Global Access: For each piece of content you have the right to make it available for
viewing to the remaining platform users, if you so choose.
2. Type: It informs you what type of file is the one uploaded.
3. Filename: Displays the filename of the document.
4. Title: Shows the title entered for the file.
5. Description: Presents the description entered for the file.
6. The last column consists of arrows pointing downwards. Pressing on this arrow will
initiate the download of the file to the computer you are working on.
The save button at the end of the page allows you to store the changes you may have affected on the
“Set Global Access” column. In the figure above, students have not uploaded any research palns.
3.2.7 Visit Phase
The Pre-Visit was completed with the completion of Research Plans. It is time for the learners to visit
the exhibit at the museum, wear the mobile AR unit and execute their plans. The pedagogical
activities continue at the museum and off the platform. You, the educator, and the remaining
classroom can follow the learners progress from the classroom as well as communicate with them.
Connect Platform – User Manual
Page 24 of 24
VSTP & CONNECT Platform User Manual
Version: v1.1
Date: 20/10/2008
Author: Intrasoft International SA
At the workspace tool bar Visit-> Monitor, you can establish audio visual communication with learner
wearing the mobile AR unit.
The audio-visual communication between the classroom and the
mobile AR unit user is unidirectional.
3.2.8 Post-Visit Phase
The learner has returned from the museum visit. They experimented and collected data. It is time to
author a Research Report (RR). The learners will upload image, videos, documents and other content
in files of varying formats while trying to formulate their conclusions into the RR. The platform
makes available these files plus the data collected during the museum visit to the educator.
Clicking on the Post-Visit button will bring up the following screen:
Figure 15. Post-visit Phase
In the workspace tool bar, pressing Post-Visit-> Experimental Data allows to bring in from the mobile
AR unit the experimental data and video collected during the museum visit. They are made available
to the learners who use them to create the research reports.
Connect Platform – User Manual
Page 25 of 25
VSTP & CONNECT Platform User Manual
Version: v1.1
Date: 20/10/2008
Author: Intrasoft International SA
In the workspace tool bar, pressing Post-Visit-> Research Reports will present all the research reports
students upload in this phase for the current EP. The interface is exactly the same as the one described
in Figure 14 for the Pre-Visit phase content.
3.2.9 Toolbox
The Toolbox is a series of tools available for you to use at any point regardless of the stage any
particular pathway is. They are pretty much standard in their features, thus descriptions will be
restricted to places where specialized features exist.
The tools are organized in two groups within the Toolbox:
1. General:
Overview: This is the overall list of lesson plans, video visits and reports from previous
pathways.
a. E-mail: The CP does not provide you with an e-mail system but rather with an
interface to your existing mail. In order to set it up request assistance from your system
administrator,.
b. Forum & Chat: These tools are self explanatory and their functionality is standard.
Any moderately experienced Internet user will not have difficulty navigating their
functionality.
c. File management: The educator uploads a number of files containing content pertinent
to the pathways they construct for their learners. All these files are accumulated and
presented collectively under the General->File Management. The interface used to
show the files they have loaded is shown below.
Connect Platform – User Manual
Page 26 of 26
VSTP & CONNECT Platform User Manual
Version: v1.1
Date: 20/10/2008
Author: Intrasoft International SA
Figure 16. General->File Management
Each file is associated with the pathway it was uploaded for. Through here, new files
can be uploaded and old files can be searched using keywords.
d. Learner management: The educator enters learners into the CP as part of the
Preparatory Phase in order to assign them to EPs. All these learners can be managed
from this option. Clicking on Learner Management will introduce the interface below:
Connect Platform – User Manual
Page 27 of 27
VSTP & CONNECT Platform User Manual
Version: v1.1
Date: 20/10/2008
Author: Intrasoft International SA
Figure 17. General->User Management
The information displayed here for each student do not differ much from the
information shown in Figure 9. It is should be noted that here are displayed all the
users entered over time. Therefore the system displays the pathway they are assigned
to.
e. Search: Clicking on the Search icon introduces a simple keyword search tool. It is
enough to enter a number of key words into the text box, optionally select how they are
connected and where to search in then press the Go button. The system return all
documents containing the words you are searching by.
2. Exhibits: In this group currently, you have the option to only see a list of available exhibits.
Thus, under the Toolbox clicking on Exhibits->Exhibits will present the following interface:
Connect Platform – User Manual
Page 28 of 28
VSTP & CONNECT Platform User Manual
Version: v1.1
Date: 20/10/2008
Author: Intrasoft International SA
Figure 18. Toolbox Exhibits->Exhibits
Selecting of the exhibits will bring information regarding the exhibit.
Connect Platform – User Manual
Page 29 of 29