1
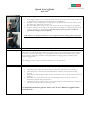
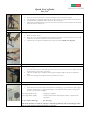
Quick User’s Guide
Flex-Lift ®
Assembly:
1.
2.
3.
4.
Insert the mast in centre box of the base and drive the mast all the way down
Lift the lifting arm manually and push the actuator (motor) outwards until it locks into place
Unfold the base completely until it clicks into place and locks
Check that the red emergency stop button on the control box is released. Turn the red knob
clockwise until it “jumps out”
Folding the base:
1.
2.
3.
Brake the 2 rear wheels.
With one foot push the burgundy release handle at the back of the centre box to the left and
simultaneously push the centre box forwards with the foot.
Un-brake the rear wheels and fold the base with your hands. Mind your fingers!!
Folding the lifting arm:
1.
2.
3.
Use the hand control to electrically drive the actuator into the lowest position. Then manually
lift the hoisting arm to the top position
Lift both security flaps towards the hoisting arm and gently pull the actuator towards the
mast.
Lower the hoisting arm and place the yoke parallel to the mast.
Charging the Batteries:
1.
Once the hand control has been inserted into the wall charger, a permanently lit yellow light
indicates that charging is ongoing. Preferably you should leave the Flex-Lift to charge for a
period of 4-5 hours or overnight.
Yellow light blinks slowly:
Yellow light blinks quickly:
Charging is complete
Control cycle has been interrupted or there is a failure in the
electronics.
In case of Error Message:
See rear page
N.B: If the batteries are cold, the capacity is reduced significantly and you should give them
time to reach ambient temperature before re-charging.
Quick User’s Guide
Flex-Lift ®
Emergency lowering:
1.
2.
3.
4.
In the highly unlikely event of electrical failure after the patient has been hoisted, the Flex-Lift
is equipped with a separate electrical “Emergency Lowering Box”.
In order to use the Emergency Lowering, remove the cable of the actuator from the control
box (The plug is inserted in socket No. 1)
Insert the cable of the actuator in the socket on the side of the “Emergency Lowering Box”
Push the red button on the side of the “Emergency Lowering Box” and lowering takes place
as long as the button is pushed down. The movement is slow, but there is sufficient
power for lowering the arm completely.
N.B.: Contact an authorised dealer for service inspection before using the Flex-Lift again.
Failure Message:
A yellow light blinking quickly indicates either electronic default or that or that the software has not
had time to run a full security check. Remove the hand control from the wall charger and wait approx.
20 seconds or until the yellow light is no longer blinking. Then insert the hand control again. After a
few seconds the yellow light should be either permanently lit (charging mode) or blinking slowly
(trickle charging mode).
If fast blinking persists, contact an authorized dealer for service inspection.
Trouble Shooting:
In the unlikely situation that your Flex-Lift does not work, please try the following:
1.
2.
3.
4.
5.
Check that the mast has been driven all the way down into the centre box of the base.
Check that the bas e has been fully unfolded and has “clicked” into the locked working
position
Check that the red “Emergency Stop” button is released. To do so, turn the button clockwise
and let go
If the Flex-Lift is cold, the batteries may have discharged. Leave the lift to reach room
temperature and then charge the batteries
Check that the plugs of the actuator (motor) and hand control are inserted in the control box
and that they have been driven all the way home.
For detailed information, please refer to the “User’s Manual” supplied with
your Flex-Lift.