1
Operating Instructions
General Safety Instructions
Application
Electrical Connection
Installation
Maintenance
Submersible sump pump
You have bought a Jung Pumpen product and
therefore purchased quality and performance.
Guarantee this achievement by an installation
according to the operating instructions so that our
product can meet your demands to your full
satisfaction. Please note that damages as a result
of poor installation will affect the guarantee.
For this reason please follow the advice of the
operating instructions.
Like any other electrical appliance the operation of
this product can fail by electrical failure or
technical faults. It is wise to always consider
standby pumps, emergency generator and a
control unit fitted with mains independent alarm.
U 6 K NIRO E/1
U 6 K NIRO D/2
U 6 K NIRO ES/1
U 6 KS NIRO DS/2
ID-No. 00226 / 01
ID-No. 00228 / 02
ID-No. 00227 / 01
ID-No. 00229 / 02
19778 - 3.6 - 0401 page 1
Operating Instructions
General Safety Instruction
Safety instructions relevant for operation
This operation manual gives basic instructions that should
be followed carefully during installation, operation and
maintenance. It is essential that this manual is carefully
read by the responsible personnel/operator before
assembly and commissioning. It is always to be kept
available at the installation site.
If hot or cold machine components involve hazards, they
must be guarded against accidental contact.
Guards for moving parts (e.g. coupling) must not be
removed form the machine while in operation.
Any leakage of hazardous (e.g. explosive, toxic, hot) fluids
(e.g. from the shaft seal) must be drained away so as to
prevent any risk to persons or the environment. Statutory
regulations are to be complied with. The pumping station
must be kept tidy and in good condition.
Hazards resulting from electricity are to be prevented
(see for example, the national-specifications or the
regulations of your local electricity supply company.)
Identification of safety instructions in the
operating manual
Safety instructions given in this manual non-available with
which would affect safety are identified by the following
symbol:
Safety instructions relevant for maintenance,
inspections and assembly work
General danger for personnel
Dangerous voltage
Danger for machine and function
It is imperative that signs affixed to the machine, e.g.
rotation arrow
fluid connection symbols
data / approval plate
be observed and kept legible.
Qualification of personnel
An authorized (certified) electrician and mechanic shall
carry out all work. Scope of responsibility and supervision
of the personnel must be exactly defined by the plant
operator. If the staff does not have the necessary
knowledge, they must be trained and instructed, which
may be performed by the machine manufacturer or
supplier on behalf of the plant operator, moreover, the
plant operator is to make sure that the contents of the
operating manual are fully understood by the personnel.
Hazards in the event of non-compliance with
the safety instructions
Non-compliance with the safety instructions may produce
a risk to the personnel as well as to the environment and
the machine and results in a loss of any right to claim
damages or compensation. For example, non-compliance
may involve the following hazards:
- Failure of important functions of the machine/plant
- Failure of specified procedures of maintenance and
repair
- Exposure of people to electrical, mechanical and
chemical hazards
- Endangering the environment owing to hazardous
substances being released.
Safety regulations for owner / operator
All safety instructions contained in this manual, all relevant
national and local health and safety codes and any other
service and safety instructions issued by the plant operator
shall be complied with.
page 2
It shall be the plant operator’s responsibility to ensure that
all maintenance, inspection and assembly work is
performed by authorized and qualified personnel who have
adequately familiarized themselves with the subject matter
by studying this manual in detail.
Any work on the machine shall only be performed when it
is at a stand-still, it being imperative that the procedure for
shutting down the machine described in this manual be
followed.
Pumps and pump units which convey hazardous media
must be decontaminated. All waste emissions such as
used oil must be appropriately disposed of, oil spills must
be cleaned up and emissions to the environment must be
reported. On completion of work all safety and protective
facilities must be reinstalled and made operative again.
Prior to restarting the machine, the instructions listed under
"Electrical Connection" and "Installation" are to be
observed.
Unauthorized alterations and production of
spare parts
Any modification may be made to the machine only after
consultation with the manufacturer. Using spare parts and
accessories authorised by the manufacturer is in the
interest of safety. Use of other parts may exempt the
manufacturer from any warranty or compensation claims.
Unauthorized modes of operation
The reliability of the machine delivered will be only
guaranteed if it is used in the manner intended, in
accordance with clause 1; of this manual: The limit
values specified in the data sheet must under no
circumstances be exceeded.
Warranty claim
Jung Pumpen pumps are long living, high quality
products with expected reliable operation. However,
should the need arise for a warranty claim, please
contact your Jung Pumpen distributor.
Operating Instructions
List of contents
•
General safety instructions............................................................................
page 2
•
List of contents..............................................................................................
page 3
•
Extent of delivery..........................................................................................
Description
Application
Transportation and storage
page 4
-
•
Safety precautions ...................….................................................................
page 5
•
Installation / Maintenance ............................................................................
Sense of rotation
Installation
Checking the seal chamber
Oil changing
Cleaning
page 6 - 10
-
•
Sectional drawing .........................................................................................
page 11
•
Spare parts list ..............................................................................................
page 12
page 3
Operating Instructions
Technical Data
U6KE
Supply voltage [V]
U 6 K ES
U6KD
1 N PE ~ 230
U 6 K DS
3 N PE ~ 400
Power input P1 [kW]
0,70
0,75
Nominal current [A]
3,40
1,30
cos phi
0,94
0,85
r.p.m. [1/min]
2600
2800
weight [kg]
7,80
8,00
max. switch. frequency
30 / h
max. water temperature
35° C
protective system
IP 68
Description
-
This manual applies to a Jung Pumpen submersible
sump pump U 6 K .....with enclosed unassembled
quarter elbow.
-
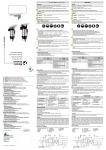
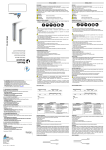
Picture 1: dimensions
-
-
-
For pumping groundwater or water that contains a
high percentage of lime, iron, fibres ......
we recommend, depending on the delivery head
and flow rate, the heavy duty range US/UB 62 251 or US/UB 73 - 253.
At different operating conditions in explosion
hazardous locations please ask the industrial and
trade supervision, the building inspection or the
employer´s liability insurance association.
Allowed temperature of pumped medium:
Continuous operation : 35 °C (S1-operation)
With 10,0 m cable the U 6 pumps are suitable for
outdoor use. (EN 60335-2-41 and 41 A 1)
The pump types with a cable length of 3,0 m are
only for indoor use.
If kept dry the pump can be stored down to a
minimum temperature of -20°C. The flooded pump
must not freeze.
noise emission: >70 dB (A)
If the pumps are used in a swimming
pool or a garden pond the power supply
has to be connected to a residual-current circuit braker
with 30 mA. During the pump operation no persons are
allowed in the water.
Transportation and storage
Application
-
-
The U 6 series is designed for usual domestic
waste water. It must not be used for pumping
sewage water from lavatories. In some countries
sumps with a connection to the public sewer are an
explosion hazardous location. For this application
the explosion proof UFK type is necessary, for
further information ask your distributor.
The pumps can be used for pumping waste water
from dish washers and washing machines.
page 4
The pump can be transported and stored in vertical or
horizontal position.
Always use the shackle to carry the pump,
never lift it at the cable. Make sure the pump
cannot roll or fall over and injure people or
damage property.
If kept dry the pump can be stored down to a minimum
temperature of -20°C. The flooded pump must not
freeze.
For longer periods of storage, the pump must be protected
against moisture and heat. The impeller should be rotated
occasionally to prevent the seals from sticking together.
After a long period of storage, the pump should be
inspected before it is taken into operation. Pay special
attention to the seals and the cable gland.
Follow the instructions of „Operation“.
Operating Instructions
-
-
Please pay attention to the following
regulations at installing the pump(s) or ask
your qualified electrician / distributor.
regulations for electrical installations
(in Germany: VDE 0100, VDE 0165)
VDE 0100 Teil 701, bathrooms
VDE 0100 Teil 704, building ground
VDE 0100 Teil 737, damp rooms
regulations for prevention of accidents in sewage
technical installations
(in Germany: GUV 7.4, GUV 17.6)
guidelines for explosion protection
(in Germany: GUV 19.8)
electrical installations in explosion hazardous areas
(in Germany: Elex V)
-
-
-
Safety precautions
In order to minimize the risk of accidents in connection
with the service and installation work, the following rules
should be followed:
Never work alone. Use a lifting harness, safety line
and a respirator as required. Do not ignore the risk
of drowning.
Make sure there are no poisonous gases within the
work area.
Check the explosion risk before welding or using
electric hand tools.
Do not ignore health hazards. Observe strict
cleanliness.
Bear in mind the risk of electrical accidents.
Make sure that the lifting equipment is in good
condition.
Provide a suitable barrier around the work area,
e.g. guard rail
Make sure you have a clear path of retreat.
Use safety helmet, safety goggles and protective
shoes.
All personnel who work with sewage systems must
be vaccinated against diseases to which they may
be exposed.
A first-aid kit must be close at hand.
Note that special rules apply to installation in
explosive atmosphere.
Follow all other health and safety rules and local codes
and ordinances
Special rules apply to installation in
explosive atmosphere.
Intrinsically safe circuits (Exi) are
normally required for the automatic
level control system by level regulators.
-
A Jung Pumpen control unit gives you the certainty of
design under safety regulations and an acceptance of
work without any problems.
-
Level sensors must be used at low voltage. For
further details please see data sheet / o.m.
Local rules may specify otherwise.
To prevent the pump from blocking after long rest
periods an additional daily trial run unit can be
installed.
Connection only to a mains supply installed in
accordance to the local regulations. For fusing use
only 10 A slow fuses or automatic circuit-breaker
with C or D characteristic. (former G and K)
Because the motor´s nominal voltage is measured
at the terminal board of the pump, please consider
the voltage drop of long supply cables.
The motors of the three-phase a.c. pumps must be
protected by a suitable overcurrent release.
Adjustment as following:
direct start:
+ 10% of the nominal current
star-delta start:
(nominal current x 0,58) + 10 %
If the protective arrangement has trigged, eliminate
the trouble
Replace the cable if the cable jacket is damaged.
Do not pinch the cable or pull it around sharp
bends.
Always install the control unit in a dry and well
ventilated room above the backpressure level.
Never install the control unit in the sump !
-
-
-
-
-
Electrical connection
Following works should only be done by
qualified and authorized electricians.
Jung Pumpen disclaims all responsibility for
work done by untrained or/and unauthorized
personnel.
Heed operating voltage !
(see name plate and additional labels)
Take out the main fuses to isolate the mains supply
from the control unit before repairs or any other
works and make sure it cannot be energized again.
If the pump is equipped with automatic level
control, there is a risk of sudden restart.
Before starting check the efficiency of the
protective arrangements of the pump and the
monitoring equipment. Failure to heed this warning
may cause a lethal accident.
-
-
-
page 5
Do not put the lead ends into water!
Irruption of water may cause malfunctions.
If persons are likely to come into physical contact
with pump or pumped media, the earthed
(grounded) socket must have an additional
connection to an earth- (ground) fault protection
device (GFI).
When pumping near a lake, a jetty, a pond etc. a
safety distance of at least 20 m between the
person and the pump is applicable. Do not place
the pump directly in a pool. Observe the special
safety regulations if used in connection with
swimming pools.
Use the pump only in accordance to the data
stated on the pump´s plate resp. in the technical
data on page 4.
-
Earthing
For safety reasons, the earth conductor should be
appr. 50 mm (2 inch) longer than the phase conductors.
If the motor cable is jerked loose by mistake, the earth
conductor should be at last conductor to come loose
from its terminal. This applies to both ends of cable.
Ensure the correct earthing of the pump and the control
unit.
Operating Instructions
Operation through frequency converter
Electrical connection
If you want to operate pumps through a
frequency converter please contact
your distributor !
If the technical feasibility is already checked, the pumps
have to be ordered as a special version !
They need a special PTC thermistor for motor
protection and a tripping unit with a conformity
certificate ! (e.g. PTB 3.53 – PTC/A)
Use frequency converters only for deceleration !
If three-phase current pumps are operated through a
frequency converter, the r.p.m. change proportional to
the input-frequency.
Frequency converters have a setting range between
nearly 0 Hz and more than
50 Hz. Because of physically reasons the pumps must
not be operated with higher frequencies than indicated
on the name plate. If the frequency rises beyond the
rated value, the absorbed power escalates to the
overload of the motor.
To recognize pumps with a PTC thermistor, please
check the name plate. The last letter in the field of the
motor type must be a K.
Example: motor type: D 160-4/200 K has a PTC
thermistor and can be operated through a frequency
converter. Pumps without this mark cannot be operated
through a frequency converter.
Example: motor type: D 112-4/200
Additionally the pumps have a label at the lead end to
point out the possible frequency converter operation.
Supply voltage of the PTC thermistor: max. 2,5 V !
Picture 2: wiring diagram
Winding thermostat
Because of the built-in thermostat an additional motor
protection is not necessary. Inadmissible high
temperatures and operation times will release the
thermostat. If so, pull out the plug before repairs to
prevent automatically pump restarts.
Heed operating voltage !
(see name plate)
Do not put the plug into water!
Irruption of water may cause malfunctions.
Installation
Sense of rotation (only three-phase models)
Before installation you have to check the sense of
rotation. At correct rotating field the start bump of the
pump is into the opposite direction to the arrow on the
top of the pump. In case of wrong direction of rotation
change two of the three phases of the mains supply.
To ensure the proper installation, consider the
dimensions of the installation. The sump has to be
cleaned from all sediments before any installation or
repair works. The minimum height between the lifting
hook and the floor shall be sufficient to lift the pump out
of the sump. The lifting equipment shall be able to hoist
the pump straight up and down in the sump, preferably
without the need for resetting the lifting hook. Oversized
lifting equipment could cause damages if the pump
should stick when it is lifted.
The lifting equipment has to be securely anchored.
Watch out for the start bump,
which can be powerful
page 6
Operating Instructions
Picture 3: installation example of single unit
Picture 4: installation example with guide rail system
Single unit with guide rail system GR 32 and built-in
level control. Sump dimensions: min. 40 x 50 cm.
If a covering plate is installed intend a sump ventilation.
Single unit with built-in level control
Sump dimensions: min. 40 x 40 cm
If a covering plate is installed intend a sump ventilation.
Picture 6: installation example of duplex unit with
guide rail system
Picture 5: duplex installation example
Duplex unit with guide rail system GR 32 and built-in
level control. Sump dimensions: min. 40 x 50 cm.
If a covering plate is installed intend a sump ventilation
Sump dimensions: min. 50 x 50 cm
If a covering plate is installed intend a sump ventilation.
page 7
Operating Instructions
Always use the shackle to carry the
pump, never lift it at the cable or
the hose !
To lower the pump in a deep tank, use a
rope or a chain.
Stay clear of suspended loads.
Take out the main fuses to isolate the mains supply
both control unit and pump before any works and make
sure it cannot be energized again.
Make sure the pump cannot roll or fall over and injure
people or damage property.
In some installations the water and the pump can be hot.
Bear in mind the risk of burn injuries.
Before installation, please check:
the visible parts of the pump and the installation
sluice and reflux valves
the oil level in the oil chamber
if the impeller moves freely
direction of rotation
The pump should be installed correspondingly to picture
3 and 4. Under DIN EN 12056-2 the pressure tube must
be taken in a loop over the local back-up level and
secured with a reflux valve. Observe the min. flow
speed of 0,7 m/s in the pipe work.
Stationary installation
To remove the pump easily we recommend our guide
rail systems, alternatively a flexible connection
(min. DN 32/1¼“) in the pressure tube near the pump is
conceivable.
Adjust the duck foot bend, drill the holes through the
base of the duck foot bend and install the coupling unit,
the guide tubes and the guide bracket with the enclosed
screws and plugs. Install the pipe work including a ball
reflux valve or a swing type check valve and a stop
valve. Mount the guide rail claw on the pump, fasten the
chain at the shackle and lower the pump via guide tube
into the sump. A fastening device for a hoist simplifies
the pump installation.
Observe the measurements of the level
sensors as shown in the pictures 3, 4, 5
and 6. The sensors must not be
installed below the inlet.
In contrast to the U 6 Niro ES/ DS with
built-in level control, the switching
points of the U 6 K Niro E/D can be
changed if separate float switches are
used.
The control unit must be installed in
well ventilated room above the back
pressure level.
page 8
Mobile operation / deaeration
For mobile operation and retrofitting of existing sumps a
pump base installation is uncomplicated and easy to
maintain. Mount a 90° elbow to the discharge, install
the pressure pipe, fasten the chain at the shackle and
lower the pump into the sump. A fastening device for a
hoist simplifies the pump installation.
The level sensors must not be installed
below the inlet. The control unit must be
installed in well ventilated room above the back
pressure level. Climbing pressure pipe work has to be
installed frost protected.
If a flexible hose is connected to the pump, no reflux
valve must be installed and the hose must have a
gradient to ensure a completely drained off hose when
the pump stops working. When the pump is submerged
again, water in the hose will prevent the deaeration of
the spiral housing and therewith the correct operation of
the pump. For the same reason the pump may not
operate properly when it is submerged in switched on
condition.
In sumps that can dry out, ensure the correct
deaeration of the spiral housing by drilling a Ø 6 mm
hole into the enclosed quarter elbow (part. No. 16687)
at the marked position.
In case of a damage at the pump a
slight quantity of the oil chamber filling
can leak into the pumping medium.
Operating Instructions
Maintenance
Checking the seal chamber
Take out the main fuses to isolate the mains
supply of both, control unit and pump, before
any works and make sure it cannot be
energized again. Check the cable on
mechanical and chemical damages.
At using a chain to lift the pump, please pay
attention to the rules for prevention of
accidents. Chains have to be inspected
regularly by qualified personal.
The motor of the UFK series has the protection
type: flameproof enclosure. Only authorized
workshops or the manufacturer are permitted
to carry out repairs effecting the flameproof ness.
In case of repairs the gap peripheries have to be
inspected for damages, defective parts must be
replaced by genuine spare parts.
Jung Pumpen disclaims all responsibility for work done
by untrained, unauthorized personnel.
The checking of the seal chamber and the changing of
the oil can be done without disconnecting the pump
from the pressure pipe. Take out the, from above
visible, 4 recessed head screws (code-No. 20538).
Now you can take out the whole motor unit including the
top cover. The seal chamber has a filling- and drain
plug with hexagon head (code No. 05296). To check
the mechanical seal put the pump into a horizontal
position and drain the oil into a clean graduated
measuring can. If the quantity of oil corresponds to the
oil originally in place and is not discoloured (milky) the
primary mechanical seal is in good condition.
Milky or yellowish/grey oil indicates that water has
leaked into the oil chamber. In this case the oil filling
should be renewed and inspected again after a further
300 hours. If the oil is again found to be discoloured or
infiltrated by dirty particles the mechanical seal should
be checked for wear and replaced if necessary.
Oil changing
General safety
clean the pump thoroughly
beware of the risk of infection
follow local safety regulations
The pump is designed for use in liquids which can be
dangerous to health. When working on the pump,
prevent injuries to the eyes and skin, by:
wearing goggles and rubber gloves
cleaning the pump before any works
cleaning the parts after dismantling
hold a cloth over the drain plug to prevent splatter
when opening the oil chamber
In case of contact with dangerous liquids:
eye contact: rinse your eyes immediately in running
water for 15 min. Hold your eyelids apart with your
fingers. Contact an eye specialist
skin contact: remove contaminated clothes, wash
your skin with soap and water, seek medical
attention, if necessary
-
To keep the reliability of operation the first oil change of
the seal chamber should be made after 300 working
hours (max. 6 months), after that the oil should be
changed every 1000 working hours and not later than
once a year.
If the pump delivers water with abrasive additions
servicing should be carried out at adequate shorter
intervals. At decreasing flow rates or ascending noises
the impeller has to be checked on wear, and if
necessary, it has to be changed.
page 9
For the change of the oil, use spindle oil make: „ESSO“,
type: Spinesso 22 or other mineral oils with a viscosity
of 22 – 46, quantity: see spare parts list.
Do not overfill the seal chamber,
otherwise the pump can seriously be
damaged.
Cleaning
The foot strainer prevents blockages in the pump, it has
to be cleaned regularly as well as the float switch to
guarantee the trouble free operation with full
performance. To clean the impeller – in case of
blockages or cloggings - take out the 4 recessed head
screws (code-No. 20537) of the foot strainer underside.
Take off the foot strainer, pull out the wear plate and
clean the impeller.
Operating Instructions
Torque ratio MA for screw material:
for M 6, MA =
8 Nm (0.8 kpm)
for M 8, MA =
20 Nm (2.0 kpm)
for M 10, MA =
40 Nm (4.0 kpm)
Malfunctions
Pump does not run
cause:
missing mains supply
remedy: check supply voltage
cause:
faulty fuse (maybe too low)
remedy: check fuse and change if necessary
cause:
damaged supply cable
remedy: changing of the cable gland only by qualified
personnel
Pump runs, but doesn´t deliver water
cause: trapped air in the spiral housing
remedy:
drain off the pressure tube or hose, to ensure
the opening of the reflux valve to deaerate
the spiral housing and ensure the correct
operation of the pump
Blockage of cutting system
cause:
remedy:
solid- or fibrous admixtures blocking the
cutting system and the impeller
check cutting system, as explained under
„adjustment of cutting system“ or „cleaning“
Reduced performance curve
cause:
remedy:
cause:
remedy:
worn-out impeller
change impeller
wrong sense of rotation
change two of the three leads inside of the
plug
Jung Pumpen GmbH & Co
Industriestraße 4-6 - 33803 Steinhagen
XX1
EN 12050-2
Abwasserhebeanlage für fäkalienfreies
Abwasser DN 32
Hebewirkung – siehe technische Daten
Geräuschemissionswert < 70dB (A)
1
Die beiden ersten Ziffern der Pumpen-Nr.
bezeichnen das Produktionsjahr.
page 10
Operating Instructions
Picture 7: sectional drawing
page 11
Operating Instructions
Spare parts list
Qty. U 6 K Niro
Code-No.
Description
E
ES
D
DS
03990
05296
07162
08219
09522
10043
12811
13132
13133
14298
14302
16292
16327
16588
16687
19697
19698
19699
19700
19705
19706
19707
19773
20537
20538
29037
rotary shaft seal, 12 x 24 x 4,5
hexagon head screw M 10 x 20
float
micro switch
10,0 m cable with plug H 07 RN-F3G1,0 (without applic.)
foot strainer
mechanical seal 16 x 18,8
contactor 400 V
oil, 120 cm³
3,0 m cable with shock proof plug H 07 RN-F3G1,0
10,0 m cable with CEE plug H 07 RN-F4G1,0
selector shaft
sheet metal screw 4,8 x 32
3,0 m cable with CEE plug H 07 RN-F4G1,0
quarter elbow 1 ¼“
pump casing
pump casing cover
impeller
control cam
o-ring seal, 138 x 3
o-ring seal, 120,7 x 5,33
circlip M 10
capacitor 8µF, 400 V
oval head screw 3,5 x 16
screw „Amtec“ 5,0 x 20
retainer with top hat rail
1
1
1
1
1
1
1
1
1
2
1
1
1
10
4
-
1
1
1
1
1
1
1
1
1
1
1
1
1
1
1
2
1
1
1
10
4
-
1
1
1
1
1
1
1
1
1
1
2
1
1
10
4
1
1
1
1
1
1
1
1
1
1
1
1
1
1
1
1
1
2
1
1
10
4
1
Replacement kits
14999
oil, Spinesso 22, 1 liter bottle
19779
19780
motor unit E and ES completely, incl. 05296, 12811, 13133, 19699, 19706 and 19707
motor unit D and DS completely, incl. 05296, 12811, 13133, 19699, 19706 and 19707
19781
19782
19783
19784
top cover E completely, incl. 09522, 19773
top cover ES completely, incl. 03990, 08219, 14298, 16292, 19700, 19773
top cover D completely, incl. 13132, 14302, 29037
top cover DS completely, incl. 03990, 08219, 13132, 16292, 16588, 19700, 29037
19787
pump casing completely, incl. 10043, 19697, 19698, 19705 and 20537
19922
19923
set of seals E and D completely incl. 12811, 19705, 19706 and 19707
set of seals ES and DS completely incl. 03990, 12811, 19705, 19706 and 19707
By ordering spare parts indicate type of the pump and the part number.
page 12
Operating Instructions
page 13