1
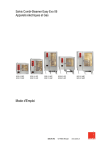
Salvis Combi-Steamer Easy Evo 06 All Electric and Gas Units SCS 1/1 SEP SCS 1/1 SGP SCS 1/1 LEP SCS 1/1 LGP SCS 1/1 HEP SCS 1/1 HGP SCS 2/1 LEP SCS 2/1 LGP SCS 2/1 HEP SCS 2/1 HGP Operating Instructions SALVIS AG CH-4665 Oftringen www.salvis.ch 2 Table of contents 1. Hints on operational safety .............................................................................................................. 5 2.1 Panel with keys / display..................................................................................................... 6 2.2 General operating states..................................................................................................... 7 2.3 Switching on / off................................................................................................................. 7 2.4 Working with programs ....................................................................................................... 7 2.4.1 Changing a program ........................................................................................................... 7 2.4.2 Deleting a program ............................................................................................................. 7 2.4.3 Writing a new program........................................................................................................ 7 2.4.4 Blocking programs .............................................................................................................. 8 2.4.5 Unblocking programs .......................................................................................................... 8 2.5 Manual operating ................................................................................................................ 8 2.5.1 Steaming ............................................................................................................................. 9 2.5.2 Combi steaming .................................................................................................................. 9 2.5.3 Hot air.................................................................................................................................. 9 2.5.4 Temperature selection ........................................................................................................ 9 2.5.5 Time selection ..................................................................................................................... 9 2.5.6 Core temperature control .................................................................................................... 9 2.5.7 Steam injection / Flue ......................................................................................................... 9 2.5.8 Fan speed ........................................................................................................................... 9 2.5.9 Buzzer ............................................................................................................................... 10 2.5.10 Energy-saving key ............................................................................................................ 10 2.5.11 Information key.................................................................................................................. 10 2.5.12 Clear key (delete).............................................................................................................. 10 2.5.13 Enter key (entry confirmation)........................................................................................... 10 2.5.14 Start/Stop key.................................................................................................................... 10 2.5.15 Setting the time / date ....................................................................................................... 10 2.5.16 Setting the start time preselection .................................................................................... 11 2.6 Service Program ............................................................................................................... 11 2.7 Fast re-cooling .................................................................................................................. 13 2.8 HACCP log printer ............................................................................................................ 13 2.9 Water credit indications for water softeners ..................................................................... 13 3. Autoclean – Automatic self-cleaning ............................................................................................. 14 3.1 Installation ......................................................................................................................... 14 3.2 Operating .......................................................................................................................... 15 4. Cleaning and maintenance ............................................................................................................ 17 4.1 Appliances without Autoclean ! ......................................................................................... 17 4.2 Extractable shower with automatic return......................................................................... 17 4.3 Caring for the door sealing................................................................................................ 18 4.4 Cleaning of outer surfaces ................................................................................................ 18 4.5 Cleaning of door glasses .................................................................................................. 18 4.6 Cleaning of drip gutter and tray......................................................................................... 18 4.7 Cleaning the fat filter ......................................................................................................... 18 4.8 Cleaning the cooking chamber behind the air conducting sheet...................................... 19 4.9 Cleaning the air filter ......................................................................................................... 19 5. Trouble Shooting............................................................................................................................ 20 Copyright by SALVIS AG Switzerland Oftringen, 18.6.2007 Version 1.0 10/2006 Part No. 1C 949520 3 Dear Customer Please do read these operation instructions carefully, before starting to work with the Combi-Steamer. They contain important information on correct installation and operation. Functional method Combi-Steamers work, depending on the cooking mode selected, with steam, Combi-Steam (combining the two media hot air and steam) or convection (hot circulating air). The Combi-Steamer allows preparing all food items carefully, economically and simultaneously. Cooking Modes Steaming Steaming is the best, most delicate and protective cooking mode. Food is cooked gently in a constant temperature, surrounded by steam. Combi-Cooking A combination of the two modes steaming and convection. This means less shrinkage especially with large roasts. Convection The convection cooking mode is suitable for cooking all food which should be crispy and brown. Roasting, grilling, baking. SPS-System (Steam Protection System) Shortly before cooking ends, the steam remaining in the cooking chamber is exhausted. Therefore little or no steam will escape when the door is opened. 4 1. Hints on operational safety Use for intended purpose The appliance shall only be used for its intended purpose, namely the professional preparation of food. Installation Follow the local regulations of the electricity supply companies and observe the instructions for the installation of kitchen equipment in accordance with the actual standard specifications. Electrical connection must be performed by an approved electrician. Do not install the appliance near to heat sources. Keep sufficient clearance, minimum clearance to side and back walls 50 mm. In case of an installation next to materials that are sensitive to heat or even might catch fire, make sure to observe the existing fire protection regulations. Make sure not to block the air exhaust pipe. If a water softener is installed, follow the installation and operating instructions for the unit. Pay attention to connect correctly to hard and soft water. Operation Caution: The outer surfaces become hot in operation ! The Combi-Steamer shall only be operated by trained staff for its intended purpose, as outlined in this operation manual when there are no defects Danger of burning: When opening the oven door hot air and steam escape. Caution! Hot fluid in container CAUTION! When loading containers with liquids or cooking good which becomes liquid during cooking do not use higher levels than such where you can look into the inserted containers. If the protecting glass cover of the illumination is defective, the appliance shall not be started. Call the after-sales service. In case of operating trouble, disconnect the Combi-Steamer from mains, close water tap and call the after-sales service. Repair and maintenance work on the unit shall only be performed by technical service personnel trained by Salvis. Please call the factory and ask for name and address of a competent after-sales service. Do not use a water hose or a high pressure sprayer on outer surfaces. A water jet may damage parts of the appliance or else get in contact with electric live parts. DANGER! personal injury caused by an electric shock. To avoid accidents the door lock must be removed when dismantling and destroying the appliance. Noise level The emission value of the noise level is less than 70 dB (A). 5 2. Operation 2.1 Panel with keys / display ON/OFF key Program number display Program selection key Text display Cooking phase display Current phase / Total of phases used Cooking phase selection key Cooking climate selection key Hot air, Combi-steaming, Steaming Temperature display SET/CURRENT value 20 - 300°C Time display SET/CURRENT value in minutes Core temperature display SET/CURRENT value 20 - 99°C Humidity display in % Temperature selection key Cooking chamber Time selection key Core temperature selection key Vaporization key Fan step display 2 or 3 Fan speed / Air flap key Buzzer key Power reduction key Auto-Clean-key Numeric keypad with letters Clear key delete Info key Enter key Confirmation of entry Start/Stop key Program memory key Start time preselection key 24 hours Display Clock time Preselected start time Operating Error Functional Error Clock time key 6 2.2 General operating states - 2.3 Cooking does not commence until the door is closed. If a cooking process is active “run-Program No-run” / resp. “AQA” appears in the program display. Fan, cooking compartment heating and water injection are switched off when the door is opened. The cooking time is stopped, the running process is interrupted. The P-display indicates three bars flashing. After the door is closed, cooking continues from the point of interruption. Switching on / off Press 2.4 Working with programs Press LED lights. The last selected program is displayed. Press LED flashes. 0 is displayed. Enter the desired program number with the numeric keypad. 289 program locations are available. See program register in the cooking manual. Press 2.4.1 2.4.2 2.4.3 Switch appliance on/off. The software version is shown in the text field. An entry can be made once the 5 LEDs are flashing. It is then possible to work manually or with programs. Appliance starts; the display alternately indicates the program number with "run" and "AQA", when not working with the core temperature sensor. "AQA" Automatic Quantity Adjustment. The cooking time only starts to run when the temperature has reached 10°C under the entered value. In this moment "AQA" is no more displayed. Changing a program Press Select program number. Change desired values. Press Enter program number. Press Now you can change the text. Press All changes are saved. Deleting a program Press Enter program to be deleted and confirm with Press to delete Press LED flashes. Enter program number again. Press Confirm. Writing a new program Press Switch on appliance Press The last selected program is displayed. 7 . LED flashes. 0 is displayed. Entry of a vacant program number. Search for vacant and occupied program locations: Press and 0 vacant, press and 1 occupied, press Phase 1 is displayed. Entry of all desired values for the 1st phase. Press Confirm with to activate the buzzer between two phases. Press to terminate. Press Press then enter phase 2 identical to phase 1. The program can have up to 6 cooking phases. Enter program number. Press The cursor flashes in the text field. A text of up to a max.16 characters can now be entered with the keypad. Text entry: by rapid pressing of the letter key it is possible to enter e.g. A; B; C; 2; a or M; N; O; 6; o, etc. For spaces use the 0-key Return with the C-key Press All entries are saved. Display in operation: + . Total time of all phases, simultaneous pressing of Last run time of the cooking program, simultaneous pressing of . Press 2.4.4 . + Blocking programs Enter program number. Press simultaneously. "Program block" appears in the text field. Press and Press 7,4,1 and 2.4.5 Unblocking programs Enter program number. Press Press and Press 7, 8, 9 and 2.5 A dot appears after the program number. When a program is barred, the values cannot be changed and saved. simultaneously. "Program block" appears in the text field. The dot disappears after the program number. Manual operating Press Switch on appliance. The entry can be made once the LEDs are flashing. By selecting a cooking climate you access manual mode. All functions are available for selection. Working with cooking phases is not possible. The buzzer sounds on completion of the cooking process. 8 2.5.1 Steaming Press 2.5.2 Combi steaming Press 2.5.3 LED lights. Entry of 30 - 300°C is possible. All the while the heating is switched on, a dot lights up in the bottom right of the display. Time selection Press 2.5.6 LED lights. 150°C appears in the temperature display; automatic basic setting. Temperature selection Press 2.5.5 LED lights. 130°C appears in the temperature display; automatic basic setting. Hot air Press 2.5.4 LED lights. 99°C appears in the temperature display; automatic basic setting temperature range 30 - 130°C. LED lights. Entry in minutes and decimals, e.g. 5.5 corresponds to 5 minutes and 30 seconds. Max. entry 999 minutes. Start cooking time: When the cooking compartment temperature has reached 10°C under the entered value. AQA = Automatic Quantity Adjustment. Core temperature control The KT sensor is a multipoint sensor. Insert the tip of the sensor in the middle of the produce. Select desired climate, oven temperature, core temperature and any additional functions. Start appliance. - The timer is inoperative. - If the sensor is not inserted in the produce or the sensor temperature is to high, an Error Code E48 appears. Then the appliance cannot start. Cool down the sensor and start again. - If the temperature is increased again after reaching the set value, a temperature difference of at least +3°C is necessary. 2.5.7 Steam injection / Flue Climate - hot air By a brief press the flue is opened (indication 1) or closed (indication -). The flap is closed as standard. A longer press activates the steam injection. The injection time is indicated in seconds. Press Climate - Combi-Steam The flue function is disabled. LED flashes. The humidity can be selected precisely as a % from 0 - 100%. Additional steam injection is possible. Climate - Steam Humidity is always 100% and cannot be influenced. The flue is always closed and a steam injection is not possible. 2.5.8 Fan speed Press LED flashes. Entry 2 = slow, Entry 3 = fast. This applies to all climates. When gas unit, only entry 3 active. 9 2.5.9 Buzzer Signals end of program, end of phase or error message. Acknowledge by pressing the key or opening the door. Buzzer duration can be set. Buzzer can be programmed between two cooking phases, then it sounds intermittently. 2.5.10 Energy-saving key Press LED lights. Power is reduced by ½. Can only be activated in programming mode. When gas unit, this key is not active. 2.5.11 Information key Press For information, nominal/actual temperature and time display or as a decimal point key. 2.5.12 Clear key (delete) With the Clear key, programs or individual cooking steps are deleted from the program and the memory. Error messages can be cleared off. Deleting a cooking step: Enter the program No. and the cooking step to be deleted and confirm with Press . Cooking step flashes. Confirm with key. Cooking step is deleted. The following cooking steps move up. Deleting a program: Enter program number. LED flashes and confirm with Press enter number of program to be deleted, confirm with Program is deleted. . . then 2.5.13 Enter key (entry confirmation) Press to confirm changes to entries made during operation. Is also used when programming. 2.5.14 Start/Stop key Press to start cooking. When pressed during operation the cooking is interrupted. The last entered values are displayed. 2.5.15 Setting the time / date Press Switch on appliance, LEDs flash. 0 is displayed. Enter hour and minutes without decimal point. Press Enter day, month, separated by a decimal point. Press 0 is displayed. Enter year. Press Time is displayed. 10 2.5.16 Setting the start time preselection Switch on appliance. . Enter desired program number and confirm with Press Both LEDs flash. 0 is displayed. Enter Start time and press Start key. The indications and the light are extinguished. The LED in the time preselection key lights. The appliance starts automatically at the preselected time; the displays and the cooking compartment light are once more active. Press then The set data are displayed briefly. Press or in order to exit the start time preselection mode. Press and 2.6 Service Program Operation by the cook. Normal startup by holding down the key combination „convection“ “steam” and switching on and . Hold down the keys and , until in the display F. Switch through the main functions F1-F3 with the P-key. Use the temperature key to switch through the U subfunctions. F1 = Error table F2 = Counter reading F3 = Parameter settings Exit the service program with the off key I appears. . Error table (F1) Error codes appear alternately with the date and time in the clock display. If an error occurs, an acoustic signal also sounds. A maximum of 50 errors can be accessed. Pressing the “C” button deletes the error memory. Error code E: 01 E: 20 Cause of error Only gas units No flame signal upper chamber Only gas units No flame signal lower chamber Error saving data in the cooking program memory Connection error between memories E: 21 Computer in critical state E: 22 Fan motor defective Safety temperature limiter triggered. Cooking chamber sensor defective Cooking chamber sensor defective; 2nd chamber E: 02 E: 13 E: 30 E: 32 11 Reaction Reset with key “C” and restart. Reset with key “C” and restart. Switch off the appliance. Interrupt mains supply for one minute, request service. Operation stop; switch the device off and then on again Operation stop, request service Operation stop, request service Operation stop, request service E: 34 E: 35 E: 36 E: 37 E: 38 E: 40 Safety temperature limiter; 2nd chamber Safety temperature limiter; 1st chamber Condensation sensor defective Temp. problem electric plate > 65°C Temp. problem electric plate > 70°C Core temperature sensor interruption E: 42 E: 44 E: 46 E: 48 Core temperature sensor 2 interruption Core temperature sensor 3 interruption Core temperature sensor 4 interruption When starting the appliance, the core temperature is too high. No water pressure for Autoclean Fan motor does not rotate Start cooking process without values E: 51 E: 53 E: 56 Perform reset, request service Perform reset, request service You can continue work; request service Clean air filter Operation stop, request service Continue to work without core temperature sensor, request service You can continue to work You can continue to work You can continue to work Cool down sensor or adjust value. Open faucets or increase pressure Operation stop, request service Enter correct values, restart Counter readings (F2) U1 U2 U3 U4 U5 U6 Water consumption from valve Y1 in litres Temperature on the operation computer assembly Number of operation hours of the process computer [hr] Energy consumption [kWh] (for credit display of the softener) Parameter settings (F3) U1 Water credit for softener 0 Function blocked 1-19999 Litre release of the water softener Default value [0] U2 LCD contrast (10...45) Default value [15] U3 Maximum time for loudspeaker at end of process [1 – 60 minutes] Maximum alarm time for loudspeaker can be limited. 0 No limitation of alarm duration 1-60 Maximum time of the alarm Default value [0] U4 Maximum time for loudspeaker at phase change [1 – 180 seconds] Maximum alarm time for loudspeaker can be limited. 0 no limitation of alarm duration 1-180 Maximum time of the alarm Default value [10] U5 Language selection for HACCP and menu program display 0 = German 1 = English 2 = Italian (HACCP printout in English) 3 = French 4 = Spanish (HACCP printout in English) Default value [0] U6 Preheating time in minutes 0 No preheating 1...50 A new phase is initiated when 10°C warmer than the next phase temperature. Is only active when copying, see point U7! 12 U7 Copying original programs or only the new names Input 741 The original cooking programs are copied to the memory area relevant for the cook. The cook names are transferred based on the selected language (see F3 - U5). Only the present cooking program slots are overwritten which are actually present in the original cooking programs. Input 147 U8 2.7 The original cooking programs are copied to the memory area relevant for the cook. The cook names are transferred based on the selected language (see F3 - U5). Only the present cooking program names are overwritten which are actually present in the original cooking programs. SPS: Steam-Protecting-System 0 SPS inactivated 1 SPS activated Fast re-cooling Program No. 299 is intended for the fast re-cooling of the cooking compartment. Setting e.g.: 99°C and 100% humidity time 999 then start The actual temperature can be read via the Info key. 2.8 HACCP log printer Connect log printer to interface RS 232. and Hold down Press simultaneously. key until figures (saved days) appear in the display "Prog. No.". The corresponding date appears in the display "Time“. ; initiates a printout of the corresponding day. Pressing Flashing number "Display fan" indicates that printing is taking place. Printing can be interrupted with . Additional functions: Enter numbers 1-9 to print-out a corresponding number of days. Optionally print-out 1 from 28 possible dates (days). Press Enter (Time) and DDMM. . The corresponding (where present) or the next later „date" is indicated in the display "Time". press 2.9 Water credit indications for water softeners The residual water credit is displayed if a water softener is connected. The credit must be entered into the control by the service engineer. Each time the appliance is switched on, a residual credit is shown as a % in the time display for 5 seconds. If this is less than 5% it is shown in a seconds cycle. If the credit is expired, the indication "h20" is shown in a seconds cycle. After regeneration or replacement, the credit can be reset as follows: Switch the control off and back on (LEDs flash). Press and The credit is reset to 100% and the reset date is updated. Interrogate the last credit reset in the mode operating mode selection (LEDs flash). Press the steam injection key. 13 3. Autoclean – Automatic self-cleaning 3.1 Installation Please do observe carefully the detailed installation instructions. Autoclean provides a fully automatic self-cleaning of the cooking chamber. Once started, the program runs down and switches off automatically. As soon as the appliance is connected and once Autoclean is installed in accordance with the following instructions, the appliance is ready for cleaning. Hints on operational safety We prescribe to use the Salvis special cleaner and the rinse-agent. These products have been produced and tested especially for this use. All safety devices inside the unit have been designed to the use of these products in order to comply with the standard specifications of the drinking water supply. Salvis AG bears no liability for any damages caused by the use of any other cleaning products (cleaner and rinse agent) than mentioned above. Exchange of canisters respectively refilling of cleaner and rinse agent Observe the directions of the manufacturer and wear suitable protective clothing, gloves and glasses. For safety reasons, the door must not be opened during an Autoclean cleaning program. Cleaner, rinse agent, hot water and steam may escape. If it is absolutely necessary to open the door, the Autoclean program must be stopped. If the oven is not used for a longer period of time, rinse the whole Autoclean system thoroughly with lukewarm water to avoid cloggings caused by cleaner and rinseagent remainders. Remove screwing from the canisters and clean the tube ends and the filter in a warm water basin. Start Autoclean Program no. 295 and rinse the appliance until no more cleaner is remaining inside the tubes and the cabinet. Connections Refer to the dimensioned sketch for connections of cleaning and rinse agent. This label on the unit marks the position of these connections. Reiniger Cleaner Nettoyant Klarspüler Rinse agent Rince-éclat ª ª Use the supplied clamp straps to attach the hoses of the canisters to the prepared connections of the unit. Red for the cleaner and blue for the rinse-agent. Place the canisters so that they are easily accessible for replacement or refilling. Connection of cleaner and rinse agent: Observe the directions of the manufacturer and wear suitable protective clothing, gloves and glasses. In case you need longer hoses than supplied, order them under Article No. 444056 Make sure to place the two canisters lower or at the same level as the Combi-Steamer. Maximum vertical range from canister to connection = 1,50 m. Maximum hose length = 10 m. Remove the lids of the two canisters (cleaner and rinse agent) and screw the screw cap with hose to the respective canister. Red for the cleaner and blue for the rinse agent. 14 Exchange of canisters If not enough cleaner or rinse agent is left in the canisters, these must be refilled or exchanged. Make sure to connect correctly. Red to cleaner and blue to rinse-agent ! Preparation for cleaning Prior to starting a cleaning program make sure that there is sufficient cleaner and rinse agent in the respective canisters. Visual control. If not, the canisters must be exchanged or refilled. Make sure to use the correct connections, red to cleaner, blue to rinse agent. Make sure that the cooking chamber is empty then. Remove fat filter, drain filter, grids, trays and pans and clean those separately. The empty trolley of floor models must be inside the Combi-Steamer. 3.2 Operating Open the water valve before activating an Autoclean program, otherwise fault message - E51 appears and the program cannot start. If the cooking compartment temperature is hotter than 80°C on starting a program, this is indicated by the flashing indication of "HOT". A cooling program now starts automatically. The time for a cleaning program only starts running after reaching 80°C. TO SAVE TIME YOU ARE RECOMMENDED TO COOL THE COOKING COMPARTMENT WITH THE SPRAY. Autoclean programs 5 different programs are available, according to the degree of soiling. Program No. and text Level of soiling of the cooking compartment Run duration minutes*) 290 Clean manually Light soiling ca. 20 min. 291 Clean flushing Fast flushing with light soiling or for ca. 2 min. use between the cooking sequences in the course of the day Program sequence - 2-stage program - steaming 70°C, 10 min. - spraying with cleaning agent - steaming 70°C, 10 min. Flushing out with water Light soiling from frequent 292 Clean - quick preparation of vegetables and meats ca. 45 min. Softening, 1 x cleaning, flushing with clear rinse, drying 293 Clean standard Heavy soiling from frequent preparation of roasts and grills ca. 76 min. Softening, 2 x cleaning, flushing with clear rinse, drying 294 Clean intensive Very heavy soiling from repeated preparation of vegetables, roasts and/or grills ca. 107 min. Softening, 3 x cleaning, flushing with clear rinse, drying 295 Canister fill With new installation or canister change ca. 2 min. *) The duration of cleaning programs differs according to appliance size! 15 Start Autoclean program Press LEDs flash. Press cleaning key. Program number 290 appears. Press 29 appears. Program numbers 290, 291, 292, 293, 294 and 295 can be supplemented by selecting 0, 1, 2, 3, 4 and 5. Press The type of cleaning is indicated in the text field. The program runs according to fixed cycles. A cleaning program should not be interrupted. An interruption is possible providing a cleaning agent has not yet been injected. If the appliance is switched off after the injection of cleaning agent or after a power supply failure, the message „ACL not completed“ is displayed in the text field after placing the machine back in operation. The program must then be run to its end. Programs No. 291 - 295 are unchangeable and can only be selected via the cleaning key . Attention: If, by mistake, a cleaning program is selected by means of the P-touch switch, the program cannot start. This is displayed with "ACL not allowed". Program No. 290 can be adapted to requirements as follows: Switch on appliance. Press Enter No. 290 and confirm with . Change data and confirm with and 2x . On completion of the program there must be no trace of cleaning agent or clear rinse in the cooking compartment. Where necessary carry out further flushing with a hand spray. Door For safety reasons, the door must not be opened during the cleaning program. Cleaner, rinse-agent, hot water and steam may escape. In case the ACL processus is interrupted when the door is opened, "Run ACL wait" is displayed. After closing the door, the program proceeds. The door is equipped with a safety lock. To open it, press the handle down twice. Delay start programming It is possible to start a cleaning program at any desired time, after working hours or over night. Start the program according to the instructions given in the operation manual, refer to paragraph 2.5.16. Delay start programming. 16 4. Cleaning and maintenance 4.1 Appliances without Autoclean ! Perfect and regular cleaning of the appliance is of utmost importance. Reheating old grease and/or food leftovers will impair taste and smell of fresh dishes considerably. We recommend using only special Salvis cleaning agents, in this case MULTI CLEAN special. This product was developed especially for use in Combi-Steamers, we tested and approved it. If you use other products, the sealing and the interior of the cooking chamber may be damaged by corrosion. Please observe the manufacturer's operating instructions. Cooking compartment cleaning with program No. 290 Select program number 290. The program runs in 2 phases. 1. Softening phase, steaming at 60°C for 10 minutes (hanging frame, trays and grids can be left in the appliance). The buzzer sounds intermittently when the time has expired. Open the door and spray with cleaning agent; leave for ca. 10 minutes to react. Never spray cleaning agent into the cooking compartment when the temperature is higher than 60°C. 2. Cleaning phase, steaming at 60°C for 10 minutes After the buzzer sounds, open the door and flush out the cooking compartment thoroughly with a hand spray. Also clean the drain sieve. Use the shower only for rinsing the interior but not for outer surfaces. Do not spray water in a hot cooking chamber. In case cleaning agent remains in the cooking chamber, this may cause corrosion problems. Dry the inside, and then leave the door open by a small gap, so that cooking chamber is well ventilated. Do not damage thermostat sensor when cleaning! 4.2 Extractable shower with automatic return If the shower is extracted, it remains locked in different positions. To roll back the hose, just extract it completely and let it return automatically. Water runs only in locked position of the hose. 17 4.3 Caring for the door sealing A door sealing is subject to wear. Proper care of sealing prolongs service life. - Grease and caustic cleaning agents attack and weaken the sealing material and thereby accelerate the rate of wear. - Chicken and pork grease are very aggressive. Please observe the following care instructions: 4.4 - Manually clean the sealing daily with a mild grease solvent. - Use fresh water to remove any remaining cleaning agent. - Leave the door open overnight to allow the door sealing to relax. The door should also be left open when the appliance is not in use. - Inspect the sealing regularly for damage. Replace damaged sealing to prevent steam/air from escaping. - The sealing of appliances with Autoclean cleaning systems must also be cleaned by hand. Grease and cleaner deposits often collect on the outer side of the sealing. If these are not removed, the sealing decomposes at those places. - Use original Salvis cleaner when cleaning. Cleaning of outer surfaces Use fat/grease dissolving cleaning agents or special stainless steel cleaners. Do not use water jet, high pressure sprayer or steam purifier on outer surfaces. Water jets may damage parts of the appliance or else get in contact with electric live parts. DANGER! Personal injury caused by an electric shock. 4.5 Cleaning of door glasses The door is made of two parts. The inner glass can be opened for cleaning. Clean only with a soft cloth. Never use scouring agents. 4.6 Cleaning of drip gutter and tray Drip gutter at the appliance: Clean it regularly including the drain opening. Drip tray on the door: Remove it to the front for regular cleaning by pressing the two clips underneath down and pull out the tray of the support. See illustration. Door inside Fastening clips 4.7 Cleaning the fat filter Clean fat filter daily and separately to the cooking chamber cleaning. If the fat filter is very much dirty, clean it in a dish washer. We recommend to wok with two filters. Rinse filter thoroughly. 18 4.8 Cleaning the cooking chamber behind the air conducting sheet Clean weekly or according to contamination. Switch off the appliance and allow cooling down. Remove shelf-supports Remove fixing screws of air conducting sheet. Remove air conducting sheet. Clean area, now accessible, thoroughly After cleaning replace all parts removed in reverse order. It is not allowed to operate the oven without air conducting sheet !! Air conducting sheet Hang-in rack 4.9 Cleaning the air filter This filter is under the control panel. It must be cleaned every two months. Remove it and clean it in water tap or dish washer. 19 5. Trouble Shooting If your appliance should not work properly, take the following list and try to help yourself. If you do not succeed, switch off, disconnect from mains, close water tap. Call the after-sales-service Failure ON/OFF touch does not light up, no interior lighting, the oven cannot be switched on No heat performance or the fan is not running No steam generation Water in the cooking chamber does not run off Calcareous deposits on inner panels Formation of rust in the cooking chamber Steam escapes from door "Power down: 1126" is displayed Possible Cause Mains switched off Mains fuse has tripped Fuse blown Remedy Switch on Switch on mains fuse Eventually fault in the mains. Check, then replace fuse. Water tap closed Open water tap Drain clogged Remove drain-sieve and clean it, flush the drain Water too hard. WaterConnect the oven to a water-softener. softener exhausted Regenerate water softener. Poor water quality Filter the water, follow the installation instructions Wrong cleaning agent Use the Salvis product Remains of cleaning agent Wash the interior thoroughly and in the cooking chamber regularly. There are iron chips in the Remove all parts of unalloyed steel water supply system Door sealing exhausted, Readjust the door latch not enough contact pressure to the oven Door sealing defect. Call the after-sales service Voltage interruption longer Switch off/on. According to the time of than 30 sec. while cooking interruption. Increase the cooking time. 20 SALVIS AG Nordstrasse 15 CH-4665 Oftringen www.salvis.ch Telefon +41 62 788 1818 Telefax +41 62 788 1895 21