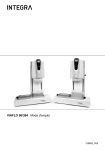
Download FIREBOY plus Operating instructions
Transcript
FIREBOY plus Operating instructions 144950_V04 Declaration of conformity / Konformitätserklärung / Déclaration de conformé / Declaración de conformidad / Dichiarazione di conformità INTEGRA Biosciences AG - CH–7205 Zizers, Switzerland declares on its own responsibility that the product / erklärt in alleiniger Verantwortung, dass das Produkt / déclare sous sa responsabilité exclusive, que le product / declara bajo su propia responsabilidad que el producto / dichiara sotto la propria totale responsabilità che il prodotto Name Type, model DVGW registration number FIREBOY plus 144000 NG 2211 AP 1042 in accordance with EC directives / gemäss der EU-Richtlinien / est conforme au terme de la directives CE / de acuerdo con las directivas CE / in conformità alle direttive CE / 2006/95/EC Low voltage equipment 2004/108/EC Electromagnetic compatibility 2011/65/EC Restriction of Hazardous Substances 2002/96/EC Waste Electrical and Electronic Equipment is in compliance with the following standards or normative documents: / mit den folgenden normativen Dokumenten übereinstimmt: /aux documents normatifs ci-après: / cumple las normativas o documentos normativos: / soddisfa le normative seguenti: EN 61010-1 Safety requirements for electrical equipment for measurement, control and laboratory use - General requirements. EN 61326-1 Electrical equipment for measurement, control and laboratory use - EMC requirements. Standards for Canada and USA CAN/CSA-C22.2 No. 61010-1 Safety requirements for electrical equipment for measurement, control and laboratory use - General requirements. UL Std. No. 61010-1 Safety requirements for electrical equipment for measurement, control and laboratory use - General requirements. FCC, Part 15, Class A Emission Zizers, April 9, 2013 Elmar Morscher CEO Thomas Neher Quality Manager FIREBOY plus – Operating instructions V04 Chapter 1 Introduction 1.1 1.2 1.3 1.4 Chapter 2 Explanation of symbols ....................................................................5 Appropriate use ................................................................................6 Safety features of the FIREBOY plus ...............................................6 Safety notes .....................................................................................7 Description of the device 2.1 Scope of delivery ..............................................................................9 2.2 Overview FIREBOY plus ..................................................................9 Chapter 3 Installation 3.1 3.2 3.3 3.4 3.5 3.6 Chapter 4 Operation 4.1 4.2 4.3 4.4 4.5 4.6 4.7 4.8 Chapter 5 Connecting FIREBOY plus to the electricity supply .......................11 Operating FIREBOY plus with optional battery ..............................11 Connecting FIREBOY plus to the gas supply.................................12 Connecting the foot or benchtop switch .........................................16 Removing and adding the burner head ..........................................16 Long burner head ...........................................................................16 Switching FIREBOY plus on and off...............................................17 Overview of menu functions ...........................................................17 FOOT SWITCH operating mode.........................................................17 BUTTON operating mode .................................................................18 SENSOR operating mode.................................................................18 Adjusting the system parameters ...................................................19 Working with liquids........................................................................20 Troubleshooting..............................................................................20 Maintenance 5.1 Cleaning and servicing ...................................................................22 5.2 Disposal..........................................................................................22 Chapter 6 Technical data 6.1 Specifications .................................................................................23 Chapter 7 Accessories 7.1 Accessories ....................................................................................24 www.integra-biosciences.com 3 English Table of contents FIREBOY plus - Operating instructions V04 English Imprint © 2013 INTEGRA Biosciences AG All rights relating to this documentation reserved. INTEGRA Biosciences AG especially reserves the rights of duplication, processing, translation and display format. Any reproduction of parts or the entire documentation, or storage thereof on electronic media, or processing or dissemination thereof, require the prior written consent of INTEGRA Biosciences AG. These operating instructions have the part number 144950; the version is V04. They apply for firmware Version 1.n. Manu- INTEGRA Biosciences AG facturer CH-7205 Zizers, Switzerland T +41 81 286 95 30 F +41 81 286 95 33 [email protected] www.integra-biosciences.com INTEGRA Biosciences Corp. Hudson, NH 03051, USA T +1 603 578 5800 F +1 603 577 5529 Custo- Please contact your local INTEGRA Biosciences AG representative. You can mer find the name and address at www.integra-biosciences.com. service Further information and other languages are available on www.integrabiosciences.com or on request ([email protected]). 4 INTEGRA Biosciences AG FIREBOY plus - Operating instructions V04 Introduction These operating instructions contain all information required for the commissioning, operation, and maintenance of the mobile safety Bunsen burner FIREBOY plus. Pur- This chapter provides information about the hazard symbols, the appropriate pose use of the FIREBOY plus, its safety features, and the safety notes. 1.1 Explanation of symbols 1.1.1 Hazard warnings in these operating instructions These operating instructions specifically advise of residual risks with the following symbols: WARNING This safety symbol advises of hazards that could result in injury or death. It also indicates hazards for machinery, materials, and the environment. It is essential that you follow the relevant precautions. CAUTION This symbol cautions about potential material damage or data loss in a microprocessor controller. Follow the instructions. NOTE This symbol identifies important notes regarding the correct operation of the device and labor-saving features. 1.1.2 Hazard warnings on the device ATTENTION HOT Risk of burns from the flame. www.integra-biosciences.com 5 English 1 Introduction FIREBOY plus - Operating instructions V04 Introduction English 1.1.3 Hazard warnings and caution notes on the LCD display The following symbols are displayed on the left in the LCD display (see “LCD display” on page 10): CAUTION IN THE "SENSOR" MODE Flame ignites automatically if object, e.g. hand, comes close to the sensor. ATTENTION HOT Risk of burns from the device still being hot. BATTERY EMPTY (OPTIONAL) The symbol of the battery is displayed if no power supply is connected. A flashing symbol indicates that the battery is almost empty and must be recharged. 1.2 Appropriate use The FIREBOY plus is an automatic safety Bunsen burner for heating or flamesterilizing suitable laboratory materials. For continuous operation over an extended period of time, the optionally available long burner head (see “7.1 Accessories” on page 24) must be used. FIREBOY plus may not be altered in design or in any of its safety aspects. If alterations are made, INTEGRA Biosciences will be relieved from all liability for any resulting damage. 1.3 Safety features of the FIREBOY plus The FIREBOY plus is equipped with the following safety devices: • If the flame has not ignited after about 3 seconds, the flame monitor closes off the gas valve. • If the flame is inadvertently extinguished, an attempt will be made to reignite it. If this is not successful, a message is displayed. • The burner chamber and the valve housing are monitored by a temperature sensor. If the temperature exceeds the safety level, the gas valve is automatically closed off. 6 INTEGRA Biosciences AG FIREBOY plus - Operating instructions V04 Safety notes 1.4.1 Operation of the FIREBOY plus The FIREBOY plus corresponds to state of the art and recognized safety regulations and is safe to operate. The FIREBOY plus may be operated only in flawless condition while observing these operating instructions. The device may be associated with residual risks if it is used or operated improperly by untrained personnel. Any person charged with the operation of the FIREBOY plus must have read and understood these operating instructions, and particularly, the safety notes, or must have been instructed by the supervisors so that safe operation of the device is guaranteed. Regardless of the listed safety notes, additionally applicable regulations and guidelines of the trade associations, the health authorities, and the trade supervisory office, e. g. GLP, GMP, FDA, must be observed. 1.4.2 General safety notes • Do not carry out any conversions and alterations on the device. • Defective parts may only be replaced with original INTEGRA Biosciences spare parts. • Do not open the FIREBOY plus. Repairs may only be performed by INTEGRA Biosciences or an authorized after-sales service member. • The device may be operated only under constant supervision. • Always wear protective goggles when working with the FIREBOY plus. • Work only in well ventilated areas. • Do not use the FIREBOY plus near flammable material or in explosive areas. • Use only approved and tested safety gas tubing with threaded or hose connectors and inspect the device regularly for damage. • Firmly tighten all gas connections and verify gas tightness using test equipment. • Never remove the gas cartridge adapter while it is connected to the gas cartridge. • Use only original INTEGRA Biosciences power supply pack or original INTEGRA Biosciences rechargeable batteries. • Switch off the device before removing or inserting the optional rechargeable battery. • Observe the hazard warnings on the device. www.integra-biosciences.com 7 English 1.4 Introduction FIREBOY plus - Operating instructions V04 Introduction English The gas supply must be closed off when: • the device is being transported or installed • the gas cartridge is being changed • extended breaks are taken and after the work has been completed • cleaning and repair work is being performed • the rechargeable battery or adapter is being replaced 1.4.3 Restrictions for use The following uses of the FIREBOY plus are prohibited: • rotating it and using it upside down • using it as a cooker without the optionally available long burner head, see “7.1 Accessories” on page 24. • carrying it by the burner head because the device may fall down 8 INTEGRA Biosciences AG FIREBOY plus - Operating instructions V04 Description of the device Pur- This chapter provides an overview of the FIREBOY plus and introduces the pose specific terminology. 2.1 Scope of delivery • • • • • • FIREBOY plus device Power supply Nozzle P60 butane/propane gas (fitted ex-factory) Nozzle N80 natural gas Adapter for gas hose, inner diameter 10 mm Operating instructions CAUTION Verify the scope of delivery when unpacking the device and check for potential transportation damage. Do not operate devices that are damaged and contact your local dealer. 2.2 Overview FIREBOY plus Front view 1 2 1 Burner head 2 LCD display 3 GAS KNOB: to adjust the gas supply (flame size). 4 AIR KNOB: to adjust the air supply (flame temperature). 3 4 www.integra-biosciences.com 5 5 MENU KNOB: to switch the device on and off. Rotary switch for selection of the operating mode with push function for user settings. Ignites flame in the BUTTON mode. 9 English 2 Description of the device FIREBOY plus - Operating instructions V04 6 Description of the device English LCD display 6 Motion sensor 7 Symbol of the set operating mode or caution note. 8 Information regarding the device status. 7 8 9 9 Current operating mode with selected settings, e.g. burning time or residual burning time. Burner head 10 Ignition electrode 11 Burner chamber with flame opening 12 Electrode of the flame monitor Rear view 13 Switch connection (jack) 14 Mains plug socket (mains plug) 15 Gas adapter opening (for engaging) 13 14 15 16 17 18 Bottom 16 Folding stand, to position device at an angle 17 Brass screw, access to the nozzle 18 Battery compartment 10 INTEGRA Biosciences AG FIREBOY plus - Operating instructions V04 Installation Pur- This chapter defines the requirements for the electricity supply and gas pose connection of FIREBOY plus. 3.1 Connecting FIREBOY plus to the electricity supply FIREBOY plus can be used without the battery when using the power supply pack. Insert the mains plug in the socket on the reverse side of the device (see “Rear view” on page 10) and connect to the power source. 3.2 Operating FIREBOY plus with optional battery FIREBOY plus can be operated independently from the electricity mains using an optionally available rechargeable battery (see “7.1 Accessories” on page 24). CAUTION Prior to the first start-up, the empty battery must be inserted in FIREBOY plus and charged on the mains without interruption for 12 hours. 3.2.1 Inserting or replacing the battery Slide the cover of the battery compartment on the bottom of the device in the direction of the arrow. If necessary, remove the battery. Insert the new battery in the direction of the arrow so that the blank parts on the inside point to the contacts of the device. Close the cover counter to the direction of the arrow. The battery is now replaced. CAUTION Do not short-circuit the battery, i. e. do not bypass the two poles with a conductive object. www.integra-biosciences.com 11 English 3 Installation FIREBOY plus - Operating instructions V04 Installation English 3.2.2 Charging the battery During initial start-up and when the battery symbol in the LCD display is flashing, the battery must be charged. This is performed directly in the device. FIREBOY plus incorporates a charge protection device to prevent the battery from being overcharged. This guarantees maximum battery life. Connect the charger plug in the socket on FIREBOY plus and then connect to the mains. The device can be turned on or off. 3.3 After about 12 hours the battery is recharged. The device may remain connected to the mains at all times. Connecting FIREBOY plus to the gas supply FIREBOY plus is appropriate for use with natural gas (gas mixture, >85% methane, further alkanes) and commercial butane/propane gas (mixture 65%10% butane, 20%-40% propane). 3.3.1 Fitting the nozzle for the gas in use The P60 nozzle for butane/propane gas is fitted ex-factory for FIREBOY plus. If necessary, the nozzle must be fitted for the gas in use. Type of gas Gas input pressure Inscription Nozzle Natural gas (methane) 20 mbar N80 Butane/propane gas 50 mbar P60 The nozzles are marked on the lower surface with the appropriate designation. CAUTION FIREBOY plus may only be operated with the nozzle that corresponds to the gas type in use. Only use the nozzles supplied. Prior to every nozzle installation, inspect the O-ring in the brass screw for damage and if necessary replace it. 12 INTEGRA Biosciences AG FIREBOY plus - Operating instructions V04 Installation Unscrew the brass screw (1) on the lower surface of the device using a small coin or screwdriver. 2 Turn over the device, allow the nozzle to drop out, and insert the desired new nozzle (2). Retighten the brass screw to the stop. The nozzle is now inserted. 1 3.3.2 Installation and removal of the adapters for the gas connection The adapters for the central gas supply, the gas cylinder, or the gas cartridge are inserted in the gas adapter opening of the FIREBOY plus without the gas cartridge (see "Rear view" on page 10). Insert the appropriate adapter in the gas adapter opening of FIREBOY plus, making sure it audibly clicks into position. The adapter is now installed. WARNING When replacing the adapters, always switch off the device, disconnect the mains plug, and close off the gas supply. In order to remove the adapter, use a pointed tool to press the adapter mechanism inward on the lower surface of the device and remove the adapter by pulling toward the rear. Insert the requested new adapter until it audibly clicks into position. www.integra-biosciences.com The adapter is now replaced. 13 English When replacing the nozzle, proceed as follows: FIREBOY plus - Operating instructions V04 Installation English 3.3.3 Connecting the gas cartridge The following gas cartridge types may be used: • CV 360 (about 30 min. flame duration) • CP 250 (about 200 min. flame duration) • CV 300 Plus (about 180 min. flame duration) • CV 470 (about 400 min. flame duration) • EXPRESS 444 (about 35 min. flame duration). The gas cartridges can be purchased from a local dealer. WARNING For operation with a gas cartridge, the P60 nozzle must be inserted in the device and the gas cartridge adapter must be installed. Gas cartridges may only be used at an ambient temperature of 15-35 ºC (see note in the cartridge instructions). The connection of the CP 250, CV 300 Plus/CV 470 and EXPRESS 444 cartridges is described in the enclosed instructions. The CV 360 gas cartridge is connected as follows: Verify that the gas cartridge adapter is inserted and has audibly clicked into position. Ensure that the smooth side of the cap (1) points toward the device. 1 Turn the milled knob on the cartridge adapter fully clockwise in the "OFF" direction. Insert the gas cartridge into the cap until it audibly clicks into position. Then open the gas cartridge adapter: Turn the milled knob fully counterclockwise in the "ON" direction. The gas cartridge is now open and ready for use. The flame can now be ignited using any of the three operating modes. 14 INTEGRA Biosciences AG FIREBOY plus - Operating instructions V04 Installation WARNING The gas cartridge may only be replaced if the gas cartridge adapter is connected to the device and closed off, if possible. The different gas cartridges are removed and changed as follows: If the gas cartridge adapter is equipped with a milled knob, turn the knob fully clockwise in the "OFF" direction. Remove the empty cartridge. Fit a new cartridge. If the gas cartridge adapter is equipped with a milled knob, turn the knob fully counterclockwise in the "ON" direction. The gas cartridge has been changed. CAUTION Gas will begin to flow. 3.3.5 Connecting to the central gas supply or to a gas cylinder Connect the tubing from the central supply or from the gas cylinder to the previously installed adapter and fix it with a clip if necessary. FIREBOY plus is now connected to the gas supply. 3.3.6 Setting the right flammable mixture The GAS KNOB (gas) can be used to set the gas supply and therefore the flame size while observing the flame itself. Rotating the knob clockwise reduces the gas supply (-), rotating it counterclockwise increases it (+): The air knob (air) can be used to regulate the air supply and therefore the flame temperature. Rotating the knob clockwise reduces the air supply (-), rotating it counterclockwise increases it (+). www.integra-biosciences.com 15 English 3.3.4 Removing and changing the gas cartridge FIREBOY plus - Operating instructions V04 English 3.4 Installation Connecting the foot or benchtop switch Insert the plug of the foot or benchtop switch in the socket on the reverse side of the device (see "Rear view" on page 10). 3.5 The switch is now connected. Removing and adding the burner head To remove the burner head, pull it out vertically upward. To install the burner head, place it on the device with the 3 contact pins and push it down vertically until it clicks into position. The burner head is now reinstalled. CAUTION Never carry the device by the burner head. 3.6 Long burner head If the FIREBOY plus is used for continuous operation, the optionally available long burner head must be used. For installation see previous section. CAUTION The minimum distance between the tip of the burner head and the object to be heated, e. g. cover plate of quadrupod, must be at least 60 mm. The duration of continuous operation should not exceed 60 min. The parameter “Maximum burning time” must be set accordingly, see “4.6 Adjusting the system parameters” on page 19. 16 INTEGRA Biosciences AG FIREBOY plus - Operating instructions V04 Operation Pur- This chapter explains the different operating modes of FIREBOY plus and pose explains the adjustments of the general device settings. In addition, the steps to be taken in the event of an error are described. 4.1 Switching FIREBOY plus on and off FIREBOY plus is switched on by briefly pressing on the MENU KNOB. It is switched off by pressing the knob for at least 2 seconds. If the burner is still hot, initially the “ATTENTION HOT” symbol appears on the bottom left of the LCD display. After the cooling period, the device switches off automatically. If the device has not been operated in 15 minutes, it is switched off automatically to save energy. This can be changed in SETTINGS (see “4.6 Adjusting the system parameters” on page 19). 4.2 Overview of menu functions Rotate the MENU KNOB to switch between the operating modes and select them by pressing down. • FOOT SWITCH: Flame is ignited via the foot or benchtop switch. • BUTTON: Flame is ignited by pressing the MENU KNOB. • SENSOR: Flame is ignited if an object passes the sensor. • SETTINGS: To set the general system parameters. In several operating modes, repeated pressing displays adjustable parameters on a black background. These can be changed by rotating the MENU KNOB and confirmed by pressing. 4.3 FOOT SWITCH operating mode In the FOOT SWITCH operating mode, the flame is ignited only if the foot or benchtop switch is activated. The flame burns only as long as the switch is depressed (Timer off). Alternatively, a fixed duration of the flame can be defined. Press the MENU KNOB to bring up the timer. The timer can be set between 1 second and 60 minutes by rotating it. The possible times have a black background. Press www.integra-biosciences.com 17 English 4 Operation FIREBOY plus - Operating instructions V04 Operation English the MENU KNOB to set a time. During operation, the LCD display shows the countdown. Parameter Description FOOT SWITCH off Setting the burning time of the flame. Range Basic setting 1 s - 60 min off In addition, the flame can be extinguished at any time by actuating the foot switch again or by pressing the MENU KNOB. 4.4 BUTTON operating mode In the BUTTON operating mode, the flame is ignited and also extinguished by pressing the MENU KNOB. NOTE For safety reasons, the maximum burning time is factory-set to 1 min. Go to SETTINGS (“4.6 Adjusting the system parameters” on page 19) to change the parameters. 4.5 SENSOR operating mode In the SENSOR operating mode, the flame is ignited if an object passes the sensor window with a maximum distance of 6-8 cm. CAUTION For safety reasons, it is recommended not to change the factory-setting of SENSOR (2X) activation (see “4.6 Adjusting the system parameters” on page 19). In this setting, the flame is only ignited if the sensor is activated two times in quick succession. This almost excludes inadvertent ignition. Adjust the duration of the flame to between 1 second and 60 minutes by rotating and then pressing the MENU KNOB. During operation, the LCD display shows the countdown. 18 INTEGRA Biosciences AG Parameter Description SENSOR 10 s Setting the burning time of the flame. Operation Range Basic setting 1 s - 60 min 10 s English FIREBOY plus - Operating instructions V04 Of course the flame can be extinguished at any time by passing the sensor window again or by pressing the MENU KNOB. 4.6 Adjusting the system parameters Within the SETTINGS menu, bring up the following functions by rotating the MENU KNOB to the right: Description Language Setting the desired language. English Deutsch Français Italiano Español English Maximum burning time Setting the maximum burning time in the BUTTON operating mode. 1 - 60 min off 1 Automatic shut-off Definition of how many minutes after the last use the device shuts off automatically. 1 - 60 min off 15 min Sensor sensitivity Setting the sensor sensitivity in 3 sensitivity stages. low middle high middle Sensor activation Setting whether the sensor must be activated 1x or 2x successively to ignite the flame. 1x 2x 2x Default settings Restores the default settings from the factory. no yes no Info Information regarding the firmware for the service technician. - - Exit settings Return to the operating modes (FOOT SWITCH). - - www.integra-biosciences.com Range Basic setting Parameter 19 FIREBOY plus - Operating instructions V04 Working with liquids English 4.7 Operation In order to protect the burner chamber from contamination when working with liquids, the folding stand at the base of FIREBOY plus can be used to incline the device. The inclination direction can be modified by removing the folding stand after pressing it together and inserting it on the opposite side. 4.8 Troubleshooting Warnings and notes are shown at the top left of the LCD display (see “LCD display” on page 10). A differentiation is made between the following types: Symbol Description ! Technical notes, e.g. BURNER HEAD MISSING. i Notes for the user, e.g. CHECK GAS. In the event of an error, the flame is automatically extinguished. Every message must be confirmed by pressing the MENU KNOB. The device then assumes the operating mode set last. The following table lists the possible error messages and the recommended action for elimination: 20 INTEGRA Biosciences AG FIREBOY plus - Operating instructions V04 Operation Technical cause Possible cause and correction CHECK GAS The flame monitor does not detect a flame. No gas supply is connected. Connect the gas supply Open the gas connection The valve is closed. Flame was blown out several times. Correctly set the gas/air mixture Prevent draft English Error message Electrode of the flame monitor is broken or dirty. Visually inspect electrode Clean electrode with alcohol The nozzle is blocked. Nozzle is soiled and blocked. Remove nozzle, pierce with a needle and clean it. BURNER HEAD MISSING Prior to ignition Burner head not added or not process, the contact added correctly. pin on the burner head Add burner head is not detected. Contact pin on burner head is contaminated. Clean the contact pin EXCESS Burner chamber TEMPERATURE temperature measured exceeds the critical value Continuous operation overheated the device. Wait until the device has cooled off. Ambient temperature exceeds the permitted value. Reflection of the flame on the device due to unauthorized use. FLAME DETECTION FAIL Failure of flame monitor TECHNICAL ERROR NN www.integra-biosciences.com Electrode of the flame monitor is kinked or dirty. Visually inspect, if necessary clean. Note number (NN) and call service technician. 21 English FIREBOY plus - Operating instructions V04 5 Maintenance 5.1 Cleaning and servicing Maintenance FIREBOY plus body and burner head should be regularly cleaned in order to maintain a high availability. Maintenance intervals depend on operating conditions and degree of pollution. WARNING Allow the burner head to cool off before cleaning, disinfecting, and servicing the device. Switch off the device and disconnect it from the gas supply. Allow the device to dry before operating it again. Use a cloth moistened with soapy water or a 70% ethanol solution to clean FIREBOY plus. Longest life span of burner head is reached with a splash-free application in a clean working environment (see also “4.7 Working with liquids” on page 20). If the burner head gets soiled, it can be removed for cleaning purposes (see “3.5 Removing and adding the burner head” on page 16) and cleaned with commercially available disinfecting or cleaning agents. It can also be replaced with a new one, see “7.1 Accessories” on page 24. CAUTION Ignition and flame monitoring electrodes (white ceramic posts) only tolerate low mechanical forces! In the event of an error, carefully clean the ignition electrode with a lint-free cotton swab saturated with 70% ethanol solution. If any of the ceramic posts is loose or broken, the burner head must be replaced. For proper function, all three contact pins and their correspondent spring contacts must be clean and free of corrosion. Same applies for the burner head shaft (plug) and the burner chamber (socket), especially the spring-loaded ball (lock pin) and the nozzle with orifice (pinhole). 5.2 Disposal The FIREBOY plus device must not be disposed of with unsorted municipal waste. Dispose of the FIREBOY plus in accordance with the laws and regulations in your area governing disposal of devices. 22 INTEGRA Biosciences AG 6 Technical data 6.1 Specifications Technical data English FIREBOY plus - Operating instructions V04 Device Type Safety Bunsen burner Dimensions (W x D x H) 100 x 150 x 60 mm without burner head Weight 1.3 kg Mains adapter Input voltage 100–240 VAC, 50/60 Hz Output voltage 9 VDC / 0.5 A Rechargeable battery (optional) Type NiMH 3.6 V Capacity at least 2000 mAh Charging time 12 h Operating time 8 h1 Operating conditions Operation 15-35 °C, 15-80% RH (not condensing) Storage -10-60 °C, 5-80% RH (not condensing) Nominal thermal rating Propane/butane gas 1.6 kW Natural gas 1.0 kW Nominal gas input pressure Propane/butane gas 50 mbar Natural gas 20 mbar 1. With a new, fully charged battery in alternating operation switched on every 30s for 10s. www.integra-biosciences.com 23 FIREBOY plus - Operating instructions V04 English 7 Accessories Accessories A variety of accessories are available, which adapt FIREBOY plus to the respective application requirements and work environments. 7.1 Accessories Part No. Accessories 24 Battery NiMH 3.6 V, rechargeable 144 310 Gas cartridge adapter for 52 g butane cartridge, e.g. Campingaz CV 360. 144 050 Gas cartridge adapter for 250 g butane cartridge, e.g. Campingaz CP 250, with safety stand and connecting hose. 144 051 Gas cartridge adapter for 230 g butane cartridge, e.g. Campingaz CV 300 Plus, with safety stand and connecting hose. 144 052 Gas cartridge adapter for EXPRESS 444 144 053 Foot switch and connecting cable 143 200 INTEGRA Biosciences AG Accessories Part No. Accessories www.integra-biosciences.com Benchtop switch and connecting cable 171 081 Windshield for hoods 143 205 Borosilicate glass splash protector 143 210 Burner head 144 300 Long burner head, for continuous operation 144 306 Mains adapter Europe 230 VAC 156 631 Mains adapter UK 240 VAC 156 632 Mains adapter US 120 VAC 156 630 Mains adapter AU 240 VAC 156 633 Mains adapter JP 100 VAC 156 634 Gas safety tubing Ø 10 mm. Length 2 m, max. pressure 100 mbar, DVGW approved 140 055 Adapter for gas hose, inner diameter 10 mm 144 240 Adapter for 1/4" left-hand thread 144 227 25 English FIREBOY plus - Operating instructions V04


