1
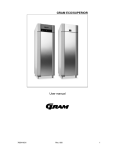
GRAM ECO/SUPERIOR User manual 765041631 Rev. 002 1 Gram Commercial A/S Aage Grams Vej 1 6500 Vojens +45 73 20 12 00 www.gram-commercial.com 765041631 Rev. 002 2 Contents Application .................................................................................................................... 4 Safety information ........................................................................................................ 5 Location ........................................................................................................................ 6 General description ...................................................................................................... 9 Electrical connection .................................................................................................. 10 General use ................................................................................................................ 11 Operating the product................................................................................................. 13 Errors and alarms ....................................................................................................... 14 User menu .................................................................................................................. 16 Troubleshooting.......................................................................................................... 20 Keylock ....................................................................................................................... 21 Defrosting ................................................................................................................... 21 Defrost water .............................................................................................................. 22 Door closing mechanism ............................................................................................ 23 Power failure .............................................................................................................. 23 Cleaning ..................................................................................................................... 23 Door gaskets .............................................................................................................. 24 Long term storage ...................................................................................................... 24 Service........................................................................................................................ 25 Disposal ...................................................................................................................... 26 EC-Declaration of conformity ..................................................................................... 27 Wiring diagram Gram Eco .......................................................................................... 28 Wiring diagram Gram Superior .................................................................................. 29 Piping diagram ........................................................................................................... 30 765041631 Rev. 002 3 ENGLISH Thank you for choosing a quality product from Gram Commercial. This manual will advise you how to install, use and maintain your new product. Before our products leave the factory, they undergo a full function and quality test. Should you nevertheless experience problems with the product, then contact your local dealer. Gram Commercial subsidiaries and dealers placed all over the world are ready to help you. Gram Commercial supplies warranty on all products. This warranty is subject to correct use according to specifications, where e.g. common maintenance and eventual repairs are carried out by Gram Commercial techicians or technicians with knowledge of the products. Changes in installation and other use of the procuct than prescribed in this manual, might affect the operation and durability of the product. The manual is written according to our current technical knowledge. We constantly work on updating this information, and we reserve the right to make technical changes. Application This product is designed for storage of foodstuff at a constant temperature. The product may not be used for chilling or freezing of foodstuff. The product is only to be used for the purpose for which it has been expressly designed. Any other use could cause that the products stored in the product are not kept at the right temperature. The manufacturer will not be held liable or responsible for any damage caused by improper, incorrect or unreasonable use. 765041631 Rev. 002 4 Safety information Important Description of symbols used in this manual. Warning Lacking observation to these instrucions might result in accidents with personal injury. Important If these instructions are not observed, the product might be damaged or destroyed. Be aware that Gram Commercial has taken precautions to ensure that the safety of the product is in order. Please read carefully the following information regarding safety. It is important, that everyone who are to use or install the product, to have access to this manual. This appliance is not intended for use by persons with reduced physical, sensory or mental capabilities, or lack of experience and knowledge, unless they have been given supervison or instruction concerning use of the appliance by a person responsible for their safety. Children should be supervised to ensure that they do not play with the appliance. The appliance might contain parts with sharp edges in the compressor compartment, and in the inside compartment. The appliance is not to be transported on a sack truck, there is a danger of loosing the balance, causing danger to persons. Do not pull the power cord to dicconnect the appliance, or when moving the appliance. 765041631 Rev. 002 5 Location When receiving the product, check the packaging material for damage. If any damage occurs at the packaging material, it should be considered if the product might have been damaged too. If the damage is substantial, please contact your dealer. The transport pallet can be removed by loosening the screws that fasten the pallet to the product. This task requires at least 2 persons.The heaviest part of the product is at the top. Be aware of this, when removing the transport pallet. Fig.1 If the cabinet has been transported in horizontal position it must stand upright at least 2 hours before it is started to allow the oil from the compressor to run back. 765041631 Rev. 002 6 Because of the heavy weight of the product, the floor might be damaged or scratched when moving the product. Correct set up gives the most effective operation. The product should be located in a dry and adequately ventilated room. To ensure efficient operation, it may not be placed in direct sunlight or against heat-emitting surfaces. The product is designed to operate in an ambient temperature between +16C and +40°C. Avoid placement of the product in a chlorine/acid-containing environment (swimming bath etc.) due to risk of corrosion. The product and parts of the interior is equipped with a protecting film, which should be removed before use. Clean the product with a mild soap solution before use. The set up place must be level and horizontal. For versions with legs, use the adjustable legs to make sure that the product stands level and upright. For versions with castors, the locking devices of the two front castors must be activated, when the product is in place. The base must be level, and the product may not be placed on frames or the like. Fig. 2 765041631 Rev. 002 7 There must always be 20 cm of free space above the product, to ensure that the heat from the condenser can be led away. The product should be placed as close as possible up against the wall. For products with a heating element in the tray on the cabinet backside, however max. 75 mm from the wall. Max. 75 mm Fig. 3 765041631 Rev. 002 8 General description Compressor Condenser with air filter Front panel Display Gasket Air intake Door Air distribution plate Shelves for storage Foot pedal Fig. 4 765041631 Rev. 002 9 Electrical connection Read the text below thoroughly before electrical connection. The product is intended for connection to alternating current. The connection voltage (V) and frequency (Hz) are shown on the name plate in the cabinet (see Fig. 8). Only the supplied cord is to be used. Never use an extension cord for this appliance! If a wall socket is placed in a longer distance than the length of the supplied power cord, contact an electrician to establish a wall socket within the range of the supplied power cord. If the product is defective, it must be examined by a service electrician advised by Gram Commercial during the guarantee period, if it is a product with built-in compressor. If it is a product connected to an external compressor unit, it must be examined by the company who has connected the product to the unit. Outside the guarantee period, it is advisable to use the service advised by Gram Commercial, if possible. If this is not the case, assistance is required from a refrigeration company with knowledge of Gram’s products. Fig. 5 765041631 Rev. 002 10 Always disconnect the power if interruptions in power supply occur, and when electrical parts are removed/put on, and before cleaning and maintenance of the product. Repairing of electrical/technical parts may only be performed by a service electrician from Gram Commercial or an authorised refrigeration company with knowledge of Gram’s products. Do not use the product before all coverings are installed, so that live or rotating machine parts can not be touched. The product is not to be used outdoor. All earthing requirements stipulated by the local electricity authorities must be observed. The plug and wall socket should then give correct earthing. If necessary, contact an electrician. Make sure the product is switched off at the socket before service is performed on electrical parts. It is not sufficient to switch off the product by the START/STOP key as there will still be voltage to some electrical parts of the product. General use Do not block vent holes in the front panel. Do not damage the refrigeration system parts. During normal operation, some parts of the refrigeration system in the compressor compartment might reach high temperatures, and could therefore cause burns if touching these components. Do not use electrical devices inside the product. To ensure correct and efficient air flow in the cabinet, the shaded areas must be kept free of items. (see Fig. 6) All items to be stored, that are not wrapped or packed, must be covered in order to avoid unnecessary corrosion of the inner parts of the cabinet. If any controller parameters are changed from default, this could cause that the product is not functioning normally, and harmful temperatures could damage items that are kept inside the product. If the product is turned off, wait minimum 3 minutes before turning it on again. This is to protect the compressor from damage 765041631 Rev. 002 11 Do not place foodstuff below the bottom shelf support Fig. 6 765041631 Rev. 002 12 Operating the product Control elements: 1 2 4 + 3 - 5 P Primary display Display of temperature Secondary display Display of error codes, alarms, settings etc. Control lamps These lamps indicate, which components/functions are active. Warning lamps These lamps only lights up if something is wrong, or action is required. Control keys On/off key. Used for turning the appliance on or off, and exiting the menu. P key. Used as selection key and for activation of a menu in combination with other keys. +/- keys. Up/down in setting. Numeric keys. Setting of parameters. P - + 1 765041631 2 3 4 5 Rev. 002 13 Starting up: Plug in the appliance. Push to turn on the appliance. The display shows the software version, and relevant control lamps light up. On cold cabinets, or if the cabinet has been turned off for a short time, and the evaporator temperature is still below the freezing point, a defrost will be activated. See the chapter “Defrosting”. Temperature setting: Keep P pressed. When doing this, the setpoint temperature is displayed. While P is kept pressed, the setpoint can be changed by pressing + or - . - Each time + or is pressed the temperature will change one degree. The new value flashes in the display When the required setpoint has been set, let go of the keys, a short beep sounds, and the settings are saved. Errors and alarms Display code OP A1 / OP Description The door is open. Door alarm, if the door remains open, or is not closed correctly. A2 Local high temperature alarm. A4 External high temperature alarm Applicable to all alarms: press operation. 765041631 P to confirm the alarm. The display returns to normal Rev. 002 14 Display code F1 Description Room sensor error. Error display will continue until the error has been mended. Service assistance is required. Evaporator sensor error. F2 Error display will continue until the error has been mended. Service assistance is required. Condenser sensor 1 error. F3* Error display will continue until the error has been mended. Service assistance is required. F4* Condenser sensor 2 error. (only on products with 2 refrigeration circuits) Error display will continue until the error has been mended. Service assistance is required. Too high condenser temperature. F7* FILTER The code is displayed until the condenser temperature returns to normal. The cause might be a clogged condenser, or too high ambient temperature. If the ambient temperature is too high, the placement of the cabinet might be wrong, and an alternative place should be found. Ventilation might help. If this does not help, request service assistance. * Applies only to cabinets with built-in compressor. Reminder of cleaning the condenser air filter: After 600 compressor running hours the filter must be cleaned and it is indicated by warning lights: FILTER . If the cleaning is not completed within 650 hours, the warnings continue, and an acoustic alarm sounds. Resetting the FILTER alarm: After cleaning the air filter, the controller must be reset to remove the alarms. It can only be reset by using a certain key combination. Push three times followed by pushing disappear after 1 minute. P three times. FILTER alarm will 765041631 Rev. 002 15 User menu User menu overview: Menu access P + 1 1. Dry refrigeration DC ON/OFF 2. Rapid thaw 3. Local alarm setting UF LAL ON/OFF LHL °C LHd min. DA On/off DAd BU min. On/off EHL °C ELL °C min. min. K 4. External alarm setting EAL 5. Temperature offset (sensor calibration) 6. Alarm limits CAL EHd ELd CA ALL FAS/ESC 7. No. of defrosts DEF 4 +/- Description Activation of dry refrigeration. (on/off) Activation of rapid thaw. (on/off) Setting the upper alarm limit. At alarm, the display shows: A2 Time delay for the upper alarm limit. Activation of local door alarm. At alarm, the display shows: A1 (1=on / 0=off) Time delay for the door alarm. Activation of buzzer. The buzzer sounds at alarms A1, A2. (1=on / 0=off) Setting the upper alarm limit. At alarm, the display shows: A3 Setting the lower alarm limit. At alarm, the display shows: A4 Time delay for upper alarm. Time delay for lower alarm. -5…+5 K Setting of alarm limits. Fixed/escorting. FAS= fixed limits / ESC = limits following the setpoint Number of defrosts in 24 hours. Note: The numbers at each menu item refer to the numbers in the descriptions on the following pages. If a change of the setting is required, get access to the menu by pushing more than 3 seconds. The values are changed by pushing the + or new setting is saved by pushing P . To exit the menu, push P + 1 for keys. The . 765041631 Rev. 002 16 1. Setting of dry refrigeration Note : Applies only to products equipped with dry refrigeration. Press P + 1 P for more than 3 seconds. The secondary display shows DC. Press Press + , ON flashes in the display. Press Press twice to exit the user menu. Dry refrigeration is now active. De-activation of dry refrigeration is done in the same way. P , the secondary display shows OFF, because the program is off. to confirm, ON lights constantly, and the control lamp DRY lights. 1x P + 1 >3 sek. + 1. 5 DC P OFF 5 +/- ON 5 2x P DRY 2. Setting of rapid thaw Note: Applies only to products equipped with rapid thaw. The temperature setpoint must be set between +2C and +8C in order to activate rapid thaw. Press P + 1 Press + Press P Press + , ON flashes in the display. Press P for more than 3 seconds. . The secondary display shows UF. , the secondary display shows OFF, because the program is off. to confirm, ON lights constantly, and the control lamp lights. At the same time the thaw symbol is displayed: Press twice to exit the user menu. Rapid thaw is now active. The control lamp flashes, simultaneously the color of the arrow runs from the bottom to the top. When the rapid thaw ends, returns to normal operation. and are turned off and the controller 2x P + 1 >3 sek. + 2. UF 5 P OFF 5 +/- ON 5 2x P 765041631 Rev. 002 17 3. Local alarm setting P + 1 Press Press + , until the secondary display shows LAL. Press P Press P Change the value by using the + or Press Press P for more than 3 seconds. , select menu option LHL, LHd, DA, DAd or BU with the + key. to confirm. - key. to confirm. 3 times to exit the user menu. 3x P + 1 >3 sek. 5 + LAL P 3. 4. 5. 6. 7. LHL 5 - + LHd 5 - + DA 5 - + DAd 5 - + BU 5 3x 25 5 +/- 24 5 P 5 5 +/- 4 5 P OFF 5 +/- On 5 P 5 5 +/- 4 5 P OFF 5 +/- On 5 P P P P P P 3x 3x 3x 3x 4. Local alarm setting Press P + 1 Press + , until the secondary display shows EAL. Press P , select menu option EHL, ELL, EHd, or ELd with the + key. Press P Change the value by using the + or Press Press P for more than 3 seconds. to confirm. - key. to confirm. 3 times to exit the user menu. 4x P + 1 >3 sek. + EAL 5 P 8. 9. 10. 11. EHL 5 - + ELL 5 - + EHd 5 - + ELd 5 3x 25 5 +/- 24 5 P 25 5 +/- 24 5 P 5 5 +/- 4 5 P 5 5 +/- 4 5 P P P P P 3x 3x 3x 765041631 Rev. 002 18 5. Temperature offset Press P + 1 Press + , until the secondary display shows CAL. Press P , the secondary display shows CA. Change the value by using the + or Press Press P for more than 3 seconds. - key. to confirm. 3 times to exit the user menu. 5x P + 1 >3 sek. + 12. CAL 5 5 P CA P 0 5 +/- 2x 5 1 P 6. Alarm limits P + 1 Press Press + , until the secondary display shows ALL. Press Change the value by using the + or Press Press P P for more than 3 seconds. , the secondary display shows FAS. - key. to confirm. twice to exit the user menu. 6x P + 1 >3 sek. + 13. ALL 5 P FAS 5 +/- ESC 5 2x P 7. Number of defrosts P + 1 Press Press + , until the secondary display shows DEF. Press P , the secondary display shows the current no. of defrosts ( 4 is default). Change the value by using the + or Press Press P for more than 3 seconds. - key. to confirm. twice to exit the user menu. 7x P + 1 >3 sek. 765041631 + 14. DEF 5 P 4 5 +/- 5 5 2x P Rev. 002 19 Troubleshooting Noise: If abnormal noise occurs, request service assistance. Operating sounds from compressor, condenser fan and interior fan are normal. Some models are equipped with a drain pump. If sheet metal parts, front panels or panels in front of the compressor compartment are making noise, these might be open. Close the panels. Frosting inside compartment: Ambient humidity too high. The door is opened too often. The door is left open for too long. Damaged door gasket. Check it thoroughly for damages. Poor cooling performance: Ambient temperature too high. The door is opened too often and/or open for too long. The door is left open. Damaged door gasket. Temperature setting too high. Product too packed with foods - air inlet/outlet blocked. Condenser air filter is clogged. Warm or hot foods inside the product. Defrost in progress. The cabinet temperature may rise temporarily during the defrost cycle, but it will not affect the foods inside. The defrost symbol displayed. is Some of the foods are frozen: Product too packed with foods - air inlet/outlet blocked. Temperature setpoint too low. Evaporator fan might be defective. Condensation around the door: Ambient humidity too high. The door is not closed tightly. Damaged door gasket. 765041631 Rev. 002 20 Too high energy consumption: Ambient temperature too high. The door is opened too often and/or open for too long. The door is left open. Damaged door gasket. Temperature setpoint too low. Product is too packed with foods - air inlet/outlet blocked. Condenser air filter is clogged. Warm or hot foods are brought into the product. Product is placed in direct sunlight or close to heat-emitting surfaces. The default settings have been changed. Keylock The keypad can be locked by simultaneously pushing seconds. + 1 for more than 5 lights to indicate that the keys are locked, and a short beep sounds. Now it is not possible to use the keys for temperature setting etc. The same code is to be used for unlocking the keypad again. Defrosting Defrosting is automatically performed 4 times every 24 hours. If the product is operating under severe load (frequent door opening and frequent replenishment), manual defrosting can become necessary. Starting manual defrosting: push P + simultaneously for more than 3 seconds. Refrigerator: Control lamps for fan and defrosting Extended refrigerator: Control lamp for defrosting alight depending on temperature setpoint. Freezer: Control lamp for defrosting are alight. is alight, and lamp for fan is is alight. Shortly after the defrosting period has ended, the compressor starts and the compressor symbol is alight. It is possible to change the number of defrosts. Find further information on: www.gram-commercial.com Do not use sharp or pointed objects to accelerate the defrosting process. 765041631 Rev. 002 21 Defrost water The product produces water during defrosting, which is led into a tray at the rear of the product (see Fig. 7). A re-evaporation pipe from the refrigeration system, and an electrical heating element, placed in the tray, re-evaporates the water. Some models are equipped with a condensate pump, which pumps the water up into a tray in the compressor compartment, where it is re-evaporated.. It is recommended to clean the tray or the pump and corresponding parts at least once a year. Remember to disconnect the cabinet before cleaning. Be careful not to damage piping parts and heating element during cleaning. Fig. 7 765041631 Rev. 002 22 Door closing mechanism The door is equipped with a self-closing system. If the door is opened less than 90, it will close by itself. If the door is opened more than 90, it will stay open. The door can be opened by using the foot pedal. This leaves both hands free when placing foodstuffs the cabinet. Power failure In the event of a power failure, the control remembers the temperature setting and restarts the product when power is restored. If the power failure persists for some time, the control might revert to the factory setting. Cleaning Insufficient cleaning will cause that the product will not work at optimum perfomance, or eventually it will be defective. Before cleaning, the product should always be disconnected. Do not flush the product with water, do not use water jet or steam hose as this may cause short-circuits in the electrical system. Cleansing agents containing chlorine or compounds of chlorine as well as other corrosive means, are not to be used, as they might cause corrosion to the stainless panels of the cabinet and the evaporator. The compressor compartment and in particular the condenser must be kept free from dust and dirt. This is best done with a vacuum cleaner and a brush. The air filters on the condenser and the front panel can be removed and cleaned in a dishwasher at max. 50°C. For the external maintenance – use stainless steel polish. The product should be cleaned internally with a mild soap solution at suitable intervals and checked thoroughly before it is put into operation again. 765041631 Rev. 002 23 Door gaskets This chapter deals with the importance of a well-functioning door gasket. Gaskets are an important part of a refrigerator/freezer. Gaskets with reduced functionality, reduces the tightness of the cabinet. Reduced tightness might cause increased humidity, internal icing, an iced up evaporator (leading to reduced refrigeration capacity), and in worst case reduced lifecycle of the cabinet. Therefore it is important to be aware of the condition of the gasket. Regular inspection is recommended. The gasket should be cleaned regularly with a mild soap solution. If a gasket needs replacement, contact your supplier. Long term storage If the product is taken out of operation, and need to be prepared for long-term storage, clean the inside compartment, the door and door gasket thorougly with a hot soapy damp cloth. Eventual remnants of food could create mould. 765041631 Rev. 002 24 Service The refrigerating system and the hermetically sealed compressor require no maintainance - they merely have to be kept clean. If refrigeration fails, first investigate whether the unit has been unintentionally disconnected or switched off at the socket, or whether a fuse has blown. If it is not possible to find the cause of the refrigeration failure, please contact Gram service department. When contacting us please tell us the name and serial number (S/N) / (WWYY) of the cabinet. This information is stated on the name plate, see Fig. 8. Location of the name plate: Gram Commercial A/S Aage Grams Vej 1, 6500 Vojens Denmark CVR nr. 12 00 66 32 Type REF PO No S/N Foam propellant Cyclopentane Input: V Defrost: Refrigerant: Climate class: Isolation class: Permissible operation over-pressure: Suction side: Hz W A W g 10 bar Discharge side: 25 bar Fig.8 765041631 Rev. 002 25 Disposal The below only concerns the United Kingdom. Disposal of an old cabinet is only available when we are delivering a new one at the same time. Cabinets must be fully defrosted and emptied prior to collection. Gram recognises that our products for the catering market are considered as WEEE when they become obsolete. To ensure that Gram’s responsibilities are handled correctly and environmentally friendly, we are signed up the largest Business to Business compliance scheme in the UK – B2B Compliance http://www.b2bcompliance.org.uk B2B Compliance will on our behalf deal with all areas of our responsibilities when collecting and disposing of equipment which fall under the UK WEEE regulations. B2B Compliance can be contacted on telephone number 01691 676124. 765041631 Rev. 002 26 EC-Declaration of conformity We, Gram Commercial A/S, declare under sole responsibility that the following products: Name: Plus Eco 70, Plus Superior 72, Twin Eco 82, Twin Superior 84, Euro Eco 60, Euro Superior 62 Refrigerant: R134a, R404A, R290, R600a To which this declaration relates, is in compliance with all the applicable essential requirements, and other provisions of the European Council Directive. Directive of the European Parliament and of the Council: - Pressure Equipment Directive 97/23/EF - Directive for Machinery 2006/42/EF - Low voltage Directive 2006/95/EF - EMC Directive 2004/108/EF - RoHS Directive 2002/95/EF - Atex Directive 94/9/EF Gram Commercial A/S Aage Grams Vej 1 DK-6500 Vojens Telephone: + 45 73 20 12 00 Vojens, 18. february 2014 John Lund R&D Manager 765041631 Rev. 002 27 Wiring diagram Gram Eco 765041631 Rev. 002 28 Wiring diagram Gram Superior 765041631 Rev. 002 29 Piping diagram 765041631 Rev. 002 30 765041631 Rev. 002 31