1
Product User Manual
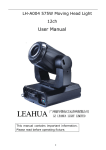
Moving head lighting 1200W Wash (16CH)
Product Introduce
First of all thank you for your purchase of our computer moving head lighting.
For your safety and better use of this product, please read this manual carefully
before using. And operate in strict accordance with the order, avoid misuse
caused lamps damage or personal safety.
Main technical parameters
Voltage: 110V 220V/50HZ 60HZ
Power: 1500 W
Bulb: HMI1200W/S
Channel: 16 Channels
Color: 7 Colors + white + rainbow effect
Strobe: 1-7 FPS + Promise dimming
Beam angle: 15 degrees
Control: DMX512 Digital Address Showing
Control loop: (Parameter Description)
Channel 1: strobe/shutter/reset
Channel 2: color
Channel 3: dimmer
Channel 4: color filter
Channel 5: pan
Channel 6: tilt
Channel 7: pan fine
Channel 8: tilt fine
Channel 9: X/Y speed
Channel 10: cyan
Channel 11: magenta
Channel 12: yellow
Channel 13: C/M/Y speed fast-slow
Channel 14: C/M/Y speed slow-fast
Channel 15: vector mode
Channel 16: reset
Focal length display manual (Panel Display Manual)
This control display menu designs for variety computer models, equipped with
variety control functions, simple controlling; For some computer models not
including movements, the corresponding menu option settings are invalid.
First; DMX512 [Address setting] (This feature allows you to change
the device address value)
1, Press the "ESC" key once or several times, till showing "A.001" At this time
press "UP" or "DOWN" key to see other functions.
2, Press the "ENTER" button, the letter "A" is off, use "UP" or "DOWN" key
to select the address of "001-512", click "ENTER" button to confirm the
withdrawal or click "ESC" key to abandon the withdrawal.
3, Accept the mainframe sync (subsidiary mode) to set address value to "001."
4,In the state of the showing address, such as devices without connecting DMX
controller, display will flicker, such as devices connecting DMX controller, the
screen will not flicker, but DMX signal light flashes due to signal.
Second; DN. Pr. [DMX default] (This feature allows you to choose
different control methods)
1, Press "UP" or "DOWN" to browser other menus
2, Press "ENTER" to enter, then click the "UP" or "DOWN" to choice "nod.1"
or "nod.2", press the "ENTER" to confirm saving withdraw or press the "ESC"
to confirm not saving withdraw
Nod.1: [Mode 1] normal channels control
Nod.2: [Mode 2] less channels control
3, Accept the mainframe sync (subsidiary mode) to default DMX to "001."
Third; TEST [testing program] this feature allows you to implement
internal demonstration program without external controller. This setting will
also be saved, and when you do not withdraw from the test program you will
automatically each time start the testing program.
Press "UP" or "DOWN" button to visit other features, click the "ENTER" to
enter.
1, nod.1: [Test Mode 1] Press "UP" or "DOWN" button to select other models,
press the "ENTER" to enter indicating the "RUN" to test run. If you need to
withdraw, press "ESC" to quit.
2, mast: [Host control] this function allows you to run this not requiring that a
host sends DMX sync signal to the Vice-use.
Press "UP" or "DOWN" button to select other models, press "ENTER" to enter
indicating that the "ON" signal sent as a host, DMX-signal indicator light is on.
Displaying the "OFF" signal is not sent, DMX signal light is off, press "ENTER"
to confirm the preservation withdraw, press "ESC" to not preservation
withdraw. Set to "ON", you must interrupt the external DMX controller and not
having more than two the same settings in the same mainframe with the road.
Four; AUDIO [Excited voice] this feature allows you to use voice inspire to
test program
1, Press "UP" or "DOWN" button to visit other menus
2, Press "ENTER" to enter, and click the "UP" or "DOWN" to choice "ON" or
"OFF" showing that when testing is running whether using excited voices. "ON"
shows the use of voice, "OFF" indicates not using the voice from test mode
control. After set up the "ON” testing program audio signal lights will flicker
with the music.
Five; Pan [Pan level downturn] this feature allows you to reverse the level of
action.
Press "ENTER" to enter, use the "UP" or "DOWN" button, if needing
downturn, select "ON", and if you do not reverse, select "OFF", press
"ENTER" to confirm the preservation withdraw, press "ESC" to not
preservation withdraw.
Six; Tilt [Vertical tilt reversal] this feature allows you to reverse vertical
movements.
Press "ENTER" to enter, use the "UP" or "DOWN" button, if needing
downturn, select "ON", and if you do not reverse, select "OFF", press
"ENTER" to confirm the preservation withdraw, press "ESC" to not
preservation withdraw.
Seven; Rest [Device reset] this feature allows you to re-activated device to the
original standard positioning. Press "ENTER" to confirm.
Installation Instruction
Indoor environment applicable operating temperature is below 35 ° C,
installation, operation and maintenance personnel performance lamps must be
cooked before the start of operations. The majority of damage is not familiar
with its performance due to errors caused by operation. In the first use of the
former, open to check whether there are damages caused by transportation:
Before the replacement of light bulb, make sure that power has been cut off, and
only after a cooling lamps (bulb temperature up to 200 ° C above), open the rear
cover, insert bulbs. Attention that bulbs with the side of a small bubble is upward,
Do not touch the bulb with bare hands; cancel with the rear cover replacement
bulbs, tightening screws.
Attention
When the bulb is installed, the entire installed and repaired handling lights,
please confirm disconnecting the power of lights.
Please do not use other specifications of different supply voltage and types of
light bulbs.
Lighting in the use of the process may lead to high fever and therefore not place
the lighting around the burning explosive articles, please do not touch the light
body in the process of using
Guarantee the lamp as the distance between objects larger than 1 m:
Do not watch the lamp light source, so as not to damage eyes:
In the maintenance, please contact with qualified maintenance staff.
Product warranty card
Product Name: Model: Date of manufacture: The purchase
date;
End-user: Sale shop:
Name: Contact Person:
Address: Telephone:
Contact Person:
Tel: Seal:
Description: These gaps must be filled truthfully from the
end-user point-of-sale, seal, or without warranty.
(Warranty Terms and Conditions see below)
Warranty: This product warranty is from the date of purchase.
Warranty Terms:
1. the warranty period in the normal use of this product and the fault can be
made under the terms of the warranty, the warranty card and produce purchase
tickets (photocopy), in the designated service centers or production, you can
enjoy free maintenance services.
2, in the warranty period, the following conditions will be implemented paid
maintenance services.
(1)Do not show effective warranty card;
(2)There is no sales name or defacement of it.
(3)Damage caused by the resistance of the fault.
(4)Damage in the transport
(5)Damage dues to fail to follow the using introduce.
(6)Damage caused by authorization or without the manufacturers of the
products professionals demolition repair
(7)Damage due to identify by the use of non-factory spent supporting