1
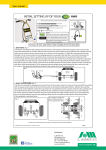
OPERATOR’S MANUAL BM-21 BEVELLING MACHINE Unit 30, Newhallhey Business Park, Rawtenstall, Rossendale, Lancashire, UK, BB4 6HR Phone: +44 1706 229490, Fax: +44 1706 830496 www.jeiuk.com e-mail: [email protected] BM-21 Contents 1. GENERAL INFORMATION ............................................................................................... 3 1.1. Application ................................................................................................................. 3 1.2. Technical data............................................................................................................ 3 1.3. Equipment included ................................................................................................... 4 2. SAFETY PRECAUTIONS.................................................................................................. 5 3. STARTUP AND OPERATION ........................................................................................... 7 3.1. Adjusting bevel width and angle ................................................................................. 7 3.2. Usage ........................................................................................................................ 8 3.3. Bevelling pipes ..........................................................................................................10 3.4. Bevelling larger pipes (only for optional equipment) ..................................................12 3.5. Replacing cutting inserts ...........................................................................................12 3.6. Replacing milling head ..............................................................................................14 4. WIRING DIAGRAM ..........................................................................................................15 5. SPARE AND WEARING PARTS ......................................................................................16 6. DECLARATION OF CONFORMITY .................................................................................17 7. QUALITY CERTIFICATE..................................................................................................18 8. WARRANTY CARD..........................................................................................................19 Read Operator’s Manual before starting BM-21 Operator’s Manual 2 BM-21 1. GENERAL INFORMATION 1.1. Application The BM-21 Bevelling Machine is designed for milling edges of plates and pipes made of carbon steel. The machine allows for bevelling sheet edges as well as pipe edges with diameters from 150 mm (6’’) to 300 mm (12’’) in 0–60 range with maximum bevel width of 21 mm (13/16’’). When equipped with the optional guide available in separate order, it can also work on pipes with diameters above 300 mm (12’’). The machine contains dampers allowing for comfortable operation, reducing unwanted vibrations. 1.2. Technical data 366 mm (14.41’’) 339 mm (13.35’’) 441 mm (17.36’’) BM-21 Operator’s Manual 3 BM-21 Voltage Electric motor Power Rotational speed Protection level Protection class Milling speed Maximum bevel width Bevel angle range Weight ~ 220–240 V, 50–60 Hz ~ 110–120 V, 50–60 Hz Single-phase induction motor with run capacitor; 1100 W 1600 W (for 50 Hz) 1800 W (for 60 Hz) 2780–3340 rpm (at 230 V) 2740–3290 rpm (at 115 V) IP 20 Class I 550 m/min (1800 ft/min, for 50 Hz) 650 m/min (2200 ft/min, for 60 Hz) b ≈ 21 mm (13/16’’, Figure 1) 0° ≤ ß ≤ 60° (Figure 1) Approx. 23 kg (51 lbs) Figure 1. Bevel dimensions 1.3. Equipment included The BM-21 Bevelling Machine is supplied in a metal box with complete standard equipment. The included equipment consists of: bevelling machine with a set of cutting inserts metal box 8 mm Allen key 6 mm Allen key 4 mm Allen key 12 mm flat key torx T15x100 screwdriver Operator’s Manual BM-21 Operator’s Manual 4 – 1 unit – 1 unit – 1 unit – 1 unit – 1 unit – 1 unit – 1 unit – 1 unit BM-21 2. SAFETY PRECAUTIONS 1. Before starting, read this Operator’s Manual and complete proper occupational safety and health training. 2. Machine must be used only in applications specified in Operator’s Manual. 3. Machine must be complete and all parts must be genuine and fully operational. 4. Power supply specifications must conform to those specified on rating plate. 5. Power supply socket must be equipped with grounding pin. 6. Never carry machine by cord or yank it to disconnect plug from socket. It may cause power cord to break and result in electric shock. 7. Untrained bystanders must not be present near machine. 8. Before starting, check condition of machine and electrical installation, including power cord, plug, control panel components, and milling tools. 9. Keep machine dry. Exposing it to rain, snow, or frost is prohibited. 10. Keep work area well lit, clean, and free of obstacles. 11. Never use machine near flammable fluids or gases, nor in explosive environments. 12. Never use blunt or damaged tools. 13. Use only tools recommended by manufacturer and specified in Operator’s Manual. 14. Mount cutting inserts and milling head securely. Remove adjusting keys and wrenches from work area before connecting plug to power socket. 15. If cutting edge of insert is worn out, rotate insert in socket by 90° or, if all edges are worn out, replace with new insert specified in Operator’s Manual. 16. Before every use, inspect machine to ensure it is not damaged. Check whether any part is cracked or improperly fitted. Make sure to maintain proper conditions that may affect machine operation. 17. Always use safety goggles, hearing protection, gloves, and protective clothing during operation. Do not wear loose clothing. 18. Do not touch moving parts or metal chips formed during milling. Prevent objects from being caught in moving parts. 19. After every use, remove metal chips from machine, particularly from milling head. Never remove metal chips with bare hands. 20. Maintain machine and tools with care. Cover steel parts with thin grease layer to protect them against rust when not in use for a longer period. 21. Perform all maintenance work only with power cord unplugged from power socket. BM-21 Operator’s Manual 5 BM-21 22. Perform all repairs only in service center appointed by seller. 23. If machine falls on hard surface, from height, is wet, or has other damage that could affect technical state of machine, stop operation and immediately send machine to service center for inspection. WARNING! Safety rules must be closely observed. BM-21 Operator’s Manual 6 BM-21 3. STARTUP AND OPERATION WARNING! Read safety precautions before starting. 3.1. Adjusting bevel width and angle Before starting, set required bevel width and angle. First, with power cord unplugged from power socket, set the milling head penetration to zero. To do this, loosen the lever (Figure 2) and rotate the adjusting knob to decrease the penetration of the milling head into the workpiece by setting the indication “0” on the width pitch. adjusting knob bevel width pitch bevel angle pitch bolts that lock the guide securing lever Figure 2. Adjusting bevel width and angle BM-21 Operator’s Manual 7 BM-21 To change the angle of the bevel, use the supplied 6 mm Allen key to loosen two side bolts. Then, turn the guide in a way to set the required angle on the angle pitch and tighten the bolts afterward. To adjust the bevel width, use the adjusting knob, proceeding as described before. The width pitch is only an estimate, because the bevel width varies with angle. For example, for the angle of 10° the maximum width “b” (Figure 1) is approximately equal 18 mm (11/16’’), while the width pitch indicates 9 mm (6/16’’). Increasing the penetration at this angle will distort the bevel. You can obtain the maximum bevel width (b ≈ 21 mm, 13/16’’) for the angle of 45°. The demanded bevel width for the required angle must be determined experimentally by gradually increasing the milling head penetration into the workpiece. 3.2. Usage After setting the bevel width and angle, plug the machine into the grounded power socket. Then, place the machine vertically on the right side of the workpiece as shown in Figure 3 in a way that the milling head does not touch the working edge. feed direction Figure 3. Machine prepared for work on metal plates Turn on the power, which will illuminate the power switch (Figure 4). Turn on the motor using the motor ON switch, press the guide to the plate, and slowly move the machine close to the edge. Bevel by sliding the machine to the left. Bevelling is performed according to the counter-rotation. The proper feed direction is shown in BM-21 Operator’s Manual 8 BM-21 Figure 3. The direction of the milling head rotation is indicated on the motor disk under the milling head cover. power switch motor ON switch motor OFF switch lamp indicating motor operation overload lamp Figure 4. Control panel design The feed rate will depend on the profile and composition of the workpiece. You can bevel the majority of steels capable of being welded in just one pass. It is recommended that bevels wider than 12 mm (1/2’’) be accomplished in at least two or three passes. In this case you use less effort and the process takes less total time than for bevelling in single pass. To obtain the maximum bevel width (21 mm, 13/16’’) in two passes, the first pass should be 14 mm wide (9/16’’), whereas for three passes the first one should be 12 mm wide (1/2’’) and the second one 16 mm wide (5/8’’). If the feed is too fast, the red overload lamp illuminates, indicating motor overload. Further load increasing triggers the safety circuit and shuts down the motor. In this case, move the tool away from the bevelled edge, toggle power switch to position “0”, and after the red lamp turns off, turn on the power again. Operating with the maximum permitted load (flashing of the red lamp) is allowed, but the motor temperature must not exceed 85°C (185°F). This type of motor can work under high temperatures, but long-lasting overheating can permanently damage its windings. Therefore, after longer working under full load (maximum 1 hour), stop the motor to cool it down for 10–15 minutes. Do not cool down the motor by running it without load, because it will become heated even faster than when working with load. BM-21 Operator’s Manual 9 BM-21 Once the work is finished, press the motor OFF switch to stop the motor, and toggle the power switch to position “0” to turn off the power. 3.3. Bevelling pipes The guide with rollers supplied in the standard equipment allows for bevelling pipes with diameters in 150–300 mm range (6–12’’). To prepare the machine for work on pipes, use the supplied 6 mm Allen key to unscrew two bolts that lock the guide (Figure 5). Then, take out the guide set, rotate it by 180º around the vertical axis, mount again, and secure with the bolts. 2 3 1 5 4 Figure 5. Preparing the machine for work on pipes Use the supplied 8 mm Allen key and 12 mm flat key to unscrew the bolts that secure the rollers. Then, move rollers from the opening (Figure 6a) to slot (Figure 6b) by placing the T-nut into the slot. BM-21 Operator’s Manual 10 BM-21 a) b) bolt that secures the roller Figure 6. Method of moving the rollers from opening to slot Use the adjusting knob to set the indication “0” on the width pitch. Move the rollers away from each other and place the machine as shown in Figure 7, with the guide touching the pipe. Then, move the rollers symmetrically to touch the pipe, secure with the bolts in this position, and adjust the required bevel width and angle. Figure 7. Machine prepared for work on smaller pipes (150–300 mm, 6–12’’) BM-21 Operator’s Manual 11 BM-21 3.4. Bevelling larger pipes (only for optional equipment) You can optionally order the guide for bevelling larger pipes with diameters from 260 mm to 600 mm (10–24’’). To prepare the machine for work on larger pipes, disassemble the guide set as shown in Figure 5. Use the supplied 4 mm Allen key to unscrew the standard guide and mount the guide for larger pipes (Figure 8), then screw in the bolts and mount the rollers as shown in Figure 6b. Part number: PRW-0461-22-00-00-0 Figure 8. Machine prepared for work on larges pipes (260–600 mm, 10–24’’) 3.5. Replacing cutting inserts The machine is equipped with the uniform milling head that contains two insert rings, each holding five cutting inserts made of carbide, for a total of 10 inserts. The inserts can be replaced or rotated. Perform this work only with the power cord unplugged from power socket. To replace or rotate an insert, unscrew the lever (Figure 9), remove the pitch, and take out the milling head cover. BM-21 Operator’s Manual 12 BM-21 1 2 3 Figure 9. Dismantling milling head cover Use the supplied screwdriver to unscrew the set screw (Figure 10), then remove the external insert, and clean the socket. Next, place the rotated insert again or replace with a new one if all four edges are worn out. To replace an insert from the internal ring, remove the external insert first. set screw Figure 10. Replacing cutting inserts BM-21 Operator’s Manual 13 BM-21 If the width of performed bevels is low, the cutting inserts wear only on one, internal corner. Then, the good action is to change the inserts between the rings (Figure 11), which extends the life of the inserts. worn out corners Figure 11. Changing cutting inserts between rings 3.6. Replacing milling head To replace the milling head, remove its cover in the manner shown in Figure 9. Then, place a 32 mm flat key on the driving ring (Figure 12) to lock the spindle rotation, use the supplied 8 mm Allen key to unscrew the bolt, and remove the milling head. The 32 mm flat key is not included in the standard equipment. driving ring bolt that secures the head Figure 12. Replacing milling head BM-21 Operator’s Manual 14 BM-21 4. WIRING DIAGRAM BM-21 Operator’s Manual 15 BM-21 5. SPARE AND WEARING PARTS Name Milling head (including mounting screws, screwdriver, and grease) Cutting insert Mounting screw for inserts Screwdriver for mounting screws Number BM21-24 BM21IS BM21-41 BM21-67 BM-21 Operator’s Manual 16 BM-21 6. DECLARATION OF CONFORMITY EC Declaration of Conformity We JEI Solutions Ltd Unit 30, Newhallhey Business Park Newhallhey Rd, Rawtenstall Rossendale, Lancashire, UK, BB4 6HR declare with full responsibility that product: BM-21 BEVELLING MACHINE which the declaration applies to is in accordance with the following standard: EN 50144-1 and satisfies safety regulations of the guidelines: 2006/95/EC and 2006/42/EC. Rossendale, 8 November 2011 ___________________________ David McFadden Managing Director BM-21 Operator’s Manual 17 BM-21 7. QUALITY CERTIFICATE Machine control card BM-21 BEVELLING MACHINE Serial number ................................................................................ Electric test Type of test Result Test with sinusoidal voltage (voltage 1000 V, frequency 50 Hz) Name of tester ................................... Date ............ Ω Resistance of the protective circuit ................................... Signature Quality control ................................................. Adjustments, inspections Quality control ................................................. BM-21 Operator’s Manual 18 BM-21 8. WARRANTY CARD WARRANTY CARD No............. ........................................................................... in the name of Manufacturer warrants the BM-21 Bevelling Machine to be free of defects in material and workmanship under normal use for a period of 12 months from date of sale. This warranty does not cover cutting inserts, damage or wear that arise from misuse, accident, tempering or any other causes not related to defects in workmanship or material. Date of production ......................................................................................................... Serial number ................................................................................................................ Date of sale ................................................................................................................... Signature of seller.......................................................................................................... 1.05 / 1 February 2013 WE RESERVE THE RIGHT TO MAKE CORRECTIONS AND MODIFICATIONS IN THIS MANUAL WITHOUT PRIOR NOTICE BM-21 Operator’s Manual 19