1
Description
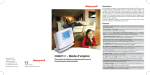
The Honeywell CM927 is a ‘wireless’ programmable room thermostat designed to
control you heating system efficiently, providing comfortable temperatures when you
are at home and energy savings when you are away. With ‘wireless’ communication
there is no need to provide a wired connection between the thermostat and boiler.
The following instructions explain how to set up, program and operate your
Honeywell CM927 Programmable Room Thermostat.
Features
Wireless connection to the boiler allows you to mount the Chronotherm in your
room without decor disruption
Armchair programming feature lets you program your Chronotherm while
resting comfortably in your armchair
Ergonomic User Interface features an ‘OK-button’ making the CM927 very
easy to use so you always stay in control.
LoT Technology provides informative ‘on-screen’ feedback and operational
assistance to the user.
Extra Large LCD (Liquid Crystal Display) Screen with Backlight provides
added user friendliness and clearer viewing – even in the dark.
7-day heating program lets you set the CM927 independently for each day of
the week to match your lifestyle, whilst maximizing energy savings.
6 independent temperature levels per day lets you set any 6 temperatures you
require (from 5 to 35°C) so you can enjoy economical comfort every day
Holiday button saves energy by letting you reduce the temperature for 1 to 99
days while you are away from home, resuming normal operation on your return.
Party button lets you temporarily maintain (or adjust) the current temperature for 1
- 23 hours. Useful when you have guests or leave the house for a short period.
CM927 - User Guide
Honeywell Control Systems Ltd.
Arlington Business Park,
7 day Wireless Programmable Room Thermostat
with LoT Technology
Bracknell
Berkshire
RG12 1EB
Technical Help Desk: 08457 678999
42011077-703 R1
www.honeywelluk.com
© 2006 Honeywell International Inc.
Day Off button copies Sunday’s program into any other day of the week, so that
you can make the CM927 follow this program if you have a day or days off.
Automatic Summer/Winter Time Change will adjust the clock automatically for
‘Daylight Saving Time’.
Built-in Memory holds the user program indefinitely so that it is never lost –
even if you remove the batteries.
Optimum Start option is an advanced feature which ensures that the optimum
temperature conditions are achieved at the required times (option set by your
installer).
Controls Layout
Contents
1
19
2
3
4
5
6
18
GETTING STARTED WITH the CM927
7
8
DAY
17
AUTOMANOFF
15
CM927
1..6
DATE
PROG
AUTO
MAN
OFF
9
10
14
13
11
12
1
Day / Date Display
11
Program Buttons
2
Time Display
12
Battery Compartment Lid
3
LoT Technology Display
13
Battery Compartment
4
Heating On Indicator
14
Holiday Function Button
5
Battery Low Indicator
15
Party Function Button
6
Temperature Display
16
Day Off Function Button
7
Temperature Change Buttons
17
Copy Day Button
8
Temperature Enquiry Button
18
Day Select Button
9
Slider Switch
19
Time Change Buttons
10 Green OK Button
Programming the CM927
The Built-in Heating Program............................................. 5
Reviewing the Heating Program........................................ 5
Modifying the Heating Program......................................... 5
Disabling / Enabling Time Periods ................................... 7
COPY
DAY
16
STEP 1: Installing the Batteries.......................................... 3
STEP 2: Setting the Date and Time.................................... 4
STEP 3: Running the Built-In Heating Program................. 4
operating the CM927
Choosing the Operating Mode.......................................... 8
AUTO mode............................................................. 8
MAN mode............................................................... 8
OFF mode................................................................ 8
During Normal Operation.................................................. 8
Temperature Enquiry................................................ 8
Temperature Override.............................................. 9
Using the Special Functions.............................................. 9
HOLIDAY Function................................................... 9
PARTY Function...................................................... 10
DAY OFF Function.................................................. 11
Adjusting the Time........................................................... 11
fine tuning the CM927
Changing the User Parameters....................................... 12
Change the Time Format........................................ 13
Reset the Built-in Program...................................... 13
Summer / Winter Time Change.............................. 13
FAQ’s & troubleshooting
Trouble Shooting Guide................................................... 14
Frequently Asked Questions............................................ 16
WHAT IS A PROGRAMMABLE ROOM THERMOSTAT?
An explanation for householders..................................... 19
WHAT IS A PROGRAMMABLE ROOM THERMOSTAT?
...an explanation for householders
(The following explanation applies to heating applications only)
A programmable room thermostat is both a programmer and a room thermostat. A
programmer allows you to set ‘On’ and ‘Off’ time periods to suit your own lifestyle.
A room thermostat works by sensing the air temperature, switching on the heating
when the air temperature falls below the thermostat setting, and switching it off once
this set temperature has been reached.
So, a programmable room thermostat lets you choose what times you want the
heating to be on, and what temperature it should reach while it is on. It will allow you
to select different temperatures in your home at different times of the day (and days
of the week) to meet your particular needs.
Turning a programmable room thermostat to a higher setting will not make the room
heat up any faster. How quickly the room heats up depends on the design of the
heating system, for example, the size of boiler and radiators.
Neither does the setting affect how quickly the room cools down. Turning a
programmable room thermostat to a lower setting will result in the room being
controlled at a lower temperature, and saves energy.
The way to set and use your programmable room thermostat is to find the lowest
temperature settings that you are comfortable with at the different times you have
chosen, and then leave it alone to do its job. The best way to do this is to set low
temperatures first, say 18°C, and then turn them up by one degree each day until you
are comfortable with the temperatures. You won’t have to adjust the thermostat further.
Any adjustments above these settings will waste energy and cost you more money.
If your heating system is a boiler with radiators, there will usually be only one
programmable room thermostat to control the whole house. But you can have different
temperatures in individual rooms by installing thermostatic radiator valves (TRVs) on
individual radiators. If you don’t have TRVs, you should choose a temperature that
is reasonable for the whole house. If you do have TRVs, you can choose a slightly
higher setting to make sure that even the coldest room is comfortable, then prevent
any overheating in other rooms by adjusting the TRVs.
The time on the programmer must be correct. Some types have to be adjusted
in spring and autumn at the changes between Greenwich Mean Time and British
Summer Time.
You may be able to temporarily adjust the heating programme, for example, ‘Override’,
‘Advance’ or ‘Boost’. These are explained in the manufacturer’s instructions.
Programmable room thermostats need a free flow of air to sense the temperature, so
they must not be covered by curtains or blocked by furniture. Nearby electric fires,
televisions, wall or table lamps may prevent the thermostat from working properly.
Manufactured for and on behalf of the Environment and Combustion Controls Division of Honeywell Technologies Sàrl, Ecublens, Route du Bois 37,
Switzerland by its Authorised Representative Honeywell International Inc.
GETTING STARTED WITH THE CM927
This section shows you how to setup and run the thermostat in 3 simple steps:
STEP 1: Installing the Batteries
Note: Please follow the instructions in this section only if the thermostat screen is
blank (no symbols or digits are displayed). If the screen displays some information
move on to STEP 2: Setting the Date and Time.
To install the Batteries:
a. Lift up the front cover of the thermostat
to reveal the battery cover and product
controls.
b. Remove the battery cover by pressing
down and sliding out.
c. Insert the 2 x AA LR6 Alkaline Batteries
supplied with the thermostat, ensuring
the correct orientation (see ‘Controls
Layout’ on page 2).
d. After a short pause the thermostat will
display information on the screen and
is now ready for use.
e. Replace the battery cover by sliding
it firmly back into the front of the
thermostat.
PLEASE RESPECT YOUR ENVIRONMENT!
Take care to dispose of used batteries carefully.
GETTING STARTED WITH THE CM927
STEP 2: Setting the Date and Time
To set the Date and Time:
a. Move the slider switch to the DATE position. ‘SET THE DAY’ will be displayed on
the screen and the day digits will be flashing.
DATE
PROG
AUTO
MAN
OFF
b. Use the
or
buttons to set the correct day. When either of these buttons
are pressed ‘DAY OK?’ will be displayed. Once the correct day is reached, press
the green
button to confirm.
c. Now the month digits will start flashing and ‘SET THE MONTH’ will be displayed.
Change the month and then the year using the
or
buttons, pressing the
green
button to save any changes made. (If an invalid date has been entered
you will be returned to the start of the date setting mode).
d. After setting a valid date, the time digits will begin flashing and ‘SET THE TIME’
will be displayed.
e. Use the
or
buttons to set the correct time. Each press of the button will
change the time by one minute and holding the button down will change the time
slowly at first and get progressively quicker. Once the correct time is set, press
the green
button to confirm then ‘CHANGES SAVED’ will be displayed for a
moment followed by ‘DATE COMPLETE’.
Note: If the slider switch is moved at any time before ‘DATE COMPLETE’ is displayed
the changes to the date and time will NOT be saved.
STEP 3: Running the Built-in Heating Program
The thermostat is now ready for operation. Move the slider switch to the AUTO
position and the built-in heating program will start running. The built-in heating
program has been designed to provide normal comfort requirements, but if you want
to customise the default settings (as shown on the next page) please see the next
section ‘PROGRAMMING THE CM927’.
programming THE CM927
The Built-in Heating Program
The built-in heating program has 6 temperature level changes per day that can be
set between 3.00am and 2.50am the following day - allowing you to maintain the
evening temperature after midnight. Each temperature level can be set between
5°C and 35°C, and adjusted in 0.5°C increments. The factory default program for
heating is as follows:
Monday to Friday
Period
1
2
3
4
5
6
Time
6:30
8:00
12:00
14:00
18:00
22:30
Temperature
21°C
18°C
21°C
18°C
21°C
16°C
Saturday & Sunday
Period
1
2
3
4
5
6
Time
8:00
10:00
12:00
14:00
18:00
23:00
Temperature
21°C
21°C
21°C
21°C
21°C
16°C
Reviewing the Heating Program
To review or edit the heating program move the slider switch to the PROG position
then use the
or
buttons to navigate between the 6 individual programming
periods for Monday. Use the DAY button to step through each day of the week, so
the complete 7 day heating program can be reviewed or edited.
Modifying the Heating Program
To change the heating program:
a. Set the slider switch to the PROG position, entering programming mode. ‘SET
TIME 1’ will be displayed and the time settings for period 1 on Monday (MON)
will be flashing. The active period is highlighted by a flashing square symbol
around the numbers at the bottom of the screen and the selected day is flashing
in the top left hand corner of the screen.
DATE
PROG
AUTO
MAN
OFF
1 2 3 4 5 6
programming THE CM927
b. To adjust the period start time press the
or buttons and ‘TIME 1 OK?’ will
be displayed. Holding the button down will change the time quickly.
Note: If you are pressing the
or buttons and the display flashes the next
change period, it means the next change will be pushed forward if you continue
to press
or
buttons).
c. Press the green
button to confirm the setting. ‘CHANGES SAVED’ is displayed
for 1.5 seconds then ‘SET TEMP 1’ will be shown.
Note: If the original time setting did not require adjustment press the green
button to move on to step ‘d.’.
d. The temperature setting for period 1 on Monday (MON) will now be flashing. To
adjust this press the
or
buttons and ‘TEMP 1 OK?’ will be displayed.
e. Press the green
button to confirm the setting. ‘CHANGES SAVED’ will be
displayed for a moment followed by ‘SET TIME 2’.
f. The next time and temperature period will now be active. Adjust this by repeating
steps b - e above until all 6 periods are set for Monday or move the slider switch
to the AUTO position to run the program as set, at any time.
g. After setting period 6 ‘CHANGES SAVED’ will be displayed as before, followed
by ‘DAY COMPLETE’.
You now have a choice of how to set the program for the next day:
h. To COPY the Monday’s program to another day:
Press the COPY DAY button to copy Monday’s program into Tuesday. The display
will go blank apart from ‘COPY MON TO’, indicating the program for Monday will
be copied to the selected target day, which is flashing in the top left corner of the
display. To select a different target day press the DAY button to cycle through the
days. Once the required day is flashing accept it by pressing the green
button.
Note: Once the target day is confirmed it becomes the day that is copied if the
COPY DAY button is pressed again.
OR
To program a different day:
Press the DAY button to select the next day, which is displayed in the top left
corner of the display. The program for that day can then be adjusted by following
steps b - g above. Programs for the remaining days can be set in the same way,
using the DAY button to move to the next day.
programming THE CM927
i. To exit the programming mode move the slider switch to the desired operating
mode - AUTO, MAN or OFF. Note: To run the adjusted program select the AUTO
mode.
Note: If the unit is left in programming mode for more than 10 minutes without
the slider being moved or any buttons pressed, ‘MOVE THE SLIDER’ will be
displayed. Press a button to finish programming the thermostat or move the
slider to select the desired operating mode.
Disabling / Enabling Time Periods
The thermostat has 6 periods each day that can be programmed, but you may not
need all of these switch points for your heating requirements. Therefore, any period
from 2 to 6 can be disabled or enabled as follows:
To disable time periods:
Go to the desired period ( 2 to 6 ) by moving the slider switch to the PROG
position, then using the
,
and DAY buttons to navigate, ensuring the
correct period is highlighted with the flashing square symbol. Press and hold the
button for at least 2 seconds and the display will indicate the period has been
removed from the program.
To enable time periods:
Navigate to the disabled period by moving the slider switch to the PROG position,
then using the
or
and DAY buttons. Once selected ‘DISABLED’ will be
displayed. Press and hold the button for at least 2 seconds and ‘ENABLED’ will
be displayed for a moment before returning to normal programming mode.
operating THE CM927
Choosing the Operating Mode
The thermostat can operate in three different modes: Automatic, Manual or Off. To
set the operating mode move the slider switch to the desired position. The screen
indicates which mode is currently active by displaying AUTO, MAN or OFF.
• AUTO (automatic) mode
Automatic mode sets the thermostat to follow the temperature program (default
or personalised). Operating the thermostat in this mode is the best way to
maintain a high level of temperature comfort whilst maximising your energy
savings.
• MAN (manual) mode
Manual mode sets the thermostat to act as a simple thermostat with a fixed
setpoint throughout the day. The setpoint can be adjusted from 5°C to 35°C
by using the
or
buttons. The thermostat will continue to maintain this
temperature until another operating mode or temperature is selected.
• OFF mode
Off mode sets the thermostat to control to a minimum temperature setting of 5°C
(default) that acts as a frost protection measure for your home. This value can be
adjusted by calling your installer.
During Normal Operation
• Temperature Enquiry
In AUTO and MAN operating modes the thermostat will display the current room
temperature, which is indicated by the text ‘ROOM TEMP’ displayed on the
screen. To review the programmed ‘target’ temperature (the temperature which
the thermostat is trying to maintain) press the button. This ‘target’ temperature
value will be displayed flashing and the text ‘TARGET TEMP’ will be shown for 5
seconds before returning to the current room temperature value.
In OFF operating mode the thermostat again displays the current room
temperature, as above, but when the button is pressed the text ‘FROST TEMP’
is displayed indicating the set value to protect your home. To modify this value
please contact your installer.
operating THE CM927
• Temperature Override
During normal operation (AUTO mode) the programmed temperature can be
adjusted manually by pressing the
or
buttons. The ‘target‘ temperature
will be displayed and flash for 5 seconds – during this time the
or buttons
can be used to modify the set value.
Note: This temperature override is cancelled at the next programmed
temperature change.
Using the Special Functions
• HOLIDAY Function
The holiday function allows you to set a constant temperature (default = 10°C)
for a specified number of days (from 1 - 99 days). This lets you save energy and
related costs when you are away from home, but resumes normal operation on
the day of your return.
To set the Holiday function:
a. Move the slider switch to the AUTO or MAN position.
b. Press the
button to display the holiday days counter and temperature
setting, along with the holiday indicator
.
c. The day after the current day will be selected and ‘RETURN DATE OK?’ will be
displayed. Press the
or time buttons to set the holiday time (1 – 99 days).
Note: (The day and date will update according to the number of days
selected).
d. Press the green
e. ‘CHANGES SAVED’ will be displayed for a moment followed by ‘TEMP OK?’.
Press the
or
buttons to set the holiday temperature (5°C - 35°C)
button to confirm the setting.
f. Press the green
button to confirm the setting. ‘HOLIDAY MODE’ will now
be displayed on the screen until the return date is reached or the holiday
mode is cancelled.
The thermostat will now control to the new temperature for the set number of days
that your home is vacant. At midnight the holiday counter will be reduced by one until
the selected number of days have passed. The thermostat will then return to normal
operation as set by the slider switch position (AUTO or MAN position). To cancel the
HOLIDAY setting or to exit the function at any time press the
button a second time
or move the slider switch to a different position.
operating THE CM927
• PARTY Function
The party function allows you to extend your heating program by a specified
number of hours at a particular temperature before resuming with the normal
temperature program. This is especially useful when you want to maintain or
increase the temperature during a special occasion such as a party or when
entertaining guests.
This function can also be used to reduce the temperature when you leave the
house for a short period (shopping, visiting friends, etc) thus saving energy and
saving you money.
To set the Party function:
a. Move the slider switch to the AUTO or MAN position.
b. Press the
button to display the party hours counter and temperature
setting, along with the party indicator .
c. The text ‘PARTY DURATION’ will now be displayed on the screen. Use the
or
buttons to set the number of hours (1 - 23 hours).
d. Press the green
e. ‘CHANGES SAVED’ will be displayed for a moment followed by ‘TEMP OK?’
Use the
or
buttons to set the desired temperature (5°C - 35°C).
f. Press the green
button to confirm the setting. ‘PARTY MODE’ will now be
displayed on the screen until the timer reaches zero or the party mode is
cancelled.
The unit will now control to the new temperature for the set number of hours then
return to normal operation as set by the slider switch position (AUTO or MAN
position). To cancel the PARTY setting or to exit the function at any time press
the button a second time or move the slider switch to a different position.
10
button to confirm the setting.
operating THE CM927
• DAY OFF FUNCTION
The day off function allows you to temporarily run Sunday’s heating program for
as many days as you desire. This is useful when you have a day off during your
normal week or will, unintentionally, be at home on a workday due to illness,
etc.
To set the Day Off function:
a. Move the slider switch to the AUTO position.
button to display the days off counter, ‘DAYS OFF’ will be
b. Press the
displayed and the day off indicator
will appear.
c. Press the
or
buttons to set the number of days (1 – 99 days) you
would like the alternative heating program to run for.
Note: (The day and date will update according to the number of days
selected).
d. Press the green
button to confirm the setting.
e. On confirmation ‘CHANGES SAVED’ will be displayed on the screen for a
moment and then will return to the normal display, with the days off indicator
displayed.
The thermostat will now control to the alternative heating program for the set
number of days before resuming with the normal heating program. To cancel the
DAY OFF mode or to exit the function at any time press the
button a second
time or move the slider switch to a different position.
Adjusting the Time
To adjust only the time during normal operation use the
or
buttons to adjust
the time and press the green
button again to confirm any changes.
11
fine tuning THE CM927
Changing the User Parameters
The user mode allows you to modify some basic settings of the thermostat to meet
your personal preferences. You can change the time display format (24hr or AM/PM),
reset the heating program to the built-in settings and disable or enable the summer/
winter time change feature.
To change any of these user’s parameters:
a. Move the slider switch to the OFF position, then press and hold the
approximately 5 seconds. button for approximately 5 seconds.
DAY
COPY
DAY
OFF
CM927
DATE
PROG
AUTO
MAN
OFF
1..6
b. Once entered the following information will be shown on the screen:
12
button for
fine tuning THE CM927
c. Now choose which one of the following parameters you would like to change:
i) Change the time format
or
‘CLOCK SELECT’ should be displayed on the screen - press the
buttons to select the preferred time format (12=AM/PM format, 24=24hr format)
and the display will flash, indicating a change has been made. To confirm this
change press the green
button.
ii) Reset the built-in program to the factory default
time button once. The display will show ‘RESET PROGRAM’.
Press the
Press the
or
buttons to select the preferred setting (0=user program,
1=factory program) and the display will flash, indicating a change has been
made. To confirm this change press the green
button.
iii) Enable or disable summer/winter time change
time button twice. The display will show ‘AUTO CHANGE’. Press
Press the
the
or buttons to select the preferred setting (0=disabled/Off, 1=enabled/
On) and the display will flash, indicating a change has been made. To confirm
this change press the green
button.
d. To exit the user mode move the slider switch to the AUTO, MAN or OFF
position.
13
14
The heating is not required
at this moment.
Fault in thermostat
The thermostat’s LCD display
shows a symbol but the
heating does not switch on.
The thermostat shows a flashing
symbol on the LCD
screen.
Remove and re-insert the batteries in the thermostat.
If the
symbol does not clear itself in a few
minutes call the installer.
The heat demand is send to the HC60NG as a value
between 0-100%. The HC60NG will adjust the boiler
on time to meet this requirement. That is why the
heating will be off sometimes even if the symbol is
displayed. To check if RF system is communicating
properly press the
button to increase the set
temperature a few degrees above the current
temperature. The heating should come on after a few
seconds.
Replace with new batteries.
Replace with new batteries.
Exhausted batteries.
Batteries are exhausted and
need replacing.
Check that the batteries have been installed in the
correctorientation.
Incorrect battery orientation.
The thermostat shows a flashing
symbol on the LCD screen.
Check to see if there are batteries in the battery
compartment and the paper tab has been removed.
Batteries not installed.
The thermostat has a blank LCD
screen.
Remedy
Possible Cause
Symptom
Troubleshooting Guide
faq’s & troubleshooting
The thermostat not set
correctly for your system.
The thermostat not set
correctly for your system.
Heating switches ON or OFF too
slowly or quickly.
Temperature swings between
too hot and too cold.
Call installer.
RF communication fault.
Call Installer.
Call Installer.
NOTE: You can control the boiler manually when the RF
communication is lost: Press the HC60NG push button
to switch the boiler on and off. When the green LED is
on – the boiler is on.
Hook the thermostat back on the wall bracket or
replace the thermostat on the table stand in the
position where RF communication was reliable.
Call electrical installer to check the boiler and
HC60NG power supply as well as the connection
between the boiler and the HC60NG.
Wrong electrical connection.
RF communication lost due
to the wrong location of the
thermostat.
Move the slider switch to MAN and press
or to
increase the temperature a few degrees above the
current room temperature. The heating should come
on after a few seconds.
Program does not call for
heat.
The red LED on the HC60NG is
constantly on or flashing.
Check that there is power to the heating system.
No power to heating system.
The thermostat’s LCD display
works but the heating does not
switch on (HC60NG LEDs are off
or green one is on).
Remedy
Possible Cause
Symptom
faq’s & troubleshooting
15
faq’s & troubleshooting
How do I change the batteries on the CM927 when they run out?
The thermostat constantly monitors the battery power level, which typically last for
about 2 years before needing replaced. When the power is running low a flashing
symbol will be displayed on the screen. To change the batteries follow the steps in
the above section (‘STEP 1: Installing the Batteries’ on page 3), replacing the used
batteries with new ones in step c.
Note: While changing the batteries your program settings will be stored but you may
need to adjust the time and date settings to be correct.
How do I set one temperature for the whole day?
To operate as a simple thermostat with one temperature for a period of time, move
the slider switch to the MAN position. Adjust the manual temperature by pressing the
or
buttons. This can be set anywhere from 5°C to 35°C in 0.5°C steps. The
thermostat will continue to maintain this temperature until another operating mode is
selected or the temperature is adjusted.
What is Optimum Start?
Optimum Start is a program which ensures that the optimum temperature conditions
are achieved at the required times. This is an Energy Efficiency feature that adjusts
the start time of your heating system depending upon how cold it is. For example,
on cold days your heating system will be started earlier to ensure that your home is
warm when you get up (at the target temperature) and on warmer days the heating
system will be started later to save energy. So, if the Optimum Start Feature is used,
then the time / temperature settings which are entered into the thermostat should
be set to when you want to be warm by and not when you want the heating system
to start.
I want to use the table stand instead of wall mounted bracket. Where can I
position the room unit?
It is important to keep the room unit in a location where reliable RF communication
was proven. Advise your installer where would you like to position the room unit and
he will check if the RF communication is reliable in the selected location(s).
Important: The Room Unit measures the temperature of the room where it is located.
It is important that the placement of the Room Unit within the room is away from;
draughts, direct sunlight and other heat sources. As this is a wireless device certain
objects could interfere with the RF signal - Leave at least 30cm distance from any
metal objects (including wall boxes) and at least 1 metre from any other electrical
equipment eg. radio, TV, PC, etc.
16
faq’s & troubleshooting
How do I remove the thermostat from the table stand or wall bracket?
After programming is finished always replace the thermostat back on the wall holder
or table stand.
Wall bracket
Table stand
HC60NG Relay Box Controls Layout
Push button and
relay status LED’s
What does it mean when the HC60NG relay box green LED is ON?
Green LED indicates normal operation of the radio frequency system. When the
green LED is ON the boiler is also ON. When the LED is OFF the boiler is OFF.
17
faq’s & troubleshooting
Can I use my CM927 to control my air-conditioning system?
Yes, if your system has been set up correctly you can use your thermostat to control
the cooling. To switch the thermostat between heating and cooling modes press
the
or
buttons together for 5 seconds in any of the product operating modes
(AUTO, MAN or OFF). The text ‘COOLING’ will be displayed for a moment on the
screen to indicate the cooling operation is now active. The factory default program
for cooling is specified in the table below, but this can be modified in the same way
as the default heating program:
Monday to Friday
Period
1
23456
Time
6:30
8:00
12:00
14:00
18:00
22:30
Temperature
24°C
28°C
24°C
28°C
24°C
24°C
Saturday & Sunday
Period
1
23456
Time
8:00
10:00
12:00
14:00
18:00
23:00
Temperature
24°C
24°C
24°C
24°C
24°C
24°C
If something happens to my heating system how can I check that the thermostat
is working?
Refer to the Troubleshooting Guide on page 17. If you still need assistance after this
call your installer. The thermostat should only be opened or removed by a qualified
professional to prevent possible injury from electric shock and/or damage to the
product.
18
42011077-703 R1