1
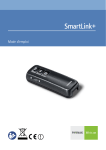
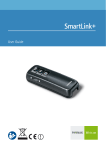
User Guide
!
Contents
2
Welcome 4
ZoomLink+ and accessories 5
User interface 6
How your ZoomLink+ works 8
Getting started
9
Charging the ZoomLink+
Switching ZoomLink+ ON/OFF
10
9
Microphone opening
14
Using ZoomLink+
15
ZoomLink+ placed on a table
15
ZoomLink+ reporter style
17
ZoomLink+ worn by your partner
18
ZoomLink+ connecting to a TV
20
ZoomLink+ connecting to a GPS in the car
24
Special functions
28
Operating range
30
For professionals: Changing the FM channel
31
Restarting ZoomLink
32
Displaying the firmware version
33
Troubleshooting
34
FM receivers
36
Important notices
37
Declaration of conformity
38
Service and warranty
40
Phonak distributors worldwide
42
3
Welcome
ZoomLink+ by Phonak is an easy to operate and flexible transmitter
with built in microphones. It features three microphone modes,
which guarantees the best reception in each listening situation.
ZoomLink+ is compatible with all Phonak receivers.
To obtain maximum benefit from the ZoomLink+ transmitter and
its comprehensive features, please read this user guide carefully.
Ask your hearing care professional if you have any questions.
Phonak wishes you much hearing enjoyment with ZoomLink+.
The following symbols appear in this user guide:
Important notes for all users.
Special notes for users of Phonak hearing instruments
with remote control compatibility.
Please also check www.phonak.com for additional FM information
Phonak - Life is on
4
ZoomLink+ and accessories
a ZoomLink+
b ZoomLink+ home and travel case
c Adapter for external connections
d Audio cable
e Charging unit
f MyLink*
* ZoomLink+ is compatible with all Phonak FM receivers.
The easy to use MyLink receiver is shown above.
All accessories can be ordered separately.
5
User interface
a
b
c
e
d
f
g
h
6
a Button to adjust the lavalier length
b Lavalier with integrated antenna
c Microphone functions
SuperZoom (narrow-angle sound pickup with
noise cancellation)
Zoom (wide-angle sound pickup)
Omni (360° sound pickup)
Switching ZoomLink+ ON:
Long press (~1 second) on the desired microphone button
Switching ZoomLink+ OFF:
Long press (~1 second) on any microphone button
d Microphone openings
e Display
f Clip
g For hearing care professionals:
Pen push for frequency change
h Interface for external connections
7
How your ZoomLink+ works
ZoomLink+ picks up your partner’s voice and instantly relays it
to your receiver, e.g. MyLink. The receiver sends it directly into
your hearing instruments.
Your partner
wears ZoomLink+
around the neck
You wear your hearing
instruments and the
FM receiver, e.g. MyLink
In places where you are not satisfied with the performance of
your hearing instruments alone, e.g. in noisy environments,
ZoomLink+ will always provide you with a loud and clear speech
signal.
8
Getting started
Charging ZoomLink+
ZoomLink+ contains a built in Lithium-ion battery with fast–
charge capability. A fully discharged battery takes around
2 hours to recharge. The battery will be about 80% charged
within an hour.
Plug the charging unit
into the power socket
Attach the ZoomLink+ adapter
for external connections
click
Plug the charging
unit into the mini
USB socket
Use only original Phonak charging units
9
Getting started
JThe battery symbol in the
ZoomLink+ display flashes during
charging. The battery cannot
be over-charged.
JThe battery symbol stops flashing
when ZoomLink+ is 100% charged.
JZoomLink+ operates for
approximately 10 hours when
fully charged.
JMake sure the socket outlet is
easily accessible.
Switching ZoomLink+ ON / OFF
To switch ON:
Press and hold one of the
three microphone buttons
for two seconds (long press).
To switch OFF:
Press and hold one of the
three microphone buttons
for two seconds (long press).
10
When switching ON, the ZoomLink+ shows startup information.
When the ZoomLink+ is ready, the following information
appears:
JFM channel number
JBattery status
JMicrophone setting
Microphone setting symbols:
Button
LCD
SuperZoom
Zoom
Omni
11
Getting started
Switching ZoomLink+ ON/OFF
At start-up, ZoomLink+ automatically selects the most recently
used FM channel.
ZoomLink+ automatically synchronizes Phonak multichannel
receivers to this channel, if the distance between ZoomLink+
and the Phonak receivers is less than approximately 8–10 inches
(20cm).
You may hear a beep tone when the synchronization is completed.
For customers using Phonak hearing instruments that are
compatible with analog remote controls:
JAt start-up, ZoomLink+ automatically sets digital Phonak hearing
instruments with remote control compatibility to the “FM + M“
program. Your hearing care professional can change this setting
to “FM only”, if required.
JAt switch-OFF, ZoomLink+ automatically resets digital Phonak
hearing instruments with remote control compatibility to the
hearing instrument program.
JHearing instruments need to be within the operating range
of the remote control built into ZoomLink+. This range is approximately 8–10 inches (20cm).
12
Example of the automatic hearing instrument program setting:
Hearing
instrument
program
FM + hearing
instrument
microphone
active
ZoomLink+ switched ON Automatic reset
to a pre-defined
hearing instrument
program,
e.g. program 4
ZoomLink+
switched OFF
Please ask your hearing care professional about the actual
program setting for your particular hearing instrument.
13
Getting started
Microphone opening
Do not cover the microphone openings with your fingers
when ZoomLink+ is in use. It will affect the sound quality.
14
Using ZoomLink+
ZoomLink+ can be used in different ways, depending on the
situation. The following examples illustrate the most common
cases for typical ZoomLink+ use.
ZoomLink+ placed on the table
Recommended use:
JIn restaurants
J In conferences
J At home
J At business meetings
Discussion partners
You
15
Using ZoomLink+
How to use ZoomLink+:
JPlace it on the table. If you use the Zoom setting, the front
of ZoomLink+, where the lavalier is attached, should point to
the speakers that you want to hear. If you use the omni-setting,
the orientation of ZoomLink+ has no influence, as sound is
picked up from all angles.
JMake sure the lavalier is not folded together or knotted.
JSwitch ON ZoomLink+ by holding down one of its 3 microphone buttons.
Recommended ZoomLink+ settings:
16
Zoom (wide-angle sound pickup)
Omni (360° sound pickup),
to be used in low background noise
Reporter style
Recommended for
conversation in noisy
conditions with one or
more talkers close by,
like:
Jat parties
Jin shopping malls
How to use ZoomLink+:
JHold it in your hand. Make sure you do not cover the microphone opening on the left-hand side of ZoomLink+. The front
of ZoomLink+ should point at the speaker(s) you want to hear.
Recommended ZoomLink+ settings:
SuperZoom (narrow-angle sound pickup)
Zoom (wide-angle sound pickup)
17
Using ZoomLink+
Worn by your partner
Recommended for conversations with one person:
JSpeaker in an auditorium
JTraveling with another person
JOn walks
JDuring sport
JAt home
18
How to use ZoomLink+:
J Pass ZoomLink+ to your conversation partner.
J Your partner should wear it around the neck. The cord needs
to be adjusted as depicted below.
To ensure optimal speech
quality, make sure the distance
between the speaker’s mouth
and ZoomLink+ is between
8–10 inches (20–30 cm).
J Switch ON ZoomLink+ by holding
down one of its 3 microphone buttons.
Recommended ZoomLink+ settings:
SuperZoom (narrow-angle sound pickup)
Zoom (wide-angle sound pickup)
19
Using ZoomLink+
Connecting to a TV
Connect ZoomLink+ to your TV
or other multimedia device to
enjoy crystal clear in-the-ear audio
without disturbing others.
AUDIO
MICRO
In addition to TV, this function is suitable for use with:
JCD players
JRadio receivers
JComputers and laptops with audio outputs
JMP3 players
JAny other audio devices with a headphone output
How to use ZoomLink+:
JMake sure ZoomLink+ is switched OFF.
JConnect ZoomLink+ – as pictured overleaf – and place
it in front of the television or multimedia device.
JSwitch ON the television. Your ZoomLink+ will automatically
switch ON after it detects an audio signal.
JTo ensure maximum operating range, make
sure the lavalier cord is not folded or knotted.
JWhen the television or audio device is
switched OFF, ZoomLink+ will
automatically switch OFF after
approximately 40 seconds.
a
Connect the adapter for
external connection
20
TV/Radio headphone output
b
AUDIO
Plug in to the
audio jack
AUDIO
MICRO
Audio cable
The volume of the audio output on some televisions is adjustable.
Please consult your television’s own user guide to learn about
this feature, if available.
For devices without headphone output sockets:
If your TV or audio device does not provide a headphone output
socket, you can connect ZoomLink+ to your device’s Cinch or
Scart socket instead. Just ask your hearing care professional for
the Phonak Scart or Cinch adapter.
21
Using ZoomLink+
If the audio equipment does not have a headphone output
socket, place ZoomLink+ in front of the loudspeaker of the television or the radio receiver. Then switch ON ZoomLink+ and the
television. This may prevent that the television loudspeakers are
muted when ZoomLink+ is connected to the television.
Recommended ZoomLink+ settings:
22
SuperZoom (narrow-angle sound pickup)
Zoom (wide-angle sound pickup)
Scart adapter Cinch adapter
If there is no Cinch or Scart socket available, place ZoomLink+
in front of the television or other device’s loudspeaker.
Then switch ON ZoomLink+ in Zoom or SuperZoom mode, before
switching ON your television.
23
Using ZoomLink+
Connecting to a GPS in the car
While a TV set provides a constant audio signal, GPS devices
only send out audio information every few seconds or minutes.
ZoomLink+’s permanent audio input setting has been developed
with exactly these products in mind.
To activate the permanent
audio input:
JSwitch ON ZoomLink+
by holding down one of
its 3 microphone buttons
for 2 seconds.
JAttach the adapter for
external connections to
the ZoomLink+.
JConnect one end of the audio cable to the ZoomLink+’s
adapter for external connections interface, and the other to
the audio output socket of the GPS.
JSwitch ON the GPS.
If you leave the car, proceed as follows:
JRemove the audio cable and the adapter for external connections
from the ZoomLink+.
JIf you do not need the ZoomLink+: switch OFF ZoomLink+.
If you want to continue using ZoomLink+: hold down the
Zoom or SuperZoom button for one second. This will switch OFF
the GPS mode and activate the microphones in ZoomLink+.
24
For standard audio input use, the microphones in ZoomLink+ are
automatically switched OFF. If there is a need to activate the
internal microphones in parallel to the audio input, proceed as
follows:
JPlug in ZoomLink+ as illustrated
on page 21 and switch ON the
television. ZoomLink+ switches
ON automatically when it detects
an audio signal from the television.
‘A’ (Audio) appears on the LCD.
JTo activate the ZoomLink+ microphones in parallel to the audio
key. ‘2’ appears
input, press the
on the LCD. ZoomLink+ is in omni
mode.
The audio input volume is reduced
when activating the internal
microphones.
JTo switch OFF ZoomLink+ microphones during audio input use,
key again. ‘2’ disappears on the LCD and ‘A’ is
press the
displayed again.
25
Choosing the right microphone setting
Key symbol
26
Recommended for
Noise level
Focus
SuperZoom
high
fewer speakers
Zoom
medium
fewer speakers
Omni
low
more speakers
Voice pickup pattern
Symbol in display
focused in a narrow angle in
front of the ZoomLink+
wider angle in front of the
ZoomLink+
360° around the ZoomLink+
The speakers should be close
to the ZoomLink+
27
Special functions
Using an external microphone
The ZoomLink+ can be used with an external mini clip-on
microphone (called MM8) or a miniaturized boom microphone
(called iBoom). This can be beneficial in a variety of situations
such as college lectures or presentations, or when using
ZoomLink+ in the car.
J The letter A on the display means that the ZoomLink+ is
relaying an audio signal from an external microphone or
source, such as a TV set.
J Use the lavalier antenna to ensure optimal operating range.
MM8
iBoom
Switch ON ZoomLink+ and connect
the external microphone.
MM8 features a separate
ON/OFF switch.
Ensure that the MM8
AUDIO
is correctly switched ON!
Plug in here:
28
MICRO
Usage
Action
External microphone only.
Plug in the external
microphone as illustrated and
switch it ON, if necessary.
The ZoomLink+ begins
relaying speech as soon as
it detects a signal.
A appears in the display.
ZoomLink+ microphone
and external microphone
simultaneously.
Plug in the external
microphone and press the
key.
ZoomLink+
Switch OFF ZoomLink+
microphone; only the
external microphone
remains active.
Press the
End of use.
Unplug the external
microphone and detach
the ZoomLink+ adapter.
Then switch OFF the
ZoomLink+.
key again.
29
Operating range
The operating distance is the distance between the speaker
talking into ZoomLink+ and the hearing instrument user with
MyLink or any other Phonak receiver.
Speaker using ZoomLink+
Listener using MyLink or
any other receiver
The maximum distance is typically more than 50 feet (15 m)
indoors and more than 130-170 feet (40-50 m) outside.
High-power electronic equipment, larger electronic
installations and metallic structures may affect and
significantly reduce the operating range.
30
For professionals
Changing the FM channel
If the radio channel used in ZoomLink+ is frequently disturbed
by an external source of interference, the hearing care professional
can switch ZoomLink+ to another radio channel.
1) Switch ON ZoomLink+ by pressing the button for one second.
2) Using a pen, press the push button, as pictured. After one
second, the channel displayed in the LCD will change. Hold
the button down until the desired channel is displayed.
3) Release the button. The channel number in the LCD will stop
blinking after a few seconds.
4) Set the default channel of
the MyLink or MicroLink
receivers to the same channel
by using the FM SuccessWare.
31
Restarting ZoomLink+
In case of a system problem, ZoomLink+ can be restarted by
simultaneously pressing the three microphone keys.
When these buttons are pressed, the ZoomLink+ will switch
itself OFF and restart automatically.
In case of a system error, ZoomLink+ displays the error code
for ten seconds and restarts afterwards automatically.
32
Displaying the firmware version
Should you need to know the firmware version of your
simultaneously.
and
ZoomLink+, press
JThe DSP firmware version is displayed. e.g. “d—1_2”.
Then 2 seconds later…
JThe second part of the DSP firmware version is displayed. e.g.
“d+FFF”
2 seconds later…
JThe ARM firmware version is displayed. e.g. “c123”.
2 seconds later…
JThe Bluetooth firmware version is displayed. e.g. “BT172”.
Optional charging unit
Phonak offers an optional twin charger for ZoomLink+, for
use when two ZoomLink+ devices need to be charged
simultaneously. It is also suitable for use with any other Phonak
FM transmitter that features a mini-USB charging socket.
Only use original Phonak charging units for your ZoomLink+!
33
Trouble shooting
Situation
ZoomLink+ does not switch ON.
Radio interference.
Voices are inaudible when
the ZoomLink+ is switched ON.
Poor speech intelligibility.
34
Most probable cause
Remedy
Battery exhausted.
Charge the ZoomLink+
(2 hours minimum).
Extraneous cause:
radio antenna or similar
interfering devices nearby.
Change channel
(see page 31).
a) Hearing instrument set
to wrong program.
b) Receiver switched OFF.
c) Radio frequency not
synchronized.
a) Check hearing
instrument program.
b) Switch ON receiver.
c) Switch ZoomLink+ OFF
and ON by holding it close
to the FM receivers.
ZoomLink+ is positioned too
far away from the speaker.
a) Select another
microphone setting
(see page 11).
b) Move the ZoomLink+
closer to the speaker.
35
FM receivers
An FM System consists of an FM transmitter – such as
ZoomLink+ – and in most cases two FM receivers.
There are different types of FM receivers available:
JMiniaturized universal Dynamic FM receivers such as
Phonak’s MLxi. MLxi can be used with both Phonak and
many other brands of hearing instrument.
JDesign integrated, miniaturized Phonak Dynamic FM receivers
such as ML12i, ML11i, ML10i and ML9i. These receivers are tiny
in size and designed to fit the style and form Phonak’s hearing
instruments.
JInduction-based FM receivers such as Phonak’s MyLink.
If you have any questions regarding FM receivers, consult your
hearing care professional or visit www.eschooldesk.com
ZoomLink+ should only be used with Phonak FM
receivers.
36
Important notices
JDo not use your ZoomLink+ in a place where it is prohibited
to use electronic devices, e.g. on airplanes or in hospitals.
If in doubt, please ask the person in charge.
JPersons with pacemakers or other medical devices should
ALWAYS consult their physician, the manufacturer of
their pacemaker, or other medical device BEFORE using
ZoomLink+. The use of ZoomLink+ with a pacemaker
or other medical devices should ALWAYS be in accordance
with the safety recommendations of the physician
responsible for your pacemaker or the pacemaker manufacturer.
JDo not use two or more ZoomLink+ transmitters on the same
FM channel.
JPlease note that radio signals might also be picked up and
overheard by other people.
JBefore using ZoomLink+ in another country, contact your hearing
care professional to make sure the use of your radio channels is
permitted in that country.
JDo not use water or other liquids to clean the ZoomLink+.
JOnly use original Phonak accessories.
JOnly use the original Phonak ZoomLink+ charger.
JYour ZoomLink+ should only be repaired at an authorized
service center.
37
Declaration of conformity
Hereby, Phonak Communications AG, declares that the
ZoomLink+ is in compliance with the essential requirements and
other relevant provisions of Directive 1999/5/EC.
To obtain a copy of the Declaration of conformity, please contact
the local Phonak AG representative, whose address can be taken
from the list of Phonak distributors worldwide.
This device complies with part 15 and part 95 of the FCC rules
and with RSS 210 of Industry Canada.
Operation is subject to the following two conditions:
(1) This device don’t cause harmful interference and (2) must
accept any interference received, including interference that
may cause undesired operation.
38
The transmitter is authorized by rule under the Low Power
Radio Service (47 C.F.R. Part 95) and must not cause harmful
interference to TV reception or United States Navy SPASUR
installations.
You do not need an FCC license to operate the transmitters.
The transmitters may only be used to provide: auditory
assistance to persons with disabilities, persons who require
language translation, or persons in educational settings;
health care services to the ill; law enforcement tracking services
under agreement with a law enforcement agency; or automated
maritime telecommunications system (AMTS) network control
communications. Two way voice communications and all other
types of uses not mentioned above are expressly prohibited.
Warning:
Changes or modifications made to this equipment not
expressly approved by Phonak may void the user’s authority
to operate the equipment.
39
Service and warranty
Phonak provides a manufacturer’s limited warranty for your
ZoomLink+. This covers all manufacturing and material defects.
Problems with ZoomLink+ arising from improper handling or
care and repairs made by an unauthorized party are not covered
by the warranty.
Please ask at the point of sale for full details of this warranty.
The salesperson will note the serial number of your ZoomLink+
below. It will be needed in the event of a warranty repair.
ZoomLink+ Serial number:
Date of purchase:
FM receiver(s) Serial number(s):
40
41
Phonak distributors worldwide
42
Group companies:
(detailed information on www.phonak.com)
Australia
Austria
Belgium
Brazil
Canada
China Denmark
France
Germany
India
Italy
Japan
Jordan
Mexico
Phonak Australasia Pty. Ltd.
Baulkham Hills N.S.W 2153
Hansaton Akustische Geräte GmbH
5020 Salzburg
Ets Lapperre B.H.A.C. NV
B-1702 Groot-Bijgaarden
Phonak Belgium NV, B-1700 Dilbeek
Phonak do Brasil –
Sistemas Audiológicos Ltda.
São Paulo – SP 04363-100
Phonak Canada Limited
Mississauga, Ontario L5W OB3
Phonak (Shanghai) Co. Ltd.
Shanghai City 200233
Phonak Danmark A/S
Østre Hougvej 42-44, 5500 Middelfart
Phonak France SA, 69500 Bron
Phonak GmbH, 70736 Fellbach-
Oeffingen, EC Representative
Phonak India Pvt. Ltd., 100 034 New Delhi
Phonak Italia S.r.l., 20159 Milano
Phonak Japan Co., Ltd., Tokyo 101-0044
Phonak Middle East, 11181 Amman
Phonak Mexicana, S.A. de C.V. 03920
México, D.F.MEXICO
Netherlands
New Zealand
Norway
Poland
Portugal
Russian Federation Spain
Sweden
Switzerland
Turkey
United Kingdom
USA
Phonak B.V., 4131PN Vianen
Phonak New Zealand Ltd.,
Takapuna, Auckland 9
Phonak AS, 0105 Oslo
Phonak Polska SP Z.0.0 00-567 Warszawa
Phonak Ibérica S.A., 03690 Alicante, Spain
Phonak CIS Ltd., Moscow, 115114
Phonak Ibérica S.A., 03690 Alicante
Phonak AB, 117 43 Stockholm
Phonak AG, Phonak Schweiz, 8712 Stäfa
Phonak Turkey A.S., 34357 Istanbul
Phonak UK Limited
Warrington, Cheshire WA1 1PP
Phonak LLC, Warrenville, IL 60555-3927
Independent general distributors:
A complete list of Phonak distributors is available at Phonak‘s Internet site:
www.phonak.com
Please visit us or ask your hearing care
professional for information.
Manufacturer: Phonak AG, Laubisrütistrasse 28
CH-8712 Stäfa, Switzerland
43
Important notes for all users.
Special notes for users of Phonak hearing
instruments with analog remote control
compatibility.
The CE symbol is confirmation by Phonak AG
that this Phonak product meets the requirements
of directive 93/42/EEC on medical devices
and the R&TTE Directive 1999/5/EC on Radio
and Telecommunication Terminal Equipment.
The alert sign means that potential restrictions
on its use are applicable in one or more EU
countries.
This symbol indicates that it is important that
the user refers to associated warnings given
in this user guide.
The symbol with the crossed out disposal bin
indicates that this device should not be
treated as household waste. Please hand over
your old or unused device to the applicable
collection point for the recycling of electrical
and electronic equipment or bring your old
hearing instrument device to your hearing
care professional for appropriate disposal. By
ensuring this product is disposed of correctly, you will help prevent potential negative
effects on the environment and human health.
44
Operating
conditions
This product has been designed for trouble-free
operation without restrictions when used as
intended, unless otherwise stated in this user
guide.
Transportation
and storage
conditions
Temperature should not exceed limits of
–20°/60° Celsius at a relative air humidity
of 65% for extended periods during
transportation and storage. Air pressure
between 500 and 1100 hPa is not detrimental
to this device.
45
Personal notes
029-0223-02/2009-06/A+W Printed in Switzerland ©Phonak AG All rights reserved