1
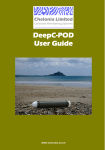
Chelonia Limited Cetacean Monitoring Systems DeepC-POD User Guide WWW.CHELONIA.CO.UK C-click, POD, TAD, T-POD, C-POD and DeepC-POD are trademarks of Chelonia Limited. Information in this document is subject to change without notice. © 2008-2011 Chelonia Limited. All rights reserved. March 2015 2 DEEPC-POD USER GUIDE Contents 1 Introduction ................................................................................................ 5 Help and support ......................................................................................... 6 2 Checking parts ........................................................................................... 7 DeepC-POD ................................................................................................. 7 Secure Digital (SD) cards ............................................................................ 8 Silica gel pack .............................................................................................. 8 Additional requirements ............................................................................... 8 3 Software installation.................................................................................. 9 Installing the software .................................................................................. 9 Other files .................................................................................................... 9 Uninstalling the software ............................................................................. 9 4 Planning your deployments ................................................................... 10 Calculating the maximum deployment time ............................................... 10 Lost and found ........................................................................................... 10 Moorings .................................................................................................... 10 Buoyancy .............................................................................................. 10 Attitude sensing .................................................................................... 10 Security ................................................................................................. 11 Theft...................................................................................................... 11 Using anchors ....................................................................................... 12 Buoys .................................................................................................... 12 Directionality ......................................................................................... 12 Towing the C-POD ............................................................................... 12 5 Setting up DeepC-PODs for deployment............................................... 14 Opening the DeepC-POD for the first time ................................................ 14 Internal parts ......................................................................................... 14 Installing batteries ...................................................................................... 15 Starting the C-POD .................................................................................... 16 Connect power ..................................................................................... 16 Insert the SD card ................................................................................. 17 Start the POD ....................................................................................... 17 Setup summary .................................................................................... 18 Closing the DeepC-POD ........................................................................... 19 DEEPC-POD USER GUIDE 3 6 Retrieving DeepC-PODs .......................................................................... 21 Opening the DeepC-POD after deployment .............................................. 21 Checking the status of the POD and removing the SD card ..................... 23 LED OFF ............................................................................................... 23 Flashing on/off twice/second ................................................................ 23 Single or double flash/second .............................................................. 23 One brief flash every 2 seconds ........................................................... 23 Completing retrieval ................................................................................... 24 Redeploying the DeepC-POD immediately ............................................... 24 7 Downloading your data ........................................................................... 26 Connecting the SD card to a PC ............................................................... 26 Running the CPOD.EXE software ............................................................. 27 Viewing summary data .............................................................................. 27 Copying the data ........................................................................................ 27 8 Analysing your data ................................................................................ 29 9 Maintenance ............................................................................................. 30 Cleaning ..................................................................................................... 30 O-rings ....................................................................................................... 30 Transducer housing ................................................................................... 30 Mooring lines ............................................................................................. 30 Electronics ................................................................................................. 30 Silica Gel .................................................................................................... 31 Storage ...................................................................................................... 31 10 Troubleshooting ...................................................................................... 32 4 DEEPC-POD USER GUIDE 1 Introduction This User Guide describes how to set up, deploy and retrieve data from your DeepC-POD. C-PODs are fully automated, static, passive acoustic monitoring systems that detect porpoises, dolphins and other toothed whales by recognising the trains of echo-location clicks they make to detect their prey, orientate and interact. C-PODs record the time of occurrence, centre frequency, intensity, duration, bandwidth and frequency trend of tonal clicks within the frequency range 20 kHz to 160 kHz. This allows them to monitor clicks from all odondocetes except sperm whales. Digitised sound is not stored. The ability of C-PODs to accept broadband clicks means that: different filter setting are unnecessary, making C-POD setup very simple logging is very uniform between different C-PODs within a project there is an opportunity to integrate data from different projects over wide geographical areas. The C-POD characteristics, settings in use during logging and click data are stored on a Secure Digital (SD) flash card in the C-POD. After deployment, the data are downloaded from the SD card onto a PC and are then analysed using the supplied C-POD PC software. The software automatically identifies the presence of cetaceans by detecting the trains of ultrasonic echo-location clicks they produce. DEEPC-POD USER GUIDE 5 Help and support We offer full email support with our C-PODs and will be pleased to help with queries on any aspect of C-POD use. Your C-POD purchase also entitles you to free future software upgrades. We offer a range of additional services, including data analysis and interpretation. You can find more information and the latest software and documentation on our web site at www.chelonia.co.uk. Keep up-to-date with important changes by joining the C-POD User Group, at www.chelonia.co.uk/cug_join.htm. You can also contact us in the following ways: Chelonia Limited The Barkhouse North Cliff Mousehole TR19 6PH UK Tel: +44 (0)1736 732462 Email: [email protected] 6 DEEPC-POD USER GUIDE 2 Checking parts Once you have unpacked your DeepC-POD, check to make sure that you have all the correct parts: DeepC-POD Lid Battery pack connector spring SD card reader SD cards: one located in the SD card holder inside the POD and one spare Contains the standard deployment battery pack, SD card and electronics Houses the hydrophone Silica gel DeepC-POD User Guide DeepC-POD The DeepC-POD consists of an aluminium casing with hydrophone housing at one end and a removable lid at the other end. C-PODs are very robust, but be careful not to drop the C-POD or subject it to hard knocks, as this might interrupt the power supply. PODs are identified by a unique number that is shown on labels on the SD cards and on the POD housing under the upper buffer ring. Unlike the standard C-POD, the DeepC-POD is not buoyant. DEEPC-POD USER GUIDE 7 Secure Digital (SD) cards Two SD cards are supplied with each C-POD. On delivery, you will find one SD card in the POD’s SD card holder and one in an SD card case. SD cards are not interchangeable between C-PODs and are labelled with their correct C-POD number to help prevent them from being used in the wrong C-POD. No setup is required; all the setup information for the C-POD is already stored on the SD card. When the C-POD is deployed, it writes click data to the card. On retrieval, you copy the data from the card by using a PC running the CPOD.exe software. When you retrieve a C-POD after deployment, you can replace the SD card with the spare and immediately redeploy the C-POD. The SD cards have a write protect tab on the side. To run the POD, the tab should always be down, in the unlocked (read/write) position, as shown below. If it is moved up to the locked position, the POD will not start. Required for the POD to run. UNLOCKED Lock after deployment to protect your data. LOCKED (write protected) Silica gel pack The silica gel pack is used to prevent condensation on the inside of the DeepC-POD when it is deployed. Two packs are supplied for each POD, one for deployment and one spare. There may be a risk of corrosion if there is no silica gel to keep the humidity low. Corrosion may cause power loss or failure of electronic components which may lead to data loss. The silica gel pack slides down between the batteries and the POD housing. Additional requirements In order to run the CPOD software and download data from SD cards, you need a computer running Microsoft Windows 95, NT, 2000, XT, Server 2003, Vista or Windows 7. Also, prior to deployment, if you choose to re-use batteries, it is recommended that you check their voltages using a voltmeter, to ensure that they are suitable for the period of deployment. The section Retrieving DeepC-PODs on page 21 contains a recommended kit list for deploying and retrieving PODs. 8 DEEPC-POD USER GUIDE 3 Software installation The installation procedure, described below, consists of downloading files from the Chelonia web site. Tip: Visit the links below on a regular basis to check for updates and modification information or join the C-POD User Group, at www.chelonia.co.uk/cug_join.htm. Installing the software Tip: The C-POD software is being developed and improved continuously. Make sure you have the latest version of the program as well as the software guides. To install the C-POD software: 1. Create a folder called CPOD on your computer. 2. Go to the Chelonia C-POD downloads page at: http://www.chelonia.co.uk/cpod_downloads.htm 3. Download CPOD.exe to the new CPOD folder: 4. Download any other support documents such as setup videos, software guides and example files. 5. Create a subfolder for your data files, called cpod data. Installation is complete. Other files You can also download the latest version of this User Guide from: http://www.chelonia.co.uk/cpod_downloads.htm Uninstalling the software To uninstall the C-POD software: 1. Delete the CPOD folder, along with any other C-POD files. DEEPC-POD USER GUIDE 9 4 Planning your deployments This section contains advice and information to help you plan your deployments. Calculating the maximum deployment time Maximum deployment time is dependent upon the following factors: The capacity of the D-cells (usually specified in milliamp hours, mAh). Using two stacks of D-cells, each with a 15000 mAh capacity, the maximum deployment time is expected to be approximately 4 months. The capacity of the SD card. Deployment environments are very variable and therefore you should consider carrying out preliminary tests of battery consumption and memory use at sea, before full deployment. Lost and found Write your contact details on the outside of the C-POD using indelible ink. Place a label inside the C-POD as well. If you prefer not to write your contact details on the C-POD, the POD lid has the web site address www.phonehome.org.uk etched in the top. This is a simple web site that will allow someone who finds a C-POD to contact us. We will then contact you to arrange its return. Moorings This section provides general information and guidelines that you should consider carefully when designing your moorings. Buoyancy Unlike the standard C-POD, the DeepC-POD is not buoyant. Attitude sensing The DeepC-POD contains an attitude sensor which records the anglefrom-vertical each minute. The attitude can be viewed in CPOD.exe, when you have copied your data files after deployment, enabling you to ensure that the C-POD was correctly deployed in a vertical position. 10 DEEPC-POD USER GUIDE The sensor is set to prevent logging until the DeepC-POD is deployed (when the hydrophone housing is pointing downwards). This allows the DeepC-POD to be set up and transported some time before deployment, saving power and memory. OFF ON OFF ON hydrophone Security The main problems with moorings are theft, being moved by trawlers or storms and abrasion of lines. Theft This is a serious risk in many areas. Some possible solutions are suggested below: Get cooperation and advice from local fishermen, who may allow you to use their gear. DEEPC-POD USER GUIDE 11 Use a very small marker, for example, a single fishing float on a thin line that is only at the surface at low slack tide. The disadvantage is that it may wind itself around weed or anything else and sink. Do not use buoys. Use a line between two anchors that can be located via GPS using a grapple. Use pop-ups. These are commercially available acoustic releases. However, currently they are very expensive. Use C-links that dissolve after a set time in the water and then release a recovery buoy from the bottom. Use divers to deploy and recover your C-PODs. Using anchors A few concrete blocks are not adequate on a sandy sea bed as these are dynamic and move with tidal currents. Massive concrete anchors, digging metal anchors or heavy metal anchors are needed. Manhole covers with a central attachment are effective but can be hard to lift. Buoys Try to use the smallest buoy that you will be able to find on retrieval. This helps to minimises drag in storms. However, some users have deployed large surface markers with radar reflectors and 4 tonne anchors. You might prefer to use a short line that results in the buoy spending most of the time submerged due to the tide stream or tide height, appearing only briefly at the surface when the tide is slack or at low water. However, make sure the float will not be collapsed by the water pressure. Directionality All C-PODs show lower sensitivity directly along the long axis of the housing, especially in the battery pack direction. Towing the C-POD Towing C-PODs is not normally recommended, for the following reasons: Animals are more or less undetectable unless they face the hydrophone. Porpoises tend to move away from moving boats and become undetectable over a width and distance that varies both with boat characteristics and with porpoise familiarity. Detection well beyond the range of responsive movement is unlikely with the C-POD so no undisturbed data set is available. 12 DEEPC-POD USER GUIDE Dolphins find towed C-PODs very interesting and will follow for long periods and get detected easily, but again the variables controlling this interaction are almost impossible to determine. Towing a long way behind a yacht might give a usable way of filling weather-gaps in survey data for porpoises, and crude dolphin-encounter data. DEEPC-POD USER GUIDE 13 5 Setting up DeepC-PODs for deployment It is strongly recommended that before you deploy your PODs, you practice setup, starting, closing, opening and downloading data, as described in this section and sections 6 and 7, so that you are confident about the operating procedures. Tip: A link to brief videos showing how to start and stop the POD can be found on the Chelonia web site at: http://www.chelonia.co.uk/cpod_downloads.htm Opening the DeepC-POD for the first time 1. Use a wrench, like those shown below, to hold the C-POD body while using a heavy screwdriver or bar to twist the lid open. Internal parts Battery pack connector spring adjustment screw Setup button 14 DEEPC-POD USER GUIDE SD card holder Installing batteries The C-POD battery pack holds 2 stacks of 5 D-cells, side-by-side in the POD housing, with the positive end of all cells facing inwards. For most purposes, alkaline D-cells are recommended. Rechargeable D-cells can be used, providing the voltage from each stack does not exceed 11 volts. However, the self-discharge rates and power density of most types of rechargeable D-cell means that running times are reduced below half. The total voltage of each stack of cells must not exceed 11 volts. Supply voltages above 11 volts will damage the C-POD irreversibly. A stack of Lithium D-cells must not be used – the voltage from four cells is too high and will damage the C-POD irreversibly. Two lithium D-cells and conducting ‘blank cells’ could be used, but the capacity advantage is minimal. NiCad rechargeable batteries are not recommended as they have a high self-discharge rate so that the running time is shorter than you would expect from the capacity of the cell. The C-POD uses one stack of D-cells at a time. The electronics selects the stack that provides the lower voltage. When the voltage from this stack of cells falls too low, it selects the other stack of cells automatically. Deployment time using 10 D-cells is dependent upon the capacity of the D-cells and the acoustic conditions at sea. To install the batteries: 1. Inspect the batteries for damage. If the insulation around the outside casing of the battery is damaged, it can cause the battery pack to shortcircuit. Either repair it with tape or use a new battery. 2. If you are re-using batteries, check the output voltage of each battery using a voltmeter. Use batteries with similar voltages in the same stack. 3. Place the C-POD on a horizontal surface. 4. Slide the cells into the C-POD, one by one. All the cells should face the same way – positive end facing into the C-POD. + - + - + - + - + - DEEPC-POD USER GUIDE 15 5. Fit the battery pack connector spring as shown below by squeezing the spring gently and passing the loop in the bottom of the spring over the rod. Then slide the spring down the rod until it touches the batteries This part fits underneath the screw head This part wraps around the metal rod and rests against the partition These parts fit on the ends of the batteries 6. Adjust the screw in the top of the rod so that the dome of the screw is just below the top of the connector. This means you will only have to push the connector down approximately 7 mm to engage the head of the screw. This ensures that the battery pack is held securely, but not too tightly, as too much pressure could deform or damage the battery casings. ~ 7 mm 7. Disconnect power for at last 4 minutes, to allow the POD electronics to discharge. Starting the C-POD Connect power 1. Fit the battery pack connector spring as shown above. The power LED flashes rapidly (approximately 2 times a second) to indicate that power is connected. 16 DEEPC-POD USER GUIDE Insert the SD card 1. Install the batteries and connect power as described above. 2. Check that the SD card tab is in the unlocked (read/write) position (see Secure Digital (SD) cards on page 5). Tip: If the SD card tab is in the locked position, the POD will not start. 3. Insert the SD card into the card holder in the C-POD and push it down quickly but gently until it locates in the card holder. The power LED now gives either one or two short flashes per second, depending on which battery stack is being used. Brief single or double LED flash every second If the power LED does not show the correct sequence of flashes, your C-POD may not be set up correctly. This can happen if you push the SD card in too slowly – the LED gives a long flash about once a second. Remove the SD card and disconnect the power for at least 4 minutes to ensure that the POD electronics are reset. Then reconnect the power and reinsert the SD card. Do not simply remove and reinsert the SD card as the POD will not start properly and this may lead to complete data loss. Start the POD The C-POD has an accurate timer but no knowledge of the date or time. In order to have accurate times and dates in your data, you must record the date and time that you start the C-POD. 1. Install the batteries, connect power and insert the SD card as described above. Make sure that the LED is giving a brief single or double flash every second. DEEPC-POD USER GUIDE 17 2. Make sure that you or someone else is ready to note down the date and exact time. 3. Hold down the setup button about 15 seconds before the end of the clock minute (the LED stops flashing for 3 seconds and then stays on). The C-POD now reads the setup file on the SD card (this takes about 3 seconds) and then the LED lights and stays on until you release the button. 4. Release the button exactly on the end of the minute and note the date and exact time. The LED flashes briefly a few times and then gives one very short single flash every few seconds. The C-POD starts recording its angle-to-vertical and the ambient temperature each minute. The C-POD will not start logging click data until the hydrophone is lower than the lid. This allows you to transport the POD without wasting battery power and memory space. When the C-POD is deployed in the sea, it should vertical, hydrophone housing downwards, and will start logging automatically (see Buoyancy on page 10 and Attitude sensing on page 10). Tip: Write down the date and time and keep it safe. You can enter the date and time into CPOD.exe when you copy your data onto your PC after deployment and it will be incorporated into the data file. Setup summary The set-up sequence is summarised below: 1 Disconnect the C-POD for at least 4 minutes to reset the electronics. 2 Connect the power. 3 Insert the SD card into the holder and press it down quickly but gently. single LED flash: or double LED flash: 4 Press/hold until LED lights/release the setup button and note the start date/time. very brief LED flash: When the C-POD is deployed vertically, hydrophone down, it will start logging. 18 DEEPC-POD USER GUIDE If the power LED does not show the correct sequence of flashes, your C-POD may not be set up correctly. Remove the SD card and disconnect the power for at least 4 minutes to ensure that the POD electronics are reset. Then reconnect the power and reinsert the SD card. Tip: A link to brief videos showing how to start and stop the POD can be found on the Chelonia web site at: http://www.chelonia.co.uk/cpod_downloads.htm Tip: If your POD fails to start correctly, refer to section 10 Troubleshooting on page 32. Closing the DeepC-POD The C-POD lid is supplied with two O-rings. The O-rings have been lightly lubricated using a PTFE dry-lube oil to ensure that the lid tightens smoothly. Tip: If you want to lubricate the O-rings before deployment, using a drylube lubricant minimises wetness and stickiness that might attract dust and grit. To close the POD: 1. Make sure there are two O-rings in place on the lid. Check that the O-rings are clean. Check particularly that there are no hairs, grit or sand trapped beneath the O-rings as these could cause damaging leaks. 2. Take a silica gel packet out of its moisture-proof container and slide it down between the batteries and the POD housing. There may be a risk of corrosion if there is no silica gel to keep the humidity low. Corrosion may cause power loss or failure of electronic components which may lead to data loss. DEEPC-POD USER GUIDE 19 The silica gel pack can become saturated in only 30 minutes of exposure to warm damp air, so keep it in an airtight jar or bag until you are ready to close the C-POD. When dry, silica gel is yellow/orange in colour. The crystals turn green when damp. To restore the crystals, place the bag in an electric oven and heat at 120°C for two hours. 3. Align the lid and C-POD housing carefully and begin screwing them together. Screw the C-POD and lid together tightly ensuring that the visible O-ring is compressed. The C-POD is now ready for deployment. 4. When the POD is ready for deployment – that is, running with lid tightly screwed on – carefully weigh the POD and note the value. Weighing the DeepC-POD before deployment is essential as it will allow you to compare the weight after deployment to ensure that water has not leaked into the POD, pressurising the contents. The C-POD is recording its angle to vertical and the temperature, but will not start logging click data if it is kept horizontal. The DeepC-POD is set up to start logging automatically when it is deployed vertically, hydrophone housing downwards (see Buoyancy on page 10 and Attitude sensing on page 10). 20 DEEPC-POD USER GUIDE 6 Retrieving DeepC-PODs It is recommended that you take the following kit with you when you retrieve C-PODs at sea: the weight of the DeepC-POD before deployment the spare SD card a means of recording your observations a watch, to note the exact time of retrieval and redeployment a scrubber and scraper to remove bio-fouling a heavy screwdriver and C-POD wrench to open and close the C-POD a towel a pair of tweezers to remove the silica gel an airtight container to put the silica gel in paper towels to clean any sand or grit that may have lodged under the O-rings a spare set of O-rings in case of damage the spare battery pack connector spring new batteries for redeployment a voltmeter to check battery condition, if you want to re-use batteries a waterproof marker pen to write contact details on the C-POD housing any tools for your attachment method a splash-proof box for this kit Tip: When you retrieve the DeepC-POD, it will continue to log while the hydrophone housing is lower than the lid. If you are not opening the POD immediately, store it horizontally to save power and memory. In this position, it logs only its angle to vertical and ambient temperature. Opening the DeepC-POD after deployment WARNING: BECAUSE THE DEEPC-POD CAN BE DEPLOYED AT GREAT DEPTH, ANY LEAKAGE OF SEAWATER INTO THE POD CAN CAUSE THE AIR INSIDE TO BECOME COMPRESSED. IF THIS HAPPENS, SIMPLY UNSCREWING THE LID MAY CAUSE AN EXPLOSIVE RELEASE OF AIR. It is therefore important that you follow the procedure below to firstly assess whether water has entered the POD and if so, how you should proceed. DEEPC-POD USER GUIDE 21 When you retrieve a DeepC-POD: 1. Use a plastic scraper to clean off any heavy fouling. 2. Scrub and wash the C-POD housing. 3. Dry the C-POD and lid, especially around the O-ring. 4. BEFORE YOU OPEN THE POD, carefully weigh it and compare the two values – before and after deployment. If the weights are the same, you can safely open the lid. If the POD is heavier, water has seeped in and the contents will now be under pressure: a. Remove the plastic plug over the decompression screw in the POD lid. b. Carefully unscrew the decompression screw to release the compressed air. If possible, do this under water, to minimise the effects of the compressed air when it is released. Decompression screw 5. When you are sure that the POD is not pressurized and is safe to open, unscrew the C-POD lid in a dry, stable location. Use a wrench, like those shown below, to hold the C-POD body while using a heavy screwdriver or bar to twist the lid open. 22 DEEPC-POD USER GUIDE Checking the status of the POD and removing the SD card As soon as you have opened the POD after deployment, make a visual inspection and make a note of the LED status. Then read the appropriate section below. LED OFF The POD has stopped. 1. Remove the SD card by pressing down gently on the card and then allowing it to spring up. If the POD lost power suddenly, there will be no summary file on the SD card. If the batteries have run down or if the SD card is full, the POD will have shut down and recorded a summary file. Flashing on/off twice/second The POD has reset or was not started. 1. Remove the SD card by pressing down gently on the card and then allowing it to spring up. Single or double flash/second The POD was setup but not started. 1. Remove the SD card by pressing down gently on the card and then allowing it to spring up. One brief flash every 2 seconds The POD is running correctly, logging temperature and angle to vertical. Tip: In the step below record the date and exact time that you release the setup button. This will allow you to check in the software later that your deployment time matches the length of your data. 1. Press and hold down the setup button until the power LED lights. 2. As soon as the LED lights, you can release the setup button and note the date and exact time. The C-POD stops recording and the LED stays on briefly while the POD writes a data summary on the SD card. 3. Remove the SD card by pressing down gently on the card and then allowing it to spring up. The power LED flashes rapidly (approximately 2 times a second). DEEPC-POD USER GUIDE 23 Tip: PODs before 970 that have not had a firmware upgrade do not flash after the SD card has been removed after deployment. This is normal. Completing retrieval Tip: If you disconnect the batteries before recording the data summary, your data will not be damaged and it can still be copied from the SD card using CPOD.exe. However, you will not be able to view the summary data before you copy the files (see section 7 Downloading your data on page 26). 1. Store the SD card safely – it contains all your data. 2. Remove the battery pack connector spring. 3. Remove the silica gel and put it in a moisture-proof container. If the granules look blue/green it means that they have become wet. To restore the crystals, place the bag in an electric oven and heat at 120°C for two hours. 4. Inspect the O-rings for damage and replace them if necessary. 5. Remove the batteries. 6. Check and record the voltage of each battery and which stack they came from. Redeploying the DeepC-POD immediately You must disconnect the power for at least 4 minutes to ensure that the POD electronics are reset, before you redeploy your POD. If you want to redeploy the DeepC-POD immediately: 1. Remove the battery pack connector spring, silica gel and batteries. 2. If you want to re-use the batteries, use a voltmeter to check their suitability. 3. Insert new batteries or re-insert the old ones if they are suitable. 4. Insert the battery pack connector spring. Observe that the power LED flashes rapidly on and off. 5. Check that the SD card tab is in the unlocked (read) position (see Secure Digital (SD) cards on page 5). 6. Insert your spare SD card and press in down quickly but gently to locate it in the holder. Observe that the power LED gives either one or two short flashes per second, depending on which battery stack is being used. 24 DEEPC-POD USER GUIDE Any data on the SD card will be overwritten when you start the C-POD. 7. Insert the silica gel pack between the battery stacks and the POD housing. 8. Press and hold down the setup button until the C-POD power LED goes out and comes on again (about 3 seconds). 9. Release the button and note the date and exact time. 10. Observe that the power LED is flashing once very briefly every few seconds. 11. Close the C-POD. 12. Carefully weigh the POD and note the value. DEEPC-POD USER GUIDE 25 7 Downloading your data When you have retrieved your SD card from a deployed C-POD, you can read the data using the CPOD.exe software. Do not format the SD card, or write any files on to it. The SD card uses a special format which you can read only by using CPOD.exe. If you use any other application to write to the SD card it will become unusable and any data on it may be corrupted or lost. The CPOD.exe software has a Summary feature that allows you to check the data on the SD card quickly, so that you can make a decision about whether to redeploy the C-POD or spend time downloading the data files and analysing them. Note that logging time in the summary file can be up to 10% lower than your recorded time. The files are on the SD card are: DATA0.CHE, DATA1.CHE etc, – the data files, each of about 1 GB SETUP.CHE – a very small file containing configuration details After an SD card has been read into a PC it can be put back into a C-POD for redeployment. Any new data will overwrite the old data on the card. Connecting the SD card to a PC SD cards have a LOCK switch on the side. It is strongly recommended that you move the switch to the locked (read only) position before you insert a card into your PC. This ensures that the data files cannot be deleted or corrupted. To set up your SD card: 1. Move the LOCK switch on the SD card up to the locked (read only) position (see Secure Digital (SD) cards on page 8). 2. Insert the SD card into the SD card adaptor. 3. Insert the adaptor into a USB port on your computer. Your PC will detect the SD card automatically and identify it as a removable drive. 4. If Windows displays AutoPlay or Scan and Fix options, close the windows without selecting any options. If you select AutoPlay options, Windows writes a file called autorun.inf to the SD card that causes data corruption. However, if you have set the SD card switch to read only, the data cannot be corrupted. Tip: If you think you may have corrupted the data on your SD card, please contact us as we may still be able to retrieve the data for you. 26 DEEPC-POD USER GUIDE Running the CPOD.EXE software In the CPOD folder: 1. Run CPOD.exe. The main window is displayed. 2. To display and hide menu options, move the mouse cursor into the blue bar at the top of the CPOD.exe window or click in the toolbar to the right of the buttons. 3. Display the menu options. 4. Click on the Read SD tab. Viewing summary data To view a summary of the data of the SD card before it is copied: 1. Click the Show summary from file DATA0.CHE button. 2. Locate the SD card with the volume name CHELONIA and open the file DATA0.CHE. A brief summary of the data is displayed. You can use this summary to decide whether to extract the data to your PC now (large amounts of data can take a long time to copy) or wait until a more suitable time. Copying the data The date, time and location data that you enter below are important – do not skip the steps. To extract data from a C-POD SD card: 1. In the Read SD page, enter the time the POD was started. The date and time will be added to the data in the file when it is copied to your PC. 2. Enter location and date information that CPOD.exe will use to append to the data file name. 3. Enter any deployment information that you want added to the data file. 4. To extract the data from the SD card to your PC, click Read SD card. 5. Locate the SD card, select the data file DATA0.CHE and click Open. A confirmation dialog box is displayed, showing the POD number. 6. If the POD number is correct, click Yes. CPOD.exe suggests a name for the data file, based on the parameters you entered above. You can simply accept the default name or change it. DEEPC-POD USER GUIDE 27 7. Locate the cpod data folder where you should store your C-POD data files and click Save. Tip: If you save .CP1 files in the same folder, it's easier to batch process files using the software. CPOD.exe extracts any data in the .CHE files and creates corresponding data files (file01.CP1, file02.CP1, etc). Tip: When you have extracted and safely stored the data from the SD card, you can reuse the card immediately – it does not need to be set up as the C-POD setup information is retained on the card. Any data on the SD card will simply be overwritten by the C-POD when it is deployed. Remember to move the SD card LOCK switch back down to the read/write position. 28 DEEPC-POD USER GUIDE 8 Analysing your data The CPOD software allows you to view, analyze and export your data. It includes automatic click train detection using the KERNO classifier and encounter classifiers that we will continue to develop as more data becomes available (see the software manual, CPOD.PDF at www.chelonia.co.uk/cpod_downloads.htm). This path of developing software, which can be used on all collected data, has been successfully followed in the C-POD’s predecessor, the T-POD. However, the T-POD software is not able to analyse data from the C-POD as the C-POD logs many more click features. The provision of a single method for use in a wide range of projects is a key aim in the development of the C-POD. We would like to use customer C-POD data to help us improve the accuracy and sensitivity of the C-POD PC software train filter and species identification. Any software improvements we make will always be retrospectively applicable to all data sets and new versions of the C-POD software will be available free of charge, so that you can re-analyse your data. If you send us a copy of your C-POD data, we will, in return, provide brief feedback on the quality of your datasets free of charge. Any data you send us will be kept in complete confidence. You can send your data to us in any of the following ways: email post an SD card to us. See our contact details on page 6. copy the data files onto a CD-ROM or DVD and post it to us. via www.chelonia.wetransfer.com via another file transfer service. For an introduction to analysing your data, download and read the software guides on the Chelonia web site (see Installing the software on page 9). DEEPC-POD USER GUIDE 29 9 Maintenance Cleaning Use a scrubbing brush to remove all marine growth and dirt completely. Wash and dry the C-POD. O-rings O-rings must be clean of all contamination – especially hairs and grit – before you close the C-POD. Any dirt on the O-rings may cause water to leak into the C-POD housing, causing damage to the electronics and loss of data. Whenever you open the C-POD, follow the guidelines below: Place the C-POD housing on a clean hard surface. Look to see if there is any water between the outer and inner O-rings when the C-POD is opened. If an O-ring has picked up particles, remove it using a blunt tool like the end of a small spoon. Carefully clean all surfaces. If you are in any doubt about the state of the O-rings, replace them with new ones. A spare set of O-rings is supplied with new C-PODs. Replacements are available from Chelonia Limited. Transducer housing Bio-fouling or contamination with grease or paint can be removed using the kind of non-abrasive pads and preparations used for cleaning cooking utensils. Mooring lines Inspect the mooring lines after every deployment for signs of wear – mainly abrasion against rough surfaces. Electronics Do not connect batteries or other DC power supplies above 11 volts. Supply voltages above 11 volts will damage the C-POD irreversibly. 30 DEEPC-POD USER GUIDE Silica Gel Silica gel packs should be inserted into the C-POD to absorb any water vapour and keep the electronics dry. When you remove a silica gel pack after opening a C-POD, put it immediately into an airtight container. When dry, silica gel is yellow/orange in colour. The crystals turn green when damp. To restore the crystals, place the bag in an electric oven and heat at 120°C for two hours. There may be a risk of corrosion if there is no silica gel to keep the humidity low. Corrosion may cause power loss or failure of electronic components which may lead to data loss. Storage Before you store your C-PODs: Remove all batteries. Clean off all barnacles and other marine encrustations. Wash the outside of the POD housing and any mooring lines using fresh water. If you are storing C-PODs in a dry place, leave them open. If you are storing C-PODs in a damp place, store them closed, with active silica gel packs inside. DEEPC-POD USER GUIDE 31 10 Troubleshooting When I deployed the POD, I forgot to write down the date and time. When you recover the POD, if the power LED is still flashing, you can give data files a ±1 minute accuracy by recording the end date and time when you press/release the setup button to record a summary file (see Checking the status of the POD and removing the SD card on page 23). When I connect power, the power LED does not light. Batteries inserted incorrectly: Check that the batteries are inserted correctly – positive end facing into the C-POD, negative towards the connector. Battery voltages too low: Check the battery voltages. The C-POD requires at least 4 volts in order to run. Batteries damaged: Check the battery casings for damage to their insulation – breaks in the insulation can cause shorting. Also check for leakage. C-POD electronics have not reset: Disconnect the power for at least 4 minutes. When I connect power and insert the SD card, the power LED continues to flash on and off, instead of giving either one or two short flashes per second. You inserted the SD card too slowly, so the POD electronics could not set up the card correctly: Remove the SD card, disconnect the batteries, and wait at least 4 minutes. Then start the setup procedure again (see Starting the C-POD on page 16). When you insert the SD card, push in down quickly but gently to locate it in the holder. Brief videos showing how to start the POD can be found on the Chelonia web site at: http://www.chelonia.co.uk/cpod_downloads.htm The POD electronics have not been discharged and reset: Remove the SD card, disconnect the batteries, and wait at least 4 minutes. Then start the setup procedure again (see Starting the C-POD on page 16). The Lock button on the SD card has moved to the locked (readonly) position: Move the Lock button to the unlocked (read) position (see Secure Digital (SD) cards on page 8). Then start the setup procedure again (see Starting the C-POD on page 16). The SD card is damaged: Start the setup process again, using the spare SD card. Please contact us for a new SD card. 32 DEEPC-POD USER GUIDE The SD card holder is damaged: Try the spare SD card. If this does not work either, check that the cards are locating in the holder correctly. Please contact us for return and repair. I'm not sure what some of the LED flash sequences mean. The various LED flash sequences are shown below. Seconds 1 2 3 4 5 Connect power: repeats Insert SD card: Single or double flash depending on battery stack used repeats Press/hold reset button. LED lights after 3 seconds Release setup button: Flashes every 5 seconds for 1 minute repeats After 1 minute, the POD records temperature/angle repeats Hydrophone up (data recording): repeats Hydrophone down: (POD records temperature/angle) repeats Press/release setup button: Remove SD card: repeats When I opened the C-POD after deployment, the power LED was off. Batteries exhausted: When battery voltage drops too low, the C-POD writes a data summary to the SD card and shuts down automatically. Your data and summary files will be intact. You can copy them to your PC in the normal way, using CPOD.exe (see Downloading your data on page 26). Battery power failed suddenly: The C-POD may not have been able to write a data summary. However, any data recorded up until the power failed will be intact. You can copy the data files to your PC in the normal way, using CPOD.exe, but you will not be able to view summary information first (see Downloading your data on page 26). DEEPC-POD USER GUIDE 33 Corrosion of battery contacts: The positive terminal battery contacts can suffer from corrosion if they become damp. This can cause a loss of power and data. A tool to clean the contacts is available free-ofcharge from Chelonia. SD card full: If the SD card becomes full, the POD writes a summary file and shuts down automatically. Your data and summary files will be intact. The SD card could become full if the POD has been deployed for a long period in a very noisy environment (see Calculating the maximum deployment time on page 10). After deployment, I accidentally disconnected power before writing a summary to the SD card. Your data files will not be damaged. You can still copy them to your PC using CPOD.exe, but you will not be able to view summary information first (see Downloading your data on page 26). After deployment, when I removed the SD card, the LEDs did not flash. PODs before 970 that have not had a firmware upgrade do not flash after the SD card has been removed. This is normal. The CP1/CP3 file starts at the wrong time. The start time was entered in the Read SD page before data was downloaded into the CP1 file. However, you can add, subtract or change the start time in the Files section of the View+ page in CPOD.exe. 34 DEEPC-POD USER GUIDE Chelonia Limited Cetacean Monitoring Systems The Barkhouse, North Cliff, Mousehole, TR19 6PH, UK Tel: +44 (0)1736 732462 Email: [email protected] Web: www.chelonia.co.uk Company Registered in UK, no. 5472768