1
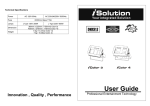
Technical Specifications
Master
Slave
Power
AC 120V 50-60Hz / AC 230V 50-60Hz
Fuse
20mm Glass T15A
Lamp
XENON 200W
Dimensions
Weight
330 x 205 x 100 mm / 13 x 8.1 x 3.94 in
2.24 kg / 4.93 lbs
2.17 kg / 4.77 lbs
User Guide
Innovation , Quality , Performance
Please read these instructions carefully before use
Introduction
Congratulations on the purchase of your new lighting effect. We are confident you will enjoy
many trouble free hours with this unit. To assist with the care and use of the product we have
prepared this short guide.
EC Declaration of Conformity
We declare that our products (lighting equipments) comply with the following
Safety Precaution
specification and bears CE mark in accordance with the provision of the
• Avoid direct eye exposure.
• Disconnect from main power before replacing lamp or servicing.
• Remember to always replace with the same lamp.
• To prevent fire or shock hazard, do not expose this unit to rain or
moisture.
• This product must not be used continuously longer than 15 minutes
under maximum speed and dimmer.
Electromagnetic Compatibility (EMC) Directive 89/336/EEC.
EN55014-2: 1997 A1:2001, EN61000-4-2: 1995; EN61000-4-3:2002;
EN61000-4-4: 1995; EN61000-4-5: 1995, EN61000-4-6:1996,
The following points are important for safety as well as for the smooth installation and
performance of the unit.
EN61000-4-11: 1994.
• Unpack carefully and be sure that no damage has occurred during transportation.
&
• It is very important to ground the yellow/green conductor in order to meet safety regulations.
Harmonized Standard
• Do not connect the device to any dimmer pack.
2A
• The electrical work that is necessary for installation must be done by qualified personnel.
EN60598-1: 2000+ALL:2000+A12:2002
• Be sure to locate the unit in a place with adequate ventilation at least 15 cm from the walls.
Be sure that no ventilation slots are blocked.
Safety of household and similar electrical appliances
• Be careful that no liquids or other objects can enter the unit. If this ever happens, disconnect
the main power immediately.
• In the event of serious operating problems, turn off the power immediately. Never try to
repair the unit yourself. Repairs carried out by non-qualified personnel can lead to serious
damage or malfunction. Please contact your dealer for technical assistance. Always use
genuine spare parts.
• Always remember to unplug the unit from the mains power before any service is done.
Part 1 : General requirements
Troubleshooting
How To Control The Unit
• If the unit is not functional – check main power supply is ‘on’ and check fuses.
• If the unit is functional but lamp does not light - lamp may require replacing.
• If the unit is not moving to the music check the sound-activation adjustment (when
applicable)
• If after trying these solutions you still have a problem contact your dealer for technical
assistance.
• The unit is built-in thermal switch, the lamp will not working when the internal temperature is
above 800C, and the lamp will working when the internal temperature is cool down.
A. Slave Unit only
This fixture is designed to operate as a stand-alone unit, the strobe speed is adjustable. It can
be controlled by strobe controllers, like BF-01C, BF-04C, BF-04A., etc. One can link the slave
unit with the Master Unit for an active pre-programmed strobe show ( Please refer to I Beat
System below.)
B. I Beat System
Caution
This system is designed to operate under master/slave link. There is a great built-in programs
in the master unit and can be triggered by music. By linking the units in master/slave
connection, the first ( master ) unit will control the other units to give an automatic sound
activated synchronized light show. This function is good when you want an instant show. Just
plug in and play for immediate operation.
• Do not obstruct the air vents.
• Do not touch unit while hot.
• No user serviceable parts inside please refer to the nearest authorized technical assistance
office for service.
Master
Power Connections
Slave 1
Slave 2
Slave 3
The unit is supplied with a power plug appropriate to its voltage and destination. Should any
other connections be required they must be carried out with the following configuration.
Earth = Green/Yellow cable
Neutral = Blue cable
Live = Brown cable
In the USA & Europe, it is required that all plugs are 3-pin type i.e. with Earth/Ground
connection.
In the UK, it is required that all mains plugs are fitted with 13A fuses.
3A
By Easy Controller
The easy remote control is used only in master/slave mode. By
connecting to the 1/4” microphone jack of the first unit, you will find
that the remote control on the first unit will control all the other units
for Stand by, Full on/Next/Speed and Audio/Manual /Auto function.
-- STAND BY : stand by and blackout all the unit.
-- FULL ON / NEXT / SPEED :
• Under Audio status ( LED light off ), hold on the FULL ON button, all
the units will strobe quickly.
• Under Manual status ( LED light on ), choose next pattern, triggered
by music, by press the button NEXT.
• Under Auto status ( LED light blinking ), press SPEED button briefly
to choose the patterns ( 12 patterns vary with different speeds- fast,
normal, or slow ), the patterns will run in a loop.
-- AUDIO / MANUAL / AUTO :
• AUDIO status ( LED light off ): All patterns triggered by music.
• MANUAL status ( LED light on ): Press button Next to choose the next pattern triggered by
music.
• AUTO status ( LED light blinking ): Press button Speed to choose patterns varied with
speed.
How To Change The Lamp
• Always switch off the main supply and never handle the lamp or luminaire when it is hot.
• Do not touch the bulb with bare hands. If this does happen, clean the lamp with denatured
alcohol and wipe with a lint free cloth before installing.
• Remember always replace with the same type lamp.
4. Poke the lamp holder on the
side of the lamp and take out it
from fixture.
1. Loose the screws on the
metal base at bottom.
5. Insert the new lamp to the
fixture, take the silicone tube
from old lamp and install the
lamp wire into the silicone tube.
2. Take the plastic base-cover
out of the casing.
4A
6. Connect the lamp wire and
trigger wire to the PCB as
before. Note: The lamp trigger
wire is tiny, please do not
damage the wire when screw
in.
7. Please reinstall step 1 and
step 2.
3. Loose the screws of the
lamp wire connect to the PCB
on the PCB and cut the binder
of fix the lamp wire on the PCB.