1
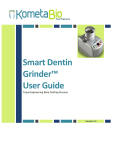
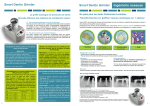
Smart Dentin Grinder™
Tissue Engineering Bone Grafting Process
With Smart Dentin Grinder™, a few short steps easily transform an extracted tooth into a clean bacteria-free
dentin particulate ready for grafting.
Note: Teeth that have root canal fillings are not suitable.
Step 1, Preparing the Teeth
•
The extraction of teeth and the preparation of the particulate dentin are done in the same clinical session.
•
Use a tungsten bur to remove all cavities, artificial material and debris from the extracted teeth, so that
only the clean tooth dentin remains. Dry the teeth well by air syringe..
Aligning the Arrows
Step 2, Preparing the Smart Dentin Grinder
•
Put the chamber on the top of the Smart Dentin Grinder.
•
Align the small arrow on the chamber with the one in the
center of the grinder.
•
Turn the chamber counterclockwise to lock it in position. When
locked, the LOCK indicator arrow on the chamber is to the right
of the arrow in the center of the grinder.
•
Switch on the Smart Dentin Grinder.
Step 3, Placing the Teeth in the Smart Dentin
Grinder
Important: Dry the prepared teeth by air syringe. Only dry teeth are
ready to grind.
•
Place the prepared teeth on the grinding sieve next to the
blades.
•
Close the chamber cap and twist it counterclockwise so that it
clicks into place.
Configuring the Grinding Time
•
To configure Grinding Time:
• Press the GRIND button. The GRIND indicator lights up.
• Press the UP and/or the DOWN button as many times as
needed in order to set the preferred Grinding Time.
We strongly recommend setting grinding time to 3 seconds.
Configuring the Sorting Time
•
To configure the Sorting time, in seconds:
• Press the SORT button. The SORT indicator lights up.
• Press the UP and/or the DOWN button as many times as
needed in order to set the preferred Sorting Time.
We recommend setting sorting time to 20 seconds.
Grinding and Sorting the Teeth
•
Press the START button to start the grinding process.
•
If large pieces are left in the grinding chamber, then press the START button again to grind for another
3 seconds and to sort for another 20 seconds. Be sure that no dentin particles are left in the grinding
chamber.
Step 4, Extracting the Chamber Drawers
•
Pull out/apart the top drawer compartment, which contains
particles of between 300 – 1,200 microns.
Step 5, Cleansing the Particles
•
Dump the contents of the top drawer compartment into
one
of the provided containers.
•
Pour the provided cleanser into the container with the
particulate. Fill to cover the particulate.
•
Close the container’s cap by turning it clockwise.
•
Leave the particulate in the cleansing solution for 10
minutes at room temperature.
•
Gently pipette out the cleansing solution.
•
Pour Phosphate Buffered Saline (PBS) into the container.
Fill approximately half the container. Shake the container gently
and then pipette out the PBS. Repeat.
The particulate dentin is ready for immediate grafting.
Step 6, Drying the Particulate for Future Grafting
•
Place the open container with the wet particulate dentin on the hot plate.
•
For five minutes, leave the particulate dentin on the hot plate at Scale 2 on the thermostat. Be careful, as
the glass container is hot!
Now, your patient can store the particulate in the refrigerator for years.
Copyright © 2013 by
Document #: 13-11-01
KometaBio International
All rights reserved.
All intellectual property rights in this publication
are owned by KometaBio International. and
protected by applicable copyright laws and
international treaty provisions.
[email protected]
Patent Pending No. US61/752,453
CE Representative: Mr. Kfir Atias
2 Devonshire Place W16HG, London, England
Telephone: 08000842417
www.kometabio.com