1
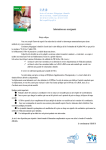
User guide for Hazard Poster Example of blank hazard poster
The hazard poster web portal can be accessed from the following address: http://ms‐sm‐
ser.itd.rl.ac.uk/Chip_poster/ Read the guide on the first page and then click step 1 on the left hand side of the page. The following screen will appear. Step 1 is to enter your personal details including project code * and org code **which will not be shown on the final poster. (* Business unit followed by cost code or project code e.g. E004 ‐ 7PGAA) ** (Account code e.g. 3021) Below the personal details are the poster details. The poster name is usually the room detailed and the poster completed by name is the person filling in the details. The facility location is a drop menu and the relevant site should be chosen. This will automatically place the chosen site in the box marked Chosen Facility Location. Fill in the two boxes marked Building & room number and Local room name. Choose your correct department from the drop menu and this will automatically place it in the box marked Chosen Department. Finally, click the ‘create new poster’ icon in the blue box on the right and this will save your details and generate a number next to the poster ID number. Make a note of this number. This number can then be used to retrieve your poster at a later date. When complete, click step 2. Step 2 is to determine the significant hazards within the area of which the poster is relating to. Scroll down the yellow hazard warning signs on the left hand side to choose the appropriate hazard sign. When chosen, click this once and the sign will appear in the area above. Next scroll down the hazard description list and choose the description that best fits your chosen hazard. When chosen, click this and it will appear in the area above. Next, in the two boxes on the right, type a simple description of the hazard and a location within the room. Move to row 2 to input the next hazard When all hazard information is completed, click the save button above the two columns. Next click step 3 Drag this scroll bar to locate correct hazard warning sign Drag this scroll bar to go to next row. Drag this Scroll bar to locate matching hazard description. Step 3 is to type in information in the box marked ‘fire fighting and environmental hazard’ regarding any fire fighting or environmental hazards within the room e.g. “There are no significant ignition sources within the room or environmental hazards other than those already identified” or “There is no automatic fire / smoke detection within the room” or “The nearest fire extinguisher can be located at ......” or “a sprinkler system is fitted in this room” Next, in the box marked power supply and shutdown procedures, write brief instructions regarding emergency power off requirements for any special apparatus. If there is no local electrical isolation within the room then say so. When you completed this section, press the save button to save your work. The screen for the above information is identified on the next page. Now click step 4. Step 4 is for contact information for those persons responsible or their managers of the hazards within the room. Please include anyone else who is capable of making arrangements for safe access. Highlight the Please Complete text in the relevant columns and type the details of all those who are familiar with the hazards within the room and are competent to make a decision if required. It is important to specify out of hours. You may wish to repeat a mobile contact number. Any further relevant information can be added to the additional information box at the bottom. Step 4 screen is shown below. When finished, click the save button to save your work. Now click step 5. Step 5 allows you to revue your poster details and make any amendments. This can be done by clicking on the steps 1‐5 icons on the left hand side of the page and going to the relevant page. If you make any changes to your poster, click the save button. You can also use the box marked additional information for media services to give them any information regarding this poster. If not required then enter N/A. You cannot see the finished poster as it will appear in print. The general appearance of the poster is shown on the first page of this guide. When you are satisfied that all information is correct, click the send to production button to send your finished poster to media services for printing. You can retrieve your saved poster details at any time by clicking on the previous user’s icon at the bottom of the step icon. This will fetch up the screen as seen below and allow you to input the poster ID number and email address.