1
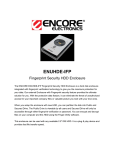
SecuGen® Peripheral User Guide
Installation, Practice/Diagnostic Tools and Troubleshooting
SG1-0007B-004 (10/07) SDD5.0
© Copyright 1998-2007 SecuGen Corporation.
ALL RIGHTS RESERVED. Specifications are subject to change without notice. SecuGen, EyeD, EyeD Hamster, EyeD Keyboard,
EyeD Mouse, EyeD OptiMouse, FDP01, FDP02, FDU01, FDU02, FDU03, FDU04, SecuGen Hamster, SecuGen Hamster Plus, and
SecuGen OptiMouse are trademarks or registered trademarks of SecuGen Corporation. Microsoft, Windows, and the Windows logo
are trademarks or registered trademarks of Microsoft Corporation in the United States and/or other countries. All other names or
brands may be the property of their respective owners.
SecuGen Peripheral User Guide
Contents
CONSUMER NOTICES ..............................................................................................................III
BEFORE YOU BEGIN ................................................................................................................ V
BIOMETRICS OVERVIEW ...................................................................................................................... V
ABOUT SECUGEN .................................................................................................................................. V
TECHNICAL SUPPORT.......................................................................................................................... VI
ABOUT SECUGEN PRODUCTS ............................................................................................................ VI
CHAPTER 1. INTRODUCTION ...................................................................................................7
1.1. PRODUCT TYPES.............................................................................................................................7
1.2. DRIVERS ...........................................................................................................................................8
1.3. SYSTEM REQUIREMENTS FOR WINDOWS ...................................................................................8
1.4. SYSTEM REQUIREMENTS FOR OTHER OPERATING SYSTEMS.................................................8
CHAPTER 2. INSTALLATION .....................................................................................................9
2.1. USB DEVICES AND DRIVERS ..........................................................................................................9
2.2. PARALLEL DEVICES AND DRIVERS .............................................................................................16
CHAPTER 3. TIPS ON USAGE AND CARE OF YOUR DEVICE .............................................18
3.1. USAGE TIPS ...................................................................................................................................19
3.2. CARE TIPS ......................................................................................................................................20
CHAPTER 4. DEVICE DIAGNOSTIC UTILITY .........................................................................21
4.1. PRACTICE CAPTURING FINGERPRINTS .....................................................................................22
4.2. ADJUST IMAGE QUALITY ..............................................................................................................23
4.3. GET DEVICE CONFIGURATION INFORMATION ...........................................................................24
CHAPTER 5. TROUBLESHOOTING ........................................................................................25
5.1. USB DEVICE PROBLEMS ..............................................................................................................25
5.2. PARALLEL DEVICE PROBLEMS ....................................................................................................26
CHAPTER 6. GLOSSARY OF COMMON BIOMETRIC TERMS ..............................................27
CHAPTER 7. TECHNICAL SPECIFICATIONS .........................................................................28
ii
SecuGen Peripheral User Guide
Consumer Notices
FCC NOTICE
INFORMATION FOR THE USER
This equipment has been tested and found to comply with the limits for a Class B digital device,
pursuant to Part 15 of the FCC Rules. These limits are designed to provide reasonable protection
against harmful interference in a residential installation. This equipment generates, uses and can
radiate radio frequency energy and, if not installed and used in accordance with the instructions,
may cause harmful interference to radio communications. However, there is no guarantee that
interference will not occur in a particular installation. If this equipment does cause harmful
interference to radio or television reception, which can be determined by turning the equipment off
and on, the user is encouraged to try to correct the interference by one or more of the following
measures:
1.
2.
3.
4.
Reorient or relocate the receiving antenna.
Increase the separation between the equipment and receiver.
Connect the equipment into an outlet on a circuit different from that to which the receiver
is connected.
Consult the dealer or an experienced radio/TV technician for help.
The user may find the following publication prepared by the Federal Communications Commission
helpful:
"How to Identify and Resolve Radio-TV Interference Problems" (Stock Number 004-00000345-4).
Available exclusively from the Superintendent of Documents, Government Printing Office,
Washington, DC 20402 (telephone 202-512-1800).
FCC WARNING
Changes or modifications not expressly approved by the party responsible for compliance to Part
15 of the FCC Rules could void the user's authority to operate the equipment.
iii
SecuGen Peripheral User Guide
CE NOTICE
INFORMATION FOR THE USER
This equipment has been tested and found to comply with the limits for a Class B or Class 2 digital
device, pursuant to EN 55022 Rules. These limits are designed to provide reasonable protection
against harmful interference when the equipment is operated in a commercial environment. This
equipment generates, uses, and can radiate radio frequency energy and, if not installed and used
in accordance with the instruction manual, may cause harmful interference to radio communications. Operation of this equipment in a residential area is likely to cause harmful interference in
which case the user will be required to correct the interference at the expense of the user.
The user may find the following publication prepared by the Federal Communications Commission
helpful:
"How to Identify and Resolve Radio-TV Interference Problems" (Stock Number 004-00000345-4).
Available exclusively from the Superintendent of Documents, Government Printing Office,
Washington, DC 20402 (telephone 202-512-1800).
WARNING
Changes or modifications not expressly approved by the party responsible for compliance to EN
55022 Rules could void the user's authority to operate the equipment.
This Class B digital apparatus meets all requirements of the Canadian Interference-Causing
Equipment Regulations.
Cet appareil numérique de la classe B respecte toutes les exigences due Réglement sur le
matériel brouilleur du Canada.
iv
SecuGen Peripheral User Guide
Before You Begin
Biometrics Overview
Biometrics is an automated method of recognizing a person based on physical or behavioral characteristics.
Biometric information that can be used to accurately identify people includes fingerprint, voice, face, iris,
handwriting, and hand geometry.
There are two key functions offered by a biometric system. One method is identification, a “one-to-many”
matching process in which a biometric sample is compared sequentially to a set of stored samples to determine
the closest match. The other is verification, a “one-to-one” matching process in which the biometric system
checks previously enrolled data for a specific user to verify whether that individual is who he or she claims to be.
The verification method provides the best combination of speed and security, especially where multiple users are
concerned, and requires a user ID or other identifier for direct matching.
With an increasing reliance on online technology and other shared resources, the information age is quickly
revolutionizing the way transactions are initiated and completed. Business transactions of all types are
increasingly being handled online and remotely. This unprecedented growth in electronic transactions has
underlined the need for a faster, more secure, and more convenient method of user verification than passwords
can provide.
Using biometric identifiers offers several advantages over traditional and current methods. This is because only
biometric authentication is based on the identification of an intrinsic part of a human being. Tokens such as smart
cards, magnetic stripe cards, and physical keys, can be lost, stolen, duplicated, or left behind; passwords can be
forgotten, shared, hacked or unintentionally observed by a third party. By eliminating all of these potential trouble
spots, only biometric technology can provide the security and convenience needed for today’s complex electronic
landscape.
Advantages of Using Fingerprints
The advantages of using fingerprints include widespread public acceptance, convenience, and reliability. It takes
little time and effort to acquire one’s fingerprint with a fingerprint identification device, and so fingerprint
recognition is considered among the least intrusive of all biometric verification techniques. Ancient officials used
thumbprints to seal documents thousands of years ago, and law enforcement agencies have been using
fingerprint identification since the late 1800s. Fingerprints have been used so extensively and for so long, there is
a great accumulation of scientific data supporting the idea that no two fingerprints are alike.
About SecuGen
SecuGen provides biometric solutions for physical and network security employing advanced fingerprint
recognition technology. The company’s comprehensive product line includes quality optical fingerprint sensors
and peripherals, software, and development kits used for a variety of innovative applications including Internet,
enterprise network and desktop security, physical access control, time and attendance management, and
financial and medical records control. SecuGen patented products feature the industry’s longest warranty and
are renowned for their accuracy, reliability and versatility. Based in Silicon Valley, SecuGen has been serving the
biometric community since 1998 and is an active member of the International Biometric Industry Association
(www.ibia.org), the Biometrics Consortium (www.biometrics.org) and the BioAPI Consortium (www.bioapi.org).
v
SecuGen Peripheral User Guide
Technical Support
Email
Website
[email protected]
www.secugen.com
About SecuGen Products
SecuGen Sensor Qualities
•
•
•
•
•
•
Excellent Image Quality: Clear, distortion-free fingerprint images are generated using advanced, patentpending optical methods. Quality imaging yields better sampling for minutiae data extraction.
Durability: Mechanical strength tests show resistance to impact, shock and scratches.
Powerful Software: Precise, fast processing algorithm ensures efficiency and reliability.
Ruggedness and Versatility: Solid engineering and superior materials allows for use under extreme
conditions.
Ergonomic Design: Compact, modular design for seamless integration into small devices, ease of use, and
compatibility make it ideal for a broad range of applications.
Low Cost: Products are developed to deliver high performance, zero maintenance at very affordable prices
for general and industrial use.
Advantages of SecuGen Sensors Over Other Optical Sensors
•
•
•
•
•
•
•
Unique optical method captures fine details, even from dry skin
Extremely low image-distortion
Reinforced materials
Wear resistance
Attractively small size
Ease of integration
Ready-to-use
Low cost through longer life and no maintenance requirements
Advantages of SecuGen Sensors Over Semiconductor (Capacitive) Sensors
•
•
•
•
•
•
Non-metal, non-silicon components make it less susceptible to corrosion when exposed to salts, oil and
moisture from skin and environment
Superior surface properties eliminate need for costly coating and processing procedures
Greater mechanical strength, wear-resistance, and durability
Broader range of applicability, especially for use in extreme conditions and climates
Immunity from electrostatic discharge
Low cost through longer life and no maintenance requirements
Strengths of SecuGen Software and Algorithms
•
•
•
•
•
•
•
Unique image processing algorithm extracts fingerprint minutiae very accurately
High signal-to-noise ratio processing algorithm screens out false features
Highly efficient matching algorithm
Fast overall process of extraction, matching and verification
Encryption function to protect user privacy
Compatibility with existing desktop, laptop PCs interface computers
Ease in developing applications for various purposes
vi
SecuGen Peripheral User Guide
Chapter 1: Introduction
Chapter 1. Introduction
Thank you for choosing SecuGen® fingerprint recognition peripherals.
You will find many uses for SecuGen peripherals, not only for the application you may have just purchased, but also
for future software applications that are being developed today through SecuGen’s wide network of independent
software vendors. This guide explains the different types of SecuGen peripherals, guides you through installation, and
provides tips on usage, care and troubleshooting.
1.1. Product Types
It is important to know the type of peripheral you are installing to ensure that the device is configured correctly on
your system. If you are not certain, please refer to the chart below, which lists the model number series and
product name.
Interface – Sensor
USB - FDU04™
USB - FDU03™
USB FDU01™, FDU02™
Parallel FDP01™, FDP02™
Peripheral Type
Hamster IV
Hamster Plus
Model Number
HFDU04
HFDU03
Hamster
HFDU01, HFDU02
Mouse
MFDU01, MFDU02
Keyboard
KFDU01, KFDU02
Hamster
HFDP01, HFDP02
Mouse
MFDP01, MFDP02
Keyboard
KFDP01, KFDP02
Product Family
SecuGen Hamster IV™
SecuGen Hamster Plus™
SecuGen Hamster III™
EyeD Hamster™
SecuGen OptiMouse™
EyeD OptiMouse™
SecuGen® Keyboard
EyeD Keyboard™
SecuGen Hamster™
EyeD Hamster™
SecuGen® Mouse
EyeD Mouse®
SecuGen® Keyboard
EyeD Keyboard™
Note: In this document and elsewhere, the terms peripheral, device, and FRD (fingerprint recognition
device) may be used interchangeably to refer to the SecuGen peripheral itself.
7
SecuGen Peripheral User Guide
Chapter 1: Introduction
1.2. Drivers
As with most PC peripherals, a peripheral device requires a driver to provide detailed instructions to the
operating system to activate or control the device. SecuGen peripherals are supplied with a device driver CD. In
many cases, the biometric software application you purchased may also have SecuGen drivers included in its
installation CD.
SecuGen periodically updates its device drivers, which are always available for download from its website at
www.secugen.com/download.
1.3. System Requirements for Windows
SecuGen USB Devices
CD-ROM drive
USB 1.1 port or hub (must be self-powered if installing SecuGen OptiMouse or Keyboard)
USB 2.0 port (for Hamster IV)
32MB RAM
20MB available hard disk space
Windows 98 (Second Edition or later version) / ME / 2000 / XP / 2003 / Vista
SecuGen Parallel Devices
CD-ROM drive
Parallel port (EPP-recommended, ECP, or SPP mode)
PS/2 port (mouse or keyboard port)
16MB RAM
20MB available hard disk space
Windows 95 / 98 / ME / NT4.0 / 2000 / XP / 2003
1.4. System Requirements for Other Operating Systems
If you are installing an application based on other platforms such as Windows CE, Linux, or DOS, please refer to
the documentation provided by the maker of the application program.
If you are using the SecuGen SDK Collection to develop applications based on these other platforms, please
consult the system requirements listed in their respective SDK manuals.
8
SecuGen Peripheral User Guide
Chapter 2: Installation
Chapter 2. Installation
You will need to install the appropriate device driver for the type of SecuGen device you wish to install. SecuGen
device drivers may be provided in a number of ways.
1.
2.
3.
On a SecuGen Device Driver CD that comes with your device.
As an electronic file downloaded from SecuGen’s website at http://www.secugen.com/download.
On an installation CD of a biometric software application that you have purchased separately.
The following instructions are provided for the first two methods listed above. For the third method, please refer to the
installation instructions provided by the maker of the application program.
2.1. USB Devices and Drivers
Installing SecuGen drivers is simple when you use the SecuGenDriverInstall Program to take you through each
step of the way.
Important Note:
•
If you are installing the USB mouse in Windows 98, you will also need your Windows 98 Installation
CD if there are no Human Interface Device (HID) drivers already installed on your system.
1.
2.
3.
4.
Before installation, close all applications that are running.
Do not plug in the USB peripheral until after the drivers have been installed on your system. The installation
program will prompt you to connect the device when it is ready.
If installing from CD, insert the SecuGen Device Driver CD into your CD-ROM drive. The installation
program will start automatically. If installing from the website, click on the driver download link and unzip the
file. Double-click on setup.exe to begin installation.
Click USB Driver to continue.
9
SecuGen Peripheral User Guide
Chapter 2: Installation
5.
Follow the instructions presented by the InstallShield Wizard to complete the driver installation.
6.
Select the device you are using and click Next.
7.
You will then be prompted to connect the USB peripheral.
8.
Connect the peripheral to the USB port, and click Next to continue. After connecting USB device, it will show
the device status.
10
SecuGen Peripheral User Guide
9.
Chapter 2: Installation
Check the Device Diagnostic Tool check box (optional) and click Finish. At this time the installation
process will end.
If you checked the Device Diagnostic Tool, the hardware test utility will run automatically. You may the run
the Device Diagnostic Tool at a later time, by clicking on Start > Run and typing SGDX. Refer to Chapter 4,
Device Diagnostic Utility, for more information on using this to ensure that the SecuGen device is
successfully installed. You can also use this utility to practice capturing your fingerprint and to become
familiar with using the device.
11
SecuGen Peripheral User Guide
Chapter 2: Installation
Manual Installation for USB Devices (Optional)
If you are experiencing problems with the SecuGenDriverInstall program, you may use the USB plug-n-play
function on Windows to carry out the driver installation process. In the example below, the instructions for manual
installation of an FDU02 device will be shown.
Important note:
•
The pointing functions of the USB mouse will not be enabled until after the driver is installed, so you
may need to use a regular mouse or the <Tab> key on the keyboard to make your selections during
installation.
1.
First, connect the USB cable of the device to the USB port on your computer. (If connecting to a USB
keyboard or hub, it must be self-powered.) The Add New Hardware Wizard will appear when the device is
connected. These screens may differ depending on your OS and type of device.
2.
USB Composite Device Driver Installation (for USB mouse only). Click Next to continue searching for
the USB Composite Device driver.
3.
Select the first option (Recommended), and then click Next.
12
SecuGen Peripheral User Guide
Chapter 2: Installation
4.
Select CD-ROM drive, and click Next to continue loading the drivers from the Device Driver CD.
5.
Click Next to continue the USB Composite Device installation, and then click Finish when installation is
complete.
6.
USB Human Interface Device Driver Installation (for USB mouse and Windows 98 only). Click Next to
continue searching for the USB Human Interface Device driver.
7.
Insert the Windows 98 installation CD. Repeat steps 3-5 to search for the HID driver on the CD ROM drive.
(The file is called hidclass.sys.) When prompted, insert the Windows 98 CD containing the necessary file,
and click OK, and then click Finish after the HID drivers are loaded.
8.
Remove the Windows 98 CD and insert the Device Driver installation CD again.
13
SecuGen Peripheral User Guide
9.
Chapter 2: Installation
SecuGen USB Driver Installation. Click Next to search for SecuGen USB drivers.
10. Select the first option (Recommended), and then click Next.
11. Select Specify a Location, and then select the directory \FDU02\Drivers\Win9x from the installation CD.
Note: For Windows 2003, XP, or 2000, select the directory \FDU02\Drivers from the Installation CD.
12. Click Next to continue the SecuGen Driver, and then click Finish when installation is complete.
14
SecuGen Peripheral User Guide
Chapter 2: Installation
13. To check that all the drivers have been installed, go to the Device Manager (by clicking on Start > Settings
> Control Panel > System > Device Manager). If any of the following is missing, try re-installing the drivers
using the steps outlined above.
TYPE OF DEVICE > SPECIFIC DEVICE
Human Interface Devices > USB Human Interface Device (needed only for USB mouse)
Universal Serial Bus controllers > USB Composite Device (needed only for USB mouse and Windows 98)
Universal Serial Bus controllers > SecuGen FDU02 USB FRD
15
SecuGen Peripheral User Guide
Chapter 2: Installation
2.2. Parallel Devices and Drivers
Installing SecuGen drivers is simple when you use the SecuGenDriverInstall program to take you through each
step of the way.
Important Notes:
•
Parallel devices require two connections to the PC: a parallel adapter and a PS/2 adapter. The
parallel adapter is used for the transfer of fingerprint-related data and functions. The PS/2 adapter is
used for PC peripheral functions, such as the mouse pointer. If the parallel adapter is not connected,
the peripherals may still function but without any fingerprint sensor capabilities.
•
Parallel devices may operate in any parallel port mode. However, EPP (Enhanced Parallel Port) mode
is recommended for fastest performance.
•
To check and/or change your parallel port mode settings before installation, go to the BIOS setup
(I/O device configuration settings). Please see Chapter 3, Troubleshooting, for brief instructions on
how to change the parallel port mode in BIOS.
1.
2.
3.
4.
5.
6.
Before installation, turn off your computer.
Connect the PS/2 connector of the device to the PS/2 port (mouse or keyboard port) on your computer. If
you are connecting the Hamster and sharing the PS/2 port, connect the Hamster directly to the computer
and then connect the other peripheral to the back of the PS/2 pass-through adapter.
Connect the parallel adapter of the device to the parallel port (printer port) on your computer. If you are
connected directly to a printer, connect the printer cable to the back of the parallel pass-through adapter.
Turn on your computer after the parallel and PS/2 connections of your SecuGen device are connected.
If installing from CD, insert the SecuGen Device Driver CD into your CD-ROM drive. The installation
program will start automatically. If installing from the website, click on the SecuGenDriverInstall link and
unzip the file. Double-click on setup.exe to begin installation.
Click Parallel Driver to continue.
16
SecuGen Peripheral User Guide
Chapter 2: Installation
7.
Follow the instructions presented by the InstallShield Wizard to complete the driver installation.
8.
Select the device you are using and click “Next”. If installing the parallel keyboard, choose “Parallel Hamster
(HFDP02).”
9.
When the device installation process is complete, the message “InstallShield Wizard Complete” will be
displayed.
10. Check the Device Diagnostic Tool check box (optional) and click Finish. At this time the installation
process will end. If you checked the Device Diagnostic Tool, the hardware test utility will run automatically.
You may the run the Device Diagnostic Tool at a later time, by clicking on Start > Run and typing SGDX.
Refer to Chapter 4, Device Diagnostic Utility, for more information on using this to ensure that the SecuGen
device is successfully installed. You can also use this utility to practice capturing your fingerprint and to
become familiar with using the device.
17
SecuGen Peripheral User Guide
Chapter 3: Tips on Usage and Care of Your Device
Chapter 3. Tips on Usage and Care of Your
Device
Why is the image quality of fingerprints important?
SecuGen fingerprint recognition technology is based on minutiae, the feature points found in a fingerprint. When
a fingerprint image is captured, a sampling of minutiae are extracted and processed into a template, which will be
used for the biometric software functions of enrollment and matching. If the captured image is not clear or does
not have enough contrast, the minutiae may be inconsistently sampled, thus resulting in less accuracy and poor
performance.
Certain environments and skin conditions, such as wet, dry, or aged skin, can initially cause a fingerprint image
to appear too light or dark. By adjusting the image quality for your device, it is possible to overcome the
enrollment or matching problems that have commonly occurred with fingers that “don’t seem to work”.
Proper placement is the key to good results
SecuGen's fingerprint matching algorithm is capable of extracting the correct minutiae even without benefit of a
perfect print. However, the proper placement of your finger during fingerprint input can help produce consistent
results for any biometric application. The following tips on usage and care will help you obtain an optimal
fingerprint image quality that ensures better performance and reduces the chances for failure to enroll and match
correctly.
Important Notes:
•
Fingerprint images are never stored
SecuGen fingerprint technology is based on minutiae, the feature points around the core of your
fingerprint. When a fingerprint is captured, only a portion of the minutiae are sampled, and then
processed by an extraction algorithm and converted into a secure template. After the template is
formed, the fingerprint image is deleted. All fingerprints are used in the form of templates
enrollment and matching.
•
Fingerprint images cannot be reconstructed from minutiae or templates
The minutiae sampled from a fingerprint do not have enough information to recreate an image of
the fingerprint. Additionally, minutiae cannot be extracted from a template because the
mathematical conversion from minutiae to template is irreversible. As a final measure of security,
templates are secured using advanced encryption to prevent data from being “hacked.”
18
SecuGen Peripheral User Guide
Chapter 3: Tips on Usage and Care of Your Device
3.1. Usage Tips
Place the pad of your finger at the center of the sensor
The pad is the fleshy part of the finger, located near the middle of the first segment of the finger. Be sure that
the pad (not the tip) covers as much of the window as possible. It is okay to place your finger at an angle of
up 45 degrees rotated in either direction.
Correct
Wrong
OK
Apply light pressure
Apply pressure lightly and evenly during the capturing process. You only need to apply as much pressure as
is required to hold a piece of paper between your fingers. Pressing too hard may result in an overly dark or
blurred image.
Keep your finger still
Wait for the red LED to light up, indicating the device is activated, and keep your finger in place while the
fingerprint is captured.
How to find the core of your fingerprint
The fingerprint generally consists of lines (or ridges) that form a pattern. The core of a fingerprint is defined
as the topmost point on the innermost ridge that curves downward. The core can usually be found at or just
below the center of the first segment of your finger. The following image shows examples of core points on
different fingerprint patterns.
19
SecuGen Peripheral User Guide
Chapter 3: Tips on Usage and Care of Your Device
To avoid problems if you cut or injure your finger
As a preventative measure, it is best to enroll more than one finger so that if one finger becomes unavailable
for authentication, you will have an alternate finger to use. For this reason, many biometric products,
including SecuGen software, provide the option of multiple finger enrollments.
If your biometric product features a password or PIN back-up, you can use this feature in case no finger or
properly working fingerprint device is available.
If none of the above options work, please contact your IT administrator or technical support provider for help.
Problematic fingerprints
By following the above guidelines, you should be able to get consistently good results. Sometimes, however,
certain skin conditions or environments may cause poor fingerprint images. Damp skin may cause
fingerprints that are too dark or smudged, but can be remedied by wiping fingers before input. If your finger
is dry (especially after washing), you may moisturize it by breathing on it or touching it to your forehead to
pick up surface oil before input. Alternatively, if these problems are persistent, you can by adjust the
brightness settings for your device to get the best contrast and brightness levels. For more instructions, refer
to section 4.3.
3.2. Care Tips
Normal oil, residue or smudges on the fingerprint sensor window will not cause problems or interfere with
capturing fingerprints. The sensor window was designed to withstand heavy use and extreme conditions
including heat and cold. It does not have any coatings and is made of a hard, quartz-like material that resists
scratches, etching, and damage from environmental elements.
If you wish to clean the surface of the sensor window:
•
You may use a dry or wet paper towel or cloth to wipe off the window. To remove stubborn dirt, you can rub
the window with paper towel or cloth soaked with a soap solution.
•
Cleaning agents like glass cleaners and anti-bacterial wipes may be used without harming the sensor.
However, the plastic housing of the unit may be damaged if strong solvents, acids or caustic solutions are
used.
•
Do not pour liquids directly onto the sensor or device, as the liquid might seep into the underlying
components and cause damage.
20
SecuGen Peripheral User Guide
Chapter 4: Device Diagnostic Utility
Chapter 4. Device Diagnostic Utility
The Device Diagnostic Utility is a user-friendly tool that provides several important functions:
•
•
•
To practice capturing fingerprints and test your device for proper functioning
To optimize the image quality of fingerprints for improved accuracy
To get basic information about your system and hardware configuration
You can run the Device Diagnostic Utility at any time by going to Start > Run. Type “sgdx”, and click OK.
21
SecuGen Peripheral User Guide
Chapter 4: Device Diagnostic Utility
4.1. Practice capturing fingerprints
Important Note:
By default, fingerprint images are never stored. When a biometric software application requires you to input a
fingerprint for enrollment or verification (i.e. for login), your fingerprint images are momentarily captured and then
deleted after minutiae are extracted. Neither the minutiae nor the encrypted template, formed by the minutiae,
can be used to reconstruct a fingerprint image.
1.
Select the device you are going to use from the
Select a Fingerprint Device drop-down menu.
“Auto-Detect” is recommended for parallel devices.
2.
Click on the Image tab and then Init to initialize
the device. Initialization results are displayed at
the bottom of the window.
3.
Place your finger on the sensor window of the
SecuGen device and click Capture. When the red
LED of your device lights up, the device will capture
one image and display it in the main window.
4.
(For FDU03-based devices only) To test the
Auto-On™ function, click on the Enable Auto
Capture checkbox, and the device will
automatically capture a fingerprint when you
place your finger on the sensor window.
22
SecuGen Peripheral User Guide
Chapter 4: Device Diagnostic Utility
4.2. Adjust Image Quality
The Device Diagnostic Utility lets you adjust the fingerprint image quality settings of your device for optimal
performance. The importance of image quality is explained at the beginning of Chapter 3.
Note: Some software applications made for SecuGen products may also have an image adjustment feature builtin to their program. In such case, please refer to the corresponding documentation.
1.
2.
From the window under the Image tab, and then
click Config…. You may need to first click Init if
your device was not yet initialized.
When Device Configuration opens, place your
finger on the device sensor window, and click
Preview to view your fingerprint.
Example of image that needs adjustment
3.
For manual adjustment, click and drag the
Brightness or Contrast sliders, and then click
Preview again.
4.
If the images are still too bright, you can further
adjust the gain setting by moving the Gain slider.
(Parallel devices do not support gain adjustment.)
Example of image after manually changing settings
5.
To let the system automatically determine
optimal settings, click Auto Exposure. Hold
you finger still on the sensor window during the
entire process. The settings will automatically
change incrementally, and a blue status bar will
indicate the progress. Click Preview again to
check the improvement of your fingerprint
image.
Example of image after automatic setting adjustment
To keep the new settings, click OK.
To go back to the original settings, click Cancel.
23
SecuGen Peripheral User Guide
Chapter 4: Device Diagnostic Utility
4.3. Get Device Configuration Information
Select the General tab to view information about:
Drivers Installed
A checked box indicates which device drivers are installed on your computer.
Parallel Device
Parallel device status is available only when the parallel device is initialized.
After initialization, the status of the parallel port to which the device is
connected will be displayed.
USB Device
USB device status is available only when the USB device is initialized. The
version number and type of device connected to your system will be
displayed.
24
SecuGen Peripheral User Guide
Chapter 5: Troubleshooting
Chapter 5. Troubleshooting
5.1. USB Device Problems
My SecuGen USB device does not power on.
If you have connected the SecuGen device to a USB port in a USB keyboard or hub, verify that the USB
keyboard or hub has its own power-supply. The SecuGen USB device uses almost 110mA of electric current,
so it should only be connected to hubs that are self-powered. If the USB keyboard or hub is not self-powered,
connect the SecuGen device directly to the computer.
My USB device initializes and powers on, but cannot capture fingerprints.
When you have other high-speed USB devices, such as a digital camera or scanner, connected to your
computer, the SecuGen device cannot be used at the same time. SecuGen USB devices use almost 66% of
the USB bandwidth, and therefore cannot function concurrently with any other device using more than 40%
of the USB bandwidth. Close the programs that use the other USB devices, and if necessary, disconnect
those devices, before using the SecuGen device.
My mouse is very slow.
When certain other mouse drivers are installed on your computer, the SecuGen USB mouse response may
be slow. Click Start > Control Panel > Mouse and the Operation tab to adjust the speed of mouse pointer.
If you cannot adjust the speed of mouse pointer, remove the other mouse driver from the system.
My SecuGen USB mouse doesn’t work.
Verify that the USB adapter of the SecuGen mouse is connected to the USB port correctly. Click Start >
Control Panel > System and select the Device Manager tab to verify that the mouse drivers are installed
correctly. If they are not installed correctly as listed below, repeat the installation process and be sure to
select the USB mouse. (For FDU02 devices, refer to the next paragraph.)
My USB device is not recognized.
If you are using an FDU02 device, then be sure to use the latest device driver, such as that provided by the
SecuGenDriverInstall program v2.0. Although older FDU01 devices can work with FDU02 device drivers, the
new FDU02 models cannot work with FDU01 device drivers. You may download updated drivers from
SecuGen’s website at http://www.secugen.com/download/.
I’m using Windows XP which warns that the driver has not passed Windows Logo testing to verify its
compatibility with Windows XP
25
SecuGen Peripheral User Guide
Chapter 5: Troubleshooting
If you are a Windows XP user and you see a warning box that says the SecuGen device driver has not
passed Windows Logo testing, please click the “Continue Anyway” button. Our drivers have been tested
thoroughly, and work with the operating system perfectly. Be sure to use at least version 2.0 of
SecuGenDriverInstall when installing the driver for USB devices. This version contains signed drivers for the
USB Hamster products, and is also made available through Microsoft's Windows Update web site and will
be included in future Windows Server 2003 and Windows XP Service Packs. (www.windowsupdate.com)
5.2. Parallel Device Problems
My program says “device not found” or the device won’t initialize.
First verify that the parallel adapter of the device is connected to the parallel port correctly, and that the PS/2
connector is connected to the PS/2 port.
Parallel Port Modes can vary for desktop and laptop computers. Selecting the correct parallel port mode is
important for proper device operation. EPP (Enhanced Parallel Port) is the recommended mode for all
SecuGen® parallel port devices and may be selected using the BIOS SETUP.
How to change the BIOS SETUP:
1. To check your current parallel port configuration on your system BIOS SETUP screen, restart your
computer while pressing the <Delete> or <F2> key. Go to the I/O device section of your BIOS
configuration. You may also refer to you computer manufacturer’s operating manual for instructions on
configuring the parallel port.
2. Choose “Printer Port Mode Setup” from the System BIOS SETUP screen. The menu screen may vary
with the type of computer you have, but the menu option is typically labeled as ‘Integrated Peripheral’ or
‘I/O Device Configuration’.
3. Choose one of EPP, ECP or SPP Modes using the <+>, <->, <PageUp>, or <PageDown> keys. EPP
Mode is recommended. SecuGen parallel port devices can use either 378h or 278h standard addresses.
4. After you save the changes, your computer will restart automatically.
How do I connect other devices?
Local printers and other devices can plug directly into the back of SecuGen’s pass-through parallel port
adapter to share the port. Additionally, the SecuGen Hamster has a Y-type PS/2 extension so that you can
share the PS/2 port with your mouse or keyboard after installing the Hamster.
My printer doesn’t work.
1. First, determine whether or not the SecuGen device is initialized and running. Your printer will not work
while the device driver is on. If necessary, close the program that is using the device.
2. Disconnect the device, and connect your printer directly to the parallel port.
3. If the printer functions correctly when the SecuGen device is disconnected, there may be a defect with
the SecuGen device.
4. If the printer does not work when the SecuGen device is disconnected, the problem may be due to the
printer itself.
My SecuGen mouse pointer doesn’t work.
1. Shut down the computer and remove the parallel connector, but leave the PS/2 connector in place.
2. Reboot the system and check to see if the mouse functions work.
26
SecuGen Peripheral User Guide
Chapter 6: Glossary of Common Biometric Terms
Chapter 6. Glossary of Common Biometric
Terms
Biometrics The automated recognition of persons based on their unique measurable physical and/or behavioral
characteristics. Examples of traits used in biometrics include fingerprints, iris, face, voice, and hand geometry. All
of these biometric techniques may be differentiated by variables such as speed, durability, reliability, cost
effectiveness, and degree of user interaction. Fingerprints are generally considered the most practical and widely
used biometric identifier today.
Authentication A method for confirming the identity of an individual. Simple authentication methods include user
name and password, while more secure methods include token-based one-time passwords. The most secure
authentication methods include layered or “multi-factor” biometric procedures that combine multiple biometric
methods or a single biometric with traditional methods. Authentication is independent of authorization.
Authorization The administration of person-specific rights and privileges for access to data, resources and
applications.
Biometric Authentication Mode The way biometric data (e.g. fingerprints) is used for authentication: either
verification or identification. The mode chosen for a biometric installation or application depends on the specific
needs of a site, where either convenience or security may be emphasized.
False Acceptance Rate Also known as FAR. Measures how frequently unauthorized persons are accepted by the
system due to erroneous matching. Potentially serious. The FAR of SecuGen devices is currently about .001%.
False Rejection Rate Also known as FRR. Measures how frequently authorized users are rejected by a biometric
system. This often translates to user inconvenience and is usually improved by educating users on correct usage
of biometric devices, especially in high security environments, which usually set more stringent requirements for
precise matching.
Identification Also known as one-to-many or 1:N comparison. The authentication mode that compares input
biometric data with all other reference data of persons recorded in a system database. This method does not
require any accompanying information (such as user ID) to be provided at time of input. It is user-friendly but
may be inherently slower and less secure than the verification mode.
Latent Fingerprint Latent fingerprints are “left over” fragments of a fingerprint usually caused by the build-up of oily
residues on an optical sensor window after repeated use. (SecuGen devices use a technique that prevents latent
fingerprints from being incorrectly validated by the system.)
Matching The comparison of input biometric data with another biometric data sample (e.g. registered template) to
confirm that the input data came from the same person. If a matching threshold is met, the input data is said to
match the sample.
Minutiae Feature points that are extracted from a biometric input and used to construct a template for matching by
biometric systems. For fingerprints, minutiae include features such as the starting and ending points of ridges
and ridge junctions.
Template The biometric reference pattern of a person’s biometric input stored for matching. SecuGen products
convert fingerprint minutiae into encrypted templates using proprietary extraction algorithms, so that actual
fingerprint images are not stored and cannot be reconstructed from the template data.
Verification Also known as one-to-one or 1:1 comparison. The authentication mode that compares input biometric
data with reference data that corresponds to a user’s record. This authentication mode requires the input of an
additional identifier such as a User ID, PIN, or smart card to locate the user’s record. Verification is inherently
faster and more secure than the identification method and is most commonly used in biometric applications.
27
SecuGen Peripheral User Guide
Chapter 7: Technical Specifications
Chapter 7. Technical Specifications
The specifications listed here refer to the latest models of SecuGen peripherals available. For full specifications or
information about earlier models, please contact SecuGen.
FINGERPRINT SENSOR
FDU04
FDU03, FDU02
Image Sensor
1.3 Mpixel CMOS
Sensing Area
12.9 x 16.8 mm
CMOS
12.7 x 14.9 mm
Dimensions (module)
Resolution
Encrypted Data Size
21 x 32 x 63 mm
500 dpi
(1200 dpi intrinsic)
5V DC
Stand-by: 0.45 mA
Operational: < 130 mA
Stand-by: 0.45 mA
Operational: < 60 mA
Operational: < 50 mA
Operating: -10°C to 60°C (14° to 104°F)
Humidity
Random Vibration Test
505 dpi + 10
EPP (recommended): < 1
SPP: < 3
<1
Voltage
Temperature
500 dpi + 1
400 bytes or variable (depending on application)
Verification Time (sec)
Power Consumption
FDP02
Operating: RH 20 ~ 90%
RMS 3.2G Level (10~2000 Hz) – 2Hrs Test
(Maximum G level limited to 3 times the RMS level)
28