1
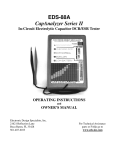
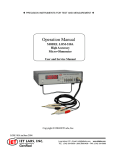
TROUBLESHOOTING CAPACITOR-RELATED PROBLEMS
using the CapAnalyzer 88A
ATTENTION: THIS UNIT IS DESIGNED TO CHECK ELECTROLYTIC
CAPACITORS IN OR OUT OF CIRCUIT WITH POWER DISCONNECTED FROM
THE CIRCUIT UNDER TEST. IF THE UNIT UNDER TEST IS POWERED UP,
THE POWER WILL BACKFEED INTO YOUR CAPANALYZER AND DESTROY
BOTH UNITS!
DO NOT ATTEMPT TO BEND THE POMONA TWEEZER PROBE ENDS, THEY
WILL SNAP OFF.
Troubleshooting and locating defective electrolytic capacitors has been a thorn in the
side of all technicians for many years. The CapAnalyzer 88A will help solve problems
caused by electrolytics in audio, video, power supply, and system control circuits. This
manual will also show how to locate these bad capacitors easily without having to unsolder
and test, or cut up the pc board, and without needing the service manual, by using
specialized test equipment specifically designed to make you more productive. Although
you will have to unlearn your old-fashioned, slower methods, those who will be progressive
enough to learn these tricks will have much more time on their hands to spend with their
family and friends.
There are several ways a capacitor can fail. In TV sets, the high temperatures usually cause
electrolytics to dry up. In high-frequency circuits such as digital pulse-width power
supplies, the capacitors tend to leak. In low-voltage circuits such as system control and lowvoltage supplies, capacitors tend to short, partially or completely. Therefore, the technician
must first check all electrolytics for DCR (DC Resistance) shorts or leakage, then check for
physically leaky or dried-up capacitors by measuring high-frequency ESR (Equivalent
Series Resistance). These methods will not require a soldering iron, a service manual, or any
cutting tools. It will require some logical reasoning, good eyesight, and some specialized
equipment; your $29 DVM won't help you find the tough dogs. With the CapAnalyzer 88A
(and the LeakSeeker 82B), hours can turn into minutes, and repairs that were once
considered "no-fixers" can now be profitable.
DRIED UP and PHYSICALLY LEAKY CAPACITORS
As a capacitor dries up internally, it can become electrically leaky. Most of the caps in this
category will be found in TVs and computer monitors. As the cap dries up, it can cause
strange problems in the particular circuit it is in. For example, in the TV's vertical section, it
can cause vertical overlap, insufficient vertical, too much overscan, or non-linear scanning.
If the cap is in the power supply, jail bars or "hairy" interference may ride on the video and
power semiconductors can keep failing. In the audio section it can cause distortion,
1
feedback or low audio. In the system control supply it can cause intermittent functions and
microcontroller confusion, even a blank display. In the video circuits it can cause incorrect
colors, distortion, even a fully scrambled picture.
Usually, the problem will be less noticeable if the unit is left on for some time. That's
because a dried-up capacitor will usually decrease its ESR with higher temperature.
Other consumer electronic components can also have these problems, but with a different
culprit: surface mounted capacitors. Most camcorders, VCRs, and big screen TVs now use
surface mounted electrolytic capacitors in modules. In VCRs, they are usually in the sound
MPX decoder module. In big screen TVs, they can be in the sound module and in the video
PIP and video convergence circuits as well. In camcorders they are everywhere, usually
showing up as varying speeds if they are in the servo circuits, color or sync problems if in
the video, and low, distorted, or missing audio if in the audio circuits.
Most technicians already know these symptoms, and have an idea where on the board to
start. The first step is visual observation; vacuum all debris off of the board and look for
dark areas under each cap, for bulging tops, and for splitting vinyl covers. On surface mount
caps, look for the solder connections under the cap to have a cloudy look. After replacing
the obviously defective caps, it is important to clean the board with a stripper solvent and to
check all local feedthroughs, as these type of capacitors leak an acidic electrolyte that loves
copper!
After visual observation and replacement of the obvious offenders, it will be necessary to
measure the rest of the caps. The problem of measuring each capacitor is more difficult than
measuring resistors, which can be measured in circuit quite easily with any cheap DVM.
That is because any circuit that encompasses an electrolytic already has some DC resistance
and some capacitance from other parts of the circuit. Some "capacitor checkers" claim to
work in circuit, but since they actually measure circuit capacitance and resistance, they give
such erroneous readings that caps usually have to be unsoldered and re-measured out of
circuit anyway. In fact, even some of the most expensive capacitor meters (over $2000) will
not always measure capacitors accurately in circuit. Some meters measure the capacitance at
two different frequencies, and show it as two different readings. Most ESR meters will show
a partially or fully shorted cap as "perfect".
Speaking of "ESR" meters, their designers already know that the trick to locating bad
capacitors in circuit is not to measure capacity at all! Years of testing by many technicians
and engineers has shown that as a capacitor ages, its Equivalent Series Resistance increases.
What is ESR? Without going through the math, a perfect capacitance will measure as an
open circuit at DC, and will show less and less resistance as the frequency across it
increases. Some inexpensive cap meters utilize this fact by measuring a cap's impedance at a
fixed frequency such as 1KHz and translating the reading to capacity. In reality, checking a
2
cap at 1KHz only works if the cap is being used in a circuit that also utilizes 1KHz.
Television and VGA monitor video circuits use frequencies into the megahertz, and in
PWM power supplies, frequencies of 100KHz and higher are commonly used. It makes
more sense to forget about capacitance altogether and use our knowledge that high
frequency ESR increases with age and as a cap dries up.
Several ESR cap checkers have appeared throughout the years. The originator was a simple
meter that used 50KHz and a simple mechanical meter. The technology wasn't good enough
at that time to measure capacitors accurately. A more recent meter is a slightly improved
version, still using an old-fashioned mechanical meter, but running at a more accurate
100KHz. However, these meters have their limitations; they cannot check for leaky or
shorted caps and the technician must individually discharge each cap before testing. Also,
the cheap test probes add their own capacitance and readings varied depending on the
position that the technician held the probes (and whether or not he or she was sweating!)
The most widely used in-circuit ESR/DCR tester is the CapAnalyzer 88A by EDS. This
unique meter uses a test frequency higher than most others, automatically discharges the cap
under test, checks for lowDCR, then checks and displays ESR on a 20 segment LED bar
scale. It includes a low-capacitance one-handed tweezer test probe, and beeps from one to
five beeps depending on the ESR reading of the cap. Because it is microprocessor
controlled, it has more features and is much more accurate than the older designs. Possibly
its best attribute is a three-colored chart on the front panel that shows typical ESR readings
of good, fair, and bad caps depending on their capacitance.
The CapAnalyzer 88A claims 100% accuracy in circuit because of its testing parameters.
The frequency is high enough to make the cap's actual capacity insignificant, so it measures
only the ESR. The high test frequency also helps isolate the cap under test from the rest of
the circuit via the high inductance of the pc board copper foil. This frequency is also high
enough to ignore any coils over 5 uH. ESR testing is done with a calibrated low resistance
at the test point which allows it to compensate for normal circuit resistance. Both DCR and
ESR measurements are under 50 millivolts so that no active devices are turned on.
Therefore only the component at the test point will rerspond. However, because it checks
DCR first, it will alert the technician immediately if the cap or anything else in that circuit is
shorted or leaky, before it checks ESR. This test parameter (DCR OHMS SET ALERT) is
user adjustable from zero to 500 ohms.
USING THE CapAnalyzer 88A to CHECK ELECTROLYTICS
When the CapAnalyzer 88A is first turned on, after a second of internal calibration checks,
it will briefly check all leds, multi-tone beeper and the battery; then it will flash the OVER
led slowly to indicate ready. The DCR OHMS slider set alert is normally set to about 150
ohms, as shown in the figure. To test an electrolytic, simply hold the tweezer test probe
3
across the cap leads; polarity does not matter. The CapAnalyzer will chirp once to let you
know that you have a good connection, and the DISCHARGING led will turn on for a
fraction of a second.
The first test is the DCR test, and the CapAnalyzer will show either a NORMAL or LOW
led, depending on the setting of the DCR OHMS SET ALERT slider. If the slider is set to
50 ohms, the CapAnalyzer will sound an alarm and light the DCR LOW led if the DC
resistance is lower than 50 ohms. Most circuits will never show this low normally; however,
in some circuits, the circuit's resistance might be lower or higher. In these cases, you may
set the slider for as low a DC resistance as you expect the circuit resistance to be normally.
For example, on a high power industrial motor controller supply, where the supply must
power a 15 ohm motor, you could set the slider to 10 ohms. The CapAnalyzer would treat
any DC resistance above 10 ohms as normal and warn you if measured DC resistance is
lower than 10 ohms. In fact, you can set the DCR SET ALERT anywhere from a fraction
of an ohm by setting the slider all the way down to 0, to as high as 500 ohms DCR.
Be advised that if you have the slider set higher than 100 ohms and try to measure a very
large electrolytic, the charging time to test the electrolytic may exceed the DCR test period
and you may get a false DCR LOW , or the CapAnalyzer may try testing the cap over and
over because of conflicting test results. Therefore, use 50 ohms as a guideline when
measuring most medium to large electrolytics, and use the values higher than 100 ohms
when measuring small tantalum and surface-mounted capacitors. Surface-mounted
tantalums can become leaky by as high as 500 ohms.
Try this now: set the DCR OHMS slider all the way down to zero and touch the probe ends
to a 10 ohm resistor. The CapAnalyzer will pass the DCR test and show the ESR as 10
ohms. Try the test again with the slider set anywhere above 10 and the DCR LOW led will
come on and the alert will sound continuously. The ESR test will not be done since the DC
resistance is lower than the setting, and the "capacitor" is considered to be shorted.
Now check a capacitor. As you touch and hold the probe across the cap, the unit will chirp
once to indicate testing has started, will pass the DCR test, then will chirp one or more
times depending on the ESRof the cap. The CapAnalyzer 88A has been designed to chirp
once if the ESR is less than one ohm; Two chirps from one to two ohms, three chirps from
two to three ohms; our chirps from four to eight ohms; and five chirps from 8 to 20 ohms.
The handy three-color chart on the front panel shows typical ESR readings, so if a 2.2 uF
cap chirps three times and shows 3.00 ohms ESR, the chart shows that this is in the green,
good. In the unusual case where the CapAnalyzer chirps five times and there is no reading
at all, this may indicate a good bi-polar capacitor (found in some TVs) which show less than
zero, using the original CapAnalyzer 88A. Series II CapAnalyzer 88A units will correctly
show the actual ESR.
4
As a rule, some caps can show in the yellow area, and may still work adequately. It is up to
the technician to make the decision on whether to replace these questionable caps, or not.
However, any caps that show ESR in the red areas are out of spec and must be replaced. For
capacitors that check as shorted, see the SHORTED CAPACITORS section.
Low-voltage surface mounted caps are usually very poor in quality and even new ones may
show in the yellow areas. Most quality-oriented service companies replace surface mount
caps with conventional caps, as long as they will fit, and the technician has the skill to cut
the leads very short and solder them in without melting everything in sight.
Note that if an electrolytic capacitor is in such bad condition to be over 20 ohms ESR, the
CapAnalyzer will treat it as an open circuit and will not even try to test it. The OVER
indicator will continue to flash. Replace these caps, as they are bad, no matter what their
capacity is. If you wish to double-check the test probe, at any time simply short the probe
contacts together and the CapAnalyzer will do a self-test. You can also check calibration at
any time with a 10 ohm resistor: set the DCR OHMS alert to zero and measure across the
resistor; the 10 ohm ESR led should illuminate.
In some cases, you may find capacitors that are physically leaking, yet they check as perfect.
Although the cap is leaking, it has not leaked enough electrolyte to render it defective and
will still operate perfectly in the circuit...for a while. If you wish to avoid callbacks, replace
them anyway.
NOTE: Although the CapAnalyzer automatically discharges capacitors before testing,
remember that there are limits. If the capacitor is large enough, and there is enough voltage
stored to blow the ends off of the test probes, you will have to replace the probes as well as
the resistors in the discharging circuit of the instrument. Therefore, use common sense when
measuring electrolytics that may have a serious charge stored. If you damage your unit, it
will appear to try to test a cap as soon as it is turned on. You can easily repair it yourself; go
to the website address on the cover of this manual for this and other important information.
QUICK ESR TEST
Normally, the CapAnalyzer discharges the cap, then tests for DCR, then measures ESR, as
we have shown. In many cases, you might know for sure that there are no shorted capacitors
and might wish to save some time by eliminating the full test and just want to quickly check
the ESR. To put the CapAnalyzer 88A in this special QuickESR test, turn the unit on while
shorting the probes ends together. Instead of the multi-tone song, the CapAnalyzer will only
beep twice and be ready for testing. Keep in mind that a shorted cap will show a low ESR,
so we recommend to use only the full test. This feature also uses less power and will result
in longer battery life.
5
SHORTED CAPACITORS
A shorted capacitor can cause several individual problems at one time. That's because it can
cause a supply voltage to be low, or missing. The cap you have just checked that shows
shorted might be shorted, or then again, it might be ok. Because various circuits feeding
from the same supply have their own capacitors, the shorted reading will be the same further
down the pcb track across another capacitor. Finding the one shorted capacitor can be
difficult because most DVMs will measure the same short resistance at every capacitor.
That's because most ohmmeters don't have enough resolution (0.001 ohm) to add or subtract
the pc board track resistance from the actual shorted cap's resistance to judge where the
short might be.
Most technicians find these capacitors by cutting the pc board tracks in various places and
measuring the resistances on each side of the cuts. When in the area they believe the short to
be in, they unsolder all suspicious pads and keep measuring until the one shorted part is
found. This is not only time-consuming, but makes a mess of the board. Forget to repair just
one cut or one solder connection, and the unit will be inoperable.
Another method used by some techs is to supply a current-limited voltage source to the
shorted supply and measure the low DC voltages at different points with a sensitive
millivoltmeter. The lowest reading is the location of the short. This works to some degree,
except that the current has to be high enough to get a reading...and maybe high enough to
burn up the board under test, especially if the board uses very thin lands.
Another alternative is to use a four or five digit DVM with milliohm scale which has the
resolution of 0.001 ohm required to measure all of the caps to ground and choose the one
with the lowest reading to ground. This only works if the cap is shorted--If the cap is only
partially shorted, say over 9.99 ohms, resolution drops to a useless 10 milliohms-or about a
5 inch length of pc board track.
EDS test equipment owners can use the LeakSeeker, also by EDS, to locate shorted, or even
leaky components, with resistance readings from zero to as high as 150 ohms.
The LeakSeeker is a dedicated instrument with only one purpose...to identify the exact
place on a pc board where a given reference resistance is at the lowest reading. The
LeakSeeker automatically calibrates itself to the defective component as soon as it's test
lead is touched anywhere along the pc board track that shows the short or low reading
(under 150 ohms). Then, as the tech touches pads along the track, the Leakseeker beeps
higher or lower depending on whether the tech is getting closer or further from the defect.
This instrument recalibrates itself automatically as you get closer to the defect.
LOW BATTERY WARNING
6
The CapAnalyzer 88A uses four alkaline AAA batteries (6 VDC). Although continuous
operating time is several hours, most users will only need to replace the batteries at three to
six month periods. We advise to measure a few capacitors, then turn off the CapAnalyzer
when you find and replace the bad cap. If left on without being used, a three-minute
warning timer will chirp three times every three minutes.
At 5.1 volts, the LOW BATTERY indicator will illuminate. The unit will still operate for
some time on a low battery, until voltage falls to 4.9 volts, with a slight reduction in
accuracy. Below 4.9 volts, the unit may ignore shorted capacitors, so a good test if you are
not sure is to short the probe tips and see if the DCR LOW led comes on and the alert
sounds, as it should.
Do not attempt to use any external voltage source more than 6VDC. If you need to keep
the CapAnalyzer on continuously, you may send your unit to EDS with a $29 check, and a
power jack and specially modified external adapter will be supplied. Alternatively, you can
install the AC adapter easily yourself with a drill and soldering iron; the adapter kit is $19.
If you need help or assistance, you may call for technical assistance at 561-487-6103.
Also, we recommend that you check out the CapAnalyzer owners technical assistance page
on our website at: http://www.eds-inc.com/eds88.html for any last-minute updates,
FAQs, and modifications.
60 DAY MONEY-BACK GUARANTEE
EDS, Inc. guarantees that the user may return this product to original place of purchase for a
full refund within 60 days of receipt under the following conditions:
The product must be undamaged and returned in the same condition as received and with
the original packing material. A copy of the bill of sale is required. You must call the
reseller for return authorization. You are responsible for return shipping charges and for
providing correct insurance coverage. Units received damaged will be returned to you, or
repaired and any costs deducted from the refund. Any broken or missing probes or hardware
will be deducted from the refund. Original shipping costs will be refunded only if the unit
has a factory defect.
All EDS products are unique and some effort is required to un-learn old habits and to learn
to use an unfamiliar new device. You are expected to use this product for at least six weeks,
and to read and follow the directions in the owners manual. If you are confused about any
instructions in the manual or need any assistance, please call EDS for assistance and make
7
an honest effort to learn to use the product. If the product proves to be too difficult for you
to learn, please make comments or suggestions to help us improve the product or revise the
owners manual.
THREE-YEAR LIMITED WARRANTY
EDS, Inc. warrants this product to be free from factory defects for a period of three years
from date of purchase. A copy of the original bill of sale is required for any claims. The
customer will call for return authorization and mail the unit to EDS for repair or
replacement. This warranty does not include any damage caused by shipping, abuse,
lightning, or incorrect testing procedures. Test probes or any other wires or cables are not
covered under this warranty. EDS shall not be responsible for any action or consequential
damages caused by the user, and assumes no responsibility for liability due to the actions of
the user. The user/operator assumes complete responsibility in using this product and is
expected to conduct their operating procedure in a safe and professional manner.
8