1
2.
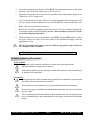
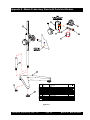
Insert the mounting rod on the back of the DV-E Viscometer into the hole on the clamp
assembly. Be sure that the clamp screw, VS-41Y, is loose.
3.
Adjust the Viscometer to be as close to level as possible while tightening the clamp screw.
Tighten the VS-41Y clamp screw.
4.
The Viscometer must be leveled. The level is adjusted using the three leveling screws on
the base. Adjust so that the bubble level on top of the DV-E is centered within the circle.
Note: Check level periodically during use.
5.
Remove the Viscometer shipping cap from the pivot cup. This cap is designed to protect the
Viscometer spindle coupling nut during shipment. Do not attempt to operate the Viscometer with the shipping cap in place!
6.
Make sure that the AC power switch at the rear of the DV-E is in the OFF position. Connect
the power cord to the socket on the back panel of the instrument and plug it into the
appropriate AC line.
The AC input voltage and frequency must be within the appropriate range as shown on
the name plate of the viscometer.
The DV-E must be earth grounded to ensure against electronic failure!!
I.5 Safety Symbols and Precautions
Safety Symbols
The following explains safety symbols which may be found in this operating manual.
Indicates hazardous voltages may be present.
Refer to the manual for specific warning or caution information to avoid personal injury
or damage to the instrument.
Precautions
If this instrument is used in a manner not specified by the manufacturer, the protection
provided by the instrument may be impaired.
This instrument is not intended for use in a potentially hazardous environment.
In case of emergency, turn off the instrument and then disconnect the elecrical cord from
the wall outlet
The user should ensure that the substances placed under test do not release poisonous,
toxic or flammable gases at the temperatures to which they are subjected to during the
testing.
Brookfield Engineering Labs., Inc.
Page 5
Manual No. M/98-350-D0902