1
Tel: +44 (0)191 490 1547
Fax: +44 (0)191 477 5371
Email: [email protected]
Website: www.heattracing.co.uk
www.thorneanderrick.co.uk
Operating Instructions
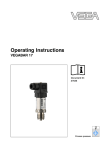
VEGABAR 17
Document ID:
27636
Process pressure
Contents
Contents
1
About this document
1.1
1.2
1.3
2
..
..
..
..
7
8
8
8
General instructions . . . . . . . . . . . . . . . . . . . . . . . . .
Instructions for installation . . . . . . . . . . . . . . . . . . . . .
Mounting steps. . . . . . . . . . . . . . . . . . . . . . . . . . . . .
10
10
10
.
.
.
.
.
.
.
.
.
.
.
.
.
.
.
.
.
.
.
.
.
.
.
.
.
.
.
.
.
.
.
.
.
.
.
.
.
.
.
.
Preparing the connection . . . . . . . . . . . . . . . . . . . . .
Connection procedure. . . . . . . . . . . . . . . . . . . . . . . .
Wiring plan. . . . . . . . . . . . . . . . . . . . . . . . . . . . . . . .
12
13
16
Setup steps . . . . . . . . . . . . . . . . . . . . . . . . . . . . . . .
Recalibration . . . . . . . . . . . . . . . . . . . . . . . . . . . . . .
18
18
Maintenance . . . . . . . . . . . . . . . . . . . . . . . . . . . . . .
Remove interferences . . . . . . . . . . . . . . . . . . . . . . . .
Instrument repair . . . . . . . . . . . . . . . . . . . . . . . . . . .
21
21
22
23
23
Technical data . . . . . . . . . . . . . . . . . . . . . . . . . . . . .
Dimensions . . . . . . . . . . . . . . . . . . . . . . . . . . . . . . .
24
30
VEGABAR 17
27636-EN-120531
Dismounting steps . . . . . . . . . . . . . . . . . . . . . . . . . .
Disposal . . . . . . . . . . . . . . . . . . . . . . . . . . . . . . . . .
Supplement
9.1
9.2
2
.
.
.
.
.
.
.
.
Dismounting
8.1
8.2
9
.
.
.
.
Structure . . . . . . . . . . . . . . . . . .
Principle of operation . . . . . . . . .
Operation. . . . . . . . . . . . . . . . . .
Packaging, transport and storage
Maintenance and fault rectification
7.1
7.2
7.3
8
5
5
5
5
6
6
6
6
6
Setup
6.1
6.2
7
..
..
..
..
..
..
..
..
..
Connecting to power supply
5.1
5.2
5.3
6
.
.
.
.
.
.
.
.
.
Mounting
4.1
4.2
4.3
5
.
.
.
.
.
.
.
.
.
Authorised personnel . . . . . . . . . . . . . . . . . . . .
Appropriate use . . . . . . . . . . . . . . . . . . . . . . . .
Warning about incorrect use . . . . . . . . . . . . . . .
General safety instructions . . . . . . . . . . . . . . . .
Safety label on the instrument . . . . . . . . . . . . . .
CE conformity . . . . . . . . . . . . . . . . . . . . . . . . .
Measuring range - permissible process pressure
Safety instructions for Ex areas . . . . . . . . . . . . .
Environmental instructions. . . . . . . . . . . . . . . . .
Product description
3.1
3.2
3.3
3.4
4
4
4
4
For your safety
2.1
2.2
2.3
2.4
2.5
2.6
2.7
2.8
2.9
3
Function. . . . . . . . . . . . . . . . . . . . . . . . . . . . . . . . . .
Target group . . . . . . . . . . . . . . . . . . . . . . . . . . . . . .
Symbolism used. . . . . . . . . . . . . . . . . . . . . . . . . . . .
Contents
Supplementary documentation
27636-EN-120531
Information:
Supplementary documents appropriate to the ordered version come
with the delivery. You can find them listed in chapter "Product
description".
Editing status: 2012-05-29
VEGABAR 17
3
1 About this document
1 About this document
1.1 Function
This operating instructions manual provides all the information you
need for mounting, connection and setup as well as important
instructions for maintenance and fault rectification. Please read this
information before putting the instrument into operation and keep this
manual accessible in the immediate vicinity of the device.
1.2 Target group
This operating instructions manual is directed to trained qualified
personnel. The contents of this manual should be made available to
these personnel and put into practice by them.
1.3 Symbolism used
Information, tip, note
This symbol indicates helpful additional information.
Caution: If this warning is ignored, faults or malfunctions can
result.
Warning: If this warning is ignored, injury to persons and/or serious
damage to the instrument can result.
Danger: If this warning is ignored, serious injury to persons and/or
destruction of the instrument can result.
Ex applications
This symbol indicates special instructions for Ex applications.
l
à
1
List
The dot set in front indicates a list with no implied sequence.
Action
This arrow indicates a single action.
Sequence
Numbers set in front indicate successive steps in a procedure.
Battery disposal
This symbol indicates special information about the disposal of
batteries and accumulators.
27636-EN-120531
4
VEGABAR 17
2 For your safety
2 For your safety
2.1 Authorised personnel
All operations described in this operating instructions manual must be
carried out only by trained specialist personnel authorised by the plant
operator.
During work on and with the device the required personal protective
equipment must always be worn.
2.2 Appropriate use
VEGABAR 17 is a pressure transmitter for measurement of gauge
pressure, absolute pressure and vacuum.
You can find detailed information on the application range in chapter
"Product description".
Operational reliability is ensured only if the instrument is properly used
according to the specifications in the operating instructions manual as
well as possible supplementary instructions.
For safety and warranty reasons, any invasive work on the device
beyond that described in the operating instructions manual may be
carried out only by personnel authorised by the manufacturer. Arbitrary
conversions or modifications are explicitly forbidden.
2.3 Warning about incorrect use
Inappropriate or incorrect use of the instrument can give rise to
application-specific hazards, e.g. vessel overfill or damage to system
components through incorrect mounting or adjustment.
2.4 General safety instructions
This is a high-tech instrument requiring the strict observance of
standard regulations and guidelines. The user must take note of the
safety instructions in this operating instructions manual, the countryspecific installation standards as well as all prevailing safety
regulations and accident prevention rules.
The instrument must only be operated in a technically flawless and
reliable condition. The operator is responsible for trouble-free
operation of the instrument.
27636-EN-120531
During the entire duration of use, the user is obliged to determine the
compliance of the necessary occupational safety measures with the
current valid rules and regulations and also take note of new
regulations.
VEGABAR 17
5
2 For your safety
2.5 Safety label on the instrument
The safety approval markings and safety tips on the device must be
observed.
2.6 CE conformity
The device fulfills the legal requirements of the applicable EC
guidelines. By affixing the CE marking, we confirm successful testing
of the product.
You can find the conformity certificate in the download section of our
homepage.
2.7 Measuring range - permissible process pressure
Due to the application, a measuring cell with a measuring range higher
than the permissible pressure range of the process fitting may have
been integrated. The permissible process pressure is stated with
"Process pressure" on the type label, see chapter 3.1 "Configuration".
For safety reasons, this range must not be exceeded.
2.8 Safety instructions for Ex areas
Please note the Ex-specific safety information for installation and
operation in Ex areas. These safety instructions are part of the
operating instructions manual and come with the Ex-approved
instruments.
2.9 Environmental instructions
Protection of the environment is one of our most important duties. That
is why we have introduced an environment management system with
the goal of continuously improving company environmental protection.
The environment management system is certified according to DIN
EN ISO 14001.
Please help us fulfil this obligation by observing the environmental
instructions in this manual:
l
l
Chapter "Packaging, transport and storage"
Chapter "Disposal"
27636-EN-120531
6
VEGABAR 17
3 Product description
3 Product description
3.1 Structure
Scope of delivery
The scope of delivery encompasses:
l
l
l
VEGABAR 17 process pressure transmitter
Depending on the version, with plug connector, connection cable
or terminal housing
Documentation
- this operating instructions manual
- Ex-specific "Safety instructions" (with Ex versions)
- if necessary, further certificates
Structure
4
3
2
1
Fig. 1: VEGABAR 17 with plug connector according to ISO 4400
1
2
3
4
Type label
Process fitting
Housing with electronics
Pressure compensation (beneath the knurled nut)
Plug connector
The type label contains the most important data for identification and
use of the instrument:
l
l
l
l
Article number
Serial number
Technical data
Article numbers, documentation
27636-EN-120531
With the serial number, you can access the delivery data of the
instrument via www.vega.com, "VEGA Tools" and "serial number
search". In addition to the type label outside, you can also find the
serial number on the inside of the instrument.
VEGABAR 17
7
3 Product description
3.2 Principle of operation
Application area
VEGABAR 17 is a pressure transmitter for measurement of gauge
pressure, absolute pressure or vacuum. Measured products are
gases, vapours and liquids. The front flush versions are also suitable
for use in viscous or contaminated products.
Functional principle
The process pressure acts on the sensor element via the stainless
steel diaphragm. The process pressure causes a resistance change
which is converted into a corresponding output signal and outputted as
measured value.1)
Voltage supply
4 … 20 mA two-wire electronics for voltage supply and measured
value transmission on the same cable.
3.3 Operation
The VEGABAR 17 has no adjustment options.
However, there are two built-in potentiometers for recalibration of zero
and span.
3.4 Packaging, transport and storage
Packaging
Your instrument was protected by packaging during transport. Its
capacity to handle normal loads during transport is assured by a test
according to DIN EN 24180.
The packaging of standard instruments consists of environmentfriendly, recyclable cardboard. For special versions, PE foam or PE foil
is also used. Dispose of the packaging material via specialised
recycling companies.
Transport
Transport must be carried out under consideration of the notes on the
transport packaging. Nonobservance of these instructions can cause
damage to the device.
Transport inspection
The delivery must be checked for completeness and possible transit
damage immediately at receipt. Ascertained transit damage or
concealed defects must be appropriately dealt with.
Storage
Up to the time of installation, the packages must be left closed and
stored according to the orientation and storage markings on the
outside.
Unless otherwise indicated, the packages must be stored only under
the following conditions:
1)
8
Not in the open
Measuring ranges up to 16 bar: piezoresistive sensor element with internal
transmission liquid. Measuring ranges up to 25 bar: strain gauge (DMS)
sensor element on the rear of the stainless steel diaphragm (dry).
VEGABAR 17
27636-EN-120531
l
3 Product description
Storage and transport
temperature
l
l
l
l
Dry and dust free
Not exposed to corrosive media
Protected against solar radiation
Avoiding mechanical shock and vibration
l
Storage and transport temperature see chapter "Supplement Technical data - Ambient conditions"
Relative humidity 20 … 85 %
27636-EN-120531
l
VEGABAR 17
9
4 Mounting
4 Mounting
4.1 General instructions
Suitability for the process conditions
Make sure that all parts of the instrument exposed to the process, in
particular the sensor element, process seal and process fitting, are
suitable for the existing process conditions. These include above all
the process pressure, process temperature as well as the chemical
properties of the medium.
You can find the specifications in chapter "Technical data" and on the
type label.
Diaphragm protection
To protect the diaphragm, the process fitting is covered by a protective
cap.
Remove the protective cap just before installation so that the
diaphragm will not get damaged. It is recommended to keep the cap
and use it again later for storage or transport.
4.2 Instructions for installation
Checking the diaphragm
Please check the diaphragm visually for damage and leaking fluid
before mounting and setting up the instrument. Make sure that the
diaphragm doesn't get damaged during installation.
Caution:
The instrument may only be used if it is in a technically flawless
condition and has an undamaged diaphragm.
Mounting position
VEGABAR 17 functions in any installation position. It is mounted
according to the same directives as a manometer (DIN EN 839-2).
Information:
We recommend using lock fittings, measuring instrument holders and
siphons from our line of accessories.
4.3 Mounting steps
For mounting VEGABAR 17, a welded socket is required. You can find
these components in the supplementary instructions manual "Welded
socket and seals".
Sealing/Screwing in
Use the seal fitting to the instrument, or in case of NPT connections, a
high-resistance sealing material.
Screw VEGABAR 17 into the welded socket with a wrench applied to
the hexagon of the process fitting. For the proper torque see chapter
"Technical data", for spanner size see chapter "Dimensions".
10
VEGABAR 17
27636-EN-120531
Welding the socket
4 Mounting
27636-EN-120531
Fig. 2: Mounting of VEGABAR 17
VEGABAR 17
11
5 Connecting to power supply
5 Connecting to power supply
5.1 Preparing the connection
Note safety instructions
Always keep in mind the following safety instructions:
l
l
Connect only in the complete absence of line voltage
If overvoltage surges are expected, overvoltage arresters should
be installed
Tip:
We recommend VEGA overvoltage arrester ÜSB 62-36G.X.
Take note of safety instructions
for Ex applications
Select power supply
In hazardous areas you must take note of the respective regulations,
conformity and type approval certificates of the sensors and power
supply units.
The supply voltage and the current signal are carried on the same twowire connection cable.
Provide a reliable separation between the supply circuit and the mains
circuits according to DIN VDE 0106 part 101.
VEGA power supply units VEGATRENN 149AEx, VEGASTAB 690,
VEGADIS 371 as well as all VEGAMETs meet this requirement. When
using one of these instruments, protection class III is ensured for
VEGABAR 17.
Keep in mind the following additional factors that influence the
operating voltage:
l
l
Select connection cable
Output voltage of the power supply unit can be lower under
nominal load (with a sensor current of 20.5 mA or 22 mA in case of
fault message)
Influence of additional instruments in the circuit (see load values in
chapter "Technical data")
The instrument is connected with standard two-wire cable without
screen. If electromagnetic interference is expected which is above the
test values of EN 61326 for industrial areas, screened cable should be
used.
Use cable with round cross-section. A cable outer diameter of 5 … 9 mm
(0.2 … 0.35 in) ensures the seal effect of the cable gland. If you are
using cable with a different diameter or cross-section, exchange the
seal or use a suitable cable gland.
For the version with round plug connector M12 x 1, a suitable, readymade connection cable (article no. ASL.1S.) in 5 m, 10 m or 25 m
lengths is available from the line of VEGA accessories.
27636-EN-120531
12
VEGABAR 17
5 Connecting to power supply
Cable screening and
grounding
Connect the cable screen on both ends to ground potential.
If potential equalisation currents are expected, the connection on the
processing side must be made via a ceramic capacitor (e. g. 1 nF,
1500 V). The low frequency potential equalisation currents are thus
suppressed, but the protective effect against high frequency interference signals remains.
Warning:
Considerable potential differences exist inside galvanic plants as well
as vessels with cathodic corrosion protection. Very large equalisation
currents can flow through the cable screen when the screen is
grounded on both ends. To avoid this, the cable screen must be
connected to ground potential only on one end (inside the switching
cabinet) in such applications. The cable screen must not be
connected to the internal ground terminal in the sensor and the outer
ground terminal on the housing not to potential equalisation!
Information:
The metallic parts of the instrument (antenna, transmitter, concentric
tube, etc.) are conductively connected with the inner and outer ground
terminal on the housing. This connection exists either as a direct
metallic contact or via the shielding of the special connection cable on
instruments with external electronics. You can find specifications on
the potential connections within the instrument in chapter "Technical
data".
Select connection cable for Ex
applications
Take note of the corresponding installation regulations for Ex
applications.
5.2 Connection procedure
Proceed as follows:
1
Loosen the screw on the rear of the plug connector
2
Remove the plug connector and seal from VEGABAR 17
3
Remove the plug insert from the plug housing
27636-EN-120531
Connection via angle
plug connector
VEGABAR 17
13
5 Connecting to power supply
1
3
2
Fig. 3: Loosen the plug insert
1
2
3
Cable gland
Plug insert
Plug housing
4
Remove approx. 5 cm of the cable mantle, strip approx. 1 cm
insulation from the individual wires
5
Lead the cable through the cable gland into the plug housing
6
Connect the wire ends to the screw terminals according to the
wiring plan
2
1
3
4
Fig. 4: Connection to the screw terminals
Cable gland
Plug housing
Plug insert
Plug seal
7
Snap the plug insert into the plug housing and insert the sensor
seal
8
Plug the plug insert with seal to VEGABAR 17 and tighten the
screw
The electrical connection is finished.
Connection via angle
plug connector with hinged cover
14
Proceed as follows:
VEGABAR 17
27636-EN-120531
1
2
3
4
5 Connecting to power supply
1
Loosen the screw in the cover of the plug connector
2
Open the cover and remove it
3
Press the plug insert downwards
4
Loosen the screws of the strain relief and cable entry
2
1
3
1
3
2
4
Fig. 5: Loosen the plug insert
1
2
3
4
Plug insert
Strain relief
Cable gland
Plug housing
5
Remove approx. 5 cm of the cable mantle, strip approx. 1 cm
insulation from the individual wires
6
Lead the cable through the cable gland into the plug housing
7
Connect the wire ends to the screw terminals according to the
wiring plan
2
1
3
4
5
Fig. 6: Connection to the screw terminals
27636-EN-120531
1
2
3
4
5
VEGABAR 17
Cable gland
Cover
Plug housing
Plug insert
Plug seal
15
5 Connecting to power supply
8
Snap the plug insert into the plug housing and insert the sensor
seal
Information:
Note the correct arrangement, see illustration
9
Tighten the screws on the strain relief and cable entry
10 Hook in the cover and push onto the plug connection, tighten
cover screw
11 Plug the plug insert with seal to VEGABAR 17 and tighten the
screw
The electrical connection is finished.
5.3 Wiring plan
Angled plug connector
according to ISO 4400
+
1
3
1
2
Fig. 7: Wiring plan, angle plug connector according to ISO 4400, top view to
VEGABAR 17
1
Voltage supply and signal output
Round plug connector
M12 x 1
+
2
1
3
4
1
3
Fig. 8: Wiring plan, round plug connector M12 x 1, top view to VEGABAR 17
1
Voltage supply and signal output
16
VEGABAR 17
27636-EN-120531
Connection via connection cable with 4-pole socket M12 x 1
(accessory)
5 Connecting to power supply
Wire colour
Socket
Brown
1
White
2
Blue
3
Black
4
Cable outlet
1
2
3
Fig. 9: Wiring plan cable outlet
1
2
3
brown (+) power supply and signal output
green (-) power supply and signal output
blue = cable screen
Terminal housing
1
2
3
4
5
+
– 1
–
+ 2
Fig. 10: Wiring plan, terminal housing
To power supply or the processing system
Control instrument (4 … 20 mA measurement)
27636-EN-120531
1
2
VEGABAR 17
17
6 Setup
6 Setup
6.1 Setup steps
After mounting and electrical connection, VEGABAR 17 is ready for
operation.
VEGABAR 17 delivers a current of 4 … 20 mA corresponding to the
actual process pressure.
Further settings are not necessary.
6.2 Recalibration
With both instruments with thread ring or field housing, zero and span
can be adjusted via integrated potentiometers. Adjustment range:
l
l
Zero ± 5 %
Span ± 5 %
This allows, for example, the consideration of an installation position
different from the reference installation position.
A shifting of zero shifts span also respectively.
Note:
The potentiometer for span should only be used if you have adequate
calibration equipment (at least 3 times more precise than the deviation
of VEGABAR 17).
Recommended recalibration cycle: 1 year.
Instruments with plug
connector or cable outlet
Proceed as follows:
1
Loosen the plug connector and screw the screwed ring in
connected status
2
Place the plug connector onto the instrument place and pull both
carefully out of the instrument
27636-EN-120531
18
VEGABAR 17
6 Setup
1
2
3
4
5
6
Fig. 11: Open the instrument
1
2
3
4
5
6
Plug connector
Plug seal
Screwed ring
Instrument plug
Plug seal
Housing
3
Set zero in unpressurized status, check 4 mA signal in the circuit
4
Set span with exact reference pressure
5
Check zero
2
1
27636-EN-120531
Fig. 12: Adjustment of zero and span
VEGABAR 17
1
2
zero (Z)
span (S)
6
Assemble the instrument and connect it.
19
6 Setup
Instruments with terminal housing
Proceed as follows:
1
Screw on the housing cover in connected status
5
4
Fig. 13: Adjustment of zero and span
1
2
zero (Z)
span (S)
2
Set zero in unpressurized status, check 4 mA signal in the circuit
3
Set a span with a sufficiently precise reference pressure
4
Check zero
5
Screw the housing cover back on
27636-EN-120531
20
VEGABAR 17
7 Maintenance and fault rectification
7 Maintenance and fault rectification
7.1 Maintenance
If the instrument is used properly, no special maintenance is required
in normal operation.
7.2 Remove interferences
Reaction when malfunctions occur
The operator of the system is responsible for taking suitable measures
to rectify faults.
Failure reasons
VEGABAR 17 offers maximum reliability. Nevertheless, faults can
occur during operation. These may be caused by the following, e.g.:
l
l
l
l
Sensor
Process
Voltage supply
Signal processing
Fault rectification
The first measure to be taken is to check the output signal. In many
cases, the causes can be determined this way and the faults rectified.
24 hour service hotline
Should these measures not be successful, please call in urgent cases
the VEGA service hotline under the phone no. +49 1805 858550.
The hotline is available to you 7 days a week round-the-clock. Since
we offer this service world-wide, the support is only available in the
English language. The service is free of charge, only the standard
telephone costs will be charged.
Check the 4 … 20 mA
signal
? No 4 … 20 mA signal
l
Connection to voltage supply wrong
à Check connection according to chapter "Connection steps"
and if necessary, correct according to chapter "Wiring plan"
l
No voltage supply
à Check cables for breaks; repair if necessary
l
Operating voltage too low or load resistance too high
à Check, adapt if necessary
? Steady output signal with pressure change
l
electronics module or measuring cell defective
27636-EN-120531
à Exchange the instrument or send it in for repair
In Ex applications, the regulations for the wiring of intrinsically safe
circuits must be observed.
VEGABAR 17
21
7 Maintenance and fault rectification
Reaction after fault rectification
Depending on the reason for the fault and the measures taken, the
steps described in chapter "Set up" may have to be carried out again.
7.3 Instrument repair
If a repair is necessary, please proceed as follows:
You can download a return form (23 KB) from our Internet homepage
www.vega.com under: "Downloads - Forms and certificates - Repair
form".
By doing this you help us carry out the repair quickly and without
having to call back for needed information.
l
l
l
l
Print and fill out one form per instrument
Clean the instrument and pack it damage-proof
Attach the completed form and, if need be, also a safety data
sheet outside on the packaging
Please ask the agency serving you for the address of your return
shipment. You can find the respective contact data on our website
www.vega.com under: "Company - VEGA worldwide"
27636-EN-120531
22
VEGABAR 17
8 Dismounting
8 Dismounting
8.1 Dismounting steps
Warning:
Before dismounting, be aware of dangerous process conditions such
as e.g. pressure in the vessel, high temperatures, corrosive or toxic
products etc.
Take note of chapters "Mounting" and "Connecting to power supply"
and carry out the listed steps in reverse order.
8.2 Disposal
The instrument consists of materials which can be recycled by
specialised recycling companies. We use recyclable materials and
have designed the electronics to be easily separable.
WEEE directive 2002/96/EG
This instrument is not subject to the WEEE directive 2002/96/EG and
the respective national laws. Pass the instrument directly on to a
specialised recycling company and do not use the municipal collecting
points. These may be used only for privately used products according
to the WEEE directive.
Correct disposal avoids negative effects on humans and the environment and ensures recycling of useful raw materials.
Materials: see chapter "Technical data"
27636-EN-120531
If you have no way to dispose of the old instrument properly, please
contact us concerning return and disposal.
VEGABAR 17
23
9 Supplement
9 Supplement
9.1 Technical data
General data
Parameter, pressure
Gauge pressure, absolute pressure, vacuum
Measuring principle
Piezoresistive/Thin film DMS
Communication interface
None
Materials and weights
Materials, wetted parts
- Process fitting
316Ti
-
Diaphragm
316Ti
-
Diaphragm with front flush version
316Ti, Hastelloy C4
-
Seal, O-ring
FPM, FKM, EPDM, NBR
Materials, non-wetted parts
- Internal transmission liquid
Synthetic oil, Halocarbon oil2)3)
-
Housing
316Ti
-
Terminal housing
316Ti
-
Ground terminal
316Ti
-
Plug
PA
-
Cable gland
PA, 316Ti
-
Plug seal
Silicone
-
Connection cable
PUR
Available cable length max.
40 m
Weight approx.
- Version with plug connector, cable outlet
0.2 kg (0.441 lbs)
-
Version with terminal housing
0.35 kg (0.772 lbs)
Torque max.
50 Nm (36.88 lbft)
Output variable
Output signal
4 … 20 mA
Zero and span adjustable via potentiometer
±5 %
Dead time
≤ 1 ms
Step response time (10 … 90 %)
- Standard version
≤ 1 ms
3)
24
Synthetic oil: For measuring ranges up to 16 bar, FDA listed for the food
processing industry. For measuring ranges up to 25 bar not available.
Halocarbon oil: With version oil and greasefree, not with vacuum measuring
ranges, not with absolute measuring ranges < 1 barabs.
VEGABAR 17
27636-EN-120531
2)
9 Supplement
-
Version for medium temperature < -30 °C
(-22 °F)
≤ 10 ms
-
Version for measuring ranges > 25 bar
≤ 10 ms
-
Version with front-flush diaphragm
≤ 10 ms
Reference conditions and actuating variables (according to DIN EN 60770-1)
Reference conditions according to DIN EN 61298-1
- Temperature
+15 … +25 °C (+59 … +77 °F)
-
Relative humidity
45 … 75 %
-
Air pressure
860 … 1060 mbar/86 … 106 kPa (12.5 … 15.4 psi)
Determination of characteristics
Limit point adjustment according to IEC 61298-2
Reference installation position
upright, diaphragm points downward
Influence of the installation position
depending on the chemical seal version
Input variable
The availability of the respective measuring range depends on the corresponding process fitting.
The specifications on overload capacity are only an overview and refer to the measuring cell.
Limitations due to the material and form of the process fitting are possible. The specifications on
the type label always apply.
Nominal range
Overload capacity, max. Overload capacity, min.
pressure
pressure
27636-EN-120531
Gauge pressure
-0.1 … 0 bar/-10 … 0 kPa
1 bar/100 kPa
-1 bar/-100 kPa
-0.16 … 0 bar/-16 … 0 kPa
1.5 bar/150 kPa
-1 bar/-100 kPa
-0.25 … 0 bar/-25 … 0 kPa
2 bar/200 kPa
-1 bar/-100 kPa
-0.4 … 0 bar/-40 … 0 kPa
2 bar/200 kPa
-1 bar/-100 kPa
-0.6 … 0 bar/-60 … 0 kPa
4 bar/400 kPa
-1 bar/-100 kPa
-1 … 0 bar/-100 … 0 kPa
5 bar/500 kPa
-1 bar/-100 kPa
-1 … 3 bar/-100 … 300 kPa
10 bar/1000 kPa
-1 bar/-100 kPa
0 … 0.1 bar/0 … 10 kPa
1 bar/100 kPa
-1 bar/-100 kPa
0 … 0.16 bar/0 … 16 kPa
1.5 bar/150 kPa
-1 bar/-100 kPa
0 … 0.25 bar/0 … 25 kPa
2 bar/200 kPa
-1 bar/-100 kPa
0 … 0.4 bar/0 … 40 kPa
2 bar/200 kPa
-1 bar/-100 kPa
0 … 0.6 bar/0 … 60 kPa
4 bar/400 kPa
-1 bar/-100 kPa
0 … 1 bar/0 … 100 kPa
5 bar/500 kPa
-1 bar/-100 kPa
0 … 1.6 bar/0 … 160 kPa
10 bar/1000 kPa
-1 bar/-100 kPa
0 … 2.5 bar/0 … 250 kPa
10 bar/1000 kPa
-1 bar/-100 kPa
0 … 4 bar/0 … 40 kPa
17 bar/1700 kPa
-1 bar/-100 kPa
0 … 6 bar/0 … 600 kPa
35 bar/3500 kPa
-1 bar/-100 kPa
0 … 10 bar/0 … 1000 kPa
35 bar/3500 kPa
-1 bar/-100 kPa
0 … 16 bar/0 … 1600 kPa
80 bar/8000 kPa
-1 bar/-100 kPa
VEGABAR 17
25
9 Supplement
Nominal range
Overload capacity, max. Overload capacity, min.
pressure
pressure
0 … 25 bar/0 … 2500 kPa
50 bar/5000 kPa
-1 bar/-100 kPa
0 … 40 bar/0 … 4000 kPa
80 bar/8000 kPa
-1 bar/-100 kPa
0 … 60 bar/0 … 6000 kPa
120 bar/12 MPa
-1 bar/-100 kPa
0 … 100 bar/0 … 10 MPa
200 bar/20 MPa
-1 bar/-100 kPa
0 … 160 bar/0 … 16 MPa
320 bar/32 MPa
-1 bar/-100 kPa
0 … 250 bar/0 … 25 MPa
500 bar/50 MPa
-1 bar/-100 kPa
0 … 400 bar/0 … 40 MPa
800 bar/80 MPa
-1 bar/-100 kPa
0 … 600 bar/0 … 60 MPa
1200 bar/120 MPa
-1 bar/-100 kPa
0 … 1000 bar/0 … 100 MPa
1500 bar/150 MPa
-1 bar/-100 kPa
Absolute pressure
0 … 0.25 bar/0 … 25 kPa
2 bar/200 kPa
0 … 0.4 bar/0 … 40 kPa
2 bar/200 kPa
0 … 0.6 bar/0 … 60 kPa
4 bar/400 kPa
0 … 1 bar/0 … 100 kPa
5 bar/500 kPa
0 … 1.6 bar/0 … 160 kPa
10 bar/1000 kPa
0 … 2.5 bar/0 … 250 kPa
10 bar/1000 kPa
0 … 4 bar/0 … 400 kPa
17 bar/1700 kPa
0 … 6 bar/0 … 600 kPa
35 bar/3500 kPa
0 … 10 bar/0 … 1000 kPa
35 bar/3500 kPa
0 … 16 bar/0 … 1600 kPa
80 bar/8 MPa
Deviation4)
≤ 0.5 %
Deviation
Influence of the product or ambient temperature5)
The following specifications apply to values within the compensated temperature range, i.e.
0 … 80 °C (176 °F), reference temperature 20 °C (68 °F).
Average temperature coefficient of the zero signal
- Standard
< 0.2 %/10 K
Meas. ranges 0 … 0.1 and 0 … 0.16 bar
< 0.4 %/10 K
Average temperature coefficient of the span
< 0.2 %/10 K
-
The following specifications are valid for values not within the compensated temperature range.
Average temperature coefficient of the zero signal
- Standard
typ. < 0.2 %/10 K
Meas. ranges 0 … 0.1 and 0 … 0.16 bar
4)
5)
26
typ. < 0.4 %/10 K
Relating to the adjusted span, incl. non-linearity, hysteresis and non-reproducibility.
Relating to the set span, incl. hysteresis and repeatability.
VEGABAR 17
27636-EN-120531
-
9 Supplement
Average temperature coefficient of the span
typ. < 0.2 %/10 K
Long-term stability (according to DIN 16086, DINV 19259-1 and IEC 60770-1)
Long-term drift of the zero signal6)
< 0.2 %/year
Ambient conditions
Ambient temperature (note temperature derating!)
- Cable outlet
-20 … +80 °C (-4 … +176 °F)
-
Round plug connector M12 x 1
-25 … +80 °C (-13 … +176 °F)
-
Angled plug connector according to
ISO 4400
-40 … +80 °C (-40 … +176 °F)
-
Terminal housing
-50 … +80 °C (-58 … +176 °F)
-
with cooling element
-20 … +80 °C (-4 … +176 °F)
1
80°C
(176°F)
55°C
(131°F)
130°C
(266°F)
150°C
(302°F)
2
Fig. 14: Temperature derating VEGABAR 17
1
2
Ambient temperature
Process temperature
Storage and transport temperature
- Standard
-
with cooling element
-30 … +100 °C (-22 … +212 °F)
-20 … +100 °C (-4 … +212 °F)
Process conditions
27636-EN-120531
Product temperature
- Standard
-30 … +100 °C (-22 … +212 °F)
-
additional
-30 … +125 °C (-22 … +257 °F)
-
with cooling element
-20 … +150 °C (-4 … +302 °F)
-
Measuring ranges from 400 bar
-30 … +70 °C (-22 … +158 °F)
Shock resistance
- Version with terminal housing
6)
VEGABAR 17
600 g according to IEC 60068-2-27 (mechanical
shock)
Under reference conditions, relating to the adjusted span.
27
9 Supplement
-
Version with plug connector or cable
outlet
1000 g according to IEC 60068-2-27 (mechanical
shock)
-
Version with cooling element
400 g according to IEC 60068-2-27 (mechanical
shock)
Vibration resistance
- Version with terminal housing or cooling
element
10 g according to IEC 60068-2-6 (resonance
vibration)
Version with plug connector or cable
outlet
20 g according to IEC 60068-2-6 (vibration at
resonance)
-
Electromechanical data
Angled plug connector
- Version
-
4-pin according to ISO 4400
Outer cable diameter
6 … 8 mm
Circular plug connector
- Version
4-pole M12 x 1
Cable outlet
- Diameter
6.8 mm
Terminal housing
- Cable entry for cable outer diameter
6 … 8 mm
-
Spring-loaded terminals for wire crosssection up to
2.5 mm² (AWG 14)
Voltage supply
Operating voltage
- Version with plug or cable outlet
10 … 30 V DC
Version with terminal housing
11 … 30 V DC
-
Load
- Version with cable outlet
RA ≤ (U-10V)/0,02 A- (length of the cable version in
m x 0.14 Ω)
-
Version with plug
see diagram
-
Version with terminal housing
see diagram
Electrical protective measures
IP 65
-
with round plug connection
IP 65
-
with cable outlet
IP 67, IP 68 (0.5 bar)
-
with terminal housing
IP 67
Voltage resistance
Insulation according to EN 50020, 6.4, 12
7)
28
According to EN 60529/IEC 529.
VEGABAR 17
27636-EN-120531
Protection rating7)
- with angled plug connector
9 Supplement
Interference resistance
- HF
-
Burst
Other protective measures
- Interpolation protection
-
Overvoltage protection
10 V/m
2 kV
Available
up to 36 V DC
Approvals
Instruments with approvals can have different technical data depending on the version.
27636-EN-120531
That's why the associated approval documents have to be noted with these instruments. They are
part of the delivery or can be downloaded under www.vega.com via "VEGA Tools" and "serial
number search" as well as via "Downloads" and "Approvals".
VEGABAR 17
29
9 Supplement
9.2 Dimensions
3 mm
3 mm
(0.12")
G1/2
~119,5 mm (4.70")
~126 mm (4.96")
GTX
20,5 mm
(0.81")
20 mm
(0.79")
~126 mm (4.96")
GDX
20,5 mm
(0.81")
2 mm
(0.08")
ø 6 mm
(0.24")
ø 17,5 mm
(0.69")
GBX
~123 mm (4.84 ")
G1/2
G1/2
10 mm
(0.39")
G1/4
ø 5 mm
(0.20")
ø 9,5 mm
(0.37")
14 mm
(0.55")
~123 mm (4.84 ")
SW27 ø 27 mm
(1.06")
20 mm
(0.79")
2 mm
~116 mm (4.57 ")
13 mm
(0.51")
VEGABAR 17 - standard housing
G1
G1/2
1/4NPT
ø 30 mm
(1.18")
851/85L/85B
~123 mm (4.84")
~116 mm (4.57")
861/86L/86B
SW41
28 mm
(1.10")
G1
ø 30 mm
(1.18")
1/2NPT
13 mm
(0.51")
~135 mm (5.31")
TBX
ø 18 mm
(0.71")
19 mm
(0.75")
ø 17,5 mm
(0.69")
10 mm
(0.39")
10 mm
(0.39")
3 mm
(0.12")
G¼
NBX
NDX
84L/84B
30
VEGABAR 17
27636-EN-120531
Fig. 15: VEGABAR 17 standard housing, GBX = G¼ B manometer connection, GDX = G½ B manometer
connection, GTX = G½ A according to DIN 3852-E, TBX = G½ B, inside G¼ B, 84L/84B = G1 B front-flush max.
25 bar, 851/85L/85B = G1 B front-flush with O-ring up to 1.6 bar, 861/86L/86B = G½ B front-flush with O-ring
> 1.6 bar, NBX = ¼ NPT thread, NDX = ½ NPT thread
9 Supplement
3 mm
~139,5 mm (5.49")
ø 6 mm
(0.24")
ø 17,5 mm
(0.69")
3 mm
(0.12")
GBX
~146 mm (5.75")
~146 mm (5.75")
G1/2
GTX
20,5 mm
(0.81")
~143 mm (5.63 ")
20 mm
(0.79")
GDX
20,5 mm
(0.81")
2 mm
(0.08")
G1/2
G1/2
10 mm
(0.39")
G1/4
ø 5 mm
(0.20")
ø 9,5 mm
(0.37")
14 mm
(0.55")
~143 mm (5.63 ")
SW27 ø 27 mm
(1.06")
20 mm
(0.79")
2 mm
13 mm
(0.51")
~136 mm (5.35 ")
VEGABAR 17 - Standard housing (Ex version)
G1
G1/2
TBX
ø 18 mm
(0.71")
SW41
1/4NPT
28 mm
(1.10")
851/85L/85B
~143 mm (5.63 ")
~155 mm (6.10")
~136 mm (5.35")
861/86L/86B
ø 30 mm
(1.18")
19 mm
(0.75")
ø 17,5 mm
(0.69")
10 mm
(0.39")
10 mm
(0.39")
3 mm
(0.12")
G¼
G1
13 mm
(0.51")
ø 30 mm
(1.18")
1/2NPT
NBX
NDX
27636-EN-120531
84L/84B
Fig. 16: VEGABAR 17 standard housing, GBX = G¼ B manometer connection, GDX = G½ B manometer
connection, GTX = G½ A according to DIN 3852-E, TBX = G½ B, inside G¼ B, 84L/84B = G1 B front-flush max.
25 bar, 851/85L/85B = G1 B front-flush with O-ring up to 1.6 bar, 861/86L/86B = G½ B front-flush with O-ring
> 1.6 bar, NBX = ¼ NPT thread, NDX = ½ NPT thread
VEGABAR 17
31
9 Supplement
VEGABAR 17 - terminal housing
max. 90 mm
(3.54")
ø
61
3 mm
14 mm
(0.55")
G1/2
10 mm
(0.39")
G1/2
3 mm
(0.12")
ø 6 mm
(0.24")
ø 17,5 mm
(0.69")
GBX
~138 mm (5.43")
G1/2
20,5 mm
(0.81")
G1/2
GTX
20,5 mm
(0.81")
~138 mm (5.43")
GDX
20 mm
(0.79")
~135 mm (5.31 ")
~131,5 mm (5.18")
~135 mm (5.31 ")
G1/4
ø 5 mm
(0.20")
ø 9,5 mm
(0.37")
2 mm
(0.08")
20 mm
(0.79")
2 mm
~128 mm (5.04 ")
)
0"
.4
(2
13 mm
(0.51")
m
m
SW27 ø 27 mm
(1.06")
G1
ø 30 mm
(1.18")
851/85L/85B
~128 mm (5.04")
~135 mm (5.31")
861/86L/86B
SW41
1/4NPT
28 mm
(1.10")
G1
ø 30 mm
(1.18")
1/2NPT
13 mm
(0.51")
~147 mm (5.79")
TBX
ø 18 mm
(0.71")
19 mm
(0.75")
ø 17,5 mm
(0.69")
10 mm
(0.39")
10 mm
(0.39")
3 mm
(0.12")
G¼
NBX
NDX
84L/84B
32
VEGABAR 17
27636-EN-120531
Fig. 17: VEGABAR 17 terminal housing, GBX = G¼ B manometer connection, GDX = G½ B manometer
connection, GTX = G½ A according to DIN 3852-E, TBX = G½ B, inside G¼ B, 84L/84B = G1 B front-flush max.
25 bar, 851/85L/85B = G1 B front-flush with O-ring up to 1.6 bar, 861/86L/86B = G½ B front-flush with O-ring
> 1.6 bar, NBX = ¼ NPT thread, NDX = ½ NPT thread
9 Supplement
VEGABAR 17 - Cooling elements, plug, cable outlet
G1
27,5 mm
(1.08")
~ 17,5 mm
(0.69")
~ 17,5 mm
(0.69")
G1/2
5
4
12 mm
(0.47")
3
~48 mm
(1.89")
13,5 mm
(0.53")
2
1
Fig. 18: VEGABAR 17 - Cooling elements, plug, cable outlet
Cooling element G½ B
Cooling element G1 B
Plug according to ISO 4400
Cable outlet
M12 x 1 plug
27636-EN-120531
1
2
3
4
5
VEGABAR 17
33
9 Supplement
27636-EN-120531
34
VEGABAR 17
27636-EN-120531
9 Supplement
VEGABAR 17
35
Tel: +44 (0)191 490 1547
Fax: +44 (0)191 477 5371
Email: [email protected]
Website: www.heattracing.co.uk
www.thorneanderrick.co.uk
ISO 9001
All statements concerning scope of delivery, application,
practical use and operating conditions of the sensors and
processing systems correspond to the information available at the time of printing.
© VEGA Grieshaber KG, Schiltach/Germany 2012
Subject to change without prior notice
27636-EN-120531