1
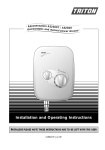
aire Thermostatic bar mixer shower Installation and Operating Instructions Installers please note these instructions are to be left with the user 2180428C October 2007 Bar mixer CONTENTS Page Introduction 1 Safety warnings 1 Main components 2 Site requirements 3 Typical suitable installations 4 Instantaneous water heaters 6 appliance capabilities 6 Preparing the mixer valve 6 Siting of the shower 7 Installation 7 Leak testing 8 commissioning 8 Operating the shower 9 cleaning the filters 9 Adjusting the showerhead 10 Cleaning the showerhead 11 To check the product suitability for commercial and multiple installations, please contact Triton’s specification advisory service before installation. Telephone: 0870 067 3767 Facsimile: 0870 067 3334 E mail: [email protected] Bar mixer Introduction This mixer is supplied with an integral single check valve and integral filter in each inlet. Inlet connections are to 15 mm compression or ½” BSP female fittings (not supplied). This book contains all the necessary fitting and operating instructions for your Triton Unichrome thermostatic bar mixer shower. Please read the instructions carefully. Read through the whole of this book before beginning your installation. Safety warnings a. Layout and sizing of pipework must be such that when other services are used, pressures at the shower control inlets do not fall below the recommended minimum. The shower installation must be carried out by a suitably competent person and in sequence of this instruction book. Care taken during the installation will provide a long and trouble free life from your shower. b. Do not choose a position where the shower could become frozen. For best performance within the specified running pressure range a minimum flow of eight litres per minute should be available to both inlets. c. Do not connect this mixer shower to any form of tap or fitting not recommended by the manufacturer. d. The showerhead must be regularly cleaned to remove scale and debris. The mixer shower must not be subjected to water temperatures above 80°C. e. Conveniently situated service valves in each inlet supply must be fitted as an independent method of isolating the shower should maintenance or servicing be necessary. The mixer is designed for use with traditional low pressure ‘gravity’ water systems, using a cold water cistern and hot water cylinder. All the models are suitable for the higher pressure systems up to a maximum of 5 bar running pressure. f. If it is intended to operate the shower in areas of hard water (above 200 ppm temporary hardness), a scale inhibitor may have to be fitted. For advice on the Triton scale inhibitor, please contact Customer Service. Important: When installing this mixer with a combination boiler or multi-point, a flow restricter must be installed in the unit. The mixer is suitable for fully modulating type combination boilers and multi-point hot water heaters. It is also suitable for thermal storage, unvented systems and pumped gravity systems. g. Do not operate the shower outside the guidelines as laid out in ‘site requirements’. Important: Before installing with a gas instantaneous water heater, make sure it is capable of delivering hot water at a minimum switch-on flow rate of 3 litres per minute. At flow rates between 3 and 8 litres per minute, the appliance must be capable of raising the water temperature to a minimum of 52°C. Water temperature at the inlet to the mixer must remain relatively constant when flow rate adjustments are made (refer to the water heater operating manual to confirm compatibility with this mixer shower). Due to continuous improvement and updating, specification may be altered without prior notice. Y-002-A Replacement parts can be ordered from Customer Service. See ‘spare parts’ for details and part numbers. Y-003-A Bar mixer Main components 1. Aire thermostatic mixer valve. Fig.1 2. Offset inlet connector. 3. Showerhead (not shown). 4. Riser rail assembly (not shown). 1 2 Bar mixer Site requirements Water temperature requirements The installation must be in accordance with Water Regulations and Bylaws. Maximum hot water temperature = 80°C Running water pressure: Minimum hot water temperature = 52°C Maximum cold water temperature = 20°C Recommended maximum = 65°C Gravity fed– 0.1 bar min. to 5.0 bar max. Mains fed –1.0 bar min. to 5.0 bar max. BS 6700 recommends that the temperature of stored water should never exceed 65°C. Maximum static water pressure: Gravity and mains – 10 bar A stored water temperature of 60°C is considered sufficient to meet all normal requirements and will minimise the effects of scale in hard water areas. Do not connect the mixer shower to a gravity hot supply and a mains cold supply (or vice versa). For the best performance within the specified running pressure range a minimum flow of eight litres per minute should be available to both inlets. Temperature adjustment range The mixed water temperature can be adjusted from cold through to a top limit which can be preset during installation. This is with full antiscald protection throughout the range (35°C to 40°C) providing the hot water temperature at the inlet remains 10°C above the outlet temperature. While the mixer shower is operational (open outlet), inlet pressures must not be capable of exceeding 7 bar. For effective operation of the internal seals, the maximum static pressure must not be exceeded. Important: This shower will shut off if there is a loss of water to either supply. Note: On sites where the running pressure is above 5 bar, the use of a suitably sized pressure reducing valve fitted in the cold mains supply pipework can provide nominally equal pressures at the mixer shower. The pipework should be installed such that the flow is not significantly affected by other taps and appliances being operated elsewhere on the premises. Where thermal store systems and instantaneous gas water heaters are used, if excessive drawoffs take place the boiler may not be able to maintain an adequate output temperature. This could result in the shower temperature becoming noticeably cooler. Bar mixer Typical suitable installations Fig.2 (diagrammatic view – not to scale) a) Instantaneous gas-heated systems, e.g. combination boilers (fig.2) The shower control must be installed with a multipoint gas water heater or combination boiler of a fully modulating design (i.e. to maintain relatively stable hot water temperatures). Combination boiler Service valves Hot water Cold mains supply A drop tight pressure reducing valve must be fitted if the supply pressures exceed 5 bar running. An expansion vessel (shown in fig.2) must be fitted, and regularly maintained, to prevent the shower mixer being damaged by excess pressures. This may already be installed within the boiler (check with manufacturer) and is in addition to the normally larger central heating expansion vessel. CH flow Expansion vessel CH return The layout and sizing of pipework must be such that nominally equal inlet supply pressures are achieved and the effects of other draw-offs are minimised. The hot supply temperature must remain a minimum of 10°C hotter than the required blend temperature for optimum performance. Stop Pressure tap reducing valve Fig.3 (diagrammatic view – not to scale) b) Unvented mains pressure systems (fig.3) Safety devices not shown The shower control can be installed with an unvented, stored hot water cylinder. For systems with no cold water take off after the appliance reducing valve, it will be necessary to fit an additional drop tight pressure reducing valve when the mains pressure is over 5 bar. The drop tight pressure reducing valve must be set at the same value as the unvented package pressure reducing valve. Mixer Service valves Unvented hot water storage unit Note: An additional expansion vessel (fig.3) may be required if a second pressure reducing valve is installed. This does not apply to packages with a cold take off after the pressure reducing valve to the cylinder. Expansion vessel Pressure reducing valves Stop tap The layout and sizing of pipework must be such that nominally equal inlet supply pressures are achieved and the effects of other draw-offs are minimised. Balanced cold mains supply Cold mains supply Bar mixer c) Mains pressurised thermal store systems (fig.4) Fig.4 (diagrammatic view – not to scale) Packages of this type, fitted with a tempering valve (blender valve) can be used. A drop tight pressure reducing valve must be fitted if the supply pressures exceed 5 bar running. An expansion vessel (shown in fig.4) must be fitted, and regularly maintained, to ensure the unit is not damaged by excess pressures. This may already be installed externally or internally within the thermal store (check with thermal store manufacturer). Mixer Hot water Blender valve Service valves d) Gravity fed systems (fig.5) Expansion vessel The shower control MUST be fed from a cold water cistern and hot water cylinder providing nominally equal pressures. There must be a minimum of 1 metre head of water depending on the shower model. The minimum head distance is measured from the base of the cold water cistern to top of the showerhead (fig.5). Pressure reducing valve Return Stop tap Flow Boiler Cold mains supply e) Pumped gravity fed systems (fig.6) Fig.5 (diagrammatic view – not to scale) The shower control MUST be fed from a cold water cistern and hot water cylinder providing nominally equal pressures. Stop valve Cold water cistern The mixer unit may be used with a gravity fed system with a pump to boost pressures as shown (fig.6). Cold supply Minimum head Alternative supply (must be below vent pipe tee) Gate valve Hot supply Cold water mains supply Service valves Hot water cylinder Drain valve Other draw-offs Draw-off must point down to avoid airlock issues Mixer Bar mixer Instantaneous water heaters appliance capabilities Fig.6 (diagrammatic view – not to scale) Stop valve Cold water cistern Alternative supply (must be below vent pipe tee) Gate valve Cold water mains supply In order to provide the best performance from the shower when connected to an instantaneous water heater, the appliance must be capable of raising the temperature of the incoming water to a minimum of 52°C (125°F) and delivering a flow rate of not less than eight litres per minute. Cold supply Minimum head A flow limiter is supplied and must be inserted into mixer outlet (fig.7). This controls the maximum flow of eight litres per minute. Hot supply With the flow limiter fitted and when the system is in use, the on/off flow control should be turned fully anti-clockwise to full flow setting. Mixer Hot water cylinder Service valve Service valve Preparing the mixer valve Pump Drain valve Other draw-offs Draw-off must point down to avoid airlock issues Isolating switch or pull cord switch (both fused at 3A) WARNING! The shower must not be positioned W-008-A where it will be subjected to freezing conditions. Ring main Check the contents to make sure all parts are present. Before installing, make sure all the openings on the valve are carefully covered to stop ingress of any debris etc. while routing the supply pipework. The shower valve is suitable for installation on a solid wall, a stud partition wall, dry lined wall or fixing to a laminate cubicle or panel. The hot and cold water pipes should be securely attached within the wall or panel to support the valve and prevent movement after installation. Flow limiter The hot water inlet has a red symbol next to the inlet and must be on the left-hand side. Hose Fig.7 Bar mixer Siting of the shower Fig.8 (diagrammatic view – not to scale) Refer to (fig.8) for correct siting of the shower. Position the shower and showerhead on the wall so that all controls can be comfortably reached while using the shower. The showerhead can be positioned either side of the shower. The unit must be positioned horizontally with the outlet port at the bottom. Installation Showerhead can be mounted either side of the mixer. Note: The outlet of the shower must not be connected to anything other than the showerhead supplied. Height of showerhead to suit user’s requirement. Do not use jointing compounds on any pipe fittings for the installation. Do not solder fittings near the shower unit as heat can transfer along the pipework and damage components. Note: Suitable service valves (complying with Water Regulations and Bylaws) must be fitted on the hot and cold water supplies to the shower as an independent means of isolating the water supplies should maintenance or servicing be necessary. When connecting the pipework, avoid using tight 90° elbows. Swept or formed bends will give the best performance. Fig.9 Plastered wall Offset fittings Adhesive The supply pipes can be routed either from the side, rising, rear or falling and must end in suitable fittings (fig.9) to accept the offset connector. Water pipe Tile The inlet centres on the shower valves are 150 mm but with the offset fittings an additional 20 mm adjustment is provided. Fitting should be flush with the finished surface When installing into a stud partition or other hollow wall structures, the installer will need to consider building rear supports or other options. Such options are beyond the scope of this guide. Suitable fitting The hot and cold supply pipes must be anchored rigidly in order to support the valve and prevent movement after installation. The pipe depth must be such that the face of the elbow is flush with the finished surface. Bar mixer Flush out the pipework in accordance with Water Regulations and Bylaws. Fig.10 Screw the supplied offset fittings into the female elbows using PTFE thread tape, making sure they are the correct centres for the shower valve. Make good the wall, tiling etc. up to the outlets. Screw the supplied collars onto the fittings until tight to the wall. The collars will provide a limited degree of tolerance and the amount of exposed thread will depend on the accuracy of elbows set in the wall. Offer the shower valve to the fittings and, checking that the sealing washers are place, screw the unions onto the fittings. Leak testing Fit the hose to the outlet and direct it to waste. Open the supplies and test for leaks in the valve connections. Remedy any leaks if necessary. commissioning Make sure that both the hot and cold water supplies are fully open and at (or near to) their design temperature and pressures, and are within the requirements as stated. Check the temperature knob (right-hand side) is rotated fully anti-clockwise (press the override button to achieve maximum temperature setting). Make sure the showerhead is directed to waste. Start the water flow by turning the flow control (left-hand side) anti-clockwise. Allow the shower to run at the maximum temperature setting until the water temperature has stabilised. Using the temperature control knob, rotate until your desired maximum showering temperature is reached. The mixer valve contains a maximum temperature override button set at 38°C. The mixer valve is factory set to provide a maximum outlet temperature of 38°C but this should be checked on site to ensure the setting has not been altered and also to ensure user safety. Bar mixer Adjusting the maximum temperature override setting Fig.11 Remove the temperature control knob by taking off the end cap and unscrewing the retaining screw (fig.10). Turn the flow control knob fully anti-clockwise. With a steady flow running, adjust the temperature valve spindle until the temperature is about 38°C (turn right for cold and left for warm). When you are satisfied with the temperature turn off the flow control. Refit the temperature control knob, checking that the temperature stop aligns with the reference dot on the mixer body and secure with the screw. Replace the end cap. Filter cap Operating the shower To start the shower, rotate the On/Off flow lever (left-hand side) fully anti-clockwise for maximum flow. To stop the water flow, rotate the On/Off flow lever fully clockwise. To adjust the water temperature, rotate the temperature control (right-hand side) − clockwise for a cooler shower or anti-clockwise for a hotter shower. To overcome the maximum temperature stop, depress the red button. Caution: Exposed metal surfaces may become hot during use. cleaning the filters Turn off the water supplies before starting. To gain access to the filters remove the unit from the inlet fittings. Remove the sealing washers from the union inlets and unscrew the filter cap on each inlet (fig.11). Remove the filter and wash the filter thoroughly under running water to remove all debris. Replace the filter into the recess on the cap and screw the unit back into each inlet union. Reassemble the shower to the inlet fittings. Filter Bar mixer Fig.12 Fig.A1 Adjusting the showerhead Five showerhead patterns are available (fig.12). Adjust the spray pattern by turning the bezel on the showerhead in either direction until the desired pattern is obtained. 10 Bar mixer Cleaning the showerhead Fig.13 Before cleaning, turn off the unit at the isolation switch to avoid the shower being accidentally switched on. Sprayplate key It is important to keep the showerhead clean to maintain the performance of the shower. The hardness of the water will determine the frequency of cleaning. For example, if the shower is used every day in a very hard water area, it may be necessary to clean the showerhead on a weekly basis. Sprayplate Sprayplate removal There is no need to remove the showerhead from the hose. Using the removal tool supplied (fig.13), locate the raised ’bosses’ into the recesses in the sprayplate. Hold in firmly and twist anti-clockwise (fig.14). This movement may turn the cartridge assembly as well until it reaches a ‘stop’. Hold the cartridge firmly and continue to twist anti-clockwise. Having loosened the sprayplate, it can be unscrewed and removed completely. Clean the sprayplate with a suitable brush or preferably leave it to soak overnight in a mild proprietary descalent. Make sure all traces of scale are removed and thoroughly rinse in clean water afterwards. Before replacing the sprayplate, switch the power back on at the isolating switch and direct the hose and showerhead to waste. Turn the temperature control to fully cold and rotate the flow control to full flow. This operation will flush out any loose scale deposits in the unit and showerhead. Stop after about thirty seconds. Refit the sprayplate by screwing clockwise. Use the tool to screw the sprayplate tight. 11 Fig.14 Bar mixer Spare parts 6 5 1 2 4 3 7 8 12 9 Bar mixer Spare parts Ref.Description Part No. 1. Closure knob 83307310 2. Mechanic headwork 83307320 3. Thermostatic cartridge 83307340 4. Regulation knob 83307350 5. Non-return valve 83307290 6. Trims pack 86001150 7. 5 mode rub clean electric showerhead white 22010980 chrome 22011130 gold 22011140 5 mode gravity showerhead white chrome gold Bar mixer fittings (optional) Offset connectors (pair) 86001110 Straight connectors (pair) UNPIPCON 22011070 22011110 22011120 Push-fit bracket for built-in pipework (pair) UNBMXFIXBT 8. 5 mode kwik kleen electric showerhead white 22011270 chrome 22011250 9. Flexible hoses are available in the following sizes: 1.00 m in white, chrome and gold 1.25 m in white, chrome and gold 1.75 m in chrome only Bracket for exposed pipework (pair) UNBMXFIXEX Bar mixer fittings (Optional) Offset (dogleg) connectors (pair) 86001110 Straight connectors (pairs) UNPIPCON Push-fit brackets for built-in pipework (pair) UNBMXFIXBT Bracket for exposed pipework (pair) UNBMXFIXEX Bar bracket UNMBXBKT 13 Bar bracket UNBMXBKT Bar mixer Fault finding Fault finding The following can be carried out by a competent person Problem/Symptom CauseAction/Cure 1 Water too hot. 2 Water too cold. 1.1Temperature control incorrectly commissioned. 1.1.1Refer to commissioning section. 1.2Not enough cold water flowing through shower. 1.2.1Turn temperature control anti-clockwise. 1.3Increase in the ambient cold water temperature. 1.3.1Turn temperature control anti-clockwise. 1.4Cold water supply blocked. 1.4.1Turn off the shower and consult a competent plumber or contact Customer Service. 1.5High volume of cold water drawn off elsewhere. 1.5.1Reduce the simultaneous demand from the supply. 2.1Temperature control incorrectly commissioned. 2.1.1Refer to commissioning section. 2.2Not enough hot water flowing through shower. 2.2.1Turn the temperature control clockwise. 2.3Decrease in the ambient cold water temperature. 2.3.1Turn the temperature control clockwise. 2.4Insufficient hot water supplies from the heating system. 2.4.1Make sure heating appliance is set to maximum or has sufficient stored hot water. 2.4.2Make sure heating appliance is igniting by trying a hot water tap elsewhere. 2.5Hot water supply blocked or restricted. 2.5.1Turn off the shower and consult a competent plumber or contact Customer Service. 2.6Flow limiter not fitted (HP systems only). 2.6.1Fit the supplied flow limiter in the showerhead (see ‘instantaneous gas water heaters’). 14 Bar mixer FAULT FINDING Problem/Symptom CauseAction/Cure 3High water flow and/or poor performance on a mains fed system. 3.1Flow limiters not fitted. 4 Water does not 4.1Water supplies cut off. flow or shower pattern collapses 4.2Shower unit blocked. when another 4.3Blockage in pipework. outlet is turned on. 4.4Showerhead blocked. 4.5System not capable of supplying multiple outlets at the same time. 3.1.1Fit the supplied limiter in the showerhead or inlets depending upon model (see ‘high pressure systems’). 4.1.1Check water elsewhere in house and if necessary contact local water company. 4.2.1Inspect the inlet filters. Clean if necessary. 4.3.1Turn off the shower and consult a suitably competent plumber. 4.4.1Clean showerhead. 4.5.1Reduce the simultaneous demand. 4.5.2Make sure stop/service valves are fully open. 4.5.3Check if sufficient water pressure. The following is recommended for a professional qualified installer only 5 Water too cold. 5.1Running pressure in excess of maximum recommended. 5.1.1Fit a pressure reducing valve. 6 Shower controls 6.1Running pressure in noisy while in excess of maximum use. recommended. 6.1.1Fit a pressure reducing valve. 7 Shower will not shut off. 7.1.1Renew flow control washer. 7.1Flow control washer worn. 15 Bar mixer 16 Bar mixer 17 Service Policy Triton Standard Guarantee In the event of a complaint occurring, the following procedure should be followed: 1 Telephone Customer Service on 0870 067 3333 (0845 762 6591 in Scotland and in Northern Ireland), having available the model number and power rating of the product, together with the date of purchase. 2 Triton Customer Service will be able to confirm whether the fault can be rectified by either the provision of a replacement part or a site visit from a qualified Triton service engineer. 3 If a service call is required the unit must be fully installed for the call to be booked and the date confirmed. In order to speed up your request, please have your postcode available when booking a service call. 4 It is essential that you or an appointed representative (who must be a person of 18 years of age or more) is present during the service engineer's visit and receipt of purchase is shown. 5 A charge will be made in the event of an aborted service call by you but not by us, or where a call under the terms of guarantee has been booked and the failure is not product related (i.e. scaling and furring, incorrect water pressure). 6 If the product is no longer covered by the guarantee, a charge will be made for the site visit and for any parts supplied. 7 Service charges are based on the account being settled when work is complete, the engineer will then request payment for the invoice. If this is not made to the service engineer or settled within ten working days, an administration charge will be added. Triton guarantee this product against all mechanical defects arising from faulty workmanship or materials for a period of five years for domestic use only, from the date of purchase, provided that it has been installed by a competent person in full accordance with the fitting instructions. Any part found to be defective during this guarantee period we undertake to repair or replace at our option without charge so long as it has been properly maintained and operated in accordance with the operating instructions, and has not been subject to misuse or damage. This product must not be taken apart, modified or repaired except by a person authorised by Triton. This guarantee applies only to products installed within the United Kingdom and does not apply to products used commercially. This guarantee does not affect your statutory rights. Replacement Parts Policy Availability: It is the policy of Triton to maintain availability of parts for the current range of products for supply after the guarantee has expired. Stocks of spare parts will be maintained for the duration of the product’s manufacture and for a period of five years thereafter. In the event of a spare part not being available a substitute part will be supplied. Payment: The following payment methods can be used to obtain spare parts: 1 By post, pre-payment of pro forma invoice by cheque or money order. 2 By telephone, quoting credit card (MasterCard or Visa) details. 3 By website order, www.tritonshowers.co.uk What is not covered: 1 Breakdown due to: a) use other than domestic use by you or your resident family; b) wilful act or neglect; c) any malfunction resulting from the incorrect use or quality of water or incorrect setting of controls; d) faulty installation. 2 Repair costs for damage caused by foreign objects or substances. 3 Total loss of the product due to non-availability of parts. 4 Compensation for loss of use of the product or consequential loss of any kind. 5 Call out charges where no fault has been found with the appliance. 6 The cost of repair or replacement of showerheads, hoses, riser rails and/or wall brackets or any other accessories installed at the same time. 7 The cost of routine maintenance, adjustments, overhaul modifications or loss or damage arising therefrom, including the cost of repairing damage, breakdown, malfunction caused by corrosion, furring, pipe scaling, limescale, system debris or frost. Customer Service: % 0870 067 3333 Scottish and Northern Ireland Customer Service: 0845 762 6591 Triton Showers Triton Road Nuneaton Warwickshire CV11 4NR Triton is a division of Norcros Group (Holdings) Limited % % Trade Installer Hotline: 0870 067 3767 Fax: 0870 067 3334 www.tritonshowers.co.uk E mail: [email protected] TRITON reserve the right to change product specification without prior notice. E&OA. © TRITON SHOWERS 2008