1
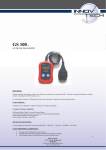
KWP2000 Plus Software Installation and Operating Instructions Installation: Install the driver package to your Notebook/PC Connect the KWP2000 ECU Flasher to your USB port Direct windows to the folder where you installed the driver package Restart your computer Reading Data from a Supported ECU: Connect the KWP2000 to your USB port and to the diagnostics port on the vehicle Start the communication software Turn the ignition on (Do not start the engine, only the 2nd key turn) Select the ECU that you want to read/write from the list Select additional options (if needed) Click the read button to read out the original data (where supported) Save the file to your hard drive , edit or forward it How to write data to a supported ECU: Connect the KWP2000 to your USB port and to the diagnostic port on the vehicle Start the communication software Turn the ignition on (Do not start the engine, only the 2nd key turn) Select the ECU that you want to read/write from the list Select additional options (if needed) Click the write button and select the file you want to write Follow the instructions on screen Switch off the ignition and wait 10 seconds to complete Visit OBDInnovations.com to see our wide range of diagnostic tools + more Reading the ECU: Choose the make and type of the engine's ECU you want to read/write from a list. If you have any doubt about your ECU type you can verify it. When the dialogue window appears, click on INFO and wait for the program to communicate with the ECU. You will see the information about your ECU type. Just click on READ to assure that we have a copy of the original file (It’s highly recommended to save a backup case there’s a problem). Visit OBDInnovations.com to see our wide range of diagnostic tools + more The program starts reading the ECU. Please do not interrupt this process. Choose where you want to save the original file and name it. To simplify it, name it with the numbers that appear in the window information of the ECU. It will ask you to turn the key of the ignition off. After turning off the ignition, press OK. Visit OBDInnovations.com to see our wide range of diagnostic tools + more Writing the ECU: Choose the make and type of the ECU and click on INFO. Open the file for your vehicle or ECU type. In the right of the window you will see the reference of the ECU that corresponds to the open file. To confirm that this information matches with your ECU type, verify the numbers in both windows. If you are absolutely sure that everything you did is correct, click on PROG. The system will now erase the memory on the ECU and flash program it with the new file. Do not interrupt this process. Visit OBDInnovations.com to see our wide range of diagnostic tools + more When it’s finished, turn the ignition off, confirm by pressing OK and you’re done! Visit OBDInnovations.com to see our wide range of diagnostic tools + more VAG (Volkswagen Automotive Group) Instruments Deactivation For Volkswagen/Audi/Seat/Skoda vehicles, before communicating with the ECU, the instruments panel must be deactivated. Open the fuse box and remove the 5A fuse shown in red on the diagram above. With the instruments panel off you can try communicating with the ECU Visit OBDInnovations.com to see our wide range of diagnostic tools + more