1
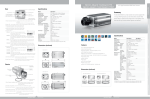
1.2 kW High Speed Hand Dryer Model No.:B2013 220-240V ~ 50Hz Operating Instructions Please read instructions in conjunction with the illustrations Please save these instructions Specifications Unit Size: mm (Inch) 587.5 185 322 TECHNICAL SPECIFICATIONS ITEM CATEGORY PERFORMANCE DATA Operating Voltage 220-240Vac, 50/60 Hz, 4.6-5A, 1.0-1.2 kW Warm Air Speed Output Air Output Temperature Dryer Shall Deliver Cover Type Motor Type Motor Thermal Protection 65-100 m/s (140-224 mi/hr), Adjustable 45°C (113°F) – Ambient Temp. 20°C (68°F) 89-124 m³/h (55-76 CFM) 3,0 mm thick molded ABS plastıc 1HP, 400-750W, 11000-20000 R.P.M., Adjustable Auto Resetting Thermostat turns unit off, 240V at 95°C (221°F) Heater Element ON/ OFF Heating options Heater Thermal Protection 300-450W, Adjustable Auto Resetting Thermostat turns unit off at 85°C (185°F) Thermal cut-off at 142°C (288°F) Standby Power LED Color Drying Time 1W Circuit Operation Infrared Automatic, self adjusting Sensor Range Sound Pressure Timing Protection Drip proof Isolation standard 12 cm±1 cm Net Weight 10.8 kg Shipping Weight Unit Size 12.8 kg Standby: color red; Active: color blue 10-15 seconds MIN 65 dB-A to 78 dB-A MAX @ 1m 60 seconds auto shut off IP23 CLASS 1 322 mm (W) x 588 mm (H) x 185 mm (D) 1 Recommended Mounting Heights DIM’S mm Men Women Children 4-7 years Children 8-10 years Children 11-13 years Children 14-16 years Handicaped A B C From Top of Hand Drying Chamber From Datum Point 1150 1080 780 880 965 1080 900 710 640 340 440 525 640 460 From Bottom of Dryer 622 552 252 352 437 552 372 Top of Hand Drying Chamber 45cm 55cm A Datum Point A Bottom of Dryer B C Power Cord Reach Range Floor Floor Cable entry 57.5 The dryer is supplied with a power cord. The power cord entry position is in the rear, right side bottom of dryer. The Datum point 37 length of the power cord is 1.5M. Ø22 (Ø7/8) Cable entry Position. Detail A Unit Rear 2 General Safety Information This product is intended for installation by a qualified service person. Use AWG NO.16 solid conductor for wiring. (1.2mm² for 220-240V) Disconnect power at the service breaker before installing or servicing. not for household use - may case burns. Failure to properly earth unit could result in severe electrical shock and/or death. All units must be supplied with a 3-wire service. The earth wire must be connected to the dryer's backplate. Important:- Read all these instructions before commencing the installation. All wiring of this hand dryer should be in accordance with the current IEE regulations, or the appropriate standards in your country. This hand dryer MUST be installed by a suitably qualified person. Ensure that the mains supply (voltage, frequency, and phase) complies with the hand dryers rating label. This appliance is not intended for use by persons (including children) with reduced physical, sensory or mental capabilities, or lack of experience and knowledge, unless they have been given supervision or instruction concerning use of the appliance by a person responsible for their safety. Children should be supervised to ensure that they do not play with the appliance. Installation Steps 1. Tape the installation template to the appropriate location on the mounting surface. Drill eight (8) holes at marked locations.(fig. 1). 2. Remove template and Insert eight (8) plastic anchors (supplied) into drilled holes (fig. 2). 3. Insert eight (8) screws (supplied) to fix backplate into top plastic anchors (fig. 3). 4. Hang the dryer on the base plate (fig. 4). 5. Use key (supplied) to unlock and withdraw the tray. Screws (supplied) through the holes at backplate bottom. Insert the tray back and lock the security screw.(fig. 5 ). 6. a. Connect hard wired power provided at KO location to terminal block behind cover panel (RH-bottom) behind filter tray. Turn on circuit breaker to initiate ‘stand by- ready to operate’ status. Connections: A. Connect the live wire (coloured Brown) to the terminal block marked "L". B. Connect the neutral wire (coloured Blue) to the terminal block marked "N". C. Connect the earth wire to the terminal block marked " ". Bare earth wires should be sleeved with a green and yellow sleeve. b. Connect t h e power cord to initiate ‘stand by- ready to operate’ status. 7. Replace the filter access tray, being careful to not over-tighten the security screw. 8. See separate sections for owner options on heater operation and air speed adjustment. (fig. 1) (fig. 2) (fig. 3) (fig.5) (fig.4) 3 Cleaning and Maintenance Periodic cleaning of the unit is recommended to ensure optimum performance. Wipe the cover with a damp cloth and mild cleaning solution. Do not Soak, Do not hose down. Never use abrasives to clean the cover. Caustic chemicals may damage unit finish. No internal parts need any regular cleaning. Circuit Diagram L N Red (110-120~Vac) / Orange (220-240~Vac) MO2 HE2 N MO1 HE1 L Transistor Power Switch VR1 Transistor Power Switch Heater With Thermo-fuse G White Motor With Thermal Switch 2A Black G/Y Thermostat Blue Brown Black FOR SENSOR Circuit Board Module ACTIVE STANDBY LED1 1234 LED2 SW.FOR HEATER SENSOR VR2 FOR MOTOR 4 Air Speed Adjustment The dryer air speed can be adjusted. However, when lowering the motor speed, the drying time will increase also. The ability of this function will be dependent on the needs of the owner. The factory setting for dryer’s motor speed is set at its highest speed. See below for how to adjust the dryer speed: 1. Use key (supplied) to unlock and withdraw the tray. (fig. 1). 2. Use flat blade screwdriver, gently turn adjustment potentiometer (fig. 2) shaft clock-wise [CW] to increase power to maximum (shaft will hard stop; DO NOT OVERTURN!). Turn tool gently CCW to reduce power as required (shaft will hard stop; DO NOT OVERTURN!). Note that at minimum power the unit may not start if low line Voltage condition exists. 3. Insert the tray back and lock the security screw. Reduce power Increase power OFF/ON Reduce Potentiometer (fig. 1) (fig. 2) Heater Element Switch ON/ OFF The Dryer has been designed with a heater switch that can turn the heater ON/OFF. The heater switch doesn't affect the drying time. In cold conditions, it may be more comfortable if it is on when drying hands. However, it will save a third of the energy if it is off. This function can be adjusted depending on the needs of the owner. The factory setting for the heater will be on. See below for how to turn the heater ON/OFF. 1. Use key (supplied) to unlock and withdraw the tray. (fig. 1). 2. Switch it to the right to turn ON. Switch it to the left to turn OFF (fig. 2). 3. Insert the tray back and lock the security screw. Switch OFF/ON Reduce (fig. 1) (fig. 2) 5 How to Change the Filter 1. Use key (supplied) to unlock and withdraw the tray.(fig. 1). 2. Change the filter (fig. 2). 3. Insert the tray back and lock the security screw. Filter Recommended Period for Changing the filter FilterIn general use (normal/ light usage), it's recommended to change the filter six (6) months. In dusty/dirty places (heavy usage), it's recommended to change it every three (3) months. Filter Assembly Information 1 6 Instructions for use, maintenance and changing the absorbent ceramic The absorbent ceramic can absorb 70g of water, and has the capacity to take a full load approximately 280 times per day. The ceramic also can evaporate water. During normal use, water will be evaporated continuously and maintain the function of absorbing. Maintenance simply requires clearing its surface. Normally, its lifetime will be the same as the machine. Improper use or maintenance could result in breakage; see below for replacement instructions. 1. 2. 3. 4. 5. Use the key to loosen the security screw and remove the tray. (fig. 1) Use the key to loosen the security screw of the base plate and remove the machine. (fig. 2) Use a screwdriver to loosen the screw ( 2 pcs) on the ceramic, and replace it with a new one. (fig. 3) Put the machine back and secure the security screw to the base plate. Put the tray back and lock up the security screw. Instructions for use of the drain tank Generally, the remaining water following usage will evaporate in the absorbent ceramic. During high traffic times, leftover water will flow to the drain tank automatically. The capacity of the drain tray is 240 cc. It's recommended to clean the drain tank every 3 months water will come through the “overflow hole” if the drain tank is full. A drainpipe (not included) can be added if necessary. The specifications of the drainpipe is I.D. 6mm, O.D. 10mm (fig. 1) (fig.1) 7 For replacement filters and spares please contact your supplier for details This product should not be disposed of with household waste. Please recycle where facilities exist. Check with your local authority for recycling advice. Supplied by FHD Online 8 0312