1
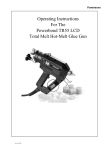
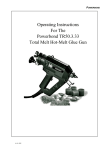
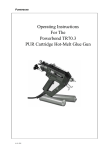
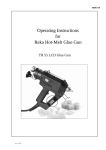
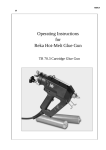
POWERBOND
Operating Instructions
For The
Powerbond TR50.4
Total Melt Hot-Melt Glue Gun
DO NOT LIE ON THE GUN ON ITS SIDE
DO NOT TIP BACKWARDS
POWERBOND
Table of Contents
Product Description ......................................................
3
Trouble-Shooting .........................................................
4
General Safety Instructions ..........................................
5
Start-up .......................................................................
7
Operation ........................................................................
9
Additional Information ..................................................
10
EC-Conformity Certificate ..........................................
11
Exploded Views .............................................................. 12
Spare Parts Legend ....................................................... 13
2
POWERBOND
Dear customer,
The glue gun you purchased will help you to glue parts together more easily and more rapidly. Before using
the gun please read these instructions thoroughly.
Product Description
Proper Use
The gun works with hot glue which is dispensed under pressure. Therefore, the glue gun should only be
used by qualified people. Handling the gun properly will save you unnecessary accident hazards and
problems.
Personal injury or material damage caused by an improper use of the Hot-Melt Glue Gun shall not be
the manufacturers but the user’s responsibility.
Technical Data
Connection
Heating capacity
Air control glue
Air consumption max.
Temperature control
Temperature control range
Overheat protection
Heat-up time
Power cable
Tank capacity
Max. application of glue per min.
Weight hand gun
230 V / 110 V
400 W
6 bars (only in combination with a pressure controller. A filter must
be added)
100 l/min
thermostat
approx. 20 - 200°C / approx. 70 - 390 °F (infinitely variable)
temperature controller
3 - 10 min (depending on glue type)
approx. 8 m
250 ml
250 ml
1200 g
Accessories
Foot switch art.no. 3518
Benchmount Stand art.no. 3618
Balancer art.no. 3544
Stand for depositing gun art. no. 3586 / 3587
Funnel for granular glue art. no. 3624
• Special nozzles upon request. Please ask for our accessory nozzle leaflet.
3
POWERBOND
Trouble - Shooting
Survey on Possible Fault Signals and Assistance in Trouble-Shooting
In case of damage, send glue gun to Powerbond. We shall not be responsible for any repair made by
the customer.
Problems
Possible Causes/
Trouble-Shooting
Faulty Operation
No or too little glue comes off • clogged nozzle
• unscrew nozzle, clean or replace it
though the heat-up time has • pressure too low
• check controller
been exactly observed
• check temperature
• temperature too low
• replace valve
• defective valve
Glue is too fluid or too con- • temperature too high or • check temperature
sistent
too low
Glue leaks out of nozzle
• clean or exchange sound absorber
• sound absorber got
stuck
• Unscrew nozzle, clean it carefully or replace
• clogged nozzle
it. Unscrew nozzle at operating temperature;
wear gloves (risk of burning)
• re-adjust pressure
• spring pressure ball
valve (nozzle) too low
No temperature
• is cable properly connected to socket?
• instrument switched off
• thermostat switched off • check thermostat and switch it on if necessary
• replace thermostat
• defective thermostat
4
POWERBOND
General Safety Instructions
User’s Care and Diligence
The Glue Gun has been designed and fabricated according to the applicable harmonized standards and
further technical specifications. So, it is state of art and ensures a maximum of safety.
This safety, however, can only be achieved in practice, if all necessary measures have been taken. The user
of the device shall be obliged to plan these measures and to make sure that they are taken.
In particular, the user shall ensure that
-
the gun is in working order
the required personal protective equipment (protective gloves) for the operating personnel is available
and used
the entire operating instructions are in legible condition and available to the operator
only sufficiently qualified and authorized personnel operates and maintains the gun
this personnel is regularly instructed in the applicable aspects of operational safety and environmental
protection, and knows the operating instructions and, in particular, the safety instructions.
Make the information available:
This operating manual shall be kept on the site of operation. It must be ensured that all persons operating
the gun can look into the manual at any time. In addition to the operating manual, the instructions pursuant
to the Factory Act and the regulations as regards the use of equipment shall always be at the operator’s
disposal.
Meaning of the Various Safety Symbols
This operating manual shall give concrete advice as to safety to draw the user’s attention to remaining unavoidable hazards. These hazards imply dangers to
• persons
• product and equipment
The symbols used in the operation manual shall, in particular, call attention to the safety instructions!
This symbol indicates that there is, above all, danger to persons, but also to
equipment and material.
Caution: Hot surface!
Accident Prevention Regulations VBG 125 - W26
Hot surfaces such as machine parts, tanks or materials, but also hot liquids cannot
always be perceived. The utmost caution is advised when this symbol is attached
to a component.
Always wear protective gloves when you have to touch hot surfaces.
5
POWERBOND
Safety Measures in Case of Normal Operation
The instrument must only be used by persons trained and instructed and being allowed to use it. They have
to know the operating instructions and be able to work accordingly.
Prior to each use, check the gun for visible damage and make sure that it is in perfect condition! Advise detected defects to your superior at once!
Safety Instructions for the Use of Holt-Melt Glue Gun TR 50.4.25
*
*
*
*
*
*
*
*
*
Fill tank only up to 1.5 cm below upper rim.
Never exceed operating temperature of the hot melt.
Overheating may lead to decomposition which may affect health.
Once the gun has warmed up, nozzle and cover are extremely hot!
Compressed air pressure max. 6 bars
Never start working without having mounted a nozzle.
Do not direct glue jet towards people.
Prior to any nozzle replacement, unplug connecting cable.
When replacing a nozzle, liquid glue might leak out. Warning: Risk of burning!
Never bring the hot nozzle into contact with the cable.
When your skin got into contact with hot glue, immediately cool it with cold water.
Do not try to remove hot melt from the skin first. If necessary consult your doctor.
When hot adhesive got into your eyes, immediately cool them under running water for
about 15 minutes and consult your doctor at once.
If the vent valve does not audibly de-aerate, hot glue might flow off the sound absorber
after the trigger has been operated.
Always wear protective gloves!
Note: - Do not lay gun on its side
- Fill tank only up to max. 1.5 cm below upper rim
- Gun must de-aerate audibly
- Always de-aerate before lid is opened
- Do not direct glue jet towards people
- Do not hold nozzle top upwards
- Never work without having mounted a nozzle
- Do not carry out overhead work
- Stop using the instrument, if casing is damaged due to shock,
breakage or heavy wear
*
Even if the gun has been switched off, it may be under pressure and glue may flow off.
6
POWERBOND
Start-up and Operation
To avoid risk of stumbling:
Lay all instrument connections (cables, hoses, and lines) so that they do not cause any risk of stumbling
(cable conduits, bridges)!
Make supply connections and settings
Connect the TR 50.4.25 Glue Gun to the electric mains of 230 V / 110 V and a compressed air line of max.
6 bars.
Plug connecting cable into socket with earthing contact.
When the gun has warmed up (approx. 10 min.), check working temperature at the thermometer (no.28).
If necessary, correct temperature at the thermostat (no. 21).
-
- to the right (clockwise)
- to the left (anti-clockwise)
= plus
= minus
Minor leaking during heat-up phase is due to hot melt expanding in the nozzle/heating chamber.
As soon as the working temperature is reached, the hot melt will not leak out anymore.
Warning: Once the gun has warmed up, nozzle and cover are extremely hot!
Never work without wearing protective gloves!
Stand incl. pressure controller and manometer
Precise adjustment of compressed air ensures an exact regulation of the glue quantity to be applied. The
adjusted pressure may be read from the manometer indication.
-
Mount compressed air hose between glue gun and stand
Connect compressed air hose for main connection to the rear side of the stand.
Loading of Glue
-
As soon as the gun has warmed up, open cover (no. 11) by turning the star grip (no. 18) to the left. Load
selected glue.
Fill tank only up to approx. 1.5 cm below upper rim. To close the cover turn grip to the right.
Allow approx. 3 - 10 minutes, depending on quantity and type of glue, for the gun to melt the glue.The
quantity to be applied can be determined by pressing the trigger (no. 29); the longer you press, the more
glue comes out.
Application of Hot Melts
Make yourself familiar with the instrument first. Apply a little glue in varying forms (small, large dots) on a
piece of paper or cardboard. This is very easy. Try to find out the correct quantity and the ideal pattern by
adjusting the pressure controllers at the stand to different pressures.
Observe the correct working temperatures of the individual hot melt.
Never start working without having mounted a nozzle!
7
POWERBOND
Nozzle Replacement
Only replace nozzles when the glue gun is warm (instrument temperature 60 - 80°C / approx. 140 - 175 °F)
and empty. For the replacement you need a SW 13 open-end spanner. You are advised to wear gloves.
Prior to exchanging nozzles, unplug connecting cable!
Replacing a cold nozzle may damage the gun. If the nozzle is replaced when it is too hot, liquid adhesive
may leak out.
Warning: Risk of burning!
When your skin got into contact with hot glue, immediately cool it with cold water.
Do not try to remove hot melt from the skin first. If necessary consult your doctor.
When hot adhesive got in your eyes, immediately cool them under running water for about 15 minutes.
Consult your doctor at once!
-
Never start working without having mounted a nozzle!
Do not direct glue jet towards people!
Working with Stationary Equipment
(in connection with pneumatic foot switch)
To work with stationary equipment mount glue gun and foot switch according to enclosed drawings
„Connection of Foot Switch“ and „Stationary Equipment“. Then, proceed as follows:
-
Press trigger (no.29) down to stop and hold it
Plug enclosed screw into the borehole provided for this purpose at one side of the casing handle
Let trigger loose
Trigger is locked
8
POWERBOND
Operation
The glue gun shall only be used/applied according to its intended use. Please see Section “General Safety
Instructions“.
Improper use of the gun may cause personal injury or material damage.
Non-observance of the safety instructions when working with the gun may lead to serious burns.
Make a functional test acc. to the following list, before you switch on the glue gun:
Check List
-
Did you make sure that compressed air is supplied to the glue gun?
Is pressure max. 6 bars and min. 2 bars?
Is the glue gun connected to 230 volts / 110 volts?
Is the nozzle clean and free of any foreign matters?
Is hot melt in the premelting tank?
Has the heat-up time of approx. 10 minutes (depending on the glue type) been observed?
While you are working...
...the glue gun always has to be deposited on its stand or wire strap (unless it is fitted to a balancer).
Never lay gun on its side!
- Open premelting tank only if required.
- Keep hot melt free of dirt and humidity.
When using the stand, remove wire strap!
General Hints
Should the sound absorber (no. 6) got stuck, the adhesive tank may be under pressure. The vent valve
(sound absorber) must audibly de-aerate each time you operate the trigger (no. 29).
Warning: With this, hot glue might come off the sound absorber!
If the vent valve does not de-aerate audibly, the adhesive tank must be de-aerated by unscrewing the
sound absorber (no. 6), the DT - SEV (no. 7) and the swivelling screw (no. 33).
For this, you are advised to wear gloves.
No liquid glue should get into the sound absorber, when the gun is ready for operation.
Always deposit the gun on its stand or use the wire strap or a balancer. When using the stand, remove
wire strap!
If nevertheless, glue should have got into the vent valve, either clean that valve or replace sound absorber,
DT - SEV and swivelling screw.
Never fill the premelting tank up to its upper rim.
9
POWERBOND
Note: - Do not lay gun on its side
- Fill tank only up to max. 1.5 cm below upper rim
- Gun must de-aerate audibly
- Always de-aerate before lid is opened
- Do not direct glue jet towards people
- Do not hold nozzle top upwards
- Never work without having mounted a nozzle
- Do not carry out overhead work
- Stop using the instrument, if casing is damaged due to shock, breakage or heavy wear.
Even if the gun has been switched off, it may be under pressure and glue might flow out!
When using the stand, remove wire strap!
Cleaning and Maintenance
Only fill clean glue into the premelting tank. Contaminated glue, nails, clamps, sand, etc. cause malfunctions.
If you observe the operating instructions, the gun does normally not need cleaning. The glue remaining in
the gun will remelt when it is warmed up and can be used for glueing again.
The glue must not get too hot, otherwise it may coke (hot melts on a polyamide basis are particularly
sensitive). If this has happened, the gun should be cleaned with REKA cleaning liquid.
If the gun is used very often, it has to be maintained regularly. To set a date, please call our service department.
Additional Information
If you have any additional questions or requests? We should be glad to help you.
Please contact us at phone no. ++44 (0) 1782 823874 or fax no. ++44 (0)1782 837038
Our mailing address is:
Powerbond Adhesives Ltd
253 Scotia Road
Tunstall
Stoke on Trent
Staffordshire
ST6 6AB
England
e-mail: [email protected]
Internet: www.powerbond.co.uk
10
POWERBOND
CE
EC-Conformity Certificate
certifies that the design of the:
TR 50.4.25 Glue Gun
is in conformity with the regulations of EC
Guidelines:
73/23/EEC 89/392/EEC revised
91/368 EEC 89/336 EEC
The following harmonized standards have been applied:
EN 60335 EN 292 EN 60204 HD 400 EN 55014 EN 60555 EN 61000
Design modifications influencing the technical data specified in the operating manual and the intended use, thus meaning a considerable change of the device, render this conformity certificate
invalid!
11
POWERBOND
12
POWERBOND
Legend for spare parts - Glue Gun TR-50.40 - No. 5327 – 220 V
No. 5333 – 110 V
4=
5=
6=
7=
8=
9=
10 =
11 =
12 =
13 =
14 =
15 =
16 =
17 =
18 =
19 =
20 =
21 =
22 =
23 =
25 =
27 =
28 =
29 =
33 =
40 =
3074
2692
2683
2693
2694
2696
2697
2713
2800
2801
2819
2802
2820
2603
2613
3665
2883
2517
2885
2718
2884
2617
2518
2711
3016
2695
Nozzle M 14 cpl.
O-Ring SEV
Silencer
DT SEV D 16
Cap SEV D 18
Membrane SEV
90° fitting SEV
Lid
Disc
Screw
Sheet
Intensification
Distance
O-Ring 40x3
Star grip
Lock nut
Lid release shaft M8-Tr 10x3
Thermostat
Spacer bush D14/20
Spring
Lock nut for lid release
Hinge link
Thermometer
Trigger
L-screwing
O-Ring DT SEV
13
POWERBOND
14