1
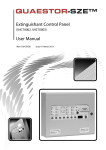
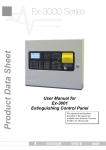
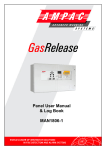
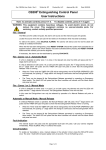
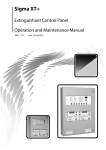
Operating Instructions
Operating Instructions
This section provides operating instructions, Man-1146 (K / VF1825-00) for the Elite XT / Sigma A-XT Releasing
Fire Control Panel. These operating instructions shall be placed on the cabinet-front or on a separate sheet that can be
framed and located adjacent to the control unit:
How To
Do This Display Comments
Buzzer sounds whilst button
is pressed
Test lamps
Lamp Test
Press button
All lamps on
Buzzer Silenced
Silence buzzer
Silence Buzzer
Press button
Enable buttons
Buzzer beeps twice every
seven seconds
Enable Access
Insert key and turn
Buzzer Silenced
Silence alarms
Silence/Sound
Alarm
Press button
Buzzer beeps urgently
Sound alarms
Fire
Silence/Sound
Alarm
Press button
All trouble indicators
flash for 3 seconds
Reset
Reset
Resets fire detection system.
Extinguishant system will
reset only after the
extinguishant has been
released
Press button
Disable a zone step 1
Mode
Press button till d1
displayed
First display
Disable a zone step 2
Select
Press button to scroll
zones
Zone 2
Fire in Zone
Disable a zone step 3
Enter
Press button
1
2
General
Disablement
3
Zone/Trouble/
On Test/Disabled
Dot flashes when disabled
Zone 2 fault LED lit
Operating Instructions
Revision P09.00, Date 8/19/2011
Man-1146 (K / VF1825-00)
1 of 7
Operating Instructions
How To
Do This
Display Comments
Put a zone into test mode
step 1
Mode
Press button till t1
displayed
First display
Put a zone into test mode
step 2
Select
Press button to scroll
zones
Put a zone into test mode
step 3
Zone 2
Fire in Zone
1
2
Test Mode On
3
Enter
Press button
Zone/Trouble/
On Test/Disabled
Dot flashes when disabled
Zone 2 trouble LED lit
Enable a zone step 1
Mode
Press button till d1
displayed
First display
Enable a zone step 2
Disabled zones will have
flashing dot.
Select
Press button to scroll
zones
Zone 2
Fire in Zone
Enable a zone step 3
Enter
Press button
1
2
3
Zone/Trouble/
On Test/Disabled
Dot stops flashing when
enabled
Zone fault LED off
Exit test mode step 1
Mode
Press button
First display
Exit test mode step 2
Zones in test mode will have
flashing dot
Select
Press to scroll zones
Zone 2
Fire in Zone
Exit test mode step 3
Enter
Press button
1
2
3
Zone/Trouble/
On Test/Disabled
Dot stops flashing when test
mode exited
Zone 1 trouble LED off
Operating Instructions
Revision P09.00, Date 8/19/2011
Man-1146 (K / VF1825-00)
2 of 7
Operating Instructions
How To
Change from Manual only to
Automatic and Manual and
vice versa
Do This Display Comments
Auto &
Manual
Manual
only
Auto &
Manual
Manual
only
Insert key and turn
Enable Access
Start Extract fan
Insert key and turn
Press Mode button till Ac
appears in display
Enter
Press button
Press Enter button again to
turn extract fan on
Press Enter button again to
turn extract fan off
Dot flashes to indicate extract
active.
Enter
Dot stops flashing to indicate
extractive inactive
Press button
Manually release the
extinguishant
CAUTION
Manual
Extinguishant Release
Extinguishant will release
after time displayed in
seconds on the countdown
timer
PULL DOWN - PUSH BUTTON
Pull down flap and press
button to release
extinguishant
Disable extinguishant
control step 1
Mode
Press mode button till
dE is displayed
Disable extinguishant
control step 2
Dot flashes to indicate
extinguishant control is
disabled
Enter
Press button
Enable extinguishant control
step 1
Flashing dot indicates
extinguishant control disabled
Mode
Press mode button till
dE is displayed
Enable extinguishant control
step 2
Dot stops flashing to indicate
extinguishant control enabled
Enter
Press button
Operating Instructions
Revision P09.00, Date 8/19/2011
Man-1146 (K / VF1825-00)
3 of 7
Operating Instructions
How To
Do This Display Comments
Disable manual release step 1
Mode
Press mode button till
dt is displayed
Disable manual release step 1
Dot flashes to indicate
Manual release is disabled
Enter
Press button
Enable Manual release step 1
Flashing dot indicates Manual
release disabled
Mode
Press mode button till
dt is displayed
Enable Manual release step 2
Dot stops flashing to indicate
Manual release enabled
Enter
Press button
Disable extract fan step 1
Mode
Press mode button till
dc is displayed
Disable extract fan step 2
Dot flashes to indicate Extract
fan is disabled
Enter
Press button
Enable extract fan step 1
Flashing dot indicates extract
fan disabled
Mode
Press mode button till
dc is displayed
Enable extract fan step 2
Dot stops flashing to indicate
Extract fan enabled
Enter
Press button
Disable first stage relay
output step 1
Mode
Press mode button till
dP is displayed
Disable first stage relay
output step 2
Dot flashes to indicate first
stage relay output is disabled
Enter
Press button
Operating Instructions
Revision P09.00, Date 8/19/2011
Man-1146 (K / VF1825-00)
4 of 7
Operating Instructions
How To
Do This Display Comments
Enable first stage relay
output step 1
Flashing dot indicates first
stage relay output disabled
Mode
Press mode button till
dP is displayed
Enable first stage relay
output step 2
Dot stops flashing to indicate
first stage relay output
enabled
Enter
Press button
Disable second stage relay
output step 1
Mode
Press mode button till
dA is displayed
Disable second stage relay
output step 2
Dot flashes to indicate
second stage relay output is
disabled
Enter
Press button
Enable second stage relay
output step 1
Flashing dot indicates second
stage relay output disabled
Mode
Press mode button till
dP is displayed
Enable second stage relay
output step 2
Dot stops flashing to indicate
second stage relay output
enabled
Enter
Press button
Disable first stage sounders
step 1
Mode
Press mode button till db
is displayed
Disable first stage sounders
step 1
Dot flashes to indicate first
stage sounders are disabled
Enter
Press button
Enable first stage sounders
step 1
Flashing dot indicates first
stage sounders disabled
Mode
Press mode button till db
is displayed
Enable first stage sounders
step 2
Dot stops flashing to indicate
first stage sounders enabled
Enter
Press button
Operating Instructions
Revision P09.00, Date 8/19/2011
Man-1146 (K / VF1825-00)
5 of 7
Operating Instructions
How To
Do This Display Comments
Step 1
Enable Access
Reset the fire control panel
after an abort function
Fire in Zone
1
2
Buzzer sounds.
3
Zone/Trouble/
On Test/Disabled
Insert key and turn
Press and hold Abort
switch while turning
Enable Access key to
the right.
Step 2
Reset
Press button
Fire Control Panel resets
after pressing the Reset
button. Fire In Zone LED
indicators are not
illuminated.
Buzzer is silenced.
Release and Abort
conditions have been
terminated.
Step 3
Enable Access
LED display of step 2 is
blank.
Insert key and turn
Turn Enable Access
key to the left.
Inspecting Batteries
Inspect the standby-batteries annually to determine the connection integrity to the Elite XT / Sigma A-XT Releasing
Fire Control Panel. The fire control panel contains sealed lead acid batteries to provide standby power in the event of
mains failure. The standby-batteries have a life expectancy of 3 to 5 years. Test the standby-batteries annually in
accordance with the battery manufacturer’s recommendations to determine their suitability for continued standby
operation.
Replacing Standby-Batteries
Replace standby-batteries when the service period reaches 3 to 5 years or when the low-battery indicator illuminates
on the power supply. Specify replacement batteries that are Power Sonic model PS-1270 F2, sealed-lead-acid,
12 VDC and 7 AH.
Operating Instructions
Revision P09.00, Date 8/19/2011
Man-1146 (K / VF1825-00)
6 of 7
Operating Instructions
Related Documentation
The following documents shall be used to provide additional information for installing and operating the VF1810 or
K1810 series Elite XT / Sigma A-XT Releasing Fire Control Panel:
•
Installation and Operation Manual, Man-1145 (K / VF1812-00), Revision E02.XX
•
Wiring Diagram, Man-1147 (K / VF1827-00), Revision E06.XX
•
UL Compliance Label, K / VF1826-00, Revision E02.XX
Emergency Contact
IN THE EVENT OF TROUBLE
CONTACT
NAME
ADDRESS
CITY
STATE
ZIP
TELEPHONE
Operating Instructions
Revision P09.00, Date 8/19/2011
Man-1146 (K / VF1825-00)
7 of 7