1
StudSensor ProSL
Nothing else measures up!
Prospect House
George Cayley Drive
Clifton Moor
York
England
YO30 4XE
Tel: +44 (0) 1904 692723
Fax: +44 (0) 1904 690385
E-Mail: [email protected]
...for secure online ordering of all our products!
Ref:.. \operat98\instructions 15\51246.qxp 05-01-15
Code: 51246
Operating
Instructions
©York Survey Supply Centre 2015
StudSensor ProSL
Stud and Joist Finder
The Zircon StudSensor ProSL finds wood and
metal studs up to ¾in (19mm) deep in walls. It
also finds studs up to 1½in (38mm) deep in floors
and ceilings. It features a sleek, high impact
case, a built in belt clip and the SpotLite Pointing
System.
1. MODE SELECTION
• Selecting Mode: For normal scan, press power
button once. For DeepScan, click button twice
(DeepScan LED will light).
• When looking for studs, always start with the
scanner in Stud Scan mode, which scans
through surfaces up to ¾in thick.
• DeepScan mode should only be selected if you
know the surface is built up and thicker than
normal construction. You should always scan the
area in Stud Scan mode first, to verify that
DeepScan is needed. DeepScan is for depths
between ¾in and 1½in.
2. IMPORTANT OPERATING TIPS - PLEASE
READ CAREFULLY
• Tool Position. For proper use, always place
scanner flat against the surface before turning on
power.
• Power. Depress and hold in the power button
continuously while in use.
• Calibration. Place unit flat on wall. Press and
hold the power button. Do not move the unit until
calibration is complete (1 - 2 seconds). When
calibration is complete, the TruCal LED will stay
on.
• Operation. Move the unit slowly, while keeping
it flat against the wall. Do not rock, tilt or lift it.
Ref:.. \operat98\instructions 15\51246.qxp 05-01-15
• If you calibrate over a stud in DeepScan mode
you will probably not detect any studs. Move the
unit a few inches right or left, release the power
button, and start over.
3. SCANNING IN STUD SCAN OR DEEPSCAN
MODE
After calibrating (see number 2), continue to hold
the power button and slowly slide the unit across
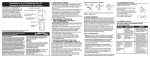
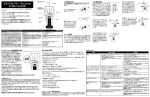
the surface. As you begin to approach a stud, the
red LEDs will light successively, from bottom to
top (see illustrations).
Continue moving the scanner slowly. When the
top green LED is lit, the beep sounds and the
SpotLite Pointing System beam shines you have
located the edge of the stud. Mark this spot.
Continue scanning beyond the marked spot until
the LEDs go out. Slide unit in reverse direction
to locate other edge of stud. Mark this second
spot. Middle of the stud is centred between the
two marks.
Scanning in Stud Scan or DeepScan
the materials are metallic foil, contain metallic
fibres or are still wet after application.
Textured walls or acoustic ceilings: When
scanning a ceiling or wall with an uneven
surface, place thin cardboard on the surface to
be scanned and scan over the cardboard using
DeepScan mode. Calibrate with cardboard in
place.
Wood flooring, subflooring or gypsum
drywall over plywood sheathing: Use
DeepScan mode.
The StudSensor cannot scan for wood studs and
joists through ceramic tile, carpeting and pad. It
is not recommended for use on lath and plaster
walls due to irregularities in plaster thickness.
Note: Sensing depth and accuracy can vary due
to moisture content of materials, wall texture and
Situation
Working with Different Materials
Wallpaper: The StudSensor functions normally
on walls covered with wallpaper or fabric, unless
5. CHANGING THE BATTERY
Note: Do not loosen or remove screw on back of
the unit.
Squeeze sides of unit to help
release clip end.
Slide
9V
battery
into
compartment, terminal side first,
matching (+) and (-) terminals
from battery to case.
Replace the clip. Battery life is
approximately 2 years under
normal conditions.
6. HELPFUL HINTS
See also number 2, Important Operating Tips.
Probable Causes
Solutions
No indications.
• No studs in that area.
• You are in DeepScan
mode and accidentally
calibrated over a stud.
• Move several inches to the left or right
and start again.
Lights start blinking and
unit beeps repeatedly.
• Tool was calibrated over a
stud or on a dense part of
the wall.
• Tool tilted or lifted during
scan.
• Turn scanner off, move over a few
inches, press power button and start
again.
• On rough surfaces, place thin
cardboard on the wall, scanning through
it to help slide scanner more smoothly.
• Electrical wiring and
metal/plastic pipes may be
near or touching back
surface of wall.
• Check for other studs equally spaced
to either side (12, 16 or 24in apart [305,
406 or 610mm]) or the same stud at
several places directly above or below
the first.
• Use CAUTION when nailing, sawing or
drilling into walls, floors and ceilings
where these items may exist.
Note: DeepScan may reprot other things besides
studs. Please see numbers 4 and 6.
4. OPERATING CAUTIONS
Depending on the proximity of electrical wiring or
pipes to the wall surface, the StudSensor may
detect them in the same manner as studs,
especially in DeepScan mode. Caution should
always be used when nailing, sawing or drilling
into walls, floors and ceilings that may contain
these items. Because of its increased sensitivity,
DeepScan may also detect other things in walls
that are not studs.
To avoid surprises, remember that studs or joists
are normally spaced 16in (406mm) or 24in
(610mm) apart and are 1½in (38mm) in width.
Anything closer together or a different width may
not be a stud, joist or firebreak. Always turn off
the power when working near electrical wires.
paint.
Detects other objects
besides studs in Stud
Scan and DeepScan
modes.
Finds more targets than
there should be.
©York Survey Supply Centre 2015