1
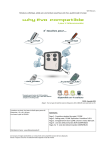
TVTEL® PC Program
+
TVTEL® Installation Manual
TVTEL® PC Program For
modern telephone based door entry
TVTEL® 2K 1–2000 Scroll Display/Speed Dial
TVTEL® 240 1–240 Speed Dial
TVTEL® PB 1–14 Call Buttons
200/CM/0105/1
www.telephoneentry.co.uk
www.telephoneentry.co.uk
REF: TESV/BS/0105
TVTEL® ENTRY SYSTEM
Aerial / Satellite on roof
CONDUIT ROUTES / CABLE SCHEDULES
Depending on local conditions conduit (metal or plastic) with inspection
elbows to be run as follows:
From
Conduit or Cable
To
(A) TVTEL® Panel
25mm
CAT5E x 2no + EARTH (6491X)
+ RG59U coaxial*
Electrical Cabinet.
(B) TVTEL® Panel
20mm
CAT5E
Locking mechanism.
If electromagnet
then will be above
door.
TV Headend
TV distribution
amplifier
(C) Exit button (R.T.E.)
20mm
CAT5E
TVTEL® Panel.
(D) Electrical Cabinet
20mm
RG59U coaxial*
TV Headend.
* Use RG11 coaxial if run is 250–500 metres.
If longer, consult NACD Ltd.
D
Internal
(1) Height from FFL to
top of R.T.E. = 1.00
metre.
C
*
NACD
PSU/
Controller
(2) Fitted on inside using
2 gang dual type
back-box. Break
glass to have flip lid.
A
(3) To be clearly visible
to persons exiting
the building.
(4) Position so that door
does not open over
R.T.E.
t
BT Socke
ENTRANCE
DOOR
NACD
RF Mod
for TV
Interface
L®
240V AC
Spur
TVTE
Panel
PRESS
TO EXIT
BREAK GLASS
PRESS HERE
B
PRESS
TO EXIT
Electric Release
BREAK GLASS
External
Electrical Riser
Height from FFL to
®
centre of TVTEL
panel = 1.30 metres.
Electrical/Power/BT equipment
in electrical cabinet fitted in
electrical riser or other
appropriate location within 50
metres of external door panel.
PRESS HERE
*It is advisable to move BT
socket (or analogue extension of
any PABX telephone system) and
fit in the PSU box.
These are fitted on
the inside.
R.T.E. = Request To Exit.
FFL = Finished Floor
Level.
Space requirements for NACD
equipment:
380mmL x 380mmW x 125mmH
TEL:
NACD Limited
Unit 10, Avebury Court, Mark Road, Hemel Hempstead, Herts, HP2 7TA.
01442 211848, FAX: 01442 212776, EMAIL: [email protected], WEB: www.nacd.co.uk
www.telephoneentry.co.uk
Our policy is one of continuous product improvement, we reserve the right to change specifications and prices without notice. All information is given in good faith. No responsibility can be accepted for errors, omissions or
incorrect assumptions. Picture reproduction of products are within the limitations of both colour and black and white printing and are intended as a guide only. © Copyright 2003 N.A.C.D. Limited. All rights reserved.
3
TVTEL
®
the perfect entrance
™
telephoneentry.co.uk
2K, 240 & PB
modern telephone based door entry
Contents
User Guide, Resident Information
Copy for distribution
TVTEL® 2K
Wiring Schematics
Opening TVTEL software program
Opening, New Installation
Configuration of Installation
Period Types, Groups
Screens
Messages
Tones
Caretaker, Managing Agent, Installation Company – Details
Setting up Call-Buttons
Setting up Access Pass Reader
Sharing telephone lines
T-RS485 modules
Setting up of Residents, Services
Call-Log
Programming of data, uploading to / downloading from panel
Screen files, audio message files, software program
Printing, creating system folder
Copying, deleting installations
Update Installations (multi-site)
Passwords, reset/restore/backups
1.1–1.7
2.1
2.2–2.3
2.4–2.6
2.7–2.10
2.10
2.11–2.12
2.13
2.14–2.15
2.16
2.16
2.16
2.17–2.20
3.1–3.4
3.5
4.1–4.3
5.1
5.2–5.3
6.1–6.2
7.1–7.3
8.1–8.2
TVTEL® PB, TVTEL® 240
Wiring Schematics
Opening, New Installation
Configuration of Installation
Period Types, Groups
Messages
Tones
Call-Button capacity
Setting up Access Pass Reader
Keypad codes
Programming Call-Buttons
Programming Tradesbutton
Programming Speed Dial Numbers
Hold Open, Latch facility
Additional Information
9.1–9.2
9.3
9.4
9.5
9.6
9.6
9.7
9.8–9.9
9.10
9.11–9.12
9.13
9.13–9.14
9.15
9.16
Our policy is one of continuous product improvement, we reserve the
right to change specifications and prices without notice. All information
is given in good faith. No responsibility can be accepted for errors,
omissions or incorrect assumptions. Picture reproduction of products
are within the limitations of both colour and black and white printing and
are intended as a guide only.
© Copyright 2003 NACD Limited. All rights reserved.
®
TVTEL
the perfect entrance
USER DETAILS
™
TVTEL/UD/TEL/0804
telephoneentry.co.uk
What do I need to do to get my details onto the system?
Please fill in the information as requested and return to NACD Ltd unless instructed otherwise. If you change your telephone
numbers, please inform us.
RESIDENT/CORRESPONDENT INFORMATION
OFFICE USE ONLY
TVTEL 2K Scroll Display Panels Only
Display to show maximum 16 characters
YOUR DETAILS
Flat No
I want the TVTEL Door Panel to call:
Floor No
®
Building Name*
Any number, landline or mobile, your choice.
1st telephone no.
Block Name*
2nd telephone no.*
Estate Name*
3rd telephone no.*
Title
4th telephone no.*
First Name(s)
Surname
* If applicable
*
Noralsy® Proximity Key Fobs are engraved with a 7 digit
number so that we can delete them if lost or stolen.
Address
My property has been issued with the following:
1
2
3
4
5
6
Postcode
Email
Managing Agent**
Same applies for Noralsy radio transmitters. Enter the relevant 7 digit
®
Telephone no.**
number in one of the boxes.
* Use to open the door instead of a key.
*If applicable **If known, not essential.
LIFESTYLE CHOICES
Features depend on TVTEL® model installed, please advise your preferences and we will endeavour to please.
➊ Any time
I am happy to receive calls 24/7.
➋ Social hours
I only want to receive calls between:
YES
NO
➌ Protected
➍ Hidden
I only want to be called by family / friends.
(Visitors will need to know your telephone number and enter it
on the panel when TVTEL prompts them or, see Speed Dial).
No details will be displayed on the screen. (Visitors will need to
know that you live here and will need to enter
followed by
your telephone number to call you or, see Speed Dial).
*
Speed Dial
I want to be called directly from the panel by entering this number:
(Choose either your flat number or a personal number and let your
friends/family know! You can still select any one of the options 1–4).
YES
NO
YES
NO
2–4 DIGITS IN LENGTH
The details (max 16 characters) displayed on the screen can be your name, spouse's name, another name of resident of flat, flat number / name, business name or combination etc.
You advise which telephone number goes with which name. The system allows for more than one name / description per flat / house / unit.*
Keypad Code
I would like to have the following Keypad Code:
4–8 DIGITS IN LENGTH*
*At discretion of Managing Agent. **Shorter codes available at the discretion of Managing Agent, but obvious codes 54321, 6789 etc not allowed. Keypad code cannot be same as flat
number for security reasons — but can be same as personal number used as a Speed Dial, if so enter # before the number when using as keypad entry code.
Photocopy if extra sheets required
CALL TIMES (USE 24 HOUR CLOCK)
®
TVTEL
the perfect entrance
USER GUIDE
™
TVTEL/UGI/0804
telephoneentry.co.uk
How do I know if a call is from the
door panel?
When you answer the phone you’ll hear a
message “Call from Door Panel” – just speak
to your Visitor as you normally would when on
the phone!
Call from
door panel
What do I then do if I want to open
the door?
Just press the 0 button on your handset…
and release it immediately, you don’t need to
hold it down.
Press the 2 button on the handset to open
a 2nd door or gate controlled by the same
TVTEL® panel, if applicable.
Press to
open door
What happens after I’ve pressed the
O button?
Both you and your Visitor will hear the
message “Please enter”.
Please
enter
Do I have to be in the building to open
the door?
You can open the door from anywhere in the
world! Just press the 0 button.
Hi Frank here, just
popped in to visit you
but you were out…
What if I don’t want to let the visitor in?
Press the # button to end the call immediately
or, don’t press the 0 button and hang-up or,
press the “End Call” button on a cordless or
mobile phone.
What happens if I’m not at home?
If you’ve got an answer machine or BT CallMinder your Visitor can leave you a message.
What happens if I’m already on the phone?
If you’ve given us a 2nd telephone number,
TVTEL® will automatically call it.
Sorry, the line is
busy, please try
again later.
CALL
TIP
What if I don’t have a 2nd telephone number
and am already on the phone?
TVTEL® will advise your Visitor that you are
busy and to call back later.
If you have BT Call-Waiting you’ll always
know if somebody is trying to call you.
Use a “Pay As You Go” mobile phone as your
handsfree door entry phone – it won’t cost you a
penny, you’ll never be on the phone when a visitor
calls and TVTEL® will still divert the call when you
are out!
Can TVTEL® call mobile
telephone numbers?
TVTEL® can call any landline, mobile
or extension number that has been
programmed into it.
Can I divert the call from the
TVTEL® panel to my office?
With BT Call-Divert you can divert
the call anywhere you want (the cost
of the divert is at your expense).
You can be on your office landline,
on the mobile out shopping or skiing
in Meribel… TVTEL® makes a
telephone call to your number, what
you do with it is up to you.
Can TVTEL® do the diverting
for me?
Of course, if the TVTEL® call is not
answered within the default 25
seconds it will automatically dial
your 2nd telephone number, for
example, your mobile. But make
sure your answer machine or BT
Call-Minder switches on after 25
seconds. If not, your Visitor will
leave a message for you and the call
will not divert to your 2nd number.
Can I see the Visitor if I don’t
know them?
If your TVTEL® panel has a camera*
then you’ll be able to see your
Visitor on all of your televisions. You
can even record unwelcome visitors
if you have a VCR.
Do I need special televisions?
Any TV – wide screen, flat screen,
plasma – it doesn’t matter! As long
as it plugs into a TV socket you can
use it!
The picture from the camera* in
the TVTEL® panel is simply another
TV channel. What channel number
you give it and what you do with the
picture is up to you – check out the
features available on your TV
system.
*Camera feature is optional.
N.A.C.D. Limited Unit 10, Avebury Court, Mark Road, Hemel Hempstead, Herts HP2 7TA.
TEL: 01442 211848 FAX: 01442 212776 EMAIL: [email protected] WEB: www.nacd.co.uk
www.telephoneentry.co.uk
Our policy is one of continuous product improvement, we reserve the right to change specifications and prices without notice. All information is given in good faith. No responsibility can be accepted for errors, omissions or incorrect assumptions.
Picture reproduction of products are within the limitations of both colour and black and white printing and are intended as a guide only. © Copyright 2003 N.A.C.D. Limited. All rights reserved.
TVTEL
®
the perfect entrance™
telephoneentry.co.uk
2K
1.1
TVTEL 2K
REF: TVTEL2K/STD/0105
Standard BT Telephone Socket
or PABX Extension Socket
2
2
EXIT
BUTTON
10.08.20XX
A
240V AC
PSU
12V DC / 2AMP
REGULATED
2
Z
09:45:35
EARTH
1
2
3
4
5
6
7
8
9
2
LOCK
0
EARTH
TVTEL 2K
REF: TVTELV2K/STD/0105
with Camera Module
HEADEND
COMMUNAL
SATELLITE / TV / FM / DAB SYSTEM
RG59U - 75 Ohms
Coaxial Cable
(or better)
2
EXIT
BUTTON
Standard BT Telephone Socket
or PABX Extension Socket
2
240V AC
PSU
12V DC / 2AMP
REGULATED
2
SELECT
CORRESPONDENT
VIA UP / DOWN
ARROWS
THEN PRESS
EARTH
BELL BUTTON
1
2
3
4
5
6
7
8
9
2
LOCK
EARTH
0
© Copyright 2003 NACD Limited. All rights reserved.
TVTEL
®
the perfect entrance™
telephoneentry.co.uk
2K
1.2
Remote Programming
Hitech House
REF: TVTEL/PCREM/0403/1
TVTEL
Entel
Panel
Standard BT
Telephone Socket
10.08.20XX
A
Z
09:45:35
Minimum PC specification is:
• Windows 95, 98, 2000, Millenium, XP, NT4.
• Pentium 3, 300MHZ
• 1GB HD
• 64 MB RAM
• CD Reader
• Serial Port (recommended)
• Dial-Up Type Modem, preferably a brand
name, external US Robotics… 56KBPS)
1
2
3
4
5
6
7
8
9
0
Kennedy House
Public Switched
Telephone Network (PSTN)
TVTEL
Entel
Panel
Standard BT
Telephone Socket
10.08.20XX
A
Z
09:45:35
1
2
3
4
5
6
7
8
9
0
Kings House
Standard BT
Telephone Socket
TVTEL
Entel
Panel
10.08.20XX
A
Option for TVTEL 2K only:
Local Programming from a COM Port of a
Laptop or PC to Connector CN6 on the PCB
of the panel using the cable with DB9
connectors supplied (RS232 bus, 38400bps).
Z
09:45:35
1
2
3
4
5
6
7
8
9
0
Standard BT Telephone Socket
Birmingham Site
Standard BT
Telephone Socket
TVTEL
Entel
Panel
10.08.20XX
A
Z
09:45:35
1
2
3
4
5
6
7
8
9
0
PC or Laptop with TVTEL Software Program
+ Integral or External Modem.
Manchester Site
Standard BT
Telephone Socket
Note: TVTEL panel communicates at maximum speed of 33600 bps,
although PC modem may be higher specification.
TVTEL
Entel
Panel
10.08.20XX
A
Z
09:45:35
1
2
3
4
5
6
7
8
9
0
Internal Telecommunications Network of a Company
REF: TVTEL/PABX/0105/1
PABX Extension Sockets
TVTEL® is programmed to dial
internal extension numbers
and, if required, external
telephone numbers.
Maximum capacity: 2000
extension/telephone numbers.
Extn.21
10.08.20XX
A
Extn. 1
Extn. 2
Extn. 3
Extn. 4
Extn. 5
Extn. 6
Extn. 7
Extn. 8
Extn. 9
Extn. 10
Extn. 11
Extn. 12
Extn. 13
Extn. 14
Extn. 15
Extn. 16
Extn. 17
Extn. 18
Extn. 19
Extn. 20
Z
09:45:35
PABX
Extension Socket *
1
2
3
4
5
6
7
8
9
0
System telephones
required to generate
DTMF tone when called
from other extension of
PABX telephone system.
*PABX extension socket to be analogue type.
© Copyright 2003 NACD Limited. All rights reserved.
TVTEL
®
the perfect entrance
™
telephoneentry.co.uk
telephoneentry.co.uk
2K
1.3
REF: TVTEL 2K/MPCB/V3/0105
MAIN CONNECTION BOARD
2
Speaker connection
(pre - connected)
1
JP6
JP5
Telephone line connection
1
3 button display controls
connection (pre-connected)
CN3
2
3
2
1
L2
L1
Telephone socket,
terminals 2 + 5
JP3
4
5
Microphone connection
(pre-connected)
1
10
9
8
7
6 NC
5 C
4 NO
3 NC
2 C
1 NO
CN2
JP7
2
1
2
CN5
CN6
3
4
JP4
Exit button (dry contact)
activates relay 2,
terminals 4 - 6
EX2
Exit button (dry contact)
activates relay 1,
terminals 1 - 3
EX1
Relay 2
Relay 1
5
6
12 button keypad
connection (pre-connected)
DB9 connection for
RS232 bus
7
3
1
Terminals 1 – 4
of J1 on Access
Control Modules
MLP3-TVT Proximity
LPT03-TVT Proximity
LHF-TVT Radio
MIR-TVT Infra-red
2
IMPORTANT
0V
CN1 2 EARTH
LINK 2 & 3 OF CN1
1 12V+
JP8
3
JP2
12v DC / 2AMP
Regulated power input
4
EARTH STUD
Direct call via dedicated
call-button connection
RJ45 connection for camera, T-RS485 module or RS485 bus.
BACK BOX CHASSIS
IMPORTANT
EARTH CABLE
The BT line serving the Door Panel
only should be:
TRUE
EARTH
A
B
Single line PBX.
RJ45 Connection into CN5 of TVTEL 2K
“Ring Back Prompt” must
be removed.
Simply dial 150 for BT Customer
Services and go to Sales or Billing.
Ask to have the “Ring Back Prompt”
and the “Ring Back Facility”
removed from the telephone line that
is connected to the Door Panel.
+12V
1
2
3
CAM
4
A/TXD
5
B/RXD
6
EXT
7
8
8
1
RJ45 PLUG
RJ45 MALE
0V
© Copyright 2003 NACD Limited. All rights reserved.
TVTEL
®
the perfect entrance™
telephoneentry.co.uk
2K
1.4
REF: TV2K/AUTO/0303
Automation Control / Volt Free
Connector Block JP4
Relay 1
10
9
8
7
6 NC
5 C
4 NO
3 NC
2 C
1 NO
EX2
EX1
Relay 2
Exit button (dry contact)
activates relay 2,
terminals 4 - 6
Exit button (dry contact)
activates relay 1,
terminals 1 - 3
To Automation
Control
REF: TV2K/LFSEC/0105
Fail Secure Locking
Connector Block CN2
Relay 1
10
9
8
7
6 NC
5 C
4 NO
3 NC
2 C
1 NO
240V AC
EX2
EX1
Relay 2
+12v
0v
Exit button (dry contact)
activates relay 2,
terminals 4 - 6
Exit button (dry contact)
activates relay 1,
IMPORTANT
terminals 1 - 3
Varistor (AC or DC supply,
polarity insensitive) or,
Diode (DC supply only,
be careful to respect polarity).
Varistor
+
12V Electric Release
Fail Secure
EARTH
POWER SUPPLY
12V DC / 2 AMP REGULATED
© Copyright 2003 NACD Limited. All rights reserved.
TVTEL
®
the perfect entrance™
telephoneentry.co.uk
2K
1.5
REF: TV2K/LFSAFE/0105
Fail Safe Locking
Connector Block CN2
10
9
8
7
6 NC
5 C
4 NO
3 NC
2 C
1 NO
Relay 1
EX2
EX1
Exit button (dry contact)
activates relay 2,
terminals 4 - 6
Breakglass emergency
exit device
Exit button (dry contact)
activates relay 1,
terminals 1 - 3
IMPORTANT
Varistor (AC or DC supply,
polarity insensitive) or,
Diode (DC supply only,
be careful to respect polarity).
Relay 2
EMEX
Varistor
+
12VDC Electro Magnet
Fail Safe
–
+12v
240V AC
0v
EARTH
POWER SUPPLY
12V DC / 2 AMP REGULATED
REF: TV2K/6BCON/0303
Adding Direct Calls via Dedicated Call - Buttons.
JP2
1
2
3
JP2
4
CALL BUTTON 1
5
6
1
2
3
4
5
6
CALL BUTTON 5
CALL BUTTON 2
CALL BUTTON 6
CALL BUTTON 3
CALL BUTTON 4
© Copyright 2003 NACD Limited. All rights reserved.
TVTEL
®
the perfect entrance
™
telephoneentry.co.uk
2K, 240 & PB
1.6
REF: TV-IF/STD
CAMERA IN PANEL
Interfacing the camera in the panel
to the communal or house TV
distribution system.
Fixing Screw
Metal Base
Solid Centre Conductor
Clamping Bracket
for Screen & Cable
Plug-in Terminal
Plug-In
Terminal Block
Block
J1
J5
Screen
To RF Modulator
Video Inputs
RG59U
RG59U
Coaxial
Coaxial
CCTV
Camera
(12VDC regulated)
Power (12V)Power
for camera
for camera (see appropriate
schematic for connections).
FM Aerial
TV Aerial
Satellite
DAB
RG59U
Coaxial Cable (or better)
Variable Frequency
Output
RF Modulator
V H VH HH
Equaliser
I.F. Amplifier
UHF 1
Distribution
Amplifier
B1
(VHF)
HEADEND
UHF Combiner
B3
(VHF)
TAPS or
Multiswitches
Entertainment
Socket
FLAT 1
TV
Satellite
FM
DAB
UHF
SAT
FM (B1)
DAB (B3)
Entertainment
Socket
FLAT 2
TV
Satellite
FM
DAB
FLAT 3,4,5, etc
UHF
SAT
FM (B1)
DAB (B3)
EQUIPMENT FOR CONNECTION TO COMMUNAL / HOUSE TELEVISION SYSTEM
TV2169
Variable frequency output RF modulator (channel range 21- 69).
T2WS
UHF Combiner 5 - 2150 MHz (2 way splitter).
T4WS
UHF Combiner 5 - 2150 MHz (4 way splitter).
Converts camera signal into conventional TV signal for integration into communal or home system.
© Copyright 2003 NACD Limited. All rights reserved.
T-RS485
Module
1.7
For connection of additional Access Control
Doors/Gates to TVTEL® 2K via RS485 Bus.
EXIT BUTTON
(Dry contact) activates
relay 2, terminals 4 – 6.
EXIT BUTTON
(Dry contact) activates
relay 1, terminals 1 – 3.
EX2
EX1
RELAY 1
RELAY 2
12V
FOR LOCK
12V DC REGULATED
POWER INPUT
T-RS485 MODULE
NC
10 9 8 7 6
C
N0
NC
C
0V
N0
+12V
REF: TVTEL/T-RS485/V3/0404/1
3 2 1
5 4 3 2 1
X2
X1
Used to connect
T-RS485 modules to
each other and/or
TVTEL 2K panel
(Terminal CN5) via
CAT5 cable. Colour
codes of cables must
be consistent.
IMPORTANT
UK mode:
jumper to
be on
position 3.
JP1
1
2
Maximum distance
between modules =
1km using CAT5 cable.
3
X6
X5
X7
12V
0V
LED
12V
0V
LED
0V
1
2 3 4
1
2 3 4
1
SGNL
SGNL
SGNL B SGNL A
12V
2 3 4
A
ACCESS PASS
READER
NOT
USED
X6
NOT
USED 4
3 2
1
5 4 2
CN5 OF TVTEL 2K
1
6 5 4 3 2 1
J1
NORALSY
ACCESS PASS
READER
Module power consumption – excluding proximity
reader(s) and electric locking:
Standby 45mA, Maximum (both relays latched)
110mA.
The T-RS485 module connects to terminal CN5
(RJ45 connector) on a TVTEL 2K using a CAT5E
cable.
B
C
®
Noralsy MLP3-TVT, MIR-TVT, LHF-TVT or LPT03TVT readers connect to terminal block X6 of the
T-RS485. (X5 is not used in the UK).
The following cabling topologies can all be used to
connect T-RS485 modules to each other.
Topologies (B), (D) and (F) are recommended.
D
Software Version must be 3.03 or later.
A maximum of 16no T-RS485 modules can be
connected to 1no TVTEL 2K panel. Each T-RS485
controls 2no relays and presentation of a valid
Access Pass can be programmed to activate both
relays simultaneously. A maximum of 8no access
zones are available.
Usually Relay 1 is used to control a door and, if
used, Relay 2 triggers a CCTV camera, light etc.
Relay activation time (secs) can be independently
set for both relays, for example:
E
F
Relay 1 (Door 1) = 5 secs.
Relay 2 (Internal lobby door) = 12 secs.
© Copyright 2003 NACD Limited. All rights reserved.
TVTEL
®
the perfect entrance™
telephoneentry.co.uk
To open the
TVTEL program,
click on the
standard Windows
Start button and
select Programs.
2K
2.1
Highlight TVTEL.
or click on desktop icon
click
There are 3no types of User. Click on
between them.
The following
TVTEL screen
appears.
to select
Supervisor:
NACD use only
Installation
Company:
Default Password = install
Access Rights = Full
Managing
Agent:
Default Password = manage
Access Rights = Restricted to
Residents function.
Can add/remove Residents
but cannot change
Parameters.
Click on Modification to
correct the time and date.
Enter the correct date and
time. The day is
automatically entered by
the program. Click on
Apply when finished.
Click on OK when finished to enter
into the program.
Note:
Passwords can, of course, be changed - see Options on General Screen.
© Copyright 2003 NACD Limited. All rights reserved.
TVTEL
®
the perfect entrance™
telephoneentry.co.uk
2K
2.2
General Screen
This is the General
screen. At this
stage, we are only
interested in the
Installation option.
We will discuss the
other options later.
Click on Installation
w
n e op
select type of
installation to
view
en
y
p
co
rt
rt
e
let
po xpo
e
im e
d
n
g
in
ist
n
ex ion
e ion ort tion ort tion
io
en llat
let llat
py llat
p la
p la
e
p
o
a
a
ex stal
im stal
d sta
c st
o st
in
in
in
in
in
tio
st
a
all
w
ne
in
ns
io
of llat
n sta
in
o
Click on New Installation
The following box
is displayed.
Tick this box to have the Program generate a
name for the Installation based on its street no and
address.
The Phone Number cannot have spaces, blanks,
hyphens, underscores or colons.
Select the type of TVTEL
panel installation
Enter the required
information.
The Serial No is printed on a white label located
on the PCB of the TVTEL panel.
The initial Passcode is the last 4 digits of the
Serial No. Details on how to change the
Passcode are given later.
With all the information entered, click on OK.
© Copyright 2003 NACD Limited. All rights reserved.
TVTEL
®
the perfect entrance™
telephoneentry.co.uk
2K
2.3
If you are opening
the program in
order to access an
existing site:
The Installations screen displays a listing of all Installations.
To select a particular
Installation simply
double click on it.
Alternatively,
highlight it and click
on Open. Use the
scroll bar to move
up and down the
listing.
Click on Open Installation
The Details of
Installation screen
opens and displays
the details of the
relevant Installation.
You now have
access to the title
bar menus.
© Copyright 2003 NACD Limited. All rights reserved.
TVTEL
®
the perfect entrance™
telephoneentry.co.uk
The TVTEL
program is
designed to
manage many
Installations. This
screen displays the
site that is to be
worked on.
2K
The
2.4
Details of Installation screen is displayed.
Click on Parameters
At the top of the
screen, there are a
number of options
available for this
Installation.
Click on Configuration
Click on
Parameters.
A drop-down box
is diplayed.
B
C
H
The
Configuration
of Installation
screen is
displayed.
A
L
P
Q
F
G
K
D
E
J
A Relay 1 is normally used to
activate a door or gate. Set the number
of seconds that the door is to unlock
for when: Either a correct keypad code
is entered or, a Resident enters the
correct DTMF code on their handset.
Standard “Secrecy of
Lock” feature =
Resident cannot open
the door without having
first received a call
from the panel.
B DTMF Code is the number
(minimum 1, maximum 4 digits) that
Residents’ must enter on their
handset(s) in order to remotely open the
door.
C
See Section 2.5.
D
See Section 2.6.
E
See Section 2.6.
F Input 2 (terminals 9 + 10 of CN2)
can be set to activate Relay 1, Relay 2
or the LCD screen backlighting. The
default setting is obviously
Relay 2.
G
Period Type feature allows the
selection of any 1 of 5 comprehensive
time-zone profiles. Input 2 is disabled
when the time is outside of the Period
Type selected.
N
O
I
M
H Call to Door Panel is a feature
allowing a Resident to telephone the
panel (provided the Telephone Number
and Passcode are known) from their
standard DTMF telephone to (a) Listen
in on the panel environment only or, (b)
Listen and communicate with the panel.
For security reasons, a Passcode must
be set.
M Adjust Microphone Volume ie audio
level, from the panel to the handset.
This is not a real-time adjustment.
I Panel rings for is the length of time
the panel is to ring before it answers
the incoming call.
P Default is ON. When the Resident
opens the door, the line will be cut after
5 seconds. If OFF, the Resident retains
full communication rights until the
comms time-out setting is reached.
J Hold Open Feature, tick the box if
you want to allow Residents to enter
*after the DTMF code to, for example,
hold open the gate.
N Adjust Loudspeaker Volume at the
panel from the handset called. This is
not a real-time adjustment.
O
See Section 2.5.
Q If using a specific telecoms
provider, enter their unique prefix here.
K Set the length of time in seconds
that the telephone called is to ring
before TVTEL abandons the call or, calls
the 2nd telephone number.
L Enter the date the Clocks Change.
The TVTEL panel will automatically
correct its time display on the
programmed dates.
© Copyright 2003 NACD Limited. All rights reserved.
TVTEL
®
the perfect entrance™
telephoneentry.co.uk
Relay 2
There are 3no
Operation modes
for Relay 2.
Note: If either the
As Relay 1 or On
pressing any
button on panel
are selected, the
Keypad Code,
DTMF Code and
Relay operates
(secs) parameters
become totally
redundant.
2K
Relay 2 is activated for
a factory default 20
seconds when the
button or any
keypad button is
pressed. This function
is normally used when
Relay 2 is controlling
lights. (Note: If the
Up/Down arrow
buttons are pressed,
Relay 2 is activated for
the same length of
time as programmed
for Screen Resets).
2.5
Relay 2 would be activated simultaneously by the same
commands as Relay 1. For example, the Keypad code(s)
and DTMF code that activate Relay 1 would also activate
Relay 2.
Click to open
Enter the Keypad
code to activate
Relay 2 (minimum
1, maximum 8
digits).
Relay 2 is
Independent. It
is only activated
by the specific
Keypad code
associated with
Relay 2 or, the
specific DTMF
Code
associated with
Relay 2.
Set the number
of seconds that
Relay 2 is to be
activated when:
The correct
Keypad code is
entered or, a
Resident enters
the correct
DTMF code on
their handset.
DTMF Code is
the number
(minimum 1,
maximum 4
digits) that
Residents’ must
enter on their
handset(s) in
order to
remotely activate
Relay 2.
Access Passes and up to 4no additional Keypad
codes with Period Types can be programmed.
Click on New to add Access Passes.
Enter required Keypad code(s).
Enter the 7 digit
number engraved on
the Access Pass
and click OK.
Select Period Type from drop-down list.
Click OK when finished .
Camera or
Relay 3
TVTEL has an RJ45
connector terminal
reference CN5 used
for triggering an
additional relay
which either
activates the MIVID3
camera module for a
preprogrammed
number of seconds
(1-300) or, is used to
trigger another 3rd
party device.
Check box if you want to use this feature.
Activated for X no of seconds (Default =
30 seconds) when somebody presses
any button on the panel. Adjust to suit.
5V DC output provided continuously.
© Copyright 2003 NACD Limited. All rights reserved.
TVTEL
®
the perfect entrance™
telephoneentry.co.uk
2K
Communication Time
Communication time
can be set from 10
to 300 seconds and
applies to both:
Calls to the Door
Panel and Calls
from the Door
Panel. The line will
be automatically cut
if the preset
maximum
communication time
is reached.
Keypad Errors
Residents and other
authorised persons
ie. Services,
Managing Agent,
Installation
Company, can be
issued with keypad
codes. Enter a
correct keypad
code and the door
unlocks for the
preset number of
seconds.
2.6
Also, for those, thankfully, very rare
occasions where a Resident is still using
an outdated Pulse Telephone : the first 2
digits of the particular Resident’s keypad
code can be used to open the door.
Pulse Telephone
Example: Resident with keypad code 49801 is
called from Door Panel. Resident does not have a
DTMF telephone and cannot, therefore, open the
door remotely from handset. Pulse phone (delay)
has been set to 10 seconds. Resident knows visitor
and advises visitor to enter the number 49 (First 2
digits of keypad code) on the panel. Visitor can
open the door by entering the number 49 after the
initial 10 second Pulse phone (delay) but before
the 60 second (in this example) communication
time runs-out.
Set the maximum length of time (secs) for the
Visitor to talk to the Resident. 60 seconds is the
default setting.
Enter length of time in seconds keypad is to
shutdown (lock-out).
Enter the maximum number of incorrect keypad
entries before keypad shutdown activated.
However, consecutive incorrect keypad code entries - Keypad Errors - suggest that the
person is not authorised to enter the building or simply abusing the keypad. To help control
this type of situation, this feature will shutdown the keypad - Keypad lock-out for - for a
maximum of 300 seconds after X no of Keypad Errors.
To further deter,
TVTEL then visually
displays on its
screen:
This feature can, of course, be used in other ways:
By changing the Keypad Errors to 9 (maximum) and the Keypad lock-out for to the 10 second
minimum, persons entering an incorrect keypad code will be advised of their error. It would be
highly unlikely that an authorised person would make 9 consecutive errors and, even if this
were to happen, the keypad would only shutdown for 10 seconds.
© Copyright 2003 NACD Limited. All rights reserved.
TVTEL
®
the perfect entrance™
telephoneentry.co.uk
2K
2.7
Period Types
The example shows that a
Period Type is whatever you
want it to be.
Period Types are used to further refine
and customise the TVTEL system.
TVTEL has 5 Period Types – Group A,
Group B, Group C, Group D and Door
Panel.
A Period Type is simply the standard 7
day week but made up of either:
(a)
(b)
(c)
(d)
2 time zones per day
1 time zone per day
1 or 2 time zones per day
Any mix of a – c.
Click on Period
Types.
Click
Select the Door Panel
tab by clicking it.
Active Periods are those times within the Open
and Close of Period 1 and Period 2. In this
example, 1500 hrs is an Active Period time but,
1810 hrs is not an Active Period time.
During an Active Period the panel displays FREE
ACCESS with an arrow pointing to the button on
the panel. Pressing the button opens the door
(activates Relay 1). This feature is usually used to
provide TRADES access in the morning between
certain hours.
If the
arrows are used to scroll the display
during an Active Period to find a particular
Resident, pressing the button will launch the call
not open the door.
➔
➔
The main Period Types
screen opens.
If you want to copy the Open or Close (or both)
times entered for the Monday to the other days of
the week, simply click on Copy Monday.
For security reasons: Bank or other National
Holiday dates should be entered here.
For security reasons: If a specific Holiday period
applies, for example; Christmas or August
shutdown, enter the dates here.
Holiday and Bank Holidays dates are, obviously,
OUT OF HOURS ie not within the Active Period.
To save, remember to click OK when all of the information for this screen has been entered.
© Copyright 2003 NACD Limited. All rights reserved.
TVTEL
®
the perfect entrance™
telephoneentry.co.uk
2K
Default Setting = Controlled Access - 24 hrs
2.8
Controlled Access – 24hrs is the most common mode of operation
used because it offers the highest level of security. It is the default
factory setting.
Relay 1 is activated ie the door is opened by: (a) Correct DTMF code
entered on the telephone called from the Door Panel (b) Resident
entering their keypad code at the Door Panel (c) Visitor entering first 2
digits of keypad code of Resident called at the Door Panel (see Pulse
phone (delay) section in Configuration).
➔
➔
With Free Access – 24hrs selected, the panel displays FREE ACCESS
with an ➔ arrow pointing to the button on the panel. Pressing the
button activates Relay 1 ie opens the door 24 hours a day. If the
arrows are used to scroll the display to find a particular Resident,
pressing the
button will launch the call not open the door. (Scroll
Display of Residents = Fully Functional).
With Free Access – 24hrs and Door “Hold Open” selected, the panel
also displays FREE ACCESS with an arrow ➔ pointing to the
button on the panel . The door is, however, in an UNLOCKED state 24
hours a day, so there is no need to press the button. This feature is
mainly used on Visitor Days, Refurbishments, Furniture Removals /
Deliveries etc.
➔
➔
Hold Open Feature
If the
arrows are used to scroll the display to find a particular
Resident, pressing the
button will launch the call. (Scroll Display of
Residents = Fully Functional).
Note: With Active Periods and Door “Hold Open” selected, operation is
exactly the same when time is within the Active Period.
➔
During an Active Period ie whilst the panel is displaying FREE ACCESS
with an ➔ arrow pointing to the
button on the panel, the
arrows used to scroll the display to find a particular Resident are totally
disabled. The Scroll Display is not available. Pressing the
button
opens the door.
➔
Turn Off Scroll Display During Active Period
The Scroll Display feature is automatically and fully re-enabled when the
Active Period ends.
Note: With Free Access - 24hrs and Off selected, operation exactly the
same as when time is within the Active Period.
➔
During an Active Period ie whilst the panel is displaying FREE ACCESS
with an ➔ arrow pointing to the
button on the panel, the
arrows can be used to scroll the display to find a particular Resident.
However, pressing the button on locating a particular Resident does
not launch the call but, rather, activates the relay(s) according to the
settings preprogrammed for this Resident.
➔
The Scroll Display feature is automatically and fully re-enabled when the
Active Period ends.
Note: With Free Access - 24hrs and Information and Activation of
Resident’s relay selected, operation exactly the same as when time is
within the Active Period.
During an Active Period ie whilst the panel is displaying FREE ACCESS
with an ➔ arrow pointing to the
button on the panel, pressing the
button activates Relay 1 ie opens the door.
The
arrows ie Scroll Display of Residents function is fully enabled,
so pressing the
button on locating a particular Resident will launch
the call.
➔
➔
Scroll Displays Information Only
During Active Period
When the Active Period ends, the fundamental and only operational
difference is that pressing the
button does not activate Relay 1 ie
does not open the door.
Note:
With Free Access - 24hrs and Fully Functional selected,
operation exactly the same ©asCopyright
when time
isNACD
withinLimited.
the Active
Period.
2003
All rights
reserved.
TVTEL
®
the perfect entrance™
telephoneentry.co.uk
2K
2.9
Free Access – 24hrs is effectively the same as a 24 hour Active Period.
If you select Controlled Access – 24hrs as the operational mode, the following parameters are, for obvious reasons,
automatically set by the system and cannot be changed:
Scroll Display of Residents = Fully Functional
Door “Hold Open” = Not available
GROUPS
Residents and Services can each be associated
with any 1no. Group. The visitor at the panel is not
shown the group status of the Resident or Service.
➔
➔
Pressing the button on the panel, after having
located the particular Resident via the
arrows
will, within the Active Period, launch the call to the
Resident.
You can name this Period Type
➔
➔
Pressing the button on the panel, after having
located the particular Resident via the
arrows
will, outside the Active Period ( ie 2231 hrs to 0729
hrs Monday to Sunday) , not launch the call to the
Resident. Instead, the panel will play audio
message no. 2 “ Your Correspondent cannot be
reached at this time, please try again later” and
simultaneously display a similar message. This
feature is usually used to protect certain residents,
for example, the elderly, from nuisance calls at
night.
In this typical example, only 1no
time-period profile was required
to create Group A. PERIOD 1,
therefore, shows 0730 hrs to
2230 hrs Monday to Sunday.
PERIOD 2 is not required and,
therefore, shows no times.
The Active Period for
Group A is, therefore, 0730 hrs
to 2230 hrs Monday to Sunday.
If not using
PERIOD 2. Click
on Open time to
highlight, then
press Delete
button. Repeat
process for Close
time. Click on
Copy Monday
tab.
Holidays and Bank Holidays are treated as
outside the Active Period ie OUT OF HOURS.
➔
➔
Pressing the button on the panel, after having
located the particular Resident via the
arrows
will, within the Active Period, activate Relay 1 ie
open the door not launch the call.
Visitors are granted
automatic access
but impression
given that access
was monitored by
Resident or Security
desk.
Pressing the button on the panel, after having
located the particular Resident via the
arrows
will, within the Active Period activate Relays 1 and
2 but only after 15 seconds. The panel will simulate
a call to make the visitor believe that access was
not automatic but controlled!
➔
➔
➔
➔
SIMULATED
TRADES
Pressing the button on the panel, after having
located the particular Resident via the
arrows
will, outside the Active Period ( ie 2231 hrs to 0729
hrs Monday to Sunday), launch the call to the
Resident.
© Copyright 2003 NACD Limited. All rights reserved.
TVTEL
®
the perfect entrance™
telephoneentry.co.uk
2K
2.10
You can also
provide Trades
Access via Access
Passes and/or
Keypad Codes that
only open the door
at certain times.
Click on Keypad/A.Passes.
Click on New to add Access Passes. Remember
all Access Passes are represented as a 7 digit
number. This number is engraved on the Access
Pass itself.
Up to 4no. Keypad Codes can also be associated
with Group. They only operate ie activate Relay 1 to
open the door within the Active Period.
Period Type is A.
Click on OK to save.
Screens & Keypad
The screen is the
display on the door
panel.
Click on Screens
& Keypad
Backlight Activation brightens the display screen
and is, normally, set as shown. Some installations,
however, will require the backlighting feature to be
off during the day ie especially bright locations.
Screen Resets is the number of seconds a screen
will be displayed before the display switches back
to the default screen.
➔
➔
Scroll Display Speed sets the speed at which the
names displayed pass through the display when
using the
buttons on the panel.
Check this box to enable the Speed Dial feature.
Visitors can now also call Residents by entering
either their flat number or their personal number on
the panel.
Click on OK when
finished.
Check this box to enable dialing of (Res/Cor) preprogrammed telephone numbers by pressing the
followed by their telephone number.
*
If you check this box pressing button 5 on the
Keypad will open the scroll display of names from
the J’s onwards, 8 from the T’s onwards etc.
Note: Enter # before all Keypad entry codes from
now on.
© Copyright 2003 NACD Limited. All rights reserved.
TVTEL
®
the perfect entrance™
telephoneentry.co.uk
2K
2.11
Messages
The display on the
Door Panel is default
set to provide the
visitor with the
appropriate visual
information message
at the appropriate
time. For example:
“Please Enter” would
be displayed on the
screen. For every
visual information
display message,
however, there is also
a corresponding audio
information message.
This screen allows you
to select whether or
not to use audio
information messages
in conjunction with the
visual information
messages. The norm
is, of course, to use
both types of
messages together.
Click on Messages
Message 10 is the audio message “Call from Door
Panel”. The options are: Off, On, Response Off.
On = Message “Call from Door Panel” is heard by
the person on their handset when they answer an
incoming call from the Door Panel. This message is
also heard by the person dialling from a remote
handset into the Door Panel. Response Off =
Message “Call from Door Panel” is heard by the
person on their handset when they answer an
incoming call but is not heard by the person
dialling into the Door Panel from a remote handset.
Messages 1 - 9 are audio messages at the Door Panel. Click
to insert or remove ✓.
Message 4 can be either: Voice “Please Enter” or,
a 1 second beep or, a continuous beep of same
duration as operating time previously set for Relay 1.
These are the volume controls for the audio
information messages and beeps only. This feature
is very useful where the Door Panel is located, for
example, next to a busy and noisy main road. Note:
It does not affect the comms level between the
visitor and the resident – see Configuration Screen.
Volume Control for system messages from panel to Resident
ie “Call from Door Panel”.
For audio reassurance (ie acknowledgement) each
time a button on the panel is pressed, insert a ✓.
Inputs 1 and 2 ie the R.T.E. (Volt Free) inputs can also be programmed so that when
triggered, the panel either
A
Activates the message “Please Enter”.
B
Activates a 1 second beep.
C
Activates a continuous beep of same duration as
operating time previously set for Relay 1.
Note:
If message 10 is OFF, there is no audio message "Call from Door Panel" to inform the person answering
the call from TVTEL. Go to Parameters, Configuration and set Pulse Phone Delay to 1 second. There will
now be a short beep 1 second after the call has been answered and simultaneous activation of the
comms.
© Copyright 2003 NACD Limited. All rights reserved.
TVTEL
®
the perfect entrance™
telephoneentry.co.uk
2K
2.12
Event Type
Audio
Message No
1
Please wait your call is in progress.
2
3
Your correspondent cannot
be reached at this time,
please try again later.
You have dialled incorrectly.
4
Please enter.
5
Sorry the line is busy,
please try again later.
6
Sorry no answer,
please try again later.
7
The code entered is incorrect.
8
Sorry your call cannot be made,
please try again later.
9
10
Each time a call is made.
Visitor presses the
button to call a Resident
at a time which is outside of Periods 1 & 2 ie
OUT OF HOURS as set for the Group/Period
Type associated with this Resident. This
Resident does not want to be disturbed
after hours.
Visitor has entered an incorrect telephone
number on the panel.
A correct keypad code has been
entered on the panel or Resident has
activated the door from handset.
Resident is engaged on the
telephone ie the line is occupied.
There is no answer from the 1st telephone
number called and, if applicable, no answer
from the 2nd telephone number.
An incorrect keypad code has been
entered on the panel.
Spare
Please dial your Correspondent’s
telephone number.
Resident’s status is Protected,therefore, when
visitors press the
to call, the panel asks
them to enter the Resident’s telephone
number.
Call from Door Panel.
Message heard by Resident on the telephone
handset when answering call from door panel.
© Copyright 2003 NACD Limited. All rights reserved.
TVTEL
®
the perfect entrance™
telephoneentry.co.uk
Tones
2K
2.13
The BT line serving the Door Panel only should be:
A
Single line PBX.
B
“Ring Back Prompt” must be removed.
Simply dial 150 for BT Customer Services and go to Sales
or Billing. Ask to have the “Ring Back Prompt” and the
“Ring Back Facility” removed from the telephone line that
is connected to the Door Panel.
Click on Dialling & Tones
Default British Telecom settings ie Ringing Tones and
Busy Tones already set.
If the Door Panel is connected directly into a PABX
system, check the relevant technical information for
the PABX model and amend settings, if applicable.
The higher the sensitivity setting, the quicker the
system detects that the Resident has answered the
phone. In situations where there is lots of “noise on
the line” it is advisable to reduce the sensitivity level
setting.
Tick this box if you are
having problems with
the reception of the
DTMF tone.
Default is ON. Allows
Visitor to hear dial tone.
Ignore, used for test
purposes only.
Audio conversation is detected by the system. Set
the number of silence seconds allowed before
disconnection – if nobody talks, the telephone line
will be automatically disconnected.
Click on OK when
finished.
© Copyright 2003 NACD Limited. All rights reserved.
TVTEL
®
the perfect entrance™
telephoneentry.co.uk
2K
2.14
Caretaker
Click on Caretaker
Enter the relevant
information for the
Caretaker.
If the Caretaker lives in the building or is, anyway,
to be contactable from the Door Panel, insert a ✓.
Click on OK when
finished.
Enter the relevant
information for the
Caretaker.
Enter a 2nd contact telephone number for the
Caretaker, for example, a mobile or pager number.
The system will automatically dial the 2nd
telephone number, immediately after it has dialled
the 1st telephone number and received no
response. The Caretaker is, therefore, also
contactable when not in his flat.
Click on OK when
finished.
Managing
Agent
Click on Managing Agent
Click on Add Managing Agt.
© Copyright 2003 NACD Limited. All rights reserved.
TVTEL
®
the perfect entrance™
telephoneentry.co.uk
2K
2.15
Enter the relevant
information for the
Managing Agent.
Click on Persons
Click on New
Enter the details for
all the relevant
contact persons at
this Managing
Agent.
Click on OK when
finished.
The new contact
person(s) will be
added to the list of
existing (if any)
contact persons.
The Contacts listing
is specific to the
Managing Agent
selected.
Click on the to display the list of Managing
Agents (if any) already entered and select
accordingly.
Click on the to display the list of Contacts (if
any) already entered and select accordingly.
Click on OK when
finished.
Installation Company
The Installation
Company tab
functions in exactly
the same way and
with the exact same
sub-screens as the
Managing Agent
tab. Repeat the
exact same
processes as
described earlier.
© Copyright 2003 NACD Limited. All rights reserved.
TVTEL
®
the perfect entrance™
telephoneentry.co.uk
2K
2.16
Call Buttons
Up to 6no.
Call-Buttons can be
included on the
Door Panel.
Click on Call-Buttons
The scroll display
function, of course,
remains available.
The Call-Button
feature is simply an
additional
convenience to
make TVTEL even
more user friendly.
Check box if relevant dedicated Call-Button exists
on the panel.
Press Duration time required before panel
launches call. This feature can be useful when
there are “false calls” made accidently by elderly
persons.
Click on OK when finished.
Access Pass
Reader
Click on Access Pass Reader
If the TVTEL® panel
has an integral
Noralsy® proximity
reader (or, Noralsy®
radio receiver, infrared receiver etc)
then you must
enable this feature.
Select from drop down list.
Click OK when finished.
NOTE: Make sure also selected if T-RS485 modules
connected to TVTEL® 2K.
Sharing
Telephone
Lines
Click
Enter the number of panels sharing the same
telephone line and then set each with a Priority
“Level” ie. which answers an incoming call 1st,
2nd etc.
Note: All panels must be interlinked via an
RS485 bus.
Up to a maximum of 5no TVTEL 2K panels can
be connected together via an RS485 bus,
connector on PCB reference CN5.
© Copyright 2003 NACD Limited. All rights reserved.
TVTEL
®
the perfect entrance™
telephoneentry.co.uk
2K
2.17
T-RS485
Modules
If there are additional
Access Pass
Reader controlled
doors connected to
the TVTEL® 2K panel
via an RS485 bus,
then this feature
must be enabled.
Click to enter tick to enable this feature.
Click on OK.
Now select… Access Pass
Reader.
Open drop down menu
and select… MLP3, MIR,
LHF. Click OK.
An additional
section, Modules,
is now added to
the title bar.
Click on Modules to open the RS485 network screen.
The following
screen opens.
Click on New icon to add a T-RS485 module.
The New RS485
module box opens.
The 6 digit serial
number is printed on
a sticker inside the
module itself.
Enter the 6 digit serial number and click OK when
finished.
© Copyright 2003 NACD Limited. All rights reserved.
TVTEL
®
the perfect entrance™
telephoneentry.co.uk
2K
2.18
The module now
appears on the
screen. Double click
on it to open.
Highlight the module and click on Open.
Enter the relevant Door Name.
Recommendation: assign each module (door) a
different zone number restricting the total number of
doors to 8.
Click to set the Period Types.
See Section 2.4.
See Section 2.4.
Select the Period Type by clicking
on to ▼ open the drop down menu.
Click to select the appropriate
Period Type.
There are 8no Zones which are used to differentiate and authorise/restrict access as required.
For example:
Door A associated with Zone 1.
Door B associated with Zone 2.
Door C associated with Zone 1.
If the Resident is authorised for Zone 1 that means Door A and Door C.
Residents are then authorised per Zone. In this way, a maximum of 16no T-RS485 modules can
be connected to 1no TVTEL® 2K panel. Alternatively, restrict the maximum number of T-RS485
modules to 8no and assign each with a different zone number ie. Zone 1 = Door 1, Zone 2 =
Door 2 etc.
© Copyright 2003 NACD Limited. All rights reserved.
TVTEL
®
the perfect entrance™
telephoneentry.co.uk
2K
2.19
The Period Types
for module Lobby A
opens. The default
setting is Controlled
Access. If required,
check the radio
button “Active
Periods” and set
time zone profiles for
Module. When
finished click OK.
There are 4no other
Group Periods
available, A–D. Each
can be named and
have specific
Access Passes /
Keypad Codes
assigned to it.
Click.
You can now enter
the relevant Access
Passes (and/or
Keypad Codes if a
keypad is connected
to the module) that
you want to assign
to Group (Period
Type) A.
Click OK when
finished.
The new module
data is now ready for
uploading from the
PC to the actual
module itself via the
TVTEL® 2K and the
RS485 bus.
© Copyright 2003 NACD Limited. All rights reserved.
TVTEL
®
the perfect entrance™
telephoneentry.co.uk
2K
2.20
Connect to TVTEL 2K and upload Parameters. Then upload Modules.
The T-RS485 module should be connected to the RS485 (CAT5) network bus. If it is powered
up, turn off the power, wait 30 seconds, turn the power back on.
The T-RS485 module should automatically identify itself to the TVTEL 2K. Note: The T-RS485
module identifies itself each time it is powered up.
If connected, click on Modules in the Downloading / Updating PC section, ‘Importing of
Modules’ and click OK.
The TVTEL 2K is not part of any Zone.
Now go to Residents and enter their Access Rights by checking the relevant Zones (Doors).
When finished, click on OK.
You must now reconnect to the TVTEL 2K and upload the Residents data.
Notes:
(1) T-RS485 modules cannot be connected to TVTEL 2K if 64 Call-Button option in use.
(2) MLP3-TVT proximity reader cannot be connected to TVTEL 2K if 64 Call-Button option in
use.
© Copyright 2003 NACD Limited. All rights reserved.
TVTEL
®
the perfect entrance™
telephoneentry.co.uk
2K
3.1
Residents
Click on Residents
Adding Residents,
Names, Flats etc to
the system.
Click on Tel+Access
new resident
open resident
delete resident
no of residents
universal keypad code
import resident
All the Residents and all their details are displayed
on this screen. Use the scroll bar to move through
the listing.
The Caretaker information entered
earlier is also displayed on this
screen as Is a Resident was
previously ✓.
Only if appropriate for this site, click on Universal
Code and then enter a Keypad Code that is going
to be used by all the Residents. This Keypad
Code will be valid at all times until changed or
deleted. When finished, click on OK.
We want to program
people into the
system and refer to
them as Residents
although, in a work
environment, they
would actually be
Employees.
Click on NEW
to add a Resident.
Group, see Period
Types section.
Each Resident can have a personal Keypad Code
which is either valid at all times or Group/Period
Type controlled.
Hidden: If YES selected,
no details whatsoever
regarding this Resident
will be displayed on the
screen of the Door Panel.
Click
Protected: If YES selected then the visitor cannot
call the Resident by pressing the . Instead, the
panel displays and, simultaneously, plays a
message advising the visitor to “Please dial your
correspondent’s telephone number”. In this way,
Residents can be protected from: (a) Being
unnecessarily disturbed by strangers during
unsocial hours (b) Receiving nuisance calls ie
children playing with the panel.
© Copyright 2003 NACD Limited. All rights reserved.
TVTEL
®
the perfect entrance™
telephoneentry.co.uk
The following
Resident’s Details
screen is displayed.
Enter the relevant
information. When
finished, click on
OK.
2K
3.2
Hidden: If YES selected, no details whatsoever
regarding this Resident will be displayed on the
screen of the Door Panel. Visitors will need to know
that Resident lives here and will need to enter either
1 * followed by telephone number 2 A special
speed dial number 2-4 digits in length.
Protected: If YES selected the visitor cannot call
the Resident by pressing the . Instead, the
panel displays and, simultaneously, plays a
message advising the visitor to “Please dial your
correspondent’s telephone number”. In this way,
Residents can be protected from: (a) Being
unnecessarily disturbed by strangers (b) Receiving
nuisance calls ie children playing with the panel.
Visitors will need to enter either 1 The telephone
number after TVTEL prompts them 2 A special
speed dial number 2-4 digits in length.
Note: Protected status – If the telephone number
physically dialled is busy or there is no answer, the
system will not automatically dial the 2nd telephone
number.
Use to assign dedicated button on panel, if
applicable.
Resident can be associated with a Period Type, for
example, to be protected from nuisance calls
during anti-social hours.
The Resident can be given an Access Pass and/or
Keypad entry code. Both can be Time Period
controlled.
Enable/Disable Lock Release rights for either/both
Relay 1 or 2.
In this completed
example, the
Resident George
Bush has:
2no telephone numbers programmed. If the
1st telephone number dialled is busy or there is no
answer, the system will automatically and
immediately dial the 2nd telephone number.
Managing Agents often, in the larger buildings,
standardise the usage of this feature ie Residents
are allowed only 1no telephone number with the
2nd telephone number being that of the
Concierge or Security Desk.
Phone Period Type C
See Period Types, Groups.
Speed Dial number of 10.
Resident chose to have Speed Dial number
correspond with flat number.
Keypad entry code 5399.
Access Pass No 8070003.
Authorisation to activate relay 1 only.
© Copyright 2003 NACD Limited. All rights reserved.
TVTEL
®
the perfect entrance™
telephoneentry.co.uk
Access Via Keypad
Codes Only
2K
3.3
Click on Residents
Click on Access Only
List of Persons
issued with Keypad
codes. These
people do not
require telephone
numbers.
Provide access into the building via a
Keypad Code to certain persons and then
restrict usage of the Keypad Code to a
particular Period Type if required.
Click on New
Enter the relevant
information. When
finished Click OK.
Dustman has Keypad Code 9204
restricted to Access Period D and can
activate Relay 1 and Relay 2.
© Copyright 2003 NACD Limited. All rights reserved.
TVTEL
®
the perfect entrance™
telephoneentry.co.uk
2K
3.4
Click on Residents
Services
Click on Services
Click on New
The Details of
Services screen is
displayed.
Up to 10no.
Services can be
entered.
All programming and
functionalities of the Services
section and sub-screens are as
per the Residents section.
Residents can be advised that, in the event of an emergency, they can contact, for
example, “Joe Plumber” by entering 900 on the panel.
© Copyright 2003 NACD Limited. All rights reserved.
TVTEL
®
the perfect entrance™
telephoneentry.co.uk
2K
3.5
Call Log
Click on Residents and select
Call Log from the drop-down box.
The Call Log screen
displays the quantity
and duration of calls
made to each
individual in the
building.
If you want to save the Call Log information, you
have a choice between saving in Excel or Word
formats.
You can select
where and how to
save the data.
You can choose your own name for the file.
© Copyright 2003 NACD Limited. All rights reserved.
TVTEL
®
the perfect entrance™
telephoneentry.co.uk
2K
4.1
Programming Panel
All programming
changes effected at
the PC, for example:
Parameter
modifications,
additions or
deletions of
Residents etc must
be uploaded from
the PC to the panel
to take effect.
Click on Loading.
The Data Transfer
screen opens.
Click on Configure.
Status
Select a free COM port if connecting locally.
The Connection
Parameters screen
opens.
Connection to the
TVTEL panel can
be made in 2 ways:
(1)
(2)
From a COM (Serial)
Port of a Laptop or
PC to Connector CN6
on the printed circuit
board of the Panel
using the cable with
DB9 connectors
supplied (RS232
bus).
Select which modem to use.
Click on OK when
finished.
Remotely from a PC
via an analogue
modem (maximum
speed 33600 bps)
via the PSTN (British
Telecom network) or
internal PABX.
Click on Connect Now.
The Data Transfer
screen opens.
Status = ON LINE.
Status
© Copyright 2003 NACD Limited. All rights reserved.
TVTEL
®
the perfect entrance™
telephoneentry.co.uk
2K
4.2
Import / Download
Every setting and
configuration
programmed
relating to
Parameters will be
downloaded onto
your PC or Laptop.
Click on Parameters to import the parameters
currently stored in the panel onto your PC or
Laptop.
Click
To make sure that your PC or
Laptop has the latest data simply
download the relevant files from the
panel i.e. update your PC with the
data that is in the panel. Then make
your changes, for example, adding a
Resident. Finish by uploading the
new updated file(s) to the panel.
During the
download, the
Windows file transfer
indicates progress.
Downloads are
always
acknowledged by
the Panel whether
successful or not.
Exactly the same procedure would be
followed for Residents, Screens,
Messages and Program.
Export / Upload
All programming is
effected at a PC or
Laptop. This
programming has
to be sent
(uploaded) to the
Panel for it to take
effect.
Every setting and
configuration
programmed in all
of the Parameter
submenus and
sections will be
uploaded to the
panel.
Click on Parameters.
Remember, always download data first,
make your changes and then upload
those changes.
Click
During the upload,
the Windows file
transfer indicates
progress.
Uploads are always
acknowledged by
the Panel whether
successful or not.
© Copyright 2003 NACD Limited. All rights reserved.
TVTEL
®
the perfect entrance™
telephoneentry.co.uk
TVTEL is more than
just an entry system.
It is a management
tool and, therefore,
information on
updates, whether
uploads or
downloads, is made
available to the
relevant authorised
persons. This
feature is especially
useful when
managing many
different
installations.
2K
4.3
Click on PC Log Info.
A listing appears of
all update actions.
Simply use the
features available
under Microsoft®
Notepad to
manipulate the
information to your
requirements ie
Save, Print etc.
© Copyright 2003 NACD Limited. All rights reserved.
TVTEL
®
the perfect entrance™
telephoneentry.co.uk
2K
5.1
Screens
Click on Screens.
The Selection of
Screens File opens.
The standard Defaut.ecr screen is the default and
should be used.
Click if you want information on how to create
customised screen files.
Select customised
screenfile
All the information you need
to create a customised
screen file is available in the
Help Section.
Audio
Messages
If you have customised some of the screens
for your particular installation and saved
under a different file name, click on the
to
see a list of screen files and select
accordingly. Click on OK when finished. You
will need to upload the customised screen file
to the Panel for it to take effect.
Click on Messages.
English V3.son is the default
audio message file.
All the information you need
to create a customised audio
message file is available in
the Help Section.
Software
Click on Software.
The Software box
details the version
and file.
This function is
mainly used to
update TVTEL® 2K
Installations only
with the latest
software releases.
IMPORTANT
PANEL SOFTWARE UPDATES VIA MODEM
RESTRICTED TO TVTEL® 2K ONLY. NOT
SUITABLE ON TVTEL® PB OR 240 PANELS.
NOTES:
(1) A version 2 panel cannot have version 3
software loaded onto it and vice-versa.
Click on OK when finished.
(2) The last Version 2 software program was
V209.prg and should be uploaded onto all
TVTEL 2K panels running earlier editions
of Version 2.
© Copyright 2003 NACD Limited. All rights reserved.
TVTEL
®
the perfect entrance™
telephoneentry.co.uk
2K
5.2
Printing
Saving all the system
information ie
backing-up all the
data of the Installation
should be a standard
procedure.
Click on Print.
An up to date printed
copy of all the data is
also essential for the
efficient and easy day
to day administration
of any Installation.
Create your own
“System Folder” full of
all the relevant
printouts.
The Printing screen
appears.
Select the report printouts by clicking with your
mouse to insert a ✓ where relevant.
To move from one
page to the next,
press the Esc
(Escape) button.
A few sample
screens:
© Copyright 2003 NACD Limited. All rights reserved.
TVTEL
®
the perfect entrance™
telephoneentry.co.uk
2K
5.3
© Copyright 2003 NACD Limited. All rights reserved.
TVTEL
®
the perfect entrance™
telephoneentry.co.uk
2K
6.1
Copying
TVTEL allows you to manage any number of Installations whether they are all at 1no address “site”, spread throughout
the country or, indeed, in different countries around the world. An Installation = 1no. TVTEL Panel. A single “site” can
very easily have numerous panels. Each panel is an Installation in its own right, nearly always with its own separate
telephone line ie telephone number.
For reasons of convenience, therefore, the TVTEL program allows you to make a Copy of existing Installations.
ne
To copy a particular
Installation, highlight it
and click on the Copy
icon. Use the scroll
bar to move up and
down the listing.
w
op
en
py
co
e
let
de
rt
po
im
rt
po
ex
Click on Copy icon.
The Copy Installation
screen opens with the
details of the
Installation that you
have chosen to copy.
Change the details to those relating
to the new Installation.
Click on OK when
finished.
The Details of
Installation screen
opens and displays
the details of Bond
Street Mansions, Rear
Entrance which is an
exact copy of Bond
Street Mansions.
Usually most of the Parameter settings can
be transferred from one Installation to
another without further modification. This is
not true, however, for the Residents who will
have to be deleted and replaced with the new
site specific information unless, of course, the
Installation is an additional panel on the
same site.
© Copyright 2003 NACD Limited. All rights reserved.
TVTEL
®
the perfect entrance™
telephoneentry.co.uk
2K
6.2
Deleting
To delete an
existing Installation
go to the
Installations screen
To delete a particular
Installation, highlight it
and click on the
Delete icon. Use the
scroll bar to move up
and down the listing.
w
ne
op
en
py
co
e
let
de
rt
rt
po
po
ex
im
Click on Delete
You will be prompted
to make sure that you
do not inadvertently
delete an Installation.
© Copyright 2003 NACD Limited. All rights reserved.
TVTEL
®
the perfect entrance™
telephoneentry.co.uk
2K
Advanced Programming Options Not Required For Set-Up
7.1
Click on Update to display the following options.
Update Menu – General Screen
Click
Clocks Change
The Clocks Change
screen opens. Enter
the relevant dates.
This information will
be the same for all the
Installations
throughout the
country.
Click Update Database to update the program on
the PC with the dates entered.
Click Upload to Panel to upload the dates entered
to the Door Panel(s).
Bank Holidays
Click on Bank Holidays.
Bank Holidays
The Bank Holidays
screen opens. Enter
the dates of all the
Bank or other
National Holidays for
the current year.
This information will
be the same for all the
Installations
throughout the
country.
Click Update Database to update the program
on the PC with the Bank Holiday dates entered.
Click Upload to Panel to upload the Bank
Holiday dates entered to the Door Panel(s).
Managing Agent Keypad Code
The Update
Managing Agent
Keypad Code
screen opens.
Click on Update Managing
Agent Keypad Code.
Select the appropriate Managing Agent by
clicking on the
.
Enter the new Keypad Code.
Click Update Database to update the program
on the PC with the new Keypad Code for the
Managing Agent.
Click Upload to Panel to upload the new Keypad
Code for the Managing Agent to the Door
Panel(s).
© Copyright 2003 NACD Limited. All rights reserved.
TVTEL
®
the perfect entrance™
telephoneentry.co.uk
2K
Advanced Programming Options Not Required For Set-Up
7.2
Installation Company Keypad Code
Click on Update Installation
Company Keypad Code.
The Update
Installation Company
Keypad Code screen
opens.
Select the appropriate Installation Company by
clicking on the
.
Enter the new Keypad Code.
Click Update Database to update the program
on the PC with the new Keypad Code for the
Installation Company.
Click Upload to Panel to upload the new Keypad
Code for the Installation Company to the Door
Panel(s).
Updating Installations
Click on Update Installations.
The Updating of
Installations
screen opens.
Choose how to
sort (search) for
your Installation.
For example, if you
select Postcode,
you will be asked
to select from a list
of postcodes.
You can select date and
time of the update.
You can select what you update.
© Copyright 2003 NACD Limited. All rights reserved.
TVTEL
®
the perfect entrance™
telephoneentry.co.uk
2K
Advanced Programming Options Not Required For Set-Up
7.3
Alternatively, click to insert a ✔ in All
Installations and highlight those you wish to
update.
In Update Type select what you want to upload
to the panel by clicking to insert a ✔ in the
appropriate boxes.
Click on Loading to upload the new data.
Updating Passcodes
Click on Change
Passcodes.
The Update of Passcode screen opens.
Select the appropriate
Installation as
explained earlier.
Click in the relevant cell in the New Passcode
column and enter the new 4 digit Passcode
number.
Click on Loading to upload the New Passcode.
© Copyright 2003 NACD Limited. All rights reserved.
TVTEL
®
the perfect entrance™
telephoneentry.co.uk
2K
Advanced Programming Options Not Required For Set-Up
8.1
Options Menu – General Screen
Click on Options and highlight Password.
Installation Company Password
Click on Installation
Company if you want to
change the password.
The Change
Installation Company
Password screen
opens.
Enter the information as requested. Click on OK
when finished.
Exactly same process for changing the
Managing Agent password.
Default program access levels and passwords:
Installation Company
=
Extensive
= install
Managing Agent
=
Restricted
to Residents
functions.
= manage
Reset Database
Click on Options and
highlight Database.
IMPORTANT
DO NOT USE “RESET” WITHOUT FIRST
CONTACTING NACD LTD.
Click on Reset if you want
to restore the factory set
defaults.
With Reset Database
you will lose all
programmed
information and data.
This function is really
designed as a “fix” in
the unlikely event that
the program has
become corrupted.
Only proceed if sure. If sure, click Yes.
© Copyright 2003 NACD Limited. All rights reserved.
TVTEL
®
the perfect entrance™
telephoneentry.co.uk
2K
8.2
Backup Database
Click on Backup to save the programmed
information and data.
The Back-Up of
Database screen
opens.
It is very
important to
regularly
back-up all
programmed
information
and data.
Click on OK.
A successful Database
Back-Up is
acknowledged.
Restore Database
Click on Restore to restore
from an earlier Back-Up.
The Restore function
overwrites all the
programmed
information
and data. Proceed
with caution.
If you want to proceed, click on Yes.
The Restore Database
screen opens.
Locate the relevant Backup file and click on
Open.
The Database will be
automatically restored.
Reindexing
The Reindexing
function reorganises
the files into their
correct order. It is
recommended to use
this feature
periodically.
Click on Reindexing to reorganise the
database into the correct order.
© Copyright 2003 NACD Limited. All rights reserved.
TVTEL
®
the perfect entrance™
telephoneentry.co.uk
PB/240
TVTEL® PB Call Button Panels
1–14 Call-Buttons
TVTEL® 240 Speed Dial Panels
1–240 Flats/Offices
FOR PROGRAMMING VIA PC WITH MODEM USING TVTEL®
SOFTWARE PROGRAM, YOU MUST FIRST CHANGE FUNCTION 61 TO
MODEM ANSWER MODE USING YOUR LANDLINE OR MOBILE
PHONE (or integral keypad on the TVTEL® 240).
*2000# (3 short beeps) 61 (long beep) 1 (3 short beeps).
© Copyright 2003 NACD Limited. All rights reserved.
TVTEL
®
the perfect entrance™
telephoneentry.co.uk
PB/240
9.1
TVTEL PB/240/MPCB/2
Telephone line
connection
2
1
JP2
JP6
Telephone socket
or PABX, terminals 2 + 5
The BT line serving the Door
Panel only should be:
Speaker connection
(pre - connected)
JP3
1
2
3
4
5
6
7
TVT-PB/BTNPCB
connection
2 L1
1 L2
A
B
51
4
Call Button 2
3
2
Call Button 1
1
BP3
62
Call Button 3
Factory Set, do not touch
BP2
73
10
9
8
7
6 NC
5 C
4 NO
3 NC
2 C
1 NO
BP1
84
BP4
S3
COM
JP7
2
1
4
3
Terminals 1 – 4 of J1
on Access Control
Modules
JP4
3
Microphone Connection
(pre-connected)
2
EX1
Exit button (dry contact)
activates relay 2,
terminals 4 - 6
Exit button (dry contact)
activates relay 1,
terminals 1 - 3
Relay 2
Relay 1
IMPORTANT
0V
LINK 2 & 3 OF JP8
12v DC / 2AMP
Regulated power input
1 12V+
1
TVTEL PCB for extra call buttons
Call Button
EX2
JP8 2 EARTH
JP5
MLP3-TVT Proximity
LPT03-TVT Proximity
LHF-TVT Radio
MIR-TVT Infra-red
“Ring Back
Prompt” must
be removed.
Simply dial 150 for BT
Customer Services and go to
Sales or Billing. Ask to have
the “Ring Back Prompt” and
the “Ring Back Facility”
removed from the telephone
line that is connected to the
Door Panel.
Reinitialisation
jumper
Call Button 4
Single line PBX.
EARTH STUD
Ref: TVT-PB/BTNPCB
BACK BOX CHASSIS
5
BP5
IMPORTANT
Call Button
EARTH CABLE
6
BP6
BP7
4
Call Button
BP8
3
7
4
BP9
3
8
4
3
9
BP10
BP11
BP12
BP13
BP14
4
4
4
4
4
3
10
3
11
3
12
3
13
3
TRUE
EARTH
14
© Copyright 2003 NACD Limited. All rights reserved.
PB/240
TVTEL
®
the perfect entrance™
telephoneentry.co.uk
9.2
Automation Control / Volt Free
TVPB240/AUTO/0103
Connector Block JP4
Relay 1
10
9
8
7
6 NC
5 C
4 NO
3 NC
2 C
1 NO
Exit button (dry contact)
activates relay 2,
terminals 4 - 6
EX2
EX1
Exit button (dry contact)
activates relay 1,
terminals 1 - 3
Relay 2
To Automation
Control
Fail Secure Locking
TVPB240/LFSEC/0105
Exit button (dry contact)
activates relay 2,
terminals 4 - 6
Connector Block JP4
Relay 1
10
9
8
7
6 NC
5 C
4 NO
3 NC
2 C
1 NO
240V AC
EX2
Exit button (dry contact)
activates relay 1,
terminals 1 - 3
IMPORTANT
EX1
Varistor (AC or DC supply,
polarity insensitive) or,
Diode (DC supply only, be
careful to respect polarity).
Relay 2
Varistor
+
12V Electric Release
Fail Secure
+12v 0v
EARTH
POWER SUPPLY
12V DC REGULATED
Fail Safe Locking
TVPB240/LFSAFE/0105
Exit button (dry contact)
activates relay 2,
terminals 4 - 6
Connector Block JP4
Relay 1
10
9
8
7
6 NC
5 C
4 NO
3 NC
2 C
1 NO
240V AC
EX2
Exit button (dry contact)
activates relay 1,
terminals 1 - 3
EX1
Relay 2
EMEX
Varistor
+
Breakglass emergency
exit device
IMPORTANT
Varistor (AC or DC supply,
polarity insensitive) or,
Diode (DC supply only, be
careful to respect polarity).
12VDC Electro Magnet
Fail Safe
+12v 0v
POWER SUPPLY
12V DC REGULATED
EARTH
© Copyright 2003 NACD Limited. All rights reserved.
TVTEL
®
the perfect entrance
™
telephoneentry.co.uk
PB/240
9.3
The TVTEL® software program is also designed to allow remote programming of TVTEL® PB
range panels and TVTEL® 240 Speed Dial panels. This is an abbreviated addendum and is to be
read in conjunction with the main TVTEL® 2K manual which goes into greater depth.
Select the
appropriate panel
type from the
drop-down list.
or click on New
Installation.
Click
Click
The New
Installation screen
opens.
Click to open drop down
menu.
Enter the required
information.
This is the telephone number of the TVTEL
panel.
Enter the 6 digit Serial No which is printed on a
white label located on the PCB of the TVTEL
panel.
Click on OK when finished.
The Details of
Installation screen
opens.
Click on
Parameters to
display the list of
sub-menus
Not all of the features of the top of the range TVTEL 2K are available on the TVTEL® PB and
TVTEL® 240 ranges.
© Copyright 2003 NACD Limited. All rights reserved.
TVTEL
®
the perfect entrance™
telephoneentry.co.uk
Click on
Configuration to
open the
Configuration of
Installation screen.
PB/240
9.4
For TVTEL PB panels
Automatic Voice Answer mode: This is the
default setting and assumes remote
accessing of TVTEL® panel from a
telephone handset for programming
purposes. There is no ring. Answers
automatically “Call from Door Panel” (or,
emits 3 short beeps). Communication link
established immediately between Caller
and Panel.
Automatic Modem Answer mode:
Recommended setting. Use this setting if
using a PC for programming purposes.
There is no ring. Integral modem answers
searching for a corresponding modem. If
no modem is detected within 15 seconds,
voice communication facilities are
established between the Caller and the
Panel.
Manual Answer mode: TVTEL PB/240 can
be programmed to ring to signal an
incoming call. The call is answered by
pressing the button on the panel –
simultaneously activating “handsfree”
communication with the caller.
TVTEL PB/240 can be called from any DTMF (touch-tone)
telephone provided, of course, the telephone or extension
number of its telephone line is known. This security feature can
be default set to either (a) Full Communication mode
(b) Discrete listen-in mode. Full Communication mode allows
the caller to immediately talk to the visitor and, if required, open
the door. Discrete listen-in mode disables the loudspeaker
enabling the caller to listen-in to the panel environment
undetected. The caller ie. Caretaker/Security can switch once
from Discrete listen-in mode to Full Communication mode
during the call by pressing the # on their telephone without
affecting the pre-programmed default mode.
Enter a Passcode to prevent unauthorised
persons from dialling into the panel. This
security feature will require persons who
dial into the panel to immediately enter the
passcode in order to access any functions.
For TVTEL 240 panels
TVTEL 240 Speed Dial offers a choice of
operational modes:
• Panel can call a maximum of 120no flats,
homes or offices – 2no telephone
numbers available per flat, home or
office (Default Setting 120 x2 mode).
• Panel can call a maximum of 240no flats,
homes or offices – 1no telephone
number per flat, home or office (240
mode).
The Speed Dial length is programmable
from 1–3 digits (Default = 3 digits).
• For 1–9 flats, recommended Speed Dial
length is 1 digit.
• For 10–99 flats, Speed Dial length
should be 2 digits.
• For 100–240 flats, Speed Dial length
must be 3 digits.
Examples of the instructions engraved on the panel. These
can, of course, be customized to suit your application.
ENGRAVING
If 1 digit speed dial (max 9 flats):
Enter 1 for flat 1, 2 for flat 2
etc and await answer.
If 2 digit speed dial (max 99 flats): Enter 01 for flat 1, 12 for flat
12 etc and await answer.If 3
If 3 digit speed dial (max 240 flats): Enter 001 for flat 1, 012 for
flat 12 etc and await answer.
TVTEL 240 Speed
Dial can also be
programmed via its
keypad. This is a
very useful feature
that can be enabled
or disabled to suit
each installation.
Check the box if
you want to disable
this feature.
Note: If you leave
this feature enabled,
it is strongly advised
that you change the
“General
Parameters” and
“Call-Button”
Programming
Codes.
If the TVTEL 240
Speed Dial is in the
default 120 x2 mode
ie it is servicing up to
a max of 120 flats,
homes or offices, it
makes sense to
enable the 2
telephone numbers
feature. The
Resident can now
supply you with a
2nd telephone
number so that
when the call to the
1st telephone
number is
unanswered or the
line is busy, TVTEL
will automatically dial
the 2nd telephone
number.
See main TVTEL 2K manual for information on those Configuration settings not explained here.
© Copyright 2003 NACD Limited. All rights reserved.
TVTEL
®
the perfect entrance™
telephoneentry.co.uk
PB/240
9.5
This is the SpeechUp level.
Default
Pic 13
Period Types
Click
TVTEL® PB / TVTEL®
240 panels have an
integral time, day,
date timeclock.
Check this box if you want to
use the integral timeclock
feature for trades facilities etc.
The Period Types
screen opens.
If you specify times
for Period 1 or
Periods 1 and 2, the
TVTEL panel will be
in NIGHT MODE
outside of these
times. The TVTEL
panel will also be in
“NIGHT MODE”
during Bank
Holidays, WeekEnds, Holiday Dates
etc.
Enter a tick if you want
the following features to
only operate during the
Active Period.
You can even create a
customised Week-end profile.
For example: Start = Sunday,
End = Sunday. Sunday is,
therefore, NIGHT MODE and
the trades button would not
function on the Sunday.
© Copyright 2003 NACD Limited. All rights reserved.
TVTEL
®
the perfect entrance
™
telephoneentry.co.uk
PB/240
9.6
Click on
Messages.
Click
The Parameters of
Voice Messages
screen is
displayed.
You can choose to
have the Messages
ON or OFF and, of
course, set the
volume level at the
panel. Refer to the
main TVTEL 2K
manual for
additional
information.
Click OK whan finished.
Click on Tones.
Click
The Call Progress
Detection screen is
displayed.
Default British
Telecom settings
are already set.
You should not
need to alter
anything on this
screen. Refer to
the main TVTEL 2K
manual for
additional
information.
© Copyright 2003 NACD Limited. All rights reserved.
TVTEL
®
the perfect entrance
™
telephoneentry.co.uk
PB/240
9.7
Click on CallButtons.
Refer to TVTEL 2K manual
Click
The Call-Buttons
screen is displayed.
TVTEL 240 allows
for up to 4no callbuttons as part of
the panel operating in
conjunction with, or
independently of,
the Speed Dial
feature.
Click OK when finished.
TVTEL PB is
delivered preset for
1, 2, 3 up to 14no
call-buttons
depending on what
was ordered.
TVTEL PB and
TVTEL 240 panels
still retain the
telephone
programming
feature ie you can
dial into the panel
from any landline or
mobile telephone to
effect programming.
For security
reasons, the CallButton
Programming
Codes (Function
91) can be
changed.
Simply click on the relevant cell and enter the new
code. In the future, to program Call-Button 1 from a
remote telephone handset, you will need to enter
1801 not 2001 as previously.
It is recommended that you also download a copy of the TVTEL PB and TVTEL 240 manual
“Programming via (DTMF) landline or mobile telephone” at www.telephoneentry.co.uk - see
Installation Guides section.
© Copyright 2003 NACD Limited. All rights reserved.
TVTEL
®
the perfect entrance™
telephoneentry.co.uk
PB/240
9.8
Access Pass
Reader
Click to open.
Select MLP3, MIR, LHF and click OK.
The title bar will
switch from this *…
*
…to this *. Click on
Access Passes to
open.
Click on Access Passes to open.
*
The Access Pass
screen opens.
The Access Pass No is always 7 digits.
Enter the holder details.
Which relays (doors, gates) is the holder
of this Access Pass authorised to open?
Click OK when finished.
© Copyright 2003 NACD Limited. All rights reserved.
TVTEL
®
the perfect entrance™
telephoneentry.co.uk
Alternatively click on
Series to create a
series of Access
Passes. Access
Passes are supplied
sequentially
numbered for ease
of administration,
identification and
higher security.
PB/240
Ne
w
Se
rie
s
Op
en
9.9
De
let
e
No
First No of Series.
Last No of Series.
Click OK when finished.
The listing appears.
Now click on each
Access Pass in turn
and enter the holder
details etc.
© Copyright 2003 NACD Limited. All rights reserved.
TVTEL
®
the perfect entrance™
telephoneentry.co.uk
Keypad Codes
PB/240
9.10
New
TVTEL® 240 only
Alternatively, if the
TVTEL® panel does
not include an
Access Pass reader,
you have the option
of using Keypad
Codes for all
authorised persons.
Enter the relevant
information and click
OK when finished.
© Copyright 2003 NACD Limited. All rights reserved.
TVTEL
®
the perfect entrance
™
telephoneentry.co.uk
PB/240
9.11
Click on Residents
to display the list of
sub-menus.
Click
Click on CallButtons to open the
Call-Buttons screen.
Click
TVTEL 240 only
Programming Call-Buttons
If the Call-Button has
been disabled there
will be a ✓ in the box.
Op
en
De
let
e
o
N
ns
to
ut
B
llCa
of
To program a
particular call-button
double click it or,
highlight it and click
on the Open icon.
The N0 of Call-Buttons you
have on your TVTEL will
be shown here.
The screen for
Call-Button 1 opens.
Call-Button no 1 can
have up to 4no
telephone numbers.
Enter the information
required. Click OK
when finished.
NO of seconds for handset to ring before TVTEL
ends the call and dials 2nd telephone number.
To disable this Call-Button, check this box..
TVTEL 240 only
© Copyright 2003 NACD Limited. All rights reserved.
TVTEL
®
the perfect entrance
™
telephoneentry.co.uk
PB/240
9.12
Call-Button numbers
2 – 14 can each
have a maximum of
2no telephone
numbers.
TVTEL 240 can be
used in any one of
the following 4
ways. Set this
feature in Button 1
screen.
Off = Only by directly entering a Speed Dial
number on the keypad, for
example: 68.
Restricted = Direct dialling but restricted to
preprogrammed telephone numbers ie.
Press the button to obtain a dial tone and then
enter any telephone or extension number
associated with a Speed Dial prefix.
Free = Direct dialling like a standard telephone
albeit that TVTEL is a “hands-free” stainless steel
panel telephone with a keypad. The button on the
panel is used to obtain a dialling tone prior to
dialling the number and then must be pressed
again to end the call.
Semi-Free = Exactly as for Free but when you
choose this option you must also set a
maximum number of digits allowed. For example:
Any number can be dialled so long as it is a local
number and not a national, international or mobile
telephone number.
TVTEL can cancel a
Call in progress, for
example, in the case
of visitor error.
No = Feature OFF. Calls cannot be stopped once
in progress. Usually used when TVTEL is used as
an emergency call-point.
Yes = Pressing the relevant button again cancels
the Call in progress. This is the default setting.
Cancel Button = Button usage is restricted to
only cancelling calls in progress. This
feature is often used when a button is fitted in the
panel and used solely for the purpose of cancelling
an erroneous call. This button would normally be
engraved “Cancel Call”.
© Copyright 2003 NACD Limited. All rights reserved.
TVTEL
®
the perfect entrance
™
telephoneentry.co.uk
PB/240
9.13
Call-buttons can
also be individually
associated with the
Period Type
previously set-up.
OFF = Button calls 24/7/365 ie whenever it is
pressed.
Day = Call; Night = Message 2. During “Day
mode” ie the Active Period, when the button is
pressed the call will be made. However, outside
of the Active Period ie “Night mode”, when the
button is pressed the call will not be made and
the visitor will hear the message “Your
correspondent cannot be reached at this time.
Please try later”.
Day = Relay 1; Night = Call
During “Day mode” ie the Active Period, when the
button is pressed, TVTEL will activate Relay no 1 ie
open the door. However, outside of the Active
Period ie “Night mode”, when the button is pressed
a call will be made.
Day = Tel no 1; Night = Tel no 2.
During “Day mode” ie the Active Period, when the
button is pressed, TVTEL will dial the 1st telephone
number. However, outside of the Active Period ie
“Night mode”, when the button is pressed, TVTEL
will dial the 2nd telephone number.
The program also
allows you to enter
information which
will facilitate
administration of the
system and which
can be printed out
as a hardcopy.
Programming Speed Dial Numbers
The Speed Dial
Numbers screen
opens.
Click
TVTEL
®
the perfect entrance
™
telephoneentry.co.uk
To program a
particular Speed
Dial double click it
or, highlight it and
click on the Open
icon.
PB/240
op
en
9.14
de
e
let
rt
po
m
i
o
n
d
ee
Sp
f
o
als
Di
The relevant Speed
Dial Number screen
opens. Enter the
telephone numbers
required.
Click on OK when
finished.
© Copyright 2003 NACD Limited. All rights reserved.
TVTEL
®
the perfect entrance
™
telephoneentry.co.uk
Hold Open
PB/240
9.15
Relays 1 and 2 can be latched ON as follows:
Screen in
Parameters section.
Go to
Enter a tick to enable this feature.
Hold Open
Command
After receiving a call from the door panel, the Resident/Correspondent needs to press the *
button on the telephone handset after entering the pre-programmed relay activation code and
hearing the message “The code entered is correct” (or, 3 short beeps) but before the end of the preprogrammed activation time of the relay in question.
Example:
DTMF release code for Relay 1 = 0
Activate Relay 1
Normally, Resident/Correspondent simply presses the 0 button on the telephone handset to
activate relay no 1 for the X no of (pre-programmed) seconds. To latch open relay no 1, the 0 must
be followed, after hearing the message “ Please Enter ” (or, 3 short beeps),
Hold Open
Command
by the *.
Activate Relay 2
DTMF release code for Relay 2 = 2
Normally, Resident/Correspondent simply presses the
2 button on the telephone handset to
2
activate relay no 2 for the X no of (pre-programmed) seconds. To latch open relay no 2, the
must be followed, after hearing the message “ Please Enter ” (or, 3 short beeps),
by the
Hold Open (Relay 2)
*.
Activate
Relay 2
Hold Open Command
* button must be pressed before the end of the pre-programmed activation time for
the relay in question. Therefore, if relay n 1 is programmed to activate for 8 seconds, the *
Clearly, the
o
Hold Open
Command
button must be pressed before the end of the 8 seconds.
It is also possible to latch open both relays simultaneously by pressing
short beeps)
2
“ Please Enter ” (or, 3 short beeps) followed by
*
0
“ Please Enter ” (or, 3
before either relay activation
has timed out.
To unlatch, simply enter into communication with the TVTEL door panel by either dialling in from
a telephone handset or receiving a call from it. Press
return to standby status.
0 for relay n
o
1 or
Activate Relay 1
2 for relay n
o
2 to
Activate Relay 2
Activation of either relay 1 or 2 as a result of keypad usage will also cancel hold-open ie cause
relevant relay to return to standby status.
TVTEL
®
the perfect entrance
™
telephoneentry.co.uk
PB/240
9.16
Additional Information
For information on
the following, please
refer to the main
TVTEL 2K manual.
© Copyright 2003 NACD Limited. All rights reserved.
(1)
(2)
BT (Ex-Directory) standard single line PBX jack master socket within 50 metres of
TVTEL panel. Call BT on 150 to have “Ring Back Prompt” removed.
or
PABX extension of the internal telecommunications network of a Company.
Socket to be analogue type.
®
TVTEL 2K
Connections:
Telephones:
(1)
(2)
(3)
Standard analogue DTMF “Touch Tone”
Mobile telephone
Cordless telephone
Note: Pulse Telephone compatible.
REN Loading:
=1
Maximum REN on any PSTN line = 4.
If any 3rd party equipment connected in parallel, for example:
burglar alarm, socket etc. REN loading limit must not be exceeded.
Power Supply:
12VDC / 2 AMP REGULATED
Power Consumption:
300mA at 12VDC
CE Norms:
EN60950
EN55022 Edition 98 Class B
EN55024 Edition 98 Class B
Telecommunications Norms:
CTR21
Operating Temperature:
-35°C to +50°C non-condensing
Number of Relays:
2 (+ 5VDC trigger output, adjustable 1-300 secs)
Relay Timers:
Relay 1
Relay 2
=
=
1 - 300
1 - 300
secs
secs
Both relays with ON/OFF period controlled latch mode possibility.
Relay Contact Ratings:
Relay 1
=
2 Amps at 12V DC
1 Amp at 24V DC
Relay 2
=
2 Amps at 12V DC
1 Amp at 24V DC
Request to Exit:
2 (N.O. contacts)
Programming:
PC running Windows 98, ME, 2000 or XP. TVTEL 2K software is available on CD-ROM or via download.
(1) From a COM Port of a Laptop or PC to Connector CN6 on the PCB of the Panel using the cable
with DB9 connectors supplied (RS232 bus, 38400 bps).
or
(2) Remotely from a PC via an analogue modem (maximum speed 33600 bps) via the PSTN (British
Telecom network) or internal PABX.
System Capacity:
2000 main telephone numbers or extensions + 2000 2nd telephone numbers.
Keypad entry codes:
1 no. per resident = 2000
Trades via keypad code(s):
Yes
Trades via proximity key(s):
Yes
Simulated Trades:
Yes
Keypad code length:
3 - 8 digits, any mix
Trades-button:
Yes (Time Profile = Door Panel)
Access Pass Reader(s):
Optional as integral part of TVTEL® program, capacity 2000 no proximity fobs, radio transmitters etc..
Non-Volatile memory:
Yes
Time, Day, Date, Calendar:
Yes
Material:
BS316 grade stainless steel with anti - vandal stainless steel security screws.
Default Parameters “Factory Settings”
Relay No. 1 activated by:
Telephone handset code
Operational time (seconds)
0
5
Relay No. 2 activated by:
Telephone handset code
Keypad on panel code
Operational time (seconds)
2
4444
5
Operational mode
Controlled Access - 24hrs
Managing Agent keypad code
Installation Company keypad code
Communication time (seconds)
Handset rings for (seconds)
Panel rings for (seconds)
Incorrect keypad entries prior to lock-out
Keypad lock-out for
Door “Free Access” times
Audio messages
Ring tones
Busy tones
Off
Off
60
25
6
Unlimited
Off
Off
On
BT settings
BT settings
N.A.C.D. Limited Unit 10, Avebury Court, Mark Road, Hemel Hempstead, Herts HP2 7TA.
TEL: 01442 211848 FAX: 01442 212776 EMAIL: [email protected] WEB: www.nacd.co.uk
www.telephoneentry.co.uk
Our policy is one of continuous product improvement, we reserve the right to change specifications and prices without notice. All information is given in good faith. No responsibility can be accepted for errors, omissions or incorrect
assumptions. Picture reproduction of products are within the limitations of both colour and black and white printing and are intended as a guide only. © Copyright 2003 N.A.C.D. Limited. All rights reserved.