1
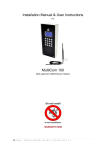
Installation Manual & User Instructions
For
MultiCom 500
Multi resident GSM Intercom System
1|Page
Multicom500 install instructions v2
Contents
Section
1
2
3
4
5
6
7
8
9
10
11
12
13
14
2|Page
Description
Introduction
Getting started
SIM card
Wiring
Keypad / onscreen programming
Adding subscribers
Programming engineering features
PC Programming
Testing
SMS programming
Installation
Operation
Factory Default
Fault finding
Multicom500 install instructions v2
Page
3
3
3
4
5
5
6
8
8
9
10
10
11
11
1. Introduction
This GSM intercom uses the cellular networks to dial pre-programmed telephone numbers
when an apartment number is called or family name is selected from the directory.
The 500 model will dial 3 numbers for 500 apartments. These numbers can be fixed line
telephones or mobile cell phones or both.
Any phone which receives a call from the intercom can activate a built in relay, which can be
connected to an electric door release or automatic gate system.
2. Getting Started
1) Before installing the unit on site, PROGRAM AND TEST IT ON A BENCH. This system
should only be installed by an access control professional, according to the wiring, fire
and security regulations of your country. The system will not be covered under
warranty by improper installation.
2) Use the keys supplied to open the front door to allow access.
3. SIM Card
1) The 100 model will operate on a standard 2G network. The 500 unit will also work on
a 3G network as well as 2G.
2) For multi apartment systems experiencing heavy use, it may be advisable to
purchase a contract SIM card with inclusive monthly minutes in a calling plan. A data
SIM is not a requirement. The intercom calling time can be set to limit the calling time
for each use, which will help ensure lowest possible calling times.
3) Ensure the SIM card has calling credit, and can make and receive voice calls in a
mobile phone.
4) If the SIM has a pin code request active, disable this in a phone first.
3|Page
Multicom500 install instructions v2
5) If the SIM card was purchased along with a phone, then it may be locked to that
phone. Ask your network provider to unlock the SIM so that it can be used in another
device.
6) Insert the working SIM card and connect the antenna as shown below BEFORE
connecting the power.
close
open
4. Wiring
Connect power to the unit as per diagram below.
Notes:
1) Do NOT use any other power supply other than the type supplied with the device.
2) Avoid installing the power supply more than 6 meters (18 feet) away from the
intercom, otherwise voltage drop and noise on the power cables will cause unstable
operation.
3) Do NOT connect this power supply to any electric locking device. Electric locks
should be powered from their own power adaptor.
USB port
24v d.c.
N/O
COM
Not used
N/O
COM
Not used
close
open
Relay 2
(Press #)
+ 12-24v
DC
Relay 1
(Press *)
LCD screen contrast adjust
WARNING: Current draw when in operation spikes at up to 2 amps. Do not use alarm
cable or CAT5 cable to connect power to this device.
Up to 2 metres (6 feet) – Minimum 0.5mm2 (20 gauge)
Up to 4 metres (12 feet) – Minimum 1mm2 (16 gauge)
Up to 8 metres (24 feet) – Minimum 1.5mm2 (14 gauge)
4|Page
Multicom500 install instructions v2
5. Keypad / On Screen Programming
To use the keypad programming method, the following keys are used…
F1 = Menu / Exit
F2 = Delete
F3 = Change abc/ABC/123 function key
* = UP
# = Down
= Enter / select
6. Adding Subscribers
To add a subscriber, first you must enter programming mode….
1) Press F1
2) Enter the default programmers code 123456
3) Press the bell / call button
4) Press * or # to select SUBSCRIBER
5) Press the bell / call button to select
6) The screen will look like this..
You may enter a flat or apartment
address which can be between 1 and 6
digits long.
7) Press the bell / call button to
proceed.
8) The screen will change to this. You can
now enter individual name and telephone
numbers for each subscriber. Move the
cursor position by pressing * or #.
Use F3 to change from capital letters to
small letters and numbers.
Enter Subscriber
ID:_____________
Inh:N
ID:_1______
N: Mr Jones
1: 0987654321
2: 0123456789
Use F2 to delete, call button to confirm, and F1 to exit again. 0 key can be used to insert a
space.
5|Page
Multicom500 install instructions v2
7. Programming Engineering Features
Under the manager settings, the diagram below illustrates the settings which can be made
on the unit…
Change password
Subscriber settings
New___________
Confirm___________
Enter subscriber ID
ID:_____________
Manager phone
System Settings
Change password
Manager phone
Talking time
Greetings
1._______________
Talking time
03 Minutes
Greetings: User
Enter new programming password and
confirm it.
If you have a building manager or guard or
reception you want visitors to call in
difficulties, please enter it here. Pressing
will directly call this number.
Limit the call time to reduce charges. Some
land line calls will only hang up when this
time expires. Recommend 1 minute.
Select or write your own welcome message
or greeting here.
Press * or # to edit
Volume Settings
Mic. volume
Speaker volume
Manager
Subscriber
SMS
Mic. Volume
<-****.…. +>
Manager Settings
Speaker Volume
System settings
Volume settings
Calling settings
Door settings
<-****.…. +>
Open by password
Enabled
Set the microphone sensitivity on the door
unit. If interference is prominent, reduce this
setting.
Set the speaker volume. Note: excessive
speaker volume can cause phone user to
hear echo. Reduce this to rectify.
If you want users to be able to use the
keypad for coded access, enable this
feature.
Opening password
Door Settings
Password:123456
Open by password
Opening password
Door opening time
Door relay type
Door open time
(03) seconds
Door relay type
Normally open
Calling Settings
Calling time
Calling time
Calling by list
Incoming call
(30) seconds
Normally open for strike locks and electric
gate systems. Normally closed for magnetic
locks.
Sets the time unit will spend calling a
number before stopping and dialling the
next. Use this to avoid voicemail or
answering machines from picking up.
On
Incoming call
Auto answer: Off
Wait rings: 3
Ringer: Off
Enable incoming call if you wish to enable
the unit to receive an incoming call. This can
be used to allow residents to call the guard,
and allow users to open the door by calling.
SMS Settings
Enable to allow remote programming by
SMS text message.
SMS settings
On
6|Page
Specify relay hold time. 1 second
recommended for strike locks. 4-6 seconds
for magnetic locks.
Enabling will allow users to view list of
residents names with an on-screen directory,
pressing * and # to scroll.
Calling by list
SMS Settings
Specify the code you want users to enter.
One code for all users.
Multicom500 install instructions v2
8. PC Programming
Software versions later than V4.04 can be programmed by PC software, via USB link.
Please follow the steps as outlined…
1) Install the PC programming software. Contact your distributor for the installation file.
2) Power off the intercom, ensure SIM is inserted and antenna connected.
3) Connect USB cable to the port closest to the power connections.
4) Power on the intercom.
5) Open the PC programming software which will look as follows…
6) Select a COM port, enter the default password 123456 and press connect as shown
below…
TIP: You may need to try this with several COM ports on your PC in order to find the
exact COM port which is actually connected via USB to the intercom.
7|Page
Multicom500 install instructions v2
7) If any of the manager settings are changed on the software, you will then need to
click on the SET button for that corresponding section in order for the new settings to
be uploaded as shown…
8) New subscribers or residents can be added, deleted or changed easily by this
software. If the intercom has already previously been programmed, click
DOWNLOAD, and the list will appear on screen. New subscriber details are added in
the boxes along the bottom of this section in conjunction with ADD, EDIT and
DELETE buttons at the side.
TIP: When finished, remember to click UPLOAD to save the new details to the intercom.
9) When all programming is completed, press DISCONNECT, then power off the
intercom, disconnect the USB cable, and power ON again.
9. Testing
The unit should now be ready for testing.
1) Enter a test apartment number or select the test number from the on screen directory
if it is enabled, and press call.
2) The unit should now be dialling the number.
3) Answer the phone, and check there is 2 way speech.
4) Press the * button. The screen should display: ”The door is opened” and the relay
should click.
8|Page
Multicom500 install instructions v2
9. SMS Programming
This system is capable of being programmed remotely by SMS. This is useful for adding or
changing numbers particularly on an on-going basis.
Each SMS text must start with the pass code, followed by a #, followed by a command,
followed by a #, followed by data in the following format..
Passcode#command#data#
9.1 Add a subscriber
Passcode#20#ID,name,telnumber1,telnumber2,0#
Passcode
Function
add
subscriber
Apartment
number
Name of
resident
0= enabled
1= disabled
Telephone
numbers
9.2 Change a subscriber
Passcode#21#ID,name,telnumber1,telnumber2,0#
Passcode
Function
change
subscriber
Apartment
number
New name
of resident
0= enabled
1= disabled
New
telephone
numbers
9.3 Delete a subscriber
Passcode#22#ID#
Passcode
Function
delete
subscriber
9|Page
Apartment
number
Multicom500 install instructions v2
Additional SMS commands are shown below (SMS format assumes the standard default
123456 manager code has not been changed. If it has, replace this with the new code.
Description
Format of SMS
Restore default passcode
Change passcode
Set managers phone number
Set talking time
Set door open by password
Set door open time
Set door relay type
Set calling time
Calling list enable / disable
Enquire subscriber
123456#01#123456#
123456#02#newcode#
123456#03#phonenumber#
123456#09#?#
123456#12#1#password#
123456#13#?#
123456#14#?#
123456#15#??#
123456#16#?#
123456#23#?#
Comment
6 digit code
? = minutes, 1-99.
1 = enable, 0 = disable
? = seconds, (2-99 sec)
0 = N/O, 1 = N/C
?? = seconds (25-99)
0=disabled, 1=enabled
? = apartment address
Default
123456
N/A
N/A
3 mins
N/A
3 secs
0 (N/O)
25
0
N/A
10. Installation
You may now install the system onsite at the customer location and re-test the features. If
the unit experiences problems onsite, this will likely be due to insufficient reception, or
excessive power cable length.
TIP: Keep the antenna higher than the speech unit. This will reduce likelihood of radiation
from the antenna distorting the audio quality.
11. Operation
Directory calling – If this is enabled, the visitor can press * or # to scroll through resident
names and select the person they wish to speak to.
Apartment number calling – If the visitor knows the apartment number they wish to call,
they can enter that apartment number on the keypad and press call. The resident can speak
with the visitor and press * on their telephone keypad to trigger relay 1, or # to trigger relay 2.
Keypad access – If enabled, residents can enter a code on the keypad in order to gain
access. Enter the code followed by F1.
Calling by phone access – If enabled, the intercom can be called from a subscriber phone
and it will automatically trigger the relay 1 without answering and end the call.
Call the manager / reception – If a manager number is entered, pressing the call button will
directly call the managers phone number.
10 | P a g e
Multicom500 install instructions v2
12. Factory Default
The default settings can be restored on the unit by the following means.
Caution, factory default will clear all telephone numbers and subscriber names from the unit.
Press…
F2 * * * # # # Call
13. Fault finding
Q: The unit will not power up.
A: Check with a multi-meter the voltage on the terminals and check polarity.
Q: The unit is showing no carrier or no SIM.
A: Check the SIM card is seated correctly. Switch off power, remove and re-insert SIM carefully.
Check the SIM has credit, can make and receive calls in a cell phone, and is not locked to a cell
phone nor has a pin code request on it.
Q: The unit is leaving voicemail on users phones.
A: If users are pressing end call, the unit will automatically connect to the voicemail. If they want it to
call the second number, they should simply ignore the call. If this is not the problem, decrease the
timing of the “Calling Time” as per instructions.
Q: The unit is calling users, but when they press the * key the lock is not operating.
A: If you can hear the relay clicking when the * key is pressed, then the unit is working normally. The
problem will then be with the wiring between the relay and the lock or gate system. Consult with a
professional door or gate install company to ensure it is wired according to local fire, safety and
electrical standards.
Q: The unit is calling users, but the relay does not click when they press * key.
A: Please verify that the user is indeed pressing the * key as many users get this mixed up with the #
key on their phone. Check reception level. If reception is poor DTMF analogue tones may not work.
Take steps to improve reception.
Q: Audio buzzing can be heard on user’s phones.
A: Reduce the microphone gain on the door phone. Increase the height of the antenna, or move it
further from the door station. Change network to improve reception. Low reception will cause
increased radiation from the antenna, affecting the microphone audio quality.
11 | P a g e
Multicom500 install instructions v2