1
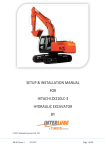
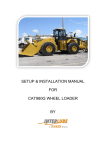
SETUP & INSTALLATION MANUAL FOR CAT308D CR EXCAVATOR BY ©2012 Interlube Systems Ltd. UK IM 001 Issue 1 9/3/2012 Table of Contents Title: Page: Ports/Bearings Fitting and Lubrication Charts 3 HDI System Installation Layout 5 List of Abbreviations 6 CAT 308D Excavator System Layout 7 System Installation Guide 8 Bill of Materials 23 Components Layout Description 25 IM 001 Issue 1 9/3/2012 Page 2 Of 25 Ports/Bearings Fitting and Lubrication Charts Output Port No. Feeds Valve No. SPL10K Primary Divider Valve Port 1 2 To SPL08 Divider Valve Port 2 5 To SPL06 Divider Valve Port 3 4 To SPL06 Divider Valve Port 6 3 To SPL06 Divider Valve Port 10 1 To SPL08 Divider Valve Output Port No. Feeds Bearing No. SPL08 Secondary Divider Valve (Valve 2) Port 1 17 To Front Slew Bearing Port 2 16 To Back Slew Bearing Port 3 18 To Ram Bearing Port 4 15 To Lift Ram Bearing Port 5 19 To Inner Slew Bearing Port 6 14 To Lift Ram Bearing Port 7 20 To Offset Slew Ram Port 8 13 To Lift Ram Bearing Top Output Port No. Feeds Bearing No. SPL06 Secondary Divider Valve (Valve 5) Port 1 10 To Bucket Pin Top Left Port 2 9 To H Frame (Bucket Linkage) Pin Port 3 11 To H Frame Ram Bottom Pin Port 5 12 To Bucket Pin Top Right IM 001 Issue 1 9/3/2012 Page 3 Of 25 Output Port No. Feeds Bearing No. SPL06 Secondary Divider Valve (Valve 4) Port 1 22 To Dipper Stick Main Bucket Pin Port 2 21 To Dipper Stick Arm Linkage Pin Output Port No. Feeds Bearing No. SPL06 Secondary Divider Valve (Valve 3) Port 1 7 To Dipper To Boom Ram Top Bearing Port 2 6 To Dipper To Boom (Knuckle) Main Pin Port 3 8 To Dipper To Boom (Knuckle) Main Pin Port 6 5 To Dipper To Boom Ram Top Bearing Output Port No. Feeds Bearing No. SPL08 Secondary Divider Valve (Valve 1) Port 1 3 To Main Boom Pin Port 2 2 To Main Boom Bearing Port 6 1 To Main Boom Bearing Port 7 4 To Dipper To Boom Ram Bottom Point Note: 1. Caution:Switch off the vehicle engine and remove the ignition key before starting work on the machine installation. This will prevent accidents occurring on site. 2. Before commencing installation of this lubrication system, it is important that the owner/operator ensures that all the bearings are pre-filled with the correct lubricant. 3. It is important to use recommended grease for the vehicle. DO NOT mix different types of grease together in Pump System. Keep them separate. (Acknowledge: Grade 2 grease is recommended for use in HDI Pump) IM 001 Issue 1 9/3/2012 Page 4 Of 25 (Acknowledge: Grade 2 grease is recommended for use in HDI Pump) IM 001 Issue 1 9/3/2012 Page 5 Of 25 IM 001 Issue 1 9/3/2012 Page 6 Of 25 IM 001 Issue 1 9/3/2012 Page 7 Of 25 System Installation Guide Location of 24Vdc HDI Pump being placed on top right hand side of CAT 308 vehicle. View from the back of the vehicle. View from the side of the vehicle. Note that: HDI 3 Litres electric pump mounted on CAT 308D pump bracket. See HDI Set up Information (ISF 294 Issue 12/09 for wiring and programming details) IM 001 Issue 1 9/3/2012 Page 8 Of 25 Location of Pump override switch (Green Button) has been placed next to the driver seat. Note that: To operate override switch, press button for approximately 5 seconds. When pump operates, the light will be ON. Component detail view below the vehicle key. IM 001 Issue 1 9/3/2012 Page 9 Of 25 Mounting positions of: 10-Ways Primary Valve (Top), 8-Ways Valve 1 (Bottom Top) 8-Ways Valve 2 (Bottom Lower) at Caterpillar Boom Arm. Side angle view of the mounting Valves. IM 001 Issue 1 9/3/2012 Page 10 Of 25 Lubricant delivered from 8-Ways Valve 1: Bearing point 1 Bearing point 2 Bearing point 3 lubricated From Valve 1. IM 001 Issue 1 9/3/2012 Page 11 Of 25 Bearing point 4 lubricated From Valve 1. Bearing point 13 lubricated From Valve 2. IM 001 Issue 1 9/3/2012 Page 12 Of 25 Both bearing points of 14 & 15 lubricated from Valve 2. Top section: Bearing point 19 & 20 lubricated from Valve 2. Bottom Section: Bearing point 16 & 17 lubricated from Valve 2. IM 001 Issue 1 9/3/2012 Page 13 Of 25 Bearing point 16 lubricated From Valve 2. Bearing point 17 lubricated From Valve 2. IM 001 Issue 1 9/3/2012 Page 14 Of 25 Bearing points 18 lubricated From Valve 2. Bearing point 7 lubricated From Valve 3. Mounting position of Valve 3 (6-Ways Valve) at Caterpillar top Right Dipper Stick. IM 001 Issue 1 9/3/2012 Page 15 Of 25 8 mm “High Pressure Pipe” (Being used on most of the fitting). Bearing point 5 lubricated from Valve 3. Bearing point 6 lubricated From Valve 3. IM 001 Issue 1 9/3/2012 Page 16 Of 25 Bearing point 8 lubricated From Valve 3. Bearing point 5 lubricated From Valve 3. Bearing point 7 lubricated From Valve 3. (Top detail view). IM 001 Issue 1 9/3/2012 Page 17 Of 25 Bearing point 8 lubricated From Valve 3. Mounting position of Valve 4 (6-Ways Valve) located at Caterpillar bottom left Stick. “Steel Helix” used to protect the high pressure rubber hose. IM 001 Issue 1 9/3/2012 Page 18 Of 25 Installation below shows the main bucket pin and H-frame linkage pin bearings drilled and EXT-1 blocks fitted. For details on how to do this, see IM 004 manual. For installation without drilling these bearings, contact Interlube Systems Ltd. for details. 10mm thick wall pipe is required for “Main Bucket Pin”. 10 mm thick wall pipe before being painted IM 001 Issue 1 9/3/2012 Page 19 Of 25 Mounting Valve 4 (6-Ways Valve) with 10 mm thick wall pipe to be fed into main bucket bearing points of 21 & 22. Bearing point 21 lubricated From Valve 4. Bearing point 22 lubricated From Valve 4. IM 001 Issue 1 9/3/2012 Page 20 Of 25 6 mm steel pipe. Mounting Valve 5 (6-Ways Valve) at the “H-frame”. 8 mm “High Pressure Pipe”. Bearing point 10 lubricated from Valve 5. Bearing point 12 lubricated from Valve 5. Bearing point 11 lubricated from Valve 5. Bearing point 9 lubricated from Valve 5. IM 001 Issue 1 9/3/2012 Page 21 Of 25 Stauff Clamps were being used most of the time during the installation period as “Tube Support” in order to hold the tube in position. Note: As a guide on these typical applications, it is advisable that the pump default run time to be set to 5 minutes. Each individual installations/applications may require specific settings. We recommend that new applications be initially monitored to ensure adequate lubrication of all bearings on the system being supplied. IM 001 Issue 1 9/3/2012 Page 22 Of 25 Bill of Materials Part No. No. Description Qty. 1 HDI 3201P HDI Pump with Moulded Reservoir (1 Element/PRV) 1 2 CAT 308 Pump Bracket CAT 308 Pump Bracket 1 3 HDI-PB-24 24V Push Button (Green) 1 4 ELECTRICAL SWA 28RFP Pushbutton connectors (SWA 28RFP) 4 5 HDI-13321-1 Splash proof Fuse Holder 1 6 FU2 5AMP 5 Amp Blade Fuse 1 7 SPL10K Primary Divider Valve with Indicator Pin 10 outlet 1 8 SPL06 Divider Valve 6 outlet 3 9 SPL08 Divider Valve 8 outlet 2 10 HP 1/8 BSP GREASE NIPPLE HP Grease Nipple (1/8") 1 11 HP TEE 1/8 BSP MMF PTFE TOP HP Tee : 1/8"bsp m/m/f hp 1 12 SPL-BP6 SPL06 Weld Plate 3 13 SPL-BP8 SPL08 Weld plate 2 14 SPL-CV-LL 6mm OD Check valve (for divider valves/Valves) 23 15 SPL-CN-6-LL 6mm OD Compression Nut for Check valve 27 16 SPL-OL-6-LL 6mm OD Steel Olives (for the SPL Check Valves) 27 17 SPL-CP-10 SPL Divider Valve Blanking Plugs 13 18 CF6-1-1/8 6mm OD x 1/8" BSP(M) Standard Connector 4 19 CFU-6-6 6mm OD x 6mm OD Equal Connector 2 20 CF6-2-1/8 6mm OD x 1/8" BSP (M) Elbow Connector 15 21 CF6-1-1/4 6mm OD x ¼" BSP (M) Standard Connector 2 22 EXT-1/8-1 1/8" BSP- M x F Short Extension (23mm) 3 23 CFU-6-10 10mm OD x 6mm OD Standard 4 24 EXT-020029 1/8” BSP(F) x 1/8” BSP(M) Long 90 Adapter 1 25 EXT-20028 1/8” BSP(F) x 1/8” BSP(M) 45 Deg Adapter 2 26 TML-8.6-FE HP Sleeve (8.6mm Pipe) 48 27 TML-8.6-ST HP Stud (8.6mm Pipe) 48 28 TML-8.6-2.3F HP Hose 8.6mm OD (grease filled) 50 29 TW-S Cable Ties Small 300 30 HLX-P-12 Plastic Helix (12mm)- 25m coil 25 IM 001 Issue 1 9/3/2012 Page 23 Of 25 No. Part No. Description 31 HLX-S-10 Steel Helix (small) 10 32 HLX-S-20 Steel Helix (Medium) 2 33 - 6mm Spring Washer (flat profile) 28 34 M10 X 6MM WASHERS Penny Washer (6mm bore) 4 35 BOLTM6X10MM M6 Socket Head (12mm) 4 36 BOLTM6X40 M6 Socket Head (40mm) 6 37 BOLTM6X70 M6 Socket Head (70mm) 2 38 AB1 1 Way Anchor Valve 1/8" BSP Steel Plated 1 39 EXCT 1 Welding Valve - 90 degree 1/8" BSP 2 40 TACKVALVE Threaded Weld Valve (M6 Thread) 10 41 SC-9.5-S Stauff Clamp 9.5mm Single 10 42 PC-6-10 P Clip - 6mm 2 43 PC-13-10 P Clip - 13mm 2 44 STP-6-1 6mm OD Steel Bundy Pipe 8 45 STP-10-3.5 Thick wall Steel Tube 4 IM 001 Issue 1 9/3/2012 Qty. Page 24 Of 25 IM 001 Issue 1 9/3/2012 Page 25 Of 25