1
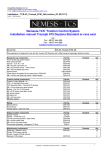
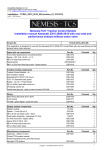
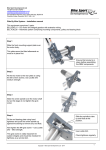
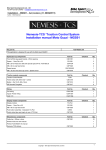
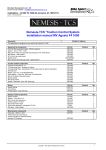
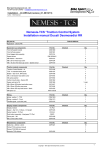
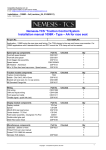
Bike Sport Developments Ltd – UK Tel 0044 (0)1327 263942 – [email protected] Installation – TCS-4C_GSXR_K7.AA (revision_02, 08/12/11) Author – Mick Boasman Nemesis-TCS ‘Traction Control System Installation manual Suzuki GSXR1000 K7 with Race Seat Kit part No. TCS-4C_GSXR_K7.AA.xls This application is designed for use with the Suzuki GSXR 1000 K7 fitted with race seat fairing Speed pick up components Suzuki GSXR front wheel speed sensor mounting bracket M8 x 50 Cap head screw zinc Speed sensor M8 Shoulder screw - 10mm dia shank M6 x 16 Zinc Hex head cap screw - Speed sensor Part No CSD1374 CSF1054 23813030401 CSF1060 CSP1019 Checked Qty 1 2 1 5 1 Traction module components Traction Control Module - 4c Coil simulator module TCS Back plate - GSXR1000 - Type 1 plate M8 Nylock nut Bobbin - Dia 20x15, M8 female/male M8 x 16 low head zinc dome screws Part No CSP1048 CSP1050 CSD1372 CSF1057 CSP1047 CSF1058 Checked Qty 1 1 1 4 4 4 Wiring Main Wiring Front Wiring Throttle signal - quick link (red) Part No CSW1386 CSW1371 CSP1015 Checked Qty 1 1 1 Display module components Display module Spacer - 11mm Dia x 6.5 M6 x 40 s/s cap head screw - black Push button assembly - blue/green TC-Pod TC-Pod mount bkt - triple clamp Spacer D12.8, ID8.2, L9.5 M8 x 40 Cap head screw zinc M3 x 8 Hex button head Part No TC-Pod CS1258 CSP1025 CS972 CSD1399 CSD1384 CSF1065 CSP1018 Checked Qty 1 1 1 1 1 1 1 2 Miscelaneous components Cable ties - 200mm x 4mm Printed TCS over view manual Printed TCS GSXR K7 AA manual Nemesis-TCS stickers Part No CSP1021 Checked Qty 10 1 1 6 CSP1022 Copyright – Bike Sport Developments Ltd 2012 1 Bike Sport Developments Ltd – UK Tel 0044 (0)1327 263942 – [email protected] Installation – TCS-4C_GSXR_K7.AA (revision_02, 08/12/11) Author – Mick Boasman IMPORTANT – To be read by ALL installers and owners Notes – This kit is designed for use on bikes fitted with a ‘race type’ seat fairing where the 4 large sub-frame mounts are not being used by the rear aluminium frame extension. Power for the TCS system is via the Kill switch. After Kill-ON (bike in Run position) the TCS system needs 3 seconds to ‘boot up’, the engine will not start during this period. This kit uses the rear speed sensor on the gearbox. For customers who are not using our default sprocket ratio of 15/43 you will need the additional WinTC programming tool to change this. Terms of use The presence of the Nemesis-TCS does not take away the responsibility of the rider to operate the bike correctly within their own abilities, the track conditions and the laws of physics. The system is designed to achieve greater on-track performance by the use of power modulation during wheel slip events, but in no way should it be considered possible for the system to recover from every conceivable loss of grip. The onus for safety always rests with the rider to stay within his or her own abilities, and to ensure that the ‘on-bike’ equipment is programmed, setup correctly, and an appropriate TC level selected for the skill of the rider, the bike and the track conditions. This equipment is intended for racing or track day performance use only and where exhaust emission controls are not applicable. By installing and using the Nemesis-TCS you automatically indemnify Competition Systems Ltd, our suppliers and our authorised dealers from all first party or third party loss or damages. Normal components warranty is not affected Preparation. Remove these parts from the bike. All fairing panels Fuel tank Seat fairing Air box TC-Display pod Fitting: Mount the display pod to the angled bracket using the M3x8mm screws. This bracket for mounting the display is supplied straight. For optimum installation on the Suzuki you should bend to a 40deg angle until the display is aligned correctly, as seen here. Fit the angle bracket to the upper triple clamp bolt using the 9.5mm spacer and longer bolt we provide. The wiring can be used to damp out some vibration and also a foam pad may be fitted between the bracket and the triple clamp, for the same purpose. Take care to ensure full steering movement without collision with the display pod Mount the CS972 switch assembly to the clutch lever assembly cylinder clamp using the M6x40 bolt and spacer provided. Connect the CS972 switch assembly to the TCPod via the 4-way connector of the TC-Pod wiring Do not secure any wires in place at this stage, as there will be further wires added in this region. If installing a pit limiter switch, mount it on the right brake lever assembly. Copyright – Bike Sport Developments Ltd 2012 2 Bike Sport Developments Ltd – UK Tel 0044 (0)1327 263942 – [email protected] Installation – TCS-4C_GSXR_K7.AA (revision_02, 08/12/11) Author – Mick Boasman Front Wheel Speed: Your TCS kit comes with a dedicated bracket, sensor, spacers and different disc cap-head bolts. Remove the 5 bolts that secure the left brake disk in place and replace with the 5 new shoulder screws with higher profile. Fit to the manufacturer recommended torque and thread lock agent. Under no circumstances should any alternative bolts be used. Remove the two M8 spindle clamp bolts from the left fork and retain for future use. Use the two new longer M8x50mm bolts and bracket but do not at this stage tighten these bolts. Remove the rubber O ring from the sensor body and fit into the rebate of the sensor bracket. Apply a small amount of grease to the sensor body and push the sensor into the bracket. Lock in place using one of the M6x16 cap Check the gap between the sensor face and the surface of one of the new disc bolts, set to 1mm to 1.5mm and now tighten the two M8 bolts to the manufacturers recommended torque. The sensor maximum range is approx 4mm for smaller targets and 6mm for larger targets, therefore no other ferrous objects should be installed anywhere near this sensor These are safety critical components and could result in wheel locking, brake failure or TCS damage if fasteners come loose. IMPORTANT – Care should be taken when using paddock stands not to damage the wiring or sensor mounting Wiring The wiring provided in this kit comes in 2 parts to simplify the installation and enable crash damaged parts to be replaced without a major strip down. Wiring – Front section The front section wiring (part No.CSW1371) has connections for all of these elements 2C - Front speed sensor 2F - TC-Pod display 2G - Pit lane speed limiter switch 2E - PC communication point (4 way AMP) 2A - Chassis link 2B - Throttle signal (single wire) This wiring to connector 2A is to be routed along the right side of the bike 2B 1 2 3 2C 2A 2E 1 4 5 8 1 2 3 4 2F 2G Copyright – Bike Sport Developments Ltd 2012 3 Bike Sport Developments Ltd – UK Tel 0044 (0)1327 263942 – [email protected] Installation – TCS-4C_GSXR_K7.AA (revision_02, 08/12/11) Author – Mick Boasman Wiring / Front - Throttle The throttle input is the single wire 2B of this loom . This needs to be attached to the signal wire (pin A) of the standard bike throttle plate position connector using the red quick link provided in the kit, as shown in the steps below and the image to the right. Note that the signal wire is supplied long and may be shortened as necessary Signal wire The quick link is made up of three parts as seen here on the right: Using the green section with the slot, push it over the orange throttle signal wire of the bike loom until the wire rests at the bottom of the slot: The large red centre section must be fitted the correct way around or the link will not work. Locate the end with the sharp pointed tip protruding from the end of the outer body and screw this end onto the green section until it rests firmly against the wire. The sharp tip will pierce the outer sleeve but not sever the inner core of the wire: Strip back the sleeve of the throttle input wire on the TCS loom so that 8mm of inner metal core is exposed. Push this into the red cap as seen here on the right with inner core showing: Screw this cap and wire into the main body ensuring that metal inner core and wire cores are sandwiched and held securely. Shrink sleeving can be put over this quick link if required. Wiring / Front – TC-Pod display Connect the front wiring loom to the TC-Pod display via the 8 way connector 2F Wiring / Front – front wheel speed Route the front speed wiring 2C across the front of the bike and following the same route as the brake line to the left calliper, connect it to the front speed sensor. The wiring for sensor must be routed taking all of the following into consideration. Movement of forks Rotation of the steering Positioning of paddock stands Wiring / Front – PC connector The 4 way PC connector should remain accessible but securely cable tied to the existing harness. Wiring / Front – Pit limiter switch The 2 way pit limiter switch connector can be cable tied out of the way if not needed or plugged into the dedicated red switch assembly CSP1041 Copyright – Bike Sport Developments Ltd 2012 4 Bike Sport Developments Ltd – UK Tel 0044 (0)1327 263942 – [email protected] Installation – TCS-4C_GSXR_K7.AA (revision_02, 08/12/11) Author – Mick Boasman 4 1 8 D M 1 Q 2 3 C 2 1 H 1 1 K 2 B 2 1 4 2 3 8 5 R 1 2 1 A G 1 L 1 2 5 P 2 N 2 1 2 Fr o n t vie w 1 1 8 14 20 F 7 13 19 26 E Wiring – Rear section / Ignition coils Route this loom section initially along the left side of the bike following the standard wiring route, once in front of the battery, this loom section must re-route to the right side of the bike and on towards the coils. Note that there is very little space on the right between engine and frame, so unless you are willing to take the time to move components it will be necessary to route this wiring outside of the frame. The following 4 connections are all ignition coil INPUT signals from the bike to the TCS unit A - Connect to Coil 1 wiring from bike wiring loom B - Connect to Coil 2 wiring from bike wiring loom C - Connect to Coil 3 wiring from bike wiring loom D - Connect to Coil 4 wiring from bike wiring loom The following 4 connections are all ignition coil OUTPUT signals from the TCS to the drive the ignition coils E - Connect to Coil 1 on the bike F - Connect to Coil 2 on the bike G - Connect to Coil 3 on the bike H - Connect to Coil 4 on the bike IMPORTANT – It is vitally important that the coil inputs and outputs are connected correctly or the bike may not start on all cylinders, or may even damage the engine. Wiring – Rear speed Locate the connector of the rear speed sensor and use connections K and L to bridge this junction. In this way the rear speed signal is shared between the TCS module and the dashboard/ECU. The speed sensor connector is a 3 way black connector located above the gearbox to the left side of the bike. If you are unsure, trace the wire to the sensor which is located on the front sprocket cover. Wiring – Battery ground This vital connection M must be connected directly to the battery negative connector, not to the engine block or any other ground source. Wiring – Front link Connector P should be routed along the right side of the bike all the way to connect up with 2A from the front loom. Wiring – Quick shifter input Connector Q is available for use with most type of OFF/ON switch type quick shifter. Pin 1 – Vbat power Pin 2 – Ground Pin 3 - Signal Copyright – Bike Sport Developments Ltd 2012 5 Bike Sport Developments Ltd – UK Tel 0044 (0)1327 263942 – [email protected] Installation – TCS-4C_GSXR_K7.AA (revision_02, 08/12/11) Author – Mick Boasman For more information on quick shifter connections please refer to the ‘System manual’ Wiring – TCS module and ground Connect the main wiring loom to the TCS module. It is vitally important that the small ground wire with the 4mm eye (N) be connected securely to the M4 stud as seen here using the M4 Nyloc nut. Without this the module or coils could be damaged as well as TCS not functioning correctly. IMPORTANT – Failure to fit the ground securely can lead to misfire / engine not starting / TCS module damage. This is the main power ground for the coil system. This assembly is then held to the sub frame horizontally using the M8x 20 screws and M8 nyloc nuts and rubber mounts. If your bike still uses the aluminium rear sub frame please contact your distributor for an alternative installation kit IMPORTANT – Failure to fit the module in the orientation shown and mounted on a horizontal axis will significantly affect the functionality of the TCS system. Wiring – Coil correction device The module highlighted in this picture must be plugged in at all times. Without this the bike will stop within 2 seconds and identify an ignition coil error. The module requires no special mounting or orientation PC Setup Your TCS module should be loaded with the following bike : BIKE - Suzuki_K7_K8.BIKE TYRE – To suit your installation CONFIG - TCS_4C_Base_35_02.CONFIG Default rear sprockets for maps are: 15/43 Gear box teeth - 4 Status Position offset value – Stronger - 0.21 to 0.32 – Refer to WinTC View Data Normal - 0.32 to 0.37 – Refer to WinTC View Data Weaker - 0.37 to 0.47 – Refer to WinTC View Data Note : The WinTC installation guide can be found in the manual - Win-TC 4C manual_v2.05_a.pdf Copyright – Bike Sport Developments Ltd 2012 6