1
Track Interface Rev1.0
User manual
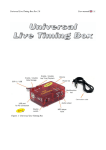
Figure 1: Track Interface
1
Track Interface Rev1.0
User manual
General index
1 Contents of the selling pack.............................................................................................................3
2 General description...........................................................................................................................3
3 Description of the Track Interface....................................................................................................4
4 Track Interface power supply...........................................................................................................6
5 Track Interface connections..............................................................................................................6
5.1 Connection to a DS bridge........................................................................................................6
5.2 Connection to a DS chrono.......................................................................................................6
5.3 Connection to a dead strip........................................................................................................7
5.4 Connection to Slot.it SCP-01 controller...................................................................................8
5.5 Connection to the Slot.it Telemetry Box...................................................................................9
5.6 Connection to other Track Interfaces........................................................................................9
6 Track Interface setting....................................................................................................................10
6.1 Setting: DS bridge lap counter sensor, dead strip sector sensor.............................................11
6.2 Setting: DS bridge sector sensor, dead strip lap counter sector..............................................11
6.3 Setting: DS bridge sector sensor, dead strip sector sensor......................................................11
6.4 Not allowed Setting................................................................................................................12
Warranty: two years. We retain the right to reject under warranty repairs of Track Interface showing
signs of tampering and/or not accompanied by the repair application (downloadable at www.slot.it )
totally filled in. This product is in accordance with RoHS guidelines. Do not dip it into water.
Completely conceived, thought up and realized by Maurizio Ferrari, Maurizio Gibertoni, Cristian
Anceschi and Stefano Giorgi of Galileo Engineering S.r.l., Via F. Cavallotti, 16 – 42122 Reggio
Emilia, Italy – www.slot.it – [email protected] If it does not work, blame it on us.
Slot.it and Slot.it logo are registered trademarks by Galileo Engineering S.r.l..
We thank you for choosing the Telemetry Box system. Before operating, please read this manual
attentively.
2
Track Interface Rev1.0
User manual
1 Contents of the selling pack
In the selling pack is the following material:
•
•
•
1 Track Interface system;
1 cable to connect a DS chrono to the Track Interface: “DS link cable”;
1 male jack-USB female plug cable to collect the signals given by the Track Interface and
bring them to the Telemetry Box: “Track to Telemetry cable”.
2 General description
The Track Interface is a system having the job to interface the Telemetry Box to the sensors (DS
bridge, dead strip...) which are on the track. In particular, it elaborates the signals given by the
sensors so that they can be read by the Telemetry Box, allowing the latter to carry out the expected
functions, such as: lap time playback and time and telemetry data storage.
Each Track Interface is able to manage the signals coming from two lanes, up to a maximum of two
sensors per lane (e.g. a dead strip and a DS bridge), allowing the user to choose the lap counter
sensor and the sector time sensor.
3
Track Interface Rev1.0
User manual
3 Description of the Track Interface
Figure 2: Track Interface: front view.
Figure 3: Track Interface: back view.
4
Track Interface Rev1.0
User manual
Figure 4: Track Interface: right side view.
With reference to the previous pictures, the following components can be distinguished:
1. “Bridge out” DIN plug: where a possible DS chrono can be connected by means of the "DS
link cable";
2. “Power” LED: it signals the presence of power supply;
3. “Lane 1” LED: it signals that the car in lane 1 has passed over a sensor. In particular:
•
one flashing: the car has passed over a sector sensor;
•
two flashing: the car has passed over a lap sensor;
4. “Lane 2” LED: it signals that the car in lane 2 has passed over a sensor. In particular:
•
one flashing: the car has passed over a sector sensor;
•
two flashing: the car has passed over a lap sensor;
5. double switch: it allows to choose the role of the sensors: lap sensor or sector sensor;
6. “External supply” power supply plug: female jack where to connect a 12V transformer,
with capacity at least 1A;
7. “Lane 1” female jack: female jack plug where to insert the male jack plug of the "Track to
Telemetry cable", in order to collect the signals given by the Track Interface concerning the
car in Lane 1;
8. “Lane 2” female jack: female jack plug where to insert the male jack plug of the "Track to
Telemetry cable", in order to collect the signals given by the Track Interface concerning the
car in Lane 2;
9. Dead Strips clamps: where to connect the cables bringing the signal from dead strips to the
Track Interface;
10. Ext. Supply clamps: where to connect the external power supply, taken from the track or
from a power unit;
11. “Bridge in” DIN connector: where to connect a possible DS bridge.
5
Track Interface Rev1.0
User manual
4 Track Interface power supply
The Track Interface can only be powered in one of the following ways:
1. by means of a DS chrono connected with socket (1);
2. by means of an external 12 V DC transformer (at least 1A) connected to female jack (6);
3. by means of an external power supply, whose source can be a bench power supply
connected to the terminal block (10). It must supply a voltage of 12V DC;
4. by combining the previous options.
Once the Track Interface is powered, the LED (2) throws a steady red light and the possible DS
bridge connected to the DIN connector (11) is powered, too.
In case that the track has got more than four lanes, it is advisable to supply all the Track Interfaces
by means of an external power unit connected to the clamps marked by the writing "Ext Supply".
5 Track Interface connections
The Track Interface can be connected to various devices and/or peripheral sensors. These are:
•
DS bridge sensor;
•
DS chrono;
•
dead strip sensor;
•
normally open switch;
•
Wincrono sensor [*];
•
Slot.it SCP-01 controller;
•
Slot.it Telemetry Box.
The sensors (lap and sector) must be positioned on the track at a time space of about six tenths of a
second.
[*] The Wincrono sensor requires a welding on the external shell of the female plug of the relative
wiring. Refer to the relative file with the instructions, downloadable from the website www.slot.it
5.1
Connection to a DS bridge
The Track Interface can be connected to a DS bridge. You only have to insert the DIN male plug of
the DS bridge's cable into the female plug (11), named "Bridge In", of the Track Interface. Once the
Track Interface is powered, the connected DS bridge is powered, too. Notice that the positioning of
the DS bridge on the track affects the correspondence between the LED (3) and (4) of the Track
Interface and the lanes, since the bridge itself decides the numbering order of the lanes.
5.2
Connection to a DS chrono
In order to connect a DS chrono to the Track Interface, the "DS link cable" DIN cable, included in
the package, must be used. You only have to insert the male plug at one and of the cable into the
"Bridge Out"(1) female DIN connector of the Track Interface, whereas the other male plug must be
inserted into the "SENSOR" female DIN connector of the DS chrono. This connection will allow
6
Track Interface Rev1.0
User manual
the driver to see on the display of the DS chrono the times obtained by the DS bridge. Moreover, if
the DS bridge has been chosen as lap counter sensor (see procedure at paragraph 6.1), the same
displayed times will be reproduced in the earphones, if a Telemetry Box has been connected to the
Track Interface.
5.3
Connection to a dead strip
The dead strip is a small piece of metal strip of the lane which has been electrically disconnected
from the rest. (See the following picture).
Figura 5: example of dead strips.
In order to pick up the signal from these strips, you only have to weld the end of an electric cable
into the part underlying the strip itself, whereas the opposite end must be inserted into the Dead
Strips clamps (9). This operation must be carried out for each dead strip. In order to obtain
consistency between the times recorded by the DS bridge and by the dead strips, the cables coming
from the dead strip of lane 1 are to be inserted into the clamps marked by number 1 in the Dead
Strip terminal block, those of lane 2 into the clamps marked with number 2. As to the polarity of
the signals, the cables can be reversed trouble-free.
7
Track Interface Rev1.0
User manual
Figure 6: example of the connection of the Track Interface to a dead
strip.
5.4
Connection to Slot.it SCP-01 controller
Figure 7: connection of the Track Interface to SCP controller.
In order to connect the Track Interface directly to a Slot.it SCP-01 controller, you need to use the
"Track to Telemetry cable" of the Track Interface, included in the pack, and the "Connection cable"
of the Telemetry Box, included in the pack of the latter. Firstly, you have to weld the latter cable to
the cartridge of the SCP-01 controller (for doing this, refer to the manual of the Telemetry Box,
paragraph 5.3). Then you only have to insert the male jack plug of the "Track to Telemetry cable" of
the Track Interface into the female jack plug (7) or (8), according as the car is positioned on the first
or the second lane. Then, for the connection to be complete, insert the male plug of the "Connection
8
Track Interface Rev1.0
User manual
cable" of the SCP-01 controller into the USB female plug of the "Track to Telemetry cable" of the
Track Interface. The final result is shown in figure 7.
5.5
Connection to the Slot.it Telemetry Box
In order to connect the Track Interface to the Slot.it Telemetry Box, you only need to use the "Track
to Telemetry cable" of the Track Interface, which can be found in the pack. You only need to insert
the male jack plug of the latter into the female jack plug (7) or (8) according as the car is positioned
on the first or the second lane. Then, for the connection to be complete, you only have to insert the
male plug of the USB white cable(10) of the Telemetry Box into the USB female plug of the "Track
to Telemetry cable" of the Track Interface. The final result is shown in figure 8. Once the Track
Interface is powered, the Telemetry Box is powered, too. The user can check it by making sure that
the LED (5) of the Telemetry Box throws a red light.
Figure 8: connection of the Track Interface to the Telemetry Box.
5.6
Connection to other Track Interfaces
Until now we have seen that a single Track Interface is able to manage only two sensors on the
same lane. What is to be done if the user wishes to use more than one sector sensor? It is necessary
to take another Track Interface and the "Sector Time Expansion Cable" (sold separately) and follow
this procedure:
1. Set the new Track Interface so that it manages the two additional sensors as sector sensors
(see how to do it in paragraph 6.3);
2. insert one of the male jack plugs of the Expansion Cable into the female jack plug (7) or (8)
of the Track Interface, according as the car is positioned on the first or the second lane;
3. insert the remaining male jack plug of the Expansion Cable into the same female jack plug
of the other Track Interface;
9
Track Interface Rev1.0
User manual
4. insert the male jack plug of the "Track to Telemetry cable" of the Track Interface into the
free female jack plug of the Expansion Cable;
5. according to the type of connection which has to be done (to Telemetry Box or to SCP-01
controller) insert the USB male plug of the "Connection Cable" or of the USB white
cable(10) of the Telemetry Box into the USB female plug of the "Track to Telemetry cable"
of the Track Interface;
6. in case that one wants to add further sector sensors on the track, insert one of the male jack
plugs of the new expansion cable into the female jack plug of the previous expansion cable,
whereas the remaining male jack must be inserted into the female jack plug (7) or (8) of the
new Track Interface, according as the car is positioned on the first or the second lane;
7. then carry out step 5.
Figure 9: connection of various Track Interfaces to each other.
6 Track Interface setting
The Track Interface allows the user to decide what role to give to the sensors, managed by the
Track Interface, thanks to the double switch (5). In particular, with reference to the DS bridge
sensors and dead strip sensors, the following combinations can be obtained:
• DS bridge lap sensor, dead strip sector sensor;
•
DS bridge sector sensor, dead strip lap sensor;
•
DS bridge sector sensor, dead strip sector sensor;
Here it is explained how to position the two switches (5) in order get the above listed combinations.
10
Track Interface Rev1.0
6.1
User manual
Setting: DS bridge lap counter sensor, dead strip sector sensor
In order that the Track Interface interprets the DS bridge as lap counter sensor and the dead strip as
sector sensor, the double switch (5) must be set as shown in figure 10.
Figure 10: Ds bridge lap
count sensor, dead strip
sector sensor.
6.2
In particular, the Bridge switch must be positioned in position 1, the
Dead Band one in position 0. When the car passes under the bridge,
the LED (3) or (4) (according to the lane the car finds itself in) flashes
twice, whereas when the car passes on the dead strip the same LED
flashes once.
Setting: DS bridge sector sensor, dead strip lap counter sector
In order that the Track Interface interprets the DS bridge as sector sensor and the dead strip as lap
counter sensor, the double switch (5) must be set as shown in figure 11.
In particular, the Bridge switch must be positioned in position 0, the
Dead Band one in position 1. When the car passes under the bridge,
the LED (3) or (4) (according to the lane the car finds itself in) flashes
once, whereas when it passes on the dead strip the same LED flashes
twice.
Figure 11: Ds bridge sector
sensor, dead strip lap counter
sensor.
6.3
Setting: DS bridge sector sensor, dead strip sector sensor
I n order that the Track Interface interprets both DS bridge and dead strip as sector sensors, the
double switch (5) must be set as shown in figure 12.
In particular, both switches must be positioned in position 0. When the
car passes under the bridge, the LED (3) or (4) (according to the lane
the car finds itself in) flashes once, and the same thing happens when
it passes on the dead strip.
Figure 12: DS bridge sector
sensor, dead strip sector
sensor.
11
Track Interface Rev1.0
6.4
User manual
Not allowed Setting
Figure 13: not allowed setting
In figure 13 the last possible switch combination for sensor setting is
shown. This combination would tell the Track Interface to consider
both DS bridge and dead strip as lap counter sensors, but this is
impossible. The Track Interface signals this wrong combination by
making LED (3) and (4) flash until the user changes the setting.
Moreover, during this situation the Track Interface does not carry out
any function.
12
Track Interface Rev1.0
User manual
Notes
CE mark
residential
This device is compliant with the requirements of the CE mark for uses in
districts, shopping precincts, vehicular and light industrial zones.
RAEE / WEEE directive
This symbol on the product or on the package indicates that this
product must be separated from household-type waste.
In conformity with 2002/96/EC European directive on waste electrical
and electronic equipment (RAEE /WEEE), this electrical product
cannot be disposed of together with undifferentiated waste. This
product must be disposed of by means of restitution to the dealer or to
the local waste collection area for recycling.
13