Transcript
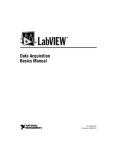
CONVERTER
Table of Contents
Overview
Overview
Features
Installation
Default Configuration
DIP Switch Settings
Cabling
Operation
Appendix
Troubleshooting
Specifications
RS-232C Interface Specification
Centronics Interface Specification
Centronics Interface Timing Chart
Preventing Radio & TV Interference
The SXP-320A / SXP-325A are interface converters that
allow Centronics and RS-232 devices to communicate
with each other (a computer with an RS-232 output to a
Centronics printer, for example).
Both units are bidirectional enabling you to convert from
serial to parallel or parallel to serial. The primary difference
between them is that the SXP-325A is configured with 512
KB of memory allowing it to serve as a printer buffer,
whereas the SXP-320A has no memory.
These two way converters provide a DB-25 RS-232C (DCE)
compatible connector, and a C-36 Centronics connector.
The serial baud rate is from 1200 to 115200 bps. (selectable
by DIP Switch). The parallel interface speed for the (nonbuffered) SXP-320A is 11.52 KB/sec; for the (buffered) SXP325A, it is 1.5 MB/sec.
The units support both hardware and software (XON/XOFF)
handshaking. Setup is extremely easy. All that is involved
is setting the DIP Switch and connecting the cables.
Features
Front View
The SXP-320A/325A is configured by setting an eight
segment DIP Switch as follows:
USER'S MANUAL
Rear View
PARALLEL PORT
• DIP Switch Sets Data Direction
• Built In Buffer for Efficient Operation (SXP-325A)
• Both Hardware and XON/XOFF Handshaking
• Easy Installation
• Compact Size
Installation
Switch Configuration Overview:
Switch
1
2
3
4
5
6
7
8
POWER ON LED
Read this guide thoroughly and follow the installation and o peration
procedures carefully to prevent any damage to the hub and/or any of the
devices it connects to.
This package contains:
AC 9V JACK
•1 Bidirectional Serial/Parallel Converter (SXP-320A or SXP-325A)
•1 AC 9V 200mA Power Adapter
•1 User Manual
DIP-SW
SERIAL PORT
RESET KEY
©Copyright 1999 ATEN® International Co., Ltd.
Manual Part NO. PAPE -1145-100
Printed in Taiwan 06/1999
Purpose
Baud rate setting
Handshake setting
Data and Stop Bits setting
Parity setting
Conversion Direction setting
An explanation of each DIP Switch setting is given below.
Note: 1. When the segment is set in the direction of the
arrow, it is ON.
2. In each table, the default setting is highlighted
All brand names and trademarks are the registered property of their respective owners.
2
1
3
Setting the Switches
Conversion Direction:
Parallel to Serial:
The baud rate is set with DIP Switch segments 1 - 3, as
shown in the table, below
DIP Switch Segment
8
ON
OFF
When performing a Parallel to Serial interface conversion:
Baud Rate:
DIP Switch Segment
1
ON
ON
ON
ON
OFF
OFF
OFF
OFF
2
ON
ON
OFF
OFF
ON
ON
OFF
OFF
Serial to Parallel:
When performing a Serial to Parallel interface conversion:
1200
2400
9600
14400
19200
38400
57600
115200
1. Plug the female end of a 25/9-pin to 25/9-pin
male/female serial cable into the PC's serial port
2. Plug the male end of the 25-pin to 25-pin male/female
serial cable into the SXP-320A/SXP-325A's serial
connector
3. Plug the female end of a C-36 to C-36 male/female
printer cable into the SXP-320A/SXP-325A's printer
connector
4. Plug the male end of the C-36 to C-36 male/female
printer cable into the printer.
Note: If your serial cable is long enough, you can plug
the SXP-320A/SXP-325A directly into the printer,
without the need for a printer cable.
5. Plug the Power Adapter into an AC source; plug the
Power Adapter cable into the SXP-320A/SXP-325A's
power jack.
Handshake:
DIP Switch Segment
4
ON
OFF
Handshake
XON/XOFF
Hardware
Data and Stop Bits:
DIP Switch Segment
5
ON
OFF
Data Bits
Stop Bits
7
8
2
1
Parity:
DIP Switch Segment
6
7
ON
Either
OFF
ON
OFF
OFF
Parallel to Serial
Serial to Parallel
Cabling
Baud Rate
(bits per second)
3
ON
OFF
ON
OFF
ON
OFF
ON
OFF
Conversion Direction
Parity
Serial Port Cabling
1. Plug the male end of a 25-pin (male) to C-36 (female)
printer cable into the PC's parallel port
2. Plug the female end of the 25-pin to C-36 male/female
printer cable into the SXP-320A/SXP-325A's Centronics
connector
3. Plug the male end of a 25-pin to 25-pin male/female
serial cable into the SXP-320A/SXP-325A's serial
connector
4. Plug the female end of the 25-pin to 25-pin male/female
serial cable into the printer's serial port
5. Plug the Power Adapter into an AC source; plug the
Power Adapter cable into the SXP-320A/SXP-325A's
power jack.
PC
25 Pin Male to 25 Pin Male Cable
25 Pin Male to 36 Pin Female
SXP-320A / SXP-325A
Device Connector's Pin #
DCE DTE DCE DTE
DB-9 DB-9 DB-25 DB-25
2
3
3
2
3
2
2
3
8
7
5
4
7
8
4
5
4
6
20
6
6
4
6
20
5
5
7
7
Cables
SXP-320A / SXP-325A
a 25-pin/25-pin cable
DCE
or a 9-pin/25-pin cable
DB-25
Tx
Rx
2
Rx
Tx
3
RTS
CTS
4
CTS
RTS
5
DSR
DTR
6
DTR
DSR
20
GND
GND
7
Parallel Port Cabling
Device's Pin #
DB-25
C-36
1
1
2-9
2-9
10
10
11
11
12
12
13
13
14
14
15
32
16
31
17
36
18-25 19-30
a 25-pin/36-pinCables
or a 36-pin/36-pin cable
STROBE
D0-D7
ACK
BUSY
PE
SLCT
AUTOFEED-XT
ERROR
INIT
SLCT-IN
GND
36 Pin Female to 36 Pin Male Cable
Parity Inhibit
Even Parity
Odd Parity
PC
SXP-320A / SXP-325A
9 or 25 Pin Female to 25 Pin Male Cable
4
5
6
7
SXP-320A / SXP-325A
C-36
1
2-9
10
11
12
13
14
32
31
36
19-30