1
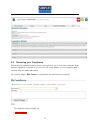
SIMPLIFi Compliance Software User Manual
Version 1.7 2013
Simplifi-Solutions Ltd,
Environmental Center,
Unit B5,
The Gordon Manley Building,
Lancaster University,
LA1 4WA
Telephone: 01524 510431
Email: [email protected]
For use with SIMPLIFi compliance software products:
• SIMPLIFi Compliance
• SIMPLIFi Support
• SIMPLIFi Guidance
• SIMPLIFi Documents
• SIMPLIFi Aspects
• SIMPLIFi Actions
• SIMPLIFI Audits
• SIMPLIFI Reporting
1
Contents
1 Homepage
1.1 Selecting Registers .
1.2 New Features . . .
1.3 Legislation Counters
1.4 Actions . . . . . . .
1.5 New Legislation . .
.
.
.
.
.
.
.
.
.
.
.
.
.
.
.
.
.
.
.
.
.
.
.
.
.
.
.
.
.
.
.
.
.
.
.
.
.
.
.
.
.
.
.
.
.
.
.
.
.
.
.
.
.
.
.
.
.
.
.
.
.
.
.
.
.
.
.
.
.
.
.
.
.
.
.
.
.
.
.
.
.
.
.
.
.
.
.
.
.
.
.
.
.
.
.
.
.
.
.
.
.
.
.
.
.
.
.
.
.
.
.
.
.
.
.
.
.
.
.
.
.
.
.
.
.
4
4
4
4
5
5
2 Administration
2.1 Users . . . . . . . . . . . . . . .
2.2 Action Types and Departments .
2.3 Compliance Levels . . . . . . . .
2.4 Risk Definitions . . . . . . . . .
2.5 Audit Check Lists and Definitions
.
.
.
.
.
.
.
.
.
.
.
.
.
.
.
.
.
.
.
.
.
.
.
.
.
.
.
.
.
.
.
.
.
.
.
.
.
.
.
.
.
.
.
.
.
.
.
.
.
.
.
.
.
.
.
.
.
.
.
.
.
.
.
.
.
.
.
.
.
.
.
.
.
.
.
.
.
.
.
.
.
.
.
.
.
.
.
.
.
.
.
.
.
.
.
.
.
.
.
.
.
.
.
.
.
.
.
.
.
.
.
.
.
.
.
.
.
.
.
.
5
6
6
7
7
8
.
.
.
.
.
.
.
.
.
.
.
.
.
.
.
.
.
.
.
.
.
.
.
.
.
.
.
.
.
.
3 Forthcoming Calendar
4 Legal Register
4.1 Building a Register . . . . .
4.2 Understanding Legislation .
4.3 Actions . . . . . . . . . . .
4.4 Attaching Evidence . . . . .
4.5 Measuring your Compliance
4.6 Print Register . . . . . . .
4.7 Quick Search . . . . . . . .
4.8 Other requirements . . . .
4.9 Legislation library . . . . .
8
.
.
.
.
.
.
.
.
.
8
8
10
10
10
11
12
12
13
13
5 Guidance Module
5.1 Upload Guidance . . . . . . . . . . . . . . . . . . . . . . . . . . . . . . . . .
14
14
6 Documents Module
6.1 Upload Documents . . . . . . . . . . . . . . . . . . . . . . . . . . . . . . . .
14
15
7 Action Register
7.1 Assigning Actions . . . . . . . . . . . . . . . . . . . . . . . . . . . . . . . .
15
15
8 Aspects Register
8.1 Creating an Aspects Register . . . . . . . . . . . . . . . . . . . . . . . . . .
8.2 Aspects Overview . . . . . . . . . . . . . . . . . . . . . . . . . . . . . . . .
8.3 Aspects Comments . . . . . . . . . . . . . . . . . . . . . . . . . . . . . . . .
16
17
18
18
9 Messages Module
19
.
.
.
.
.
.
.
.
.
.
.
.
.
.
.
.
.
.
.
.
.
.
.
.
.
.
.
.
.
.
.
.
.
.
.
.
.
.
.
.
.
.
.
.
.
2
.
.
.
.
.
.
.
.
.
.
.
.
.
.
.
.
.
.
.
.
.
.
.
.
.
.
.
.
.
.
.
.
.
.
.
.
.
.
.
.
.
.
.
.
.
.
.
.
.
.
.
.
.
.
.
.
.
.
.
.
.
.
.
.
.
.
.
.
.
.
.
.
.
.
.
.
.
.
.
.
.
.
.
.
.
.
.
.
.
.
.
.
.
.
.
.
.
.
.
.
.
.
.
.
.
.
.
.
.
.
.
.
.
.
.
.
.
.
.
.
.
.
.
.
.
.
.
.
.
.
.
.
.
.
.
.
.
.
.
.
.
.
.
.
.
.
.
.
.
.
.
.
.
.
.
.
.
.
.
.
.
.
.
.
.
.
.
.
.
.
.
.
.
.
.
.
.
.
.
.
.
.
.
.
.
.
.
.
.
10 Audit Register
10.1 Creating Checklists and Audit Types . . . . . . . . . . . . . . . . . . . . . .
10.2 Running an Audit . . . . . . . . . . . . . . . . . . . . . . . . . . . . . . . .
19
20
20
11 Management Reports
11.1 Creating a Report . . . . . . . . . . . . . . . . . . . . . . . . . . . . . . . .
11.2 Scheduling a Report . . . . . . . . . . . . . . . . . . . . . . . . . . . . . . .
21
22
22
12 New Feature: Email Alerts
22
3
1
Homepage
This display shows your user name and user type .The purpose of this page is to give you an
overview of your current compliance status and highlight where attention is needed.
1.1
Selecting Registers
If you have more than one legal register you can select the register you wish to look at using the
drop down box. If this is the register you wish to work on by default select the Set as default
option and then this is the register that will be loaded each time you log into the system.
1.2
New Features
The New Features box will only appear when we have something to tell you about new features
or improvements and once this has been viewed by a user it will disappear from the home page.
1.3
Legislation Counters
The home page will show legislation counters for each legislation type (Energy, Health and Safety, Environmental) depending on the register being viewed. Please note this is defined when
4
the register is created, for example if only Environmental is selected for the register upon creation the home page will only show the environmental legislation counter.
This counter will show new legislation added to the system and this can be viewed by clicking
the View link next to this line (See New legislation section below).
The counters will also indicate that there is a certain amount of legislation in your registers. There may be some overlap between the counters here as some legislation items fall into
more than one category. For example they may be environmental as well as energy related.
There is also a counter which will tell you how many legislation items you are not compliant with. This is based on your own assessment of the legislation and is explained in the Legal
Register section of this guide. This counter will show legislation which has been assigned a
red or yellow compliance rating and these can be viewed by using the View link on this line.
1.4
Actions
This counter will only be shown if you have the Simplifi Actions module turned on and is an
overview of actions that have been assigned to you as a user and the ones that have become
overdue and require your attention.
1.5
New Legislation
New legislation is added to the system and is included in your register or the Not Applicable
section based on your register profile. All new legislation items will be shown on the counter on
the home page to ensure they are reviewed by you. These can be viewed using the View link
on that line and will remain in the new legislation table until you have marked them as reviewed.
When you click through to a new legislation item it will have two options at the top, based
on whether it has been added to your legal register or to the Not Applicable section (this will
depend on the questions you answered when you were building your personal legal register).
The button is either marked
• Remove from Register: this means that this legislation item has been included in your
personal legal register; OR
• Add to register: this means it has been included in Not applicable
2
Administration
The Administration tab will allow you to configure the account with what information is available on your system, it will also tell you what modules you have activated and how many user
permissions you have on your account and how many you have used. This feature is only
available to account administrators.
5
2.1
Users
The users tab allows account administrators to set permissions for other users on the system as
well as restrict their access and set up new user details. Users can have their permissions set for
each legal register using the drop down next to the users name and the account administrator
can assign, for all legal and aspects registers (See Aspects section of this manual):
• None
• Read only
• Read only (and comment)
• Read and Write
2.2
Action Types and Departments
This feature is only available if the Simplifi Actions module is turned on. Essentially this allows
the account administrator to define action types such as Health and Safety, Environmental,
Emergency, also Departments such as Procurement, Offices etc. To add a type of department:
1. Select either Action Types or Departments from the menu
2. Select Add new button
3. Type in the desired title and click insert
4. Types and Departments can then be edited or removed if needed
6
2.3
Compliance Levels
The compliance definitions are set as a default within the software as follows: Green: Fully
compliant, Yellow: Partially compliant, Red: Non compliant, Grey: Not assessed, Blue: for info
only. There is an option within the administration module to change the colours and/or the
compliance definitions. There is also an option to add another admin defined compliance level.
2.4
Risk Definitions
This section allows the account administrator to define what risk factors mean in the legal
compliance section of the register. Using the drop down box and selecting Edit will allow the
account administrator to define what a risk level is and additional risk levels can be added using
7
the Add risk definition button.
2.5
Audit Check Lists and Definitions
Please refer to the Audit Register section of this Manual for a detailed explanation of these.
3
Forthcoming Calendar
Our calendar displays information about events that will be occurring in the future, this includes
anything from new pieces of legislation that are coming into force, any interesting events you
may want to take part in, public consultations that you may want to be involved with etc. You
can also add your own events to this system such as scheduled audits or regulatory visits.
Use the arrows at the top of the calendar to navigate by month.
4
Legal Register
The legal register section of the software is a powerful tool which helps to identify applicable
legislation and also understand it.
4.1
Building a Register
Upon first use you will notice that in the Legal Register there are no pieces of legislation. To
create your register you should first use the Build new Register tool by clicking that button
towards the top of the page.
8
You will firstly need to select type and country that you want to build the register for and
give your register a name. Naming your register will help to identify it (which is especially
useful if you have more than one legal register). You can only select type and country
once. You can change the register as much as you like but only within the Type and
Country of legislation you have selected.
You will then be taken through a simple question tool which will help you to identify applicable
legislation. Each question has a help button associated with it to give you further information.
The profiling wizard is made up of two parts, the first is a set of scoping questions which,
once answered will feed in to the second stage which drills down further based on your responses.
Upon completion of the profiling wizard, the software will show associated legislation based
on your responses. It is advisable at this stage for you to have a browse through the Notapplicable section in case there are any pieces of legislation that you wish to add.
You can then choose to view all applicable legislation or filter legislation by Section, Type
or Country by using the drop down menus.
To fine tune this you can use the Add/Remove from register option which is available when you
double click on a piece of legislation to view it which adds or removes items of legislation from
your register.
9
4.2
Understanding Legislation
To view a piece of legislation in your legal register, double click the title from the legislation
overview. This will open up the summaries and information for that item of legislation.
Once you have opened the legislation you will firstly see a number of buttons at the top of
the page, these will help you navigate through the system and also manage your register by
adding or removing individual pieces of legislation. You also have the option to print a single
item of legislation.
Below this is the general information section which will tell you:
• The section you are in
• The full title of the legislation
• It’s reference in the system
• When it was last updated by Simplifi
• A list of amending legislation
• The regulatory authority
Below this section you will find the legislation summaries. For each legislation item there are
two summaries called At a glance and In Depth. The first is a brief summary of the legislation
and the second is a more detailed summary of the legislation.
We also provide access to the full text of the legislation which includes all amending legislation in color coded entries to highlight what has changed.
4.3
Actions
If you have the Simplifi Actions module activated you will be able to add actions directly to
legislation items and these will then be included in the action tracker and your alert emails.
This is a useful section to ensure actions for compliance or review are captured and tracked for
legislation management.
4.4
Attaching Evidence
If you have the Simplifi Documents module or Simplifi Guidance module (see the Documents
and Guidance sections of this manual) you will be able to attach documents and evidence of
compliance against legislation. Open the Documents tab and select Add Document and you
will be taken to the relevant section where you will be able to select the item you wish to attach.
10
4.5
Measuring your Compliance
Underneath the legislation summary there is space given for you to record any comments about
how this legislation is relevant to you and you can record whether you are complying with it
correctly using our traffic light system.
You can also assign a Risk Factor to help prioritize any actions that are required
The compliance states available are:
• Non-Compliant
11
• Partially Compliant
• Fully Compliant
• Not assessed
• For info only
The compliance definitions and the related colours can be changed within the Administration module. The colours correspond to what will be shown on the Legal Register page
next to each piece of legislation depending on the compliance level chosen and makes it easy
to manage which legislation requires reviewing and implementing.
As these compliance status notes change they will be logged into the system with a time
stamped note which will help to build up your audit trail in order to demonstrate compliance.
4.6
Print Register
The print register button on the Legal Register home page will allow you to create a pdf version
of your legal register. Once clicked you will be taken to a page where you can select what you
would like to include in this report as follows:
• Legislation summary: This will create a report with the details from your legislation
summary page
• At a glance: this will include the at a glance summary of legislation in your register
• In depth: this will include the in depth summary of legislation in your register
• With comments: this will include the comments from your compliance notes
• Related documents: this will provide a summary of documents attached to each legislation
• Forthcoming event: this will create a report of events from the forthcoming calendar
between the dates you specify
• Legislation type: select the type of legislation you require in the register
Any of these can be used to create a separate or combined report depending on the amount
of information you require.
4.7
Quick Search
The Quick Search facility allows you to search quickly for a single item or items related to the
same topic. Typing in the full title will search for that specific piece of legislation (typing in a
word will search for all items that have the word in the title).
You can also search by reference if you are familiar with the Simplifi reference number for
12
a particular item. When asking for a search to be performed you must tell the software if you
are searching by title or reference by clicking the relevant option.
Once you have searched for an item you will be able to click between the tabs to see where your
searched items appear.
4.8
Other requirements
The other requirements tab can be used to include any other requirements you would like to score
or make compliance notes. These could include 9001 procedures, industry specific permitting
or your own internal procedures. Within the ISO management standards there is mention of
‘other requirements’. This is where these can be recorded.
4.9
Legislation library
The legislation library is a list of all legislation within the Simplifi data base. It allows you to view
all legislation together regardless of whether it is in your legal register or in the not applicable
section. The review column gives you the opportunity to review items that havent been added
to your legal register. You can add notes to explain why or how they are not applicable.
13
5
Guidance Module
The Guidance module is a library of guidance documents from a range of sources and regulating authorities. It can also be used as a library of your own documentation using the Upload
feature. It is split into the same sections as the legislation to make it easy for you to find what
you need as well as including some additional sections such as EMS.
Guidance is from a range of sources including Government departments, European Union, NonGovernment Organizations and industry professionals.
5.1
Upload Guidance
To upload your own guidance documents select the Upload button, you will then be taken to
the upload page. Initially you can only upload to the My management files folder, however
by selecting this folder you will be able to create sub folders in order to organize your uploads.
By selecting the Choose file button you will then be able to navigate to where your documents
are stored and upload them into the system.
6
Documents Module
This section contains our management system templates along with guidance on how to use
them. It provides templates, guidance and examples to implement a management system based
on the standards ISO 14001 and OHSAS 18001.
14
The folders EMS Manual and OHS Manual contain guidance, templates and forms to assist
in the implementation and maintenance of a management system.
Once you have created a management system the Documents module can be used to store
files in order to make auditing easier and uploaded documents can be attached to legislation to
demonstrate compliance or to assist in identifying legal requirements.
6.1
Upload Documents
To upload your own documents select the Upload button, you will then be taken to the upload
page. Initially you can only upload to the My management files folder, however by selecting
this folder you will be able to create sub-folders in order to organise your uploads. By selecting
the Choose file button you will then be able to navigate to where your documents are stored
and upload them into the system.
Once uploaded, documents can be attached to legislation to demonstrate compliance or to
assist in identifying legal requirements.
7
Action Register
The action register allows you to capture any actions that are required as part of your compliance
management. Actions can be assigned to a user and given a completion date which will ensure
that your actions are properly managed.
7.1
Assigning Actions
To assign an action either use the Actions section of a legislation item or directly to the Action
register using the Create new action button.
15
You can assign the action to yourself or any other user in the system. You can also assign
actions to colleagues who arent users on the system by adding their contact details to the mailing list which is contained within the Message module. When you assign an action to another
user within your system they will be sent an email alert informing them of the action details.
If the action is not completed by the target end date then both the person who set the action
and the person responsible for the action will receive a reminder email.
Actions can also be logged against legislation and so any non-conformity or risks can be captured here and tracked through to completion. Just select your legal register from the drop
down menu and select the legislation which is applicable.
You can also select your start date, target completion date and a recurring time so the action is reset when required. This is especially useful when using the system for monitoring
compliance as an annual review of the legislation can be scheduled.
8
Aspects Register
The aspects register is designed to be used with ISO 14001 and OHSAS 18001 and provides a
system whereby aspects can be captured, scored for significance and assigned to legislation or
guidance if required.
16
8.1
Creating an Aspects Register
To build your aspect register click the Build New Register button which will take you to the
register details page. You will then be required to give the register a name to identify it in the
system. Type the name you require in the box and click the save button.
You can then add categories for your aspects, categories can be whatever you want them
to be such as air, water, waste, location etc.
Once you have created your register you can add aspects to it by clicking the Add New
Aspect button on the required category page. You can then assign:
• Reference
• Aspect Name
• Description
• Impact
• Condition: N = Normal, A = Abnormal, E = Emergency
You can also assign a significance score to each aspect which will help you to prioritize which
aspects will be addressed first which is usually the highest scoring ones.
Scoring is based on:
• Legal compliance
• Frequency of occurrence
17
• Severity of impact
• Likelihood of occurrence
When you click the save button the score will be automatically calculated based on the
following method: (Legal+Frequency+Severity) x Likelihood = significance score
Once an aspect has been created you can use the drop down menu next to it to assign:
• Legislation from your legal register: this helps to monitor compliance and relate where
aspects have occurred
• Documents: from Guidance and Documents module
• Comments: to monitor change and the reason for it
8.2
Aspects Overview
Once your aspects have been recorded and scored, the aspects overview will sort the aspects
into a ‘league table’ showing the highest scoring most significant ones at the top. This allow
you to identify areas for improvement and put actions in place to address these areas.
8.3
Aspects Comments
Comments can be added to each aspect. When a user makes any comments on an aspect,
the last reviewed column will be updated showing the date of review and who has reviewed the
aspect.
18
9
Messages Module
The messaging module provides a link to support from us as well as information around new
legislation, guidance and policy. Incoming messages will be from Simplifi and will provide information on new legislation, who it affects and when it comes into force as well as information
around new guidance and policy added to the system.
You can get support from Simplifi by creating a new message and sending it to the System
Administrators who will respond to your query as quickly as possible. Queries are open to
whatever you need support with and are focused on legislation and compliance however if there
is anything outside this you need assistance with please feel free to ask and we will do our best
to support any query.
Within the messaging module is a mailing list. Here you can add the contact details of anyone
you want to send actions or management reports. These contacts dont necessarily have to be
users on the system.
10
Audit Register
This Module allows you to create different audit types and checklists. The checklists can then be
assigned to the relevant audit types. An audit can then be created and the assigned checklist(s)
will appear. The questions on the checklist can be answered and any evidence attached. The
audit results are captured and stored within the Audit Register.
19
10.1
Creating Checklists and Audit Types
To create a checklist, navigate to the Administration module then click on to Audit Check
Lists and click the Add button. You can then give your checklist a name and a purpose. This
is typically something as simple as: Warehouse: audit procedures. Once this is done, click the
insert button and refresh the page.
You will now see an Action column on the right. Click Questions and start adding questions to your checklist. You can add as many as you need. Once you have added your questions
to your checklist, you are then ready to create audit types.
Click Audit Type Definitions in the Administration sub menu and click add. You can then
give your audit type a name and purpose. Again this could be something along the lines of
14001: Audit 14001 procedures. Click insert and refresh the page. In the action column you
can then assign a checklist or multiple checklists to the audit types. You can have as many
checklists and audit types as you need and you can assign multiple checklists across multiple
audit types. Once you have a check list assigned to an audit type you have everything you need
to run an audit.
10.2
Running an Audit
To run an audit click Audit Register on the main menu and select add. Type in an audit
description then select Audit type, Auditor and Start date from the drop down menus. Click
insert then refresh the page.
20
Select details from the Action column on the right and the details of your audit will be displayed
along with the related checklists and their status.
In the Action column select Run and again you will see an action column where you can
answer your questions in the checklist. Once each question is answered you will have the option
within the action column to add evidence. When this option is selected the software will allow you to browse your computer to where your evidence is stored and then attach that evidence.
Once all your questions are answered and evidence attached you can then capture the results of your audit. Select your result from the dropdown and type in any recommendations.
Once this is saved, you will then have an opportunity to create a PDF report of your audit
findings.
If there are any actions which have arisen during the audit these can then be captured in
the action module and email alerts will be activated.
All of your audits will then be stored on the Simplifi platform for future reference.
11
Management Reports
This module allows you to create different types of reports using data from the Simplifi system.
You can combine different areas of the software to report on and schedule the reports to be
emailed to key personnel.
21
11.1
Creating a Report
Navigate to Management Reports and click the create report button. Give your report a
title then click save title. Next click Add Report part, this will allow you to choose areas of
data to report on, for example New Legislation, Aspects, outstanding actions etc. Once you
have chosen your report part you may be given some parameters to choose from, select your
parameters then click save.
You will then be given an opportunity to add further report parts, follow the same process.
Once you have added all your report parts and set your parameters you can then click the
Return button. You will then see your reports in a table showing: Report title, created by,
creation date, and last updated. You will also have a select action column with a drop down
menu which will give you options to edit delete or preview your report.
11.2
Scheduling a Report
Once you have created a report you can schedule that report to be sent to personnel via email
within a predefined frequency. Navigate to Reports Schedule in the main menu and click
Add Schedule entry. Give your schedule a description and select which report you want to
schedule using the drop down menu. Choose your frequency from the drop down then click
save. You will then see your schedule in a table showing: Description, report title, next run, last
run, frequency, report period start, report period end, recipients and again an action column
with options in a drop down.
You will see that the recipients column is empty. To add a recipient choose the recipients
option from the drop down, select your recipient from the next drop down and click the Add
recipient button. When you click the Return to schedule button you will see your desired
recipient in the recipient column.
Your scheduled report will now be sent to your chosen recipient(s) via email at the frequency
you have set. To stop the scheduled emails or change the frequency simply delete the schedule
or edit the frequency. Note: the recipients in the drop down are taken from the contacts you
have entered into the mailing list within the Messages module.
12
New Feature: Email Alerts
Users of the Simplifi system can now have email alerts sent to their inbox. The alerts will be
sent from the system when we upload new or amended items of legislation. The alerts will
encourage users to log in and review items rather than periodically logging in to see which
items have been added or amended. The alert will detail which registers have been updated and
provide a link to the log in page to provide quick and easy access. The account administrator
has the ability to turn on or off email alerts for individual users.
22