1
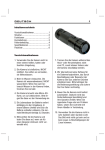
“Congratulations” and “Thank you for Purchasing your new SeaWolf 1560” 1560 USER Manual Page 1 1 Introduction The SeaWolf has been expertly engineered and manufactured to the highest quality so we want you to get the very best use from it! As with all things, a little maintenance and care can make all of the difference 1.1 Specifications Luminosity Setting 1 Approx. 5000 Lumens Setting 2 Approx. 10,000 Lumens Setting 3 Approx. 15,000 Lumens Battery capacity 1 x 100Wh Each Optics options 45, 60 90 or 120 degrees Material marine grade aluminium Finish hard anodise 50-75microns Thermal overload cut out at LED =70degrees Colour temperature as requested up to 8500Kelvin Working water temperature 0+35C External working temp -25 + 45 LED thermal cut-out will activate lowest setting Charging Temperature 0 +45 ONLY Ideally 10-40 deg DO NOT CHARGE BELOW 0 degrees Description The SeaWolf is overall 96% efficient and makes the most use of power that current technology can provide. The batteries are the highest quality badged and binned Lithium Ion’s currently available on the market. Main functions The SeaWolf will make use of the first 90W to run in whatever mode you choose, 1/3 2/3 or full. Once the unit has used up 90W of the available 100W the SeaWolf will default to the 1/3 run power ensuring that in emergency mode you are: 1) Aware that power is low 2) Provided with emergency light at 5000Lumens 3) Decreasing wear and tear on your batteries. Page 2 Whats In the Box Standard SeaWolf 1560 1 x Lens 1 x Charger 1 x Charge interface Cable Note that the charger accepts 100-240Vac Optional Extras available from our online store Ultralight Handle kit, Ultralight handle, Interface Joint and Ball Joint Ultralight Handle D Ring Attachment D ring Clamp Kits Optics available in 45, 60, 90 and 120 degree beam angles Page 3 Main Features Fixture Points 4 position switch Off/Charge 1) 5000 Lm 2) 10,000 Lm 3) 15,000 Lm Charge Port Optics Ring Lid Screws to access Battery Battery A single 100W li battery inside the unit can be removed and replaced by removing the two M5 lid screws The battery can be recharged directly from the battery charger you received by unplugging the small Anderson to jack plug cable To charge directly from the rear without removing the battery simply replace the cable and plug in. Note that in order for the battery to charge the switch needs to be in the “off charge” position Page 4 RUN Times Battery Longevity Please note that conditions and temperatures during both use and charging can affect the total stored power deviations in run times above or below those stated can occur At full burn 90Watts will provide around 35 minutes of light followed by approximately 15-20 minutes of emergency backup at 5000 lumens depending on variables. At half burn (10000 lumens) 90W will provide approximately 1 hour followed by emergency back-up of 15-20 minutes at 5000 lumens At 1/3rd Burn (5000 lumens) 90W will provide approximately 2 hours before cutting out This may vary slightly depending on temperature, battery aging and charging. During the first part of the cycle you can use any of the three power settings, the SeaWolf constantly monitors usage and so will not go into emergency mode until 90Watts has been consumed. On board intelligence monitors the light, occasionally the light may detect anomalous switch triggers in or around a strong magnetic field to reset the light simply turn off and back on again. Page 5 2 Optics 2.1 90 Degree Lens Plot 2.2 60 Degree Lens Plot 2.3 120 Degree Lens Plot Page 6 2.4 45 Degree Lens Plot 3 Using Your SeaWolf 1560 Use of your SeaWolf is largely preferential; having listened to divers, likes and dislikes we have tried to provide you with as many capabilities as possible. 3.1 The SeaWolf product is intelligent During use the SeaWolf will, amongst other things, monitor the voltages from your batteries; you should always make sure you fully charge the battery then remove it as soon as the charge light is green. We recommend storing batteries with around 50% charge in them. If during use the unit seems to discharge more quickly than usual this is likely not a fault. The first things to consider are the below. Li batteries naturally lose some power over time, if it has been some time since you charged them a top up would be advised before use? Leaving connected to the Charger for extended periods? In all cases before purchasing new batteries we recommend a controlled charge, carefully ensuring each battery is fully charged then removed after the charge light turns green. Re test your unit, if the problem persists then please call us. Page 7 3.2 General Use Attachments and Ancillaries Since choice of handles fittings is preferential the handles, ball joints, d ring clamps, handle D rings, and knuckles are sold separately. The lamp is designed to allow it to be hung, fixed or strapped to any section of your gear and two sectioned strap bars along the battery pack length facilitate a multitude of solutions from jubilee clips to bulldog double Enders, the choice and method is down to your own diving preference. 3.3 Charging the Batteries To the rear a removable plug allows access to the charge point. A single charger is supplied as standard with additional chargers available for sale. When a Lamp is plugged into the charger the green light on the charger will turn red indicating charge has commenced. Once charged the green light will turn to red. If you disconnect and reconnect the same battery you may note it turns red again, this is a built in reset and it will shortly turn back to green again. Battery Swap Out Unscrew the two rear M5 SS hex sets which will leaver forward The battery can then be removed and replaced This process should take no more than a few minutes Page 8 Important There is no need when charging directly to remove the batteries from the battery housing. NOTE: the charger has a timed cut out if left plugged in for 24 hrs. or longer it will need to be unplugged and plugged back in to reset this safety feature we strongly recommend unplugging when not in use. We strongly advise removing the battery from the charger once the light is green rather than leaving it connected for extended periods. You may purchase additional chargers to charge other batteries at the same time. DO NOT DROP THE BATTERIES INTO THE HOUSING Dropping them in may potentially cause damage to them. 3.5 Battery Power rd rd The switch on the rear of the enclosure is either off, 1/3 power 2/3 power or full when. 3.6 Transporting Note: This product has been manufactured in accordance with the transportation of dangerous goods act and is compliant, that said you should ALWAYS check with airlines first before attempting to check in. The only time you should need to remove the batteries from the housing is for transporting when flying though some airlines insist batteries are held inside the unit, regulations are still not harmonised, and whilst we have done everything possible to design these within each regulation please always check. A flight-case is available, sold separately should you wish to transport in such and when shipping transporting: You should inform the officer that: Each battery is less than 100Watt hours All are required to run the product They are not connected to each other They are lithium Ion not lithium metal 3.7 Optics One main Optic is supplied with the unit which can be chosen at point of purchase from 45, 60, 90 or 120degrees; these can be swapped by unscrewing the bezel and swapping. Page 9 3.8 Storage Before storing your unit we strongly advise it is cleaned serviced and completely dried, remove the battery from the battery compartment and store in a dry area preferably in a metal or flame proof cupboard. We recommend storing the unit in a garage or cool (not freezing) area where it cannot be inadvertently damaged. Temperatures below zero can damage batteries or make them dangerous you should never charge them below zero degrees. Batteries can be dangerous be diligent treat them with respect and always remain cautious. 4 Maintenance General Do’s and Don’ts When not in use we recommend you store your SeaWolf in dry conditions between 10 and 25 degrees C If you have spare battery packs we recommend always keeping them together when charging and using, this way they will develop and age together and reduce any unnecessary stress. Use by use the best way to keep your unit in good working order is rinsing down immediately with fresh clean water. Generally whenever you remove a lid or part it’s always good practice to double check the o-rings and o-ring seats are clean and well-greased. Always turn off when not in use we recommend removing or unplugging the battery when storing for periods of more than a few days Don’t run the lamp out of water for extended periods, as a safety mechanism the lamp has a thermal cut out to protect it. Do not touch or tamper with the LED all works conducted on the LED must be done so by the manufacturer or approved Service support centre. Do not remove the batteries from their cases, or tamper with them in any way. Any batteries damaged or defective should be correctly disposed of. Page 10 4.1 Maintenance Routine The main reason why seals can break down on all dive type equipment is nipped o-rings and salt creepage, as the sea water dries salt build up can cause seals to become unreliable, we know divers are well aware of these facts and generally look after gear so have provided an in depth guide to allow you to take full advantage of the SeaWolf design to get the most out of your kit. Avoiding this and therefore the requirement to perform too much maintenance is as simple and as easy as completely rinsing the unit down or hosing off with a light jet using fresh clean water. The following guide can be used to both come to know your equipment and also to re-order any part that may be damaged. 4.2 Lamp Head Front Cleaning and Lens swap Frequency: Routinely IMPORTANT When placing the lens into the bezel ensure that it is correctly seated evenly, a small recess is provided to locate the lens accurately. You must ensure that the bezel screws down completely. If you can see more than one thread remaining once screwed down please recheck it has seated correctly so that even force is applied all around the lens sealing face. Apply grease liberally over the entire thread to assist in removal of the lens following multiple wet dry sessions where salt build up may occur We strongly advise removing the bezel and lens following use followed by a quick clean using a toothbrush dipped in clean water to remove salt before drying. DO not get the LED wet or rinse the entire head whilst the lens is removed. Page 11 4.4 Switch assembly Frequency: Rare Servicing the switch occasionally is as simple as stripping the assembly down cleaning greasing and rebuilding this should take no more than 5 minutes Removing the centre screw allows the full assembly to come apart Note there are small bearings etc. be careful not to lose these When replacing the screw directional movement can be applied to correctly set the switch if you find the operation is uneven, by unscrewing a few threads and tightening in the direction required. This is designed in to allow for wear and drift over time. Switch assembly kits are available as replacements if required 4.5 Battery Compartment Frequency: Routine Because this compartment is regularly accessed for battery recharge and swap out, special attention should be paid to ensure O rings are in good working order and regularly cleaned and checked, we strongly advise this is done on every battery swap out. Page 12 Returns In the unlikely event that a malfunction occurs whether your product is still within its guarantee or not we have a technical support department committed to getting you running as fast as possible with minimal fuss or expense. In the first instance you can seek FAQ’s on our website www.orcalight.co.uk Alternatively you can email directly [email protected] Or call us on +44 (0)1207 281 501 If returning a part or product it is important for us to find out as much information as possible about what caused the failure, this enables us to quickly determine the best course of action for you and harden our products against such failures. When you call to return a product you will be asked several questions on what has failed, how and what the cause may be. This is all stored against an “RMA number” you can then return the product to us with that RMA number clearly marked on the package. Once received we aim to call you within 24-48 hours with the results of an initial inspection, offer quotation for repair, if applicable and ask you what course of action you wish to take Guarantee Terms The product is guaranteed against manufacturing defects. It is not guaranteed against defects that arise from, physical damage, miss-use, poor maintenance or tampering other than maintenance activities specified in the manual. IMPORTANT Batteries and all parts when end of life should be returned to the manufacturer. The labels below should be placed on the packaging If however they have any physical damage then a disposal facility should be sought locally since transportation of damaged cells is forbidden under the shipment of dangerous goods act. If you have difficulty in finding a suitable facility, please contact us and we shall do everything possible to assist you. Page 13