1
Doc No: 1723-PS-0001
Issue 9
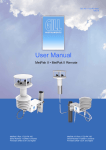
User Manual
MetPak II ▪ MetPak II Remote
MetPak II Part: 1723-PK-100
Serial Number 11270001 onwards
Firmware 2436 V2.01 and higher
MetPak II R Part: 1723-PK-150
Serial Number 11300011 onwards
Firmware 2436 V2.01 and higher
Foreword
© 2010 Gill Instruments Ltd. All rights reserved.
Thank you for purchasing the MetPak II/MetPak II R manufactured by Gill
Instruments Ltd. To achieve optimum performance we recommend that you read
the whole of this manual before proceeding with use.
Gill products are in continuous development and therefore specifications may be
subject to change and design improvements without prior notice.
The information contained in this manual remains the property of Gill Instruments
and should not be copied or reproduced for commercial gain.
Guarantee
For terms of guarantee, please contact your supplier.
Warranty is void if the coloured Wind Sensor security seal is damaged or broken,
or the Wind Sensor transducer caps have been damaged.
Trademarks
Microsoft and Windows are registered trademarks of Microsoft Corporation.
All other brands and product names are trademarks or registered trademarks of
their respective owners.
Cautions and Notes
The following symbols are used in this guide:
CAUTION. This indicates an important operating instruction that should be
followed to avoid any potential damage to hardware or property, loss of data,
or personal injury.
NOTE. This indicates important information to help you make the best use of this
product.
Applicable Parts
MetPak II Part 1723-PK-100
Applies to:Serial Number 11270001 and higher
Firmware 2436 V2.01 and higher.
Met Pak R Part 1723-PK-150
Applies to:Serial Number 11300011 and higher.
Firmware 2436 V2.01 and higher.
Contents
1.
Introduction ......................................................................................................... 1
1.1
Principle of Operation...................................................................................................... 3
1.1.1
Wind Speed and Direction Sensor ..................................................................... 3
1.1.2
Radiation Shield ................................................................................................ 4
1.1.3
Temperature and Relative Humidity Sensor with Dewpoint Output .................... 4
1.1.4
Barometric Pressure.......................................................................................... 4
1.2
Abbreviations .................................................................................................................. 5
1.3
Initial Test Guides ........................................................................................................... 6
1.3.1
MetPak II (Part 1723-PK-100) ........................................................................... 6
1.3.2
MetPak II R (Part 1723-PK-150) ........................................................................ 8
Installation ........................................................................................................ 10
2.
2.1
Pre-Installation Checks ................................................................................................. 10
2.1.1
Spare Parts ..................................................................................................... 10
2.2
Installation..................................................................................................................... 11
2.2.1
Bench system test ........................................................................................... 11
2.2.2
Equipment Required ........................................................................................ 11
2.2.3
Cabling ............................................................................................................ 11
2.2.4
Communication connections............................................................................ 16
2.2.5
Mounting MetPak II and MetPak II R ............................................................... 20
3.
Operation ........................................................................................................... 25
3.1
MetView ........................................................................................................................ 25
3.1.1
Opening MetView ............................................................................................ 25
3.1.2
Scanning for Devices....................................................................................... 26
3.1.3
The MetView Console ..................................................................................... 27
3.1.4
MetView Console Display Options ................................................................... 28
3.1.5
MetView Gauge Ranges and Graphs .............................................................. 29
3.1.6
Data logging .................................................................................................... 31
3.2
Configuring MetPak II/MetPak II R ................................................................................ 34
3.2.1
Configuring MetPak II/MetPak II R using MetSet ............................................. 35
3.2.2
MetSet Editing Screen ..................................................................................... 37
3.2.3
Configuring using HyperTerminal .................................................................... 39
3.2.4
Configuring MetPak II/MetPak II R for NMEA Output. ..................................... 43
3.2.5
Configuring MetPak II/MetPak II R for SDI-12................................................. 44
3.2.6
SDI-12 Commands .......................................................................................... 44
3.2.7
Safe Mode ....................................................................................................... 47
Last Change
09 March, 2012
MetPak II and MetPak R User Manual
© Gill Instruments Ltd
Page i
Contents
4.
Troubleshooting ................................................................................................ 49
4.1
Fault-Finding ................................................................................................................. 49
4.2
Servicing ....................................................................................................................... 50
4.3
Bench Tests .................................................................................................................. 50
5.
Maintenance ...................................................................................................... 53
6.
Technical Information ....................................................................................... 55
6.1
Specification ................................................................................................................. 55
6.2
Hub PCB Connections .................................................................................................. 57
6.3
Electrical Conformity Certificate .................................................................................... 59
Figures
Figure 1
Figure 2
Figure 3
Figure 4
Figure 5
Figure 6
Figure 7
Figure 8
Figure 9
Figure 10
Figure 11
Figure 12
Figure 13
Figure 14
Figure 15
Figure 16
Figure 17
Figure 18
Figure 19
Figure 20
Figure 21
Figure 22
MetPak II
MetPak II R
Compass points
Position of Temperature and Relative Humidity Probe in the Radiation Shield
Internal view of the hub box
Connection of Gill USB Cable (Part No. 1723-10-051)
RS232 connections
RS422 connections
RS485 Connections
SDI-12 connections
Correct mounting position for MetPak II
WindSonic Sensor Mounting
Correct mounting position for MetPak II R parts
Opening MetView Screen
Scanning for MetPak II/MetPak II R Devices
The MetView Console
MetView Gauge Range
MetView Graph
Setting up data logging
A typical data log (viewed in Windows Notepad)
Opening MetSet Screen
Summary of MetPak II/MetPak II R Device Settings using MetSet
1
2
3
4
16
17
17
18
18
19
21
23
24
25
26
27
29
30
31
33
35
36
Abbreviations
Recommended Belden cable types
Maximum cable lengths for supported communication networks
Connection status indicators
MetView scale and unit options
MetView averaging options
Max/min markers
MetView Screen Settings Options
Default configuration settings
MetPak II/MetPak II R configuration commands
Abbreviations used in UNIT configuration command
5
14
14
27
28
28
28
28
34
40
42
Tables
Table 1
Table 2
Table 3
Table 4
Table 5
Table 6
Table 7
Table 8
Table 9
Table 10
Table 11
MetPak II and MetPak II R User Manual
© Gill Instruments Ltd
Page ii
Last Change
09 March, 2012
Table 12
Table 13
Table 14
Table 15
Table 16
Table 17
Common problems and their solution
Status codes as output with the MetPak II/MetPak II R data string
HygroClip connections (6-way connector J1)
MetPak II WindSonic anemometer connections (8-way connector J4)
MetPak II R WindSonic anemometer connections (8-way connector J4)
PC communications (8-way connector, J5)
MetPak II and MetPak II User Manual
© Gill Instruments Ltd
Page iii
49
50
57
57
57
58
Last Change
09 March, 2012
1. Introduction
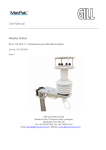
MetPak II
MetPak II is a compact and lightweight multi-sensor instrument that measures the
most essential weather parameters. Gill ultrasonic technology, as used in the
proven WindSonic instrument, measures wind speed and direction. Temperature
and Humidity are measured and Dewpoint calculated using an industry standard
probe housed in a naturally aspirated radiation shield. Barometric pressure is
measured using an industry standard sensor.
The instrument is supplied with digital ASCII RS232/RS422/485 (2 wire point to
point) and digital SDI-12 outputs. NMEA 0183 output is also configurable. An
electrical hub box is fitted to the mounting bracket allowing convenient termination
of all electrical cables.
The instrument uses a rugged U-bolt mounting clamp that attaches to any vertical
pipe up to 50mm (2”) diameter.
An electrical hub box is fitted to the mounting bracket for termination of data and
power cables.
Wind speed and
direction sensor
Radiation shield
Gore-Tex Vent for
Barometric
Pressure Sensor
Temperature and
Relative humidity
sensor
Hub box
Mounting
bracket
Figure 1
Last Change
09 March, 2012
MetPak II
MetPak II and Met Pak II R User Manual
© Gill Instruments Ltd
Page 1
Introduction
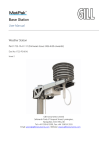
MetPak II R
With all the features of the MetPak II the MetPak II R is a compact and lightweight
multi-sensor instrument that measures the most essential weather parameters.
Gill ultrasonic technology, as used in the proven WindSonic instrument, measures
wind speed and direction at up to 10 metres from the Hub box and bracket
assembly using a 10 metre extension cable. The WindSensor is designed to be
pipe mounted on a 44.45mm (1.75”) pipe of 3mm wall thickness.
Temperature and Humidity are measured and Dewpoint calculated using an
industry standard probe housed in a naturally aspirated radiation shield. Barometric
pressure is measured using an industry standard sensor.
The instrument is supplied with digital ASCII RS232/RS422/485 (2 wire point to
point) and digital SDI-12 outputs. NMEA 0183 output is also configurable. An
electrical hub box is fitted to the mounting bracket allowing convenient termination
of all electrical cables.
The instrument bracket assembly uses a rugged U-bolt mounting clamp that
attaches to any vertical pipe up to 50mm (2”) diameter.
Remote WindSonic
(Supplied)
Radiation Shield
Temperature and
Humidity Sensor
10 Metre Cable
(Supplied)
Figure 2
MetPak II R
Gore-Tex Vented Hub
Box containing
Barometric Pressure
Sensor.
MetPak II and MetPak II R User Manual
© Gill Instruments Ltd
Page 2
Last Change
09 March, 2012
Introduction
1.1
Principle of Operation
1.1.1
Wind Speed and Direction Sensor
The MetPak II/MetPak II R uses the WindSonic wind speed and direction sensor.
The WindSonic measures the times taken for an ultrasonic pulse of sound to travel
from the North transducer to the South transducer, and compares it with the time
for a pulse to travel from S to N transducer. Likewise times are compared between
West and East, and E and W transducer.
If, for example, a North wind is blowing, then the time taken for the pulse to travel
from N to S will be faster than from S to N, whereas the W to E, and E to W times
will be the same. The wind speed and direction can then be calculated from the
differences in the times of flight on each axis. This calculation is independent of
factors such as temperature.
Figure 3 Compass points
Figure 3 shows the compass point and polarity of U and V if the wind components
along the U and V axis are blowing in the direction of the respective arrows.
Last Change
09 March, 2012
MetPak II and Met Pak II R User Manual
© Gill Instruments Ltd
Page 3
Introduction
1.1.2
Radiation Shield
The Multi-Plate Radiation Shield protects temperature and relative humidity
sensors from error-producing solar radiation and precipitation. This shield relies on
a combination of plate geometry, material and natural ventilation to provide
effective shielding.
1.1.3
Temperature and Relative Humidity Sensor with
Dewpoint Output
The Rotronic HygroClip module is a complete instrument, with integrated
temperature compensation. Calibration data is maintained within the integrated
electronics. It provides digital output signals for Relative Humidity, Temperature
and Dewpoint to the MetPak II/MetPak II R Hub box.
Figure 4
Shield
1.1.4
Position of Temperature and Relative Humidity Probe in the Radiation
Barometric Pressure
Barometric pressure output is provided by a solid-state device fitted on to the circuit
board in the MetPak II/MetPak II R hub box. Vent to atmosphere is via a Gore-Tex®
filter, which protects the pressure sensor from the effects of wind and rain.
MetPak II and MetPak II R User Manual
© Gill Instruments Ltd
Page 4
Last Change
09 March, 2012
Introduction
1.2
Abbreviations
Table 1 Abbreviations
Item
ASCII
C
CAL
CD
COM
CR
CSV
ETX
F
FPM
HF
HPA
HTML
Hz
IMM
In Hg
K
KPH
KTS
LF
M Bar
Max
MF
Min
Mm Hg
MPH
MS
MS
NMEA
NSEW
NVM
PC
ROM
RS232
RS422
Rx
RXD
SDI-12
STX
Tx
TXD
VHF
WIMWV
WIXDR
WMO
Last Change
09 March, 2012
Meaning
American Standard Code for Information Interchange
Centigrade
Calibration
Compact Disc
Communications
Carriage Return
Comma Separated Variable
End of String
Fahrenheight
Feet per Minute
High Frequency
Hecto-Pascals
Hyper Text Markup Language
Hertz
International Maritime Mobile
Inches of Mercury
Kelvin
Kilometres per Hour
Knots
Line Feed
Milli Bars
Maximum
Medium Frequency
Minimum
Millimetres of Mercury
Miles per Hour
Microsoft
Metres per Second
National Marine Electronics Association
North South East West
Non-Volatile Memory
IBM compatible Personal Computer
Read Only Memory
Communications standard
Communications standard
Receive
Received Data
Serial – Data Interface standard for microprocessor based
sensors
Start of String
Transmit
Transmitted Data
Very High Frequency
Wind Instrument Mean Wind direction and Velocity
Wind Instrument Cross track error Dead Reckoning
World Meteorological Organisation
MetPak II and Met Pak II R User Manual
© Gill Instruments Ltd
Page 5
Introduction
1.3
Initial Test Guides
1.3.1
MetPak II (Part 1723-PK-100)
This section provides an overview of the installation and operation of MetPak II.
For more detailed information about any of the steps, use the references to other
sections of this manual.
1.
Decide how you are going to connect MetPak II to your PC or
communications network. MetPak II supports the following options:
USB connection using Gill’s RS232 to USB 1.8M configuration cable
(includes integral 5V power supply). To order, contact your dealer
quoting part number: 1723-10-051).
NOTE. You could use an equivalent RS232-USB adapter such as
EasySynch RS232 to USB adaptor.
RS232 connection using standard cable and PC COM port. Separate
5V to 30V dc power supply also required.
RS422 using RS232 converter.
RS485 2 wire point-to-point communication using suitable converter
(note RS485 2 wire point-to-point is not compatible with MetView
Software).
SDI-12 connection (note SDI-12 is not compatible with MetView
Software).
NOTE. MetPak II is pre-configured for RS232 communication (factory
setting). If you want to use an alternative communication protocol, you
will need to set up the unit using an RS232 connection (with an
appropriately wired cable), change the setting (see page 34), shut the
unit down, attach a cable for the new communication type, and then
restart the unit.
2.
Unpack MetPak II. Check that you have the following:
MetPak II unit (Part No.1723-PK-100).
Gill MetView, MetSet Software and Manual supplied on the CD.
If any parts are missing, please contact your dealer.
3.
Open the hub box by unfastening the four retaining screws. Locate the
connector: J5 (see Page 16, Figure 5). Carefully pull the connector block
from its pins.
4.
Prepare the communications cable by stripping the wires to a length of 8mm.
Feed the prepared cable through one of the two available ports on the side
of the hub box.
5.
Connect the cable to J5 as described on page 16 for your chosen
communications method.
6.
Carefully press J5 onto its circuit board pins.
7.
Replace the top on the connection box. Tighten the gland on the connection
port to seal the cable in place.
8.
If you are carrying out a bench test, continue to step 13. When you have
finished testing, return to Step 9.
MetPak II and MetPak II R User Manual
© Gill Instruments Ltd
Page 6
Last Change
09 March, 2012
Introduction
Last Change
09 March, 2012
9.
Unfasten the mounting bracket. Position the MetPak II against the mounting
post (see page 21), replace the mounting bracket and tighten sufficiently to
hold the unit in place but allowing it to be rotated or moved up and down the
pole.
10.
Check the orientation and alignment of the unit (see page 21).
11.
Check the height of the unit and ensure it is clear of any obstructions,
including the mounting post, that could interfere with MetPak II’s
measurements (see page 21).
12.
Tighten the mounting bracket to hold the unit firmly in place.
13.
Connect the communications cable to your PC or network device.
14.
Place the MetPak II CD in your PC’s CD drive and install MetView.
15.
Run MetView.
16.
Click on the Scan button. MetView Software searches for the MetPak II
connection.
17.
Allow the software to search for the MetPak II unit through the available
COM ports. If you have more than one unit configured, you may have to
select the unit based on the COM port assignments.
18.
MetView reads the unit and reports its wind, temperature, humidity, dewpoint
and pressure measurements (see below). If you have any problems, please
read the Installation chapter for full details of these steps.
MetPak II and Met Pak II R User Manual
© Gill Instruments Ltd
Page 7
Introduction
1.3.2
MetPak II R (Part 1723-PK-150)
This section provides an overview of the installation and operation of MetPak II R.
For more detailed information about any of the steps, use the references to other
sections of this manual.
1.
Decide how you are going to connect MetPak II R to your PC or
communications network. MetPak II R supports the following options:
USB connection using Gill’s RS232 to USB 1.8M configuration cable
(includes integral 5V power supply). To order, contact your dealer
quoting part number: 1723-10-051).
NOTE. You could use an equivalent RS232-USB adapter such as
EasySynch RS232 to USB adaptor.
RS232 connection using standard cable and PC COM port. Separate
5V to 30V dc power supply also required.
RS422 using RS232 converter.
RS485 2 wire point-to-point communication using suitable converter
(note RS485 2 wire point-to-point is not compatible with MetView
Software).
SDI-12 connection (note SDI-12 is not compatible with MetView
Software).
NOTE. MetPak II R is pre-configured for RS232 communication
(factory setting). If you want to use an alternative communication
protocol, you will need to set up the unit using an RS232 connection
(with an appropriately wired cable), change the setting (see page 34),
shut the unit down, attach a cable for the new communication type,
and then restart the unit.
2.
Unpack MetPak II R. Check that you have the following:
MetPak II R Bracket/10 Metre Cable and Connector pack
(Spare Part No.1723-PK-153).
Gill WindSonic WindSensor (Spare Part No. 1723-PK-151).
Gill MetView, MetSet Software and Manual supplied on the CD.
If any parts are missing, please contact your dealer.
3.
Assemble the 9 way Clipper connector to the end of the 10 metre cable (see
Para 2.2.3).
If it is required to shorten the 10 Metre cable then cut the cable to the
required length, strip the cable and fit solder pins supplied to the wires.
Instructions for preparing the cable for new pins and fitting/removal of the 9way connector are detailed in Para 2.2.3.
4.
Plug the cable 9-way clipper connector into the WindSonic Wind Sensor
socket.
5.
Open the hub box by unfastening the four retaining screws. Locate the
connector: J5 (see Page 16, Figure 5). Carefully pull the connector block
from its pins.
6.
Prepare the communications cable by stripping the wires to a length of 8mm.
Feed the prepared cable through one of the two available ports on the side
of the hub box.
7.
Connect the cable to J5 as described on page 16 for your chosen
communications method.
MetPak II and MetPak II R User Manual
© Gill Instruments Ltd
Page 8
Last Change
09 March, 2012
Introduction
Last Change
09 March, 2012
8.
Carefully press J5 onto its circuit board pins.
9.
Replace the top on the connection box. Tighten the gland on the connection
port to seal the cable in place.
10.
Connect the communications cable to your PC or network device.
11.
Place the MetPak II/MetPak II R CD in your PC’s CD drive and install
MetView.
12.
Run MetView.
13.
Click on the Scan button. MetView Software searches for the MetPak II R
connection.
14.
Allow the software to search for the MetPak II R unit through the available
COM ports. If you have more than one unit configured, you may have to
select the unit based on the COM port assignments.
15.
MetView reads the unit and reports its wind, temperature, humidity, dewpoint
and pressure measurements (see below). If you have any problems, please
read the Installation chapter for full details of these steps.
MetPak II and Met Pak II R User Manual
© Gill Instruments Ltd
Page 9
Installation
2. Installation
MetPak II/MetPak II R has been designed to meet and exceed the stringent
standards listed in its specification (see Para 6.1).
2.1
Pre-Installation Checks
As with any sophisticated electronics, good engineering practice should be
followed to ensure correct operation:
Ensure the MetPak II/MetPak II R will not be affected by other equipment
operating locally, which may not conform to current standards, e.g.
radio/radar transmitters, generators etc.
Avoid mounting in the plane of any radar scanner – a vertical separation of
at least 2m should be achieved.
When installing MetPak II/MetPak II R near radio transmitting antennas,
ensure that the mounting position fulfills the following minimum separations
(all round):
VHF IMM – 1m
MF/HF – 5m
Satcom – 5m (avoid likely lines of sight)
Use cables recommended by Gill (see Para 2.2.3). If cables are cut and reconnected incorrectly (perhaps in a junction box) then EMC performance
may be compromised if cable screen integrity is not maintained.
Avoid earth loops – wire the system in accordance with these installation
guidelines.
Ensure that the power supply operates to the MetPak II/MetPak II R
specification (see Para 6.1) at all times.
Avoid turbulence caused by surrounding structures that will affect the
accuracy of the sensors such as trees, masts and buildings. The WMO
make the following recommendations. The standard exposure of wind
instruments over level open terrain is 10m above the ground. Open terrain
is defined as an area where the distance between the sensor and any
obstruction is at least 10 times the height of the obstruction.
Keep away from building exhaust vents, machinery and motors.
2.1.1
Spare Parts
1405-PK-069
WindSonic 9 way connector (MetPak II R).
1405-30-056
WindSonic 0.5 metre support tube drilled (MetPak II R).
1723-PK-151
WindSonic (MetPak II R).
1723-PK-152
Hub Box assembly (MetPak II R).
1723-PK-153
10 Metre cable with pins (MetPak II R).
1723-10-051
RS232 to USB 1.8M configuration cable (both units).
1723-PK-024
Pressure Sensor Filter Spares kit.
1723-PK-025
Hygroclip Filter Replacement Kit (2 Filters).
MetPak II and MetPak II R User Manual
© Gill Instruments Ltd
Page 10
Last Change
09 March, 2012
Installation
2.2
Installation
2.2.1
Bench system test
Prior to physically mounting the MetPak II/MetPak II R in its final location, we
strongly recommend that a bench system test is carried out to confirm the system
is configured correctly, is fully functional and electrically compatible with the
selected host system and cabling (preferably utilising the final cable length). The
required data format, units, output rate, and other options should also all be set up
at this stage.
2.2.2
Equipment Required
1723-PK-100
MetPak II set for RS232 communication (factory default setting).
Or
1723-PK-150
MetPak II R set for RS232 communication (factory default setting).
1723-10-051
MetPak II RS232 to USB 1.8M configuration cable with integral 5v
power or alternatively use RS232, RS232 converter and separate
5v to 30 dc power supply.
ES-U-1001-A
EasySynch RS232 to USB adaptor or equivalent (if not using Gill
part 1723-10-051) or connect directly to an RS232 COM port.
Power Supply 5V to 30Vdc at 50mA if required.
Belden 9503 3 pair cable (if not using Gill Part 1723-10-051), length as required.
Gill MetView Software supplied on the MetPak II/MetPak II R CD or download from
.http://www.gill.co.uk/main/software.html
2.2.3
Cabling
MetPak II R 10 Metre Cabling
If using a MetPak II R unit this comes with an integral 10 metre, Belden 8104 cable
fitted to the hub box connector J4 (see Table 16) and terminated in clipper
connector solder contacts for installing into a WindSonic Connector (supplied).
Details on fitting the connector pins on the 10 metre cable into the WindSonic
connector are as follows:If shortening the 10 Metre cable to a required length, strip and prepare as follows:Trim back the screened cable outer and screen sleeves 45mm.
Trim back the screen braid wire flush with the outer sleeve.
Cut back unused wires White/Green, Brown/White and White/Brown to 10mm from
the outer sleeve.
Strip back the connection wires by 4mm and tin solder.
Solder the contact pins to the wires. Note that the connector supplies the correct
strain relief for cables with an outside diameter of 6-12mm.
Screen Twisted Pair
Cable
4 mm
45 mm
Last Change
09 March, 2012
Screen Braid is cut flush
MetPak II and Met Pak II R User Manual
© Gill Instruments Ltd
Page 11
Installation
Route the cable through the connector parts as in direction shown below.
Whilst squeezing the red retainer in the direction of ARROWS A, pull in the
direction of ARROW B.
A
A
B
Your connector should now resemble the connector in the picture below.
Insert each contact pin until you feel a slight click. If you have inserted the contact
into the incorrect hole it can be removed at this point by simply pulling it out.
Please note there will be some resistance.
Connections are:Green/White wire to Connector Pin 1
White/Orange wire to Connector Pin 2
Orange/White wire to Connector Pin 3
Blue/White wire to Connector Pin 4
White/Blue wire to Connector Pin 6
1
8
7
2
9
4
6
Rear View of Connector
MetPak II and MetPak II R User Manual
© Gill Instruments Ltd
Page 12
3
5
Last Change
09 March, 2012
Installation
Continue to insert all of the contacts you require. Once all of the contacts are
inserted squeeze the 2 red retainers (See Arrows A on previous page) into place.
NB. The retainer can only be pushed back into place if the contacts are fully
engaged.
Fit the connector to the WindSonic Sensor so that you can finish assembling the
connector.
Screw the back shell onto the connector until it is fully in place. Please note that
the final rotations can be slightly stiff.
Now screw the next part of the connector into place.
Now screw the cable-clamping nut into place.
The connector can now be removed from the WindSonic.
NOTE: To disassemble the connector, reverse this procedure.
Last Change
09 March, 2012
MetPak II and Met Pak II R User Manual
© Gill Instruments Ltd
Page 13
Installation
Communication Cabling
MetPak II/MetPak II R has five communication connection options:
USB (using the 1.8m Gill USB cable, Part No. 1723-10-051).
RS232
RS422
RS485 (two wire point to point)
SDI-12
It is important that the cable is appropriate for the chosen communication network.
The following sections describe the recommended types and maximum lengths of
cable in each case.
NOTE. A 15-metre, 6-pair cable (wires stripped at each end) suitable for
RS232/RS422/485 or SDI-12 communication is available from Gill Instruments
(Part No. 1723-10-053).
Cable Type
Wire type:
24AWG
Wire size:
7x32 AWG.
Cable outer diameter:
6-8mm (to match the hub box gland).
For RS422/485 operation the cable should contain twisted pairs screened to match
the application.
The following table shows an example manufacturers’ reference; other
manufacturers’ equivalents can be used.
Table 2 Recommended Belden cable types
Application
No. of Pairs
SDI-12 or RS485
2
Belden Ref.
9729
Digital RS232
3
9503
Digital RS422
4
9504
Cable length
The maximum cable length is dependent on the chosen communication method.
The following table shows the maximum cable lengths for the supported
communication protocols at the given baud rates, using the recommended cable. If
any problems of data corruption etc are experienced, then a slower baud rate
should be used. Alternatively, a higher specification cable can be tried.
Table 3 Maximum cable lengths for supported communication networks
Communication format
Baud rate
Max. cable length
RS232
19200
6.5M
RS422/RS485
19200
1000M
SDI-12
1200
90m (300ft)
MetPak II and MetPak II R User Manual
© Gill Instruments Ltd
Page 14
Last Change
09 March, 2012
Installation
Cabling protection
The Cable should be secured:
With cable clamps or equivalent at regular intervals such that the hub
box cable gland does not support the cable weight.
On the MetPak II R the 10 metre cable should be supported at regular
intervals with cable clamps to ensure that the cable weight is not
supported by the WindSonic connector.
Away from the mounting U bolts to prevent chaffing of the cable.
NOTE. Install appropriate strain relief support to the cable. If possible, pass the
cable through the mounting pole.
Earthing
To ensure correct operation and for maximum protection from lightning, a separate
lightning rod system is recommended to protect the system.
You can also earth the MetPak II/MetPak II R through its mountings or by
connecting a grounding cable (minimum of 6mm² copper wire) to a spare MetPak
II/MetPak II R metalwork bolt hole. Clean off any paint that might prevent a good
connection.
When you connect the communications cable ensure that the screen has a
connection to the hub box case.
Last Change
09 March, 2012
MetPak II and Met Pak II R User Manual
© Gill Instruments Ltd
Page 15
Installation
2.2.4
Communication connections
To connect MetPak II/MetPak II R:
1.
Open MetPak II/MetPak II R’s hub box by unfastening the four screws.
2.
Locate connector J5 (see Figure 5). Carefully pull the connector off its circuit
board pins.
3.
Strip the cable wires to 8mm.
4.
Pass the cable through one of the gland nuts.
5.
Connect your cable as shown in the following diagrams:
Gill USB Cable
Figure 6
RS232
Figure 7
RS422
Figure 8
RS485
Figure 9
SDI-12
Figure 10
6.
Ensure the cable screen is grounded through the hub box gland metalwork.
7.
After connection, securely tighten the gland nut to prevent moisture ingress.
NOTE. Ensure that MetPak II/MetPak II R is configured for the chosen
communications method.
J4
J5 Pin 8
MetPak II
J5 Pin 1
Hex Terminal
Post
J4
MetPak II R
J1
MetPak II R
J1
MetPak II
Figure 5
J5, showing RS232 to USB
Configuration Cable Wires
Internal view of the MetPak II/MetPak II R hub box
MetPak II and MetPak II R User Manual
© Gill Instruments Ltd
Page 16
Last Change
09 March, 2012
Installation
USB Lead Connection (COMMS set for RS232)
Connect to
Hub box J5
Connect MetPak II/MetPak II R to a PC USB port using the Gill Configuration Cable 1723-10-051.
J5 Pin
1
2
3
4
5
6
7
8
Colour
None
None
Yellow
Orange
None
None
Black
Red
Figure 6
Connection of Gill USB Cable (Part No. 1723-10-051)
Digital Output RS232 Connections (COMMS set for RS232)
This is the MetPak II/MetPak II R default communication configuration setting.
J5 Hub Box
8 Way Push fit Block
Pin nos.
Signal names
Figure 7
Last Change
09 March, 2012
3 Pair Cable
PC 9 Way D Type
Connector
Pin
Signal
No’s
Names
RS232 TX
RS232 RX
3
4
2
3
RXD
TXD
Signal Ov
2
5
Sig Gnd
Chassis
Ground
Terminal
Post
NA
Chassis
Gnd
Power 0v
Power +ve
7
8
Screen wires
–
+
DC Power
supply
RS232 connections
MetPak II and Met Pak II R User Manual
© Gill Instruments Ltd
Page 17
Installation
Digital Output RS422 Connections (COMMS set for RS422)
This is not the default communications setting; ensure the MetPak II/MetPak II R
has been configured for this output requirement before wiring to a user device.
J5 Hub Box
8 Way Push fit Block
Terminal
Signal Names
Nos.
Figure 8
RS422 to RS232
or USB Converter
4 Pair Cable
Signal Names
RS422 TX +
RS422 TX –
RS422 RX +
RS422 RX –
6
3
5
4
RX +
RX –
TX +
TX –
Signal 0v
2
Signal Ground
Chassis
Ground
Terminal
Post
Power 0v
Power +ve
7
8
Screen wires
Chassis ground
–
+
DC Power
Supply
RS422 connections
Digital Output RS485S 2 Wire Point to Point Connections
(COMMS set for RS485P2W)
This is not the default communications setting; ensure the MetPak II/MetPak II R
has been configured for this output requirement before wiring to a user device.
Note that is not possible to network other devices on this 2-wire RS485 link.
J5 Hub Box
8 Way Push fit Block
Terminal
Signal Names
Nos.
Figure 9
RS485 to RS232
or USB Converter
2 Pair Cable
RS485 TX +
RS485 RX+
RS485 TX –
RS485 RX –
6
5
3
4
RS485TX/RX+
Signal 0v
2
Signal Ground
Chassis
Ground
Terminal
Post
Power 0v
Power +ve
7
8
RS485TX/RX–
Screen wires
Chassis ground
–
+
DC Power
Supply
RS485 Connections
MetPak II and MetPak II R User Manual
© Gill Instruments Ltd
Page 18
Signal Names
Last Change
09 March, 2012
Installation
Digital Output SDI-12 Connections (COMMS set for SDI12)
This is not the default communications setting; ensure the MetPak II/MetPak II R
has been configured for this output requirement before wiring to a user device.
J5 Hub Box
8 Way Push fit Block
Terminal
Signal Names
Nos.
SDI-12
Signal 0v
Figure 10
Last Change
09 March, 2012
SDI-12 Device
2 Pair Cable
Signal Names
1
2
Chassis Ground
Terminal
Post
Power 0v
Power +ve
7
8
SDI-12
Signal Ground
Screen wires
Chassis ground
–
+
DC Power
Supply
SDI-12 connections
MetPak II and Met Pak II R User Manual
© Gill Instruments Ltd
Page 19
Installation
2.2.5
Mounting MetPak II and MetPak II R
MetPak II
MetPak II uses a U-bolt mounting clamp suitable for attaching to a vertical pipe
with a diameter of 25-50mm. When mounting MetPak II, consider the position,
orientation and alignment of the unit.
Position
It is the responsibility of the customer to ensure that the MetPak II is mounted in a
position clear of any structure, including the mounting post, which may obstruct the
airflow or induce turbulence.
CAUTION. Do NOT mount the MetPak II in close proximity to high-powered
radar or radio transmitters. A site survey may be required if there is any
doubt about the strength of external electrical noise.
The temperature and humidity probe is mounted inside the radiation shield as
shown in Figure 4.
Orientation
Normally, the MetPak II is mounted on a vertical pole, ensuring a horizontal
Measuring Plane, (see Figure 11, Correct mounting position for MetPak II. For
indoor use the unit may be mounted with the Measurement Plane set to any
required orientation.
Alignment
The MetPak II should be aligned to point to North, or any other reference direction
–for example, the bow of a boat.
There are two arrows, a coloured rectangle, and an alignment notch to aid
alignment.
Note. It is usually simpler to work first with a compass at ground level and identify a
suitable landmark and it’s bearing.
MetPak II and MetPak II R User Manual
© Gill Instruments Ltd
Page 20
Last Change
09 March, 2012
Installation
Figure 11
Last Change
09 March, 2012
Correct mounting position for MetPak II
MetPak II and Met Pak II R User Manual
© Gill Instruments Ltd
Page 21
Installation
MetPak II R
The MetPak II R Bracket and Hub Assembly.
Position
If it is required to follow World Meteorological Organisation (WMO) requirements
then the Temperature, Humidity and Barometric Hub box assembly should be
mounted between 1.25 metres and 2 metres above ground.
It is the responsibility of the customer to ensure that the MetPak II R is mounted in
a position clear of any structure, including the mounting post, which may obstruct
the airflow or induce turbulence.
CAUTION. Do NOT mount the MetPak II R in close proximity to high-powered
radar or radio transmitters. A site survey may be required if there is any
doubt about the strength of external electrical noise.
The temperature and humidity probe is mounted inside the radiation shield as
shown in Figure 4.
Orientation
Normally, the MetPak II R is mounted on vertical pole/s, ensuring a horizontal
Measuring Plane, (see Figure 13). For indoor use the unit may be mounted with
the Measurement Plane set to any required orientation.
Mounting
The MetPak II R bracket and hub assembly uses a U-bolt mounting clamp suitable
for attaching to a vertical pipe with a diameter of 25-50mm.
The MetPak II R Wind Sensor
Position
If it is required to follow World Meteorological Organisation (WMO) requirements
then the Wind Sensor should be mounted 10 metres above ground.
Do NOT mount the WindSonic in close proximity of high-powered radar or radio
transmitters. A site survey may be required if there is any doubt about the strength
of external electrical noise.
Alignment
The MetPak II R WindSonic Wind Sensor should be aligned to point to North, or
any other reference direction.
There are two arrows, a coloured rectangle, and an alignment notch to aid
alignment.
Note. It is usually simpler to work first with a compass at ground level and identify a
suitable landmark and it’s bearing.
Mounting
MetPak II R WindSonic Wind Sensor is suitable for pipe mounting requiring a pole
of 44.45mm (1.75”) outside diameter and 3mm thickness).
MetPak II and MetPak II R User Manual
© Gill Instruments Ltd
Page 22
Last Change
09 March, 2012
Installation
Note it is important that the correct diameter pipe is used to prevent damage to the
WindSonic lower moulding when tightening the screws.
The support tube requires three 3 equally spaced holes, tapped M5, 7.5mm from
the top of the tube. Pass the cable (fitted with the 9 way Clipper plug) through the
tube.
Note: the customer must fit appropriate strain relief to the cable.
Connect the plug by twisting it whilst pushing it gently into the socket on the
WindSonic. When it locates, twist the outer sleeve clockwise to connect and lock
the plug.
Fix the WindSonic to the tube using the 3 stainless steel screws provided.
(Maximum mounting screw torque 4 Nm.)
It is the responsibility of the customer to ensure that the WindSonic is mounted in a
position clear of any structure, which may obstruct the airflow or induce turbulence.
Figure 12
Last Change
09 March, 2012
WindSonic Sensor Mounting
MetPak II and Met Pak II R User Manual
© Gill Instruments Ltd
Page 23
Installation
Figure 13
Correct mounting position for MetPak II R parts
MetPak II and MetPak II R User Manual
© Gill Instruments Ltd
Page 24
Last Change
09 March, 2012
3. Operation
There are several ways in which you can retrieve weather information from the
MetPak II/MetPak II R:
3.1
MetView (Graphically View Data and Log)
Using MetSet or an MS Windows Terminal (both to View Data and
Configure the MetPak II/MetPak II R)
SDI-12 command set (Retrieve Data)
MetView
Before you can use MetView, check that MetPak II/MetPak II R is correctly
connected to a COM or USB port on your PC (see page 17).
NOTES: MetView is compatible with RS232 and RS422 connected units only.
MetView will not read NMEA data strings.
3.1.1
Opening MetView
Click on the MetView button on your PC’s desktop or choose:
Start > Programs > MetView > MetView
The MetView Control Centre window is displayed
Scan Button– If MetPak II/ MetPak II R transmit and receive wires are connected
to the PC then use the Scan button to connect to MetView.
Connection is Receive Only Tick Box – Us if the MetPak II/MetPak II R
connection to the PC has only transmit wires connected and a MetSet version of its
current device settings is available to upload to MetView. Select ‘Connection is
Receive only’ tick box and click on the Scan button. Upload a MetSet generated
Device file from a PC location as directed.
Figure 14
Last Change
09 March, 2012
Opening MetView Screen
MetPak II and Met Pak II R User Manual
© Gill Instruments Ltd
Page 25
Operation
3.1.2
Scanning for Devices
To set up communicate between MetView and a connected MetPak II/MetPak II R:
1.
Figure 15
Click on the Scan button to search the available COM ports for MetPak
II/MetPak II R devices.
Scanning for MetPak II/MetPak II R Devices
When a device is found, MetView obtains the MetPak II/ MetPak II R configuration
settings and then retrieves and displays MetPak II/MetPak II R data.
MetPak II and MetPak II R User Manual
© Gill Instruments Ltd
Page 26
Last Change
09 March, 2012
Operation
3.1.3
The MetView Console
When connected correctly, MetView displays its data-monitoring console. This
consists of five gauges showing: Temperature, Humidity, Pressure, Wind Speed
and Wind Direction. There is also a digital readout of Dew Point. Buttons beneath
each of the gauges allow you to choose the displayed units and other options.
Each gauge also shows the maximum and minimum values recorded during the
current session. The wind speed gauge also shows the maximum gust speed.
Note: MetView will not show data if the unit is set for NMEA or SDI-12 formats.
Wind Direction
Wind Speed
Pressure
Humidity
Temperature
Disconnect
button
Dew Point
Averaging
options
Connection
Status
indicators
(see Table
below)
Firmware Version
and Unit ID
Load
Settings
button
Save
Settings
button
Default
Settings
button
Figure 16 The MetView Console
Logging
button
Max/Min
Markers
Connection Status
Table 4 Connection status indicators
Reading
Green Background Tick
Red Background Cross
1.00Hz
Thu 21 Jul 2011 15:51:07
Last Change
09 March, 2012
Function
Indicates MetPak II/MetPak II logging or
communicating correctly with MetView along with
reading the MetPak II/MetPak II R firmware version.
Indicates MetPak II/MetPak II R not logging or not
connected/communicating to MetView.
Indicates the output rate of the MetPak II/MetPak II
R when connected. Reads when the unit is
communicating correctly with MetView.
Real Time PC date and time indication.
MetPak II and Met Pak II R User Manual
© Gill Instruments Ltd
Page 27
Operation
3.1.4
MetView Console Display Options
MetView Console buttons can convert data from the MetPak II/MetPak II R to read
different units or scale settings. This does not alter the actual MetPak II/MetPak II
R configuration.
Units shown in bold denote default settings
Table 5 MetView scale and unit options
Gauge
Temperature & Dew Point
Humidity
Pressure
Wind Speed
Wind Speed Markers
Wind Direction
Function
Use buttons to choose from three temperature
scales: °C, °F, K
Displays Max and Min values during current
session in %
Use buttons to choose from pressure scales:
hPa, mbar, inHg, mmHg
Use buttons to choose from five wind speed
units: m/s, kph, mph, kts, fpm
Use buttons to add markers on the gauge for
Max/Min or Max Gust.
Use buttons to choose from two display styles:
NSEW or Maritime
Table 6 MetView averaging options
Setting
Real Time
2 Min
10Min
Function
Choose this button for no averaging
Select for 2 minute rolling average of all sensor
readings
Select for 10 minute rolling average of all sensor
readings
Table 7 Max/min markers
Setting
Off
On
Reset
Function
Maximum and Minimum Markers on all gauges
turned off
Maximum and Minimum Markers on all gauges
turned on
Reset all Gauge Maximum/Minimum Markers
and all digital Maximum/Minimum reading at will
Table 8 MetView Screen Settings Options
Setting
Save Settings
Load Settings
Default Settings
Function
Will Save all the current MetView screen
settings to a file for later retrieval if required.
Will load and update the MetView screen with a
previously saved setting.
Will return all MetView screen settings to factory
default.
MetPak II and MetPak II R User Manual
© Gill Instruments Ltd
Page 28
Last Change
09 March, 2012
Operation
3.1.5
MetView Gauge Ranges and Graphs
Gauge Range Settings.
MetView Pressure, Humidity and Temperature Gauge ranges may be changed to
view changes in conditions more visibly.
Note, These changes only affect MetView settings and do not affect the MetPak II
or MetPak II R output.
For instance if the typical temperature measurement range required is from +10
degrees to +40 deg C then the temperature gauge range can be adjusted to reflect
this.
Place the mouse pointer over the Temperature display gauge and double click to
bring up the Set Gauge Range screen. Change Max and Min readings to required
values, e.g. +10 min and +40 max.
Click on Set.
The Temperature gauge range will be updated to reflect the change.
Double Click
to bring up
Set Gauge
Range.
Figure 17
Last Change
09 March, 2012
After
changing
the
Range.
MetView Gauge Range
MetPak II and Met Pak II R User Manual
© Gill Instruments Ltd
Page 29
Operation
Graphs
MetView allows data detected over the last minute, last 1 hour and last 24 hours to
be accessed and shown on a graph.
Note. Data is only shown up to the time when the graph function is selected, the
graph is not updated once opened. Data is collected from the time that MetView is
opened and reading data from a MetPak II or MetPak II R.
Double Click on the
reading to bring up
the graph.
Click on the Last Min, Last Hour or Last 24 Hours buttons as required to view data.
Figure 18
MetView Graph
MetPak II and MetPak II R User Manual
© Gill Instruments Ltd
Page 30
Last Change
09 March, 2012
Operation
3.1.6
Data logging
NOTE. MetView logs data based on the MetPak II/MetPak II R configuration not on
the MetView console settings.
To log MetPak II/MetPak II R data, click on the Logging button on the MetView
console. The Logging dialog box is displayed.
Figure 19
Setting up data logging
Setting up a logging file
1.
Select Enable Logging to start logging to a file.
2.
Identify the name and location for the logging file:
3.
Last Change
09 March, 2012
Log File location
Click on the Browse button to identify the folder
where you want to store the data file. Enter the name
of the file.
Log file header
If required type some notes on the data that is to be
recorded which will appear at the top of the saved
data log file.
Choose from the following additional options:
Log File Rotation
Set up segmented logging with each logged file length
determined by the number entered in the text box
below. The figure 3600, for example, means that each
log file length will be 3600 lines of data. Maximum
entries per log file is limited to 65535 and a maximum
of 2048 log files can be created.
Add Timestamp
Adds the date and time to the logged data file taken
from the PC clock.
MetPak II and Met Pak II R User Manual
© Gill Instruments Ltd
Page 31
Operation
To start logging
1.
Check that the Enable Logging option is selected.
2.
Click on the OK button to commence logging and return to the console.
Note. To show that data is being recorded, the Logging button’s icon changes to a
green tick:
Logging active
Logging stopped
To stop logging
To turn off logging:
1.
Click on the Logging button on the MetView console. Clear the Enable
Logging check box.
2.
Click on the OK button. If logging has stopped, the Logging button shows a
red background cross instead of the green background tick (see above).
MetPak II and MetPak II R User Manual
© Gill Instruments Ltd
Page 32
Last Change
09 March, 2012
Operation
Understanding logged data
Logged data is stored to a file with a .log extension. This can be viewed in any
text/HTML editor or spreadsheet application.
Figure 20
A typical data log (viewed in Windows Notepad)
Each entry in the default file format consists of the following:
000001 Thu Jun 17 16:08:53 2010,
Line Number
Date/time stamp
Node letter
Wind direction
Wind speed
Pressure
Humidity
Temperature
Dewpoint
Supply voltage
Status code
Checksum
Last Change
09 March, 2012
Q,
113,
000.07, 1019.4, 035.1,+024.7,+008.3,+04.9,00, 5F
MetPak II and Met Pak II R User Manual
© Gill Instruments Ltd
Page 33
Operation
3.2
Configuring MetPak II/MetPak II R
MetPak II/MetPak II R can be configured using:
Gill MetSet or a terminal program such as Windows HyperTerminal.
Gill Wind software used as a Terminal Program only.
The default configuration settings are listed in the following table.
Table 9 Default configuration settings
Setting
Function
Comms Levels
Baud Rate
Data Connection
Output rate
Message Mode
Message Format
Output Sentence
RS232
19200
Data Bits 8, Parity None, Stop Bits 1, Flow Control None.
1Hz
Continuous
Wind Direction (degrees), Wind Speed (Metres/Sec),
Barometric Pressure (hecto pascals), Humidity (percent),
Temperature (degrees C), Dew Point (degrees C), Power
Supply (volts), Status Code (00) Checksum (hex number).
Comma Separated Variable
Node Address
Q
Message terminator
Power up message
Carriage return and line feed.
On
Example Default ASCII Data String:
<STX>Q,170,000.08,1019.5,035.0,+024.7,+008.3,+04.9,00,<ETX>55 & (CR,LF)
STX
Node letter
Wind direction
Wind speed
Pressure
Humidity
Temperature
Dewpoint
Supply voltage
Status code
ETX
Checksum
Carriage Return/Line Feed
NOTES:
<STX> is the Start of String character (ASCII value 2).
<ETX> is the End of String character (ASCII value 3).
Checksum, the 2 digit Hex Checksum sum figure is calculated from the Exclusive OR of the bytes
between (and not including) the STX and ETX characters.
MetPak II and MetPak II R User Manual
© Gill Instruments Ltd
Page 34
Last Change
09 March, 2012
Operation
3.2.1
Configuring MetPak II/MetPak II R using MetSet
Before you use MetSet check that MetPak II/MetPak II R is correctly connected to
a COM or USB port on your PC.
NOTE: MetSet is compatible with RS232 and RS422 connected units only.
Click on the MetSet button on your PC’s desktop or choose:
Start > All Programs > MetSet > MetSet
The MetSet Control Centre window is displayed. If you have more than one
MetPak II connected to your PC, MetSet, by default, selects the first device
detected.
For most applications it is recommended to click on the MetSet Connect and Read
button.
MetSet interrogates the MetPak II/MetPak II R and returns a summary of the
device settings.
Connect the
MetPak unit
output to MetSet
and read its
configuration
settings
Connect the
MetPak unit
output to MetSet
without reading
its configuration
settings
Disconnect
MetPak unit and
create MetPak
unit device
settings using
MetSet Offline
Figure 21
Last Change
09 March, 2012
Not Used
MetSet supported products list
Opening MetSet Screen
MetPak II and Met Pak II R User Manual
© Gill Instruments Ltd
Page 35
Operation
Summary of Device Settings Screen
Note that MetSet also saves a copy of this screen to the connected PC as a
Session Report File that can be accessed from the following destination.
C:\Program Files\Gill Instruments\MetSet\SessionReports
Close Summary of Device Settings screen to go to the Editing screens.
Figure 22
Summary of MetPak II/MetPak II R Device Settings using MetSet
MetPak II and MetPak II R User Manual
© Gill Instruments Ltd
Page 36
Last Change
09 March, 2012
Operation
3.2.2
MetSet Editing Screen
When connected correctly a MetSet editing screen is available to read
configuration settings, change configuration settings, save MetPak II/MetPak II R
configuration settings to a PC file location, upload MetPak II/MetPak II R
configuration settings from a PC file and view the MetPak II/MetPak II R raw data
string output.
MetPak II/MetPak II R Editing Screens
Move mouse over
exclamation or question
marks to read setting
comment
MetPak Unit
Device Setting
Options
View MetPak
Unit Raw Data
Output String
Return to
opening MetSet
Screen
Source of MetSet
Data
Firmware Version
and Unit ID
Serial Number
Connection Status
MetSet Connection Status Information.
Reading
2436 ‘METPAK II’
2.01 [Q] PV=2
S/N:00000010
2436 is the MetPak II/MetPak II R Firmware number
2.01 is the firmware revision.
[Q] is the unit identifier.
PV=2 is the Protocol Version (Gill internal reference).
MetPak II/MetPak II R serial number.
ONLINE
ONLINE in green indicates the MetPak II/MetPak II R has been
successfully connected to MetSet.
OFFLINE in Grey indicates that MetSet is being used without a MetPak
II/MetPak II R in communication with MetSet.
Source:Device
MetSet reads ‘Device’ when the source of the data that MetSet has
retrieved has come from the MetPak II/MetPak II R.
MetSet reads ‘File’ when the source of data has come from a saved file.
19200 COM 11
19200 is a report on the MetPak II/MetPak II R Baud rate setting.
COM 11 is a report on the MetPak II/MetPak II R COM Port connection
number.
Device: METPAK II
Last Change
09 March, 2012
Function
MetSet reports on the connected device (MetPak II/MetPak II R or
MetPak Pro)
MetPak II and Met Pak II R User Manual
© Gill Instruments Ltd
Page 37
Operation
MetSet Online Mode Settings.
Online Mode
Buttons
Function
Get Device Settings
MetSet retrieves the MetPak Unit Configuration settings.
Save Settings to
Device
MetSet configuration settings are saved to a connected
MetPak Unit.
Save Configuration
File
When selected MetSet edit settings are saved to a PC file
location.
Load Configuration
File
When selected MetSet retrieves a MetSet edit PC file and
updates MetSet with these settings.
Back Up Device
Settings
When selected the MetPak Unit configuration settings are
transferred to MetSet and then to a file location selected on
a PC.
Restore Device
Settings
When selected MetSet retrieves a MetPak Unit
configuration setting from a PC file, loads it into the MetPak
Unit and updates the MetSet edit settings.
Measurement Mode
View Output
X Main Menu
Click on View Output to view the raw ASCII MetPak Unit
data string scrolling at the output rate. (View only feature).
E.g. Q,014,000.06,1011.2,042.1,+023.0,+009.4,+12.0,00, 40
Click here to go back to the opening MetSet screen
MetSet Editing Screens.
Editing Screens
Comms
ASCII Set Up
Function
Use to read or change Comms Interface, Baud Rate, Node ID, Output Rate and
Message Mode.
NOTE: when COMMS or BAUD settings are changed and Saved to Device
MetSet issues a warning. These setting changes will not become active
until the MetPak Unit power is turned off and then turned on again. The
connecting device will then also need its Comms and Baud rate settings
changed to match the MetPak Unit
Use to read or change message Termination and Echo
Wind
Use to read or change North Alignment (0-359 degrees), Sensor WindSpeed on
or off, Wind Units of measure and set minimum wind speed under which
Direction will not be reported (range 0-5m/s).
Temperature
Use to read or change Temperature sensor on or off and units. Dewpoint sensor
on or off and units.
Pressure
Use to read or change Pressure sensor on or off and units.
Humidity
Use to read or change Humidity sensor on or off and units.
Reporting
Selects Output Format (Full, User, NMEA) and Output Parameters (Node, Polar,
Axis, Pressure, RH, Temp, Dewpoint, Volts, Status) either on or off and in the
order required in the data string.
PowerUp
Use to read or change reporting the status message, report message, units
message, inputs message to on or off.
Save Edited Screen
Settings to MetPak
Click on ‘Save Settings to Device’ this will change the MetPak Unit configuration
to reflect the new MetSet settings.
MetPak II and MetPak II R User Manual
© Gill Instruments Ltd
Page 38
Last Change
09 March, 2012
Operation
3.2.3
Configuring using HyperTerminal
NOTE. This section describes the procedure using Windows HyperTerminal. There
are many equivalent terminal emulators that you could use and the procedure will
be similar: identify the COM port for the connection and configure the port settings
as described in step 6.
Setting Up HyperTerminal
To configure MetPak II/MetPak II R using HyperTerminal:
1.
Select an available Com port and connect the MetPak II/MetPak II R unit.
2.
Run Hypertrm.exe
(Typically accessed via
Start | All Programs | Accessories | Communications | Hyperterminal).
3.
Select New Connection from the File menu.
4.
Enter a name for the connection, for example MetPak II and, optionally,
select an icon to represent it. Click on the OK button.
5.
In the Connect To dialog box, change Connect Using to COMX (where X is
the number of the selected COM port). Click on the OK button.
6.
In the COMX Properties dialog box, adjust the Port settings to match the
MetPak II/MetPak II R unit’s settings. The default settings are :
7.
Bits per second
Data bits
Parity
Stop bits
Flow Control
19200
8
None
1
None
Click on the OK button.
Message Reporting
MetPak II/MetPak II R has two reporting modes:
Continuous mode
In continuous mode (the default) Metpak II/MetPak II R reports continuously. So, if
you have set up the connection correctly, you should now see data strings scrolling
across the HyperTerminal window. For example:
Q,113,000.07,1019.4,035.1,+024.7,+008.3,+04.9,00,5F
Polled mode
If the unit has been set to polled mode (see MSGMODE command in Table 10),
type ?Q (where Q is the unit node letter) to prompt one line of the data string.
Entering MetPak II/MetPak II R’s setup mode
To enter the unit’s setup mode:
If the unit is in continuous reporting mode, type *.
If the unit is in polled mode, type *Q (where Q is the unit node letter).
The MetPak II/MetPak II R unit stops reporting sensor measurements and
reporting (if in continuous mode) and responds with the following message:
SETUP MODE
The unit is now ready to receive configuration commands.
Last Change
09 March, 2012
MetPak II and Met Pak II R User Manual
© Gill Instruments Ltd
Page 39
Operation
Returning to measurement mode
Type Q and press Enter. (exit from SETUP mode and return to measurement mode).
The MetPak II/MetPak II R unit returns to measurement mode and begins reporting data
(if set up for continuous mode).
Configuring commands for MetPak II/MetPak II R
Table 10
Command
*
Parameters
*
*A-Z
*A | Z
?
?A-Z
?
A | ?B | to ?Z
ALIGN
0 | 359
ASCTERM
BAUD
CR
CRLF
4800
9600
19200
38400
57600
COMMS
RS232
RS422
RS485P2W
SDI12
ECHO
OFF
ON
EXIT
HELP
MSGMODE
CONT
POLL
MetPak II/MetPak II R configuration commands
Description and examples
Used to place the unit into a SETUP mode so that User Commands may be
sent to change unit settings.
If the unit is in Polled mode this command is used to place the unit into a
SETUP mode so that User Commands may be sent to change unit settings.
Where Q is the default node letter but may be set between A to Z.
Used when the unit is configured for Polling and enables Polling.
Retrieves a line of data from a MetPak II/MetPak II R set for Polled mode
with a Node identifier set to A to Z.
Note. The unit MUST be allowed 9.5 seconds from switch on to be
operational before the ? is used to enable polling, or it will be missed.
When polled, allow 570mS for the unit to respond with a line of data. If
the MetPak Unit detects a pressure/temperature/humidity sensor fault
then allow 4 seconds for an error data output.
Align, sets and reports the degree offset applied to wind direction data read
from the MetPak II/MetPak II R.
ALIGN <no parameter> returns the current value
ALIGN 0 Sets North Alignment to 0°.
Sets ASCII output string terminator.
ASCTERM <no parameter>
returns the current value
ASCTERM CR - ASCII output string terminator is <CR>.
ASCTERM CRLF terminator set to <CR><LF>.
Sets the serial interface baud rate. Selection must be confirmed with a letter
B. Parity selection and duplex operation is optional
BAUD <no parameter> returns the current value
Example: to change 19200 baud to 4800 Baud:
Type BAUD 4800 and press Enter.
Change the terminal baud rate to 4800.
Type B and press Enter.
Completes the 4800-baud selection.
Sets the serial interface communication protocol.
COMMS <no parameter> returns the current value.
To change to RS422 operation:
Type COMMS RS422 and press Enter. (the Comms setting will remain
unchanged allowing further settings to be changed and data viewed until the
system is powered down and restarted).
NOTE: The hardware connections will need be changed to match the
new Comms setting.
Character echo can be enabled or disabled. If enabled, received characters
are only echoed while in interactive mode.
ECHO <no parameter> returns the current value.
Used to change the unit from SETUP mode to Measurement mode
(alternatively type Q or QUIT)
Lists commands that are currently available.
Sets the message-reporting mode.
MSGMODE <no parameter> returns the current value.
MSGMODE CONT - messages reported continuously.
MSGMODE POLL - messages only reported when requested by the user
(polled mode - see “?” command).
MetPak II and MetPak II R User Manual
© Gill Instruments Ltd
Page 40
Last Change
09 March, 2012
Operation
Command
NODE
Parameters
A | B |C to |
Z
NODIR
NODIR X.XX
OUTFREQ
1/4HZ
1/2HZ
1HZ
PUPMSG
STATUS |
ON | OFF
REPORT |
ON | OFF
PUPMSG REPORT - displays a header showing currently reported
parameters e.g.
NODE,DIR,SPEED,PRESS,RH,TEMP,DEWPOINT,VOLT,STATUS,CHECK
PUPMSSG REPORT OFF or ON-unit does not display (OFF) or does display
(ON) a header showing currently reported parameters.
UNITS |
ON | OFF
PUPMSG UNITS -displays a header showing the units of each field in the
data output report. e.g.
-,DEG,MS,HPA,%,C,C,V,-,PUPMSG UNITS OFF or ON - does not display (OFF) or does display (ON) a
header showing the units of each field in the data output report.
NOTE. There is a power up message in polled mode unless turned off.
Power up message is displayed when the unit is being powered up excepting
if it has been deactivated.
When the System is powered up allow for 9.5 seconds before the 1st
line of Sensor data is output.
Used to change the unit from SETUP to Measurement mode (see also EXIT)
Defines a reporting string.
REPORT <no parameter> returns the current value, e.g.
NODE,DIR,SPEED,PRESS,RH,TEMP,DEWPOINT,VOLT,STATUS,CHECK
REPORT FULL - all instrument readings are output in the following default
order: Q,225,000.02,1023.4,041.8,+023.5,+009.8,+04.9,00,50
(Node, Direction, Wind Speed, Pressure, Humidity, Temperature, Dewpoint,
Volts, Status, Checksum).
REPORT NODE – reports the unit Node letter (default Q)
REPORT POLAR -reports Polar Wind Speed, Polar Direction and Checksum
only.
REPORT AXIS - reports U Axis Wind Speed, V Axis Wind Speed and
Checksum only.
REPORT PRESS -reports Pressure and Checksum only.
REPORT TEMP - reports Temperature and Checksum only.
REPORT RH - reports Relative Humidity and Checksum only.
REPORT DEWPOINT reports Dewpoint and Checksum only.
REPORT VOLT - reports Supply Voltage and Checksum only.
REPORT STATUS - reports MetPak Unit status codes and Checksum only.
REPORT NMEA – reports Wind (WIMWV data), Temperature, Relative
Humidity and Barometric pressure (WIXDR data) in NMEA 0183 format.
Q or QUIT
REPORT
FULL
NODE
POLAR
AXIS
PRESS
TEMP
RH
DEWPOINT
VOLT
STATUS
NMEA.
Last Change
09 March, 2012
Description and examples
Sets the unit Node address for unit recognition or Polling.
NODE <no parameter> returns the current value.
NODE A sets unit Node to A etc.
Sets a minimum velocity (in 0.01m/s steps). If the velocity is equal or less
than this value then wind direction information is not displayed. This only
affects polar output formats and the maximum value that can be set is 5.00.
NODIR <no parameter> returns the current value (default 0.00).
NODIR 0.50 sets the unit to not report wind direction at or below 0.50m/s.
Sets the unit data output rate in continuous mode.
OUTFREQ<no parameter> returns the current value.
OUTFREQ 1/4HZ -sets the unit to output 1 reading every 4 seconds.
Unit powers up in the state as define by parameter.
PUPMSG (power up message) <no parameter> returns the current value,
e.g. STATUS, REPORT, UNITS.
PUPMSG STATUS - displays a firmware issue status message on power up
e.g. METPAK 2436 V2.01 STARTUP OK
PUPMSG STATUS OFF or ON– unit does not display (OFF) or does display
(ON) a firmware issue status message on power up.
MetPak II and Met Pak II R User Manual
© Gill Instruments Ltd
Page 41
Operation
Command
REPORT
Continued
Parameters
SENSOR
SERIAL
SWVER
UNITS
WIND
PRESS
TEMP
DEWPOINT
RH
Description and examples
The MetPak Unit data string can be set up in any order with the required
sensor outputs. For instance, if it is required to output data in the order
Pressure, Polar Wind, Temperature, Humidity, Status.
Type REPORT PRESS POLAR TEMP RH STATUS and press Enter.
Gives 1023.4,319,000.05,+023.5,038.3,00,1D
NOTE. A Hex Checksum figure will always be reported.
Command not used.
Used to report the MetPak II/MetPak II R serial number.
e.g. 00000008
Returns the MetPak Unit Firmware version e.g. SWVER = 2436 V2.01
Valid values are dependent on sensor type. A UNITS command with no
parameter shall display a line of test showing the selected units of the current
output string. Changes the output units for an individual sensor.
UNITS <no parameter> - returns the current value, e.g.
e.g. UNITS = -,DEG,MS,HPA,%,C,C,V,-,UNITS WIND MS - selects metres/second for the wind reading.
UNITS PRESS HPA - Selects hectoPascals for the pressure reading.
UNITS TEMP C - selects centigrade for temperature reading.
UNITS DEWPOINT C - selects centigrade for dewpoint reading.
UNITS RH % - selects percentage for relative humidity
See Table 11 for a list of unit abbreviations.
Table 11
UNITS
measurement
parameter
WIND
TEMP and
DEWPOINT
PRESS
RH
Abbreviations used in UNIT configuration command
Unit
Abbreviation
Metres per Second
Nautical Miles per Hour
Miles per Hour
Kilometres per Hour
Feet per Minute
Celsius
Fahrenheight
Kelvin
HectoPascals
MilliBars
Inches of Mercury
Millimetres of Mercury
Relative Humidity
MS
KNOTS
MPH
KPH
FPM
C
F
K
HPA
MB
INHG
MMHG
%
MetPak II and MetPak II R User Manual
© Gill Instruments Ltd
Page 42
Last Change
09 March, 2012
Operation
3.2.4
Configuring MetPak II/MetPak II R for NMEA
Output.
To configure a MetPak II/MetPak II R for RS422, 4800 Baud and NMEA 0183
output:
1.
Place the MetPak II/MetPak II R into SETUP MODE as detailed on page 39.
2.
Type REPORT NMEA and press Enter.
3.
Type BAUD 4800 and press Enter.
4.
Type COMMS RS422 and press Enter. Until the unit is restarted, the
COMMS setting will remain unchanged.
5.
Shut down the MetPak II/MetPak II R unit.
6.
Change the hardware connections for RS422.
7.
Restart the MetPak II/MetPak II R unit.
`Example NMEA data string produced at the output rate (default every 1Hz):$WIMWV,008,R,000.09,N,A*0C
$WIXDR,C,+023.0,C,TEMP,P,1.0199,B,PRESS,H,039.6,P,RH*33
The NMEA data string comprises of: $WIMWV,008,R,000.09,N,A*0C,<CR>,<LF>
Where: $WIMWV
008
R
000.09
N
A
OC
Wind Instrument Mean Wind direction and Velocity
Wind Direction
Wind Measurement Relative to the North Marker
Wind Speed
Knots (NMEA output fixed to Knots measurement only)
Acceptable measurement (V is a void fail measurement)
Hex CheckSum
And
$WIXDR,C,+023.0,C,TEMP,P,1.0199,B,PRESS,H,039.6,P,RH*33,<CR><LF>
Where: $WIXDR
C
+023.0
C
TEMP
P
1.0199
B
PRESS
H
039.6
P
RH
33
Wind Instrument Cross track error Dead Reckoning
Type of Sensor (Temperature)
Temperature Reading
Temperature Reading in Degrees Centigrade
Name of Temperature Sensor
Type of Sensor (Pressure)
Pressure Reading in Bars.
Pressure Units of Measure (Bars)
Name of Pressure Sensor
Type of Sensor (Humidity)
Humidity Reading in Percent
Humidity Units of Measure (Percent)
Name of Relative Humidity Sensor
Hex CheckSum
<CR> is a Carriage return character (ASCII hex value d)
<LF> is a Line Feed Character (ASCII hex value a)
Checksum, the 2 digit Hex Checksum sum figure is calculated from the Exclusive
OR of the bytes between (and not including) the $ and * characters.
Last Change
09 March, 2012
MetPak II and Met Pak II R User Manual
© Gill Instruments Ltd
Page 43
Operation
3.2.5
Configuring MetPak II/MetPak II R for SDI-12
To configure a MetPak II/MetPak II R unit for SDI-12:
3.2.6
1.
Place the MetPak II/MetPak II R into SETUP MODE as detailed on page 39.
2.
Type COMMS SDI12 and press Enter. Until the unit is restarted, the
COMMS setting will remain unchanged.
3.
Shut down the MetPak II/MetPak II R unit.
4.
Change the hardware connections for SDI-12.
5.
Restart the MetPak II/MetPak II R unit.
SDI-12 Commands
SDI-12 Command Summary
?!
Unit Address (default is 0).
aAb!
Change unit address (a = 0)
aM!
Wind Direction/Speed (direction in Degrees, speed in Metres/Sec ),
Temperature (degrees C), Pressure (Hecto Pascals/millibars) and
Humidity (%).
aM1!
Wind Direction/Speed (direction in Degrees, speed in Metres/Sec ),
Temperature (degrees C), Pressure (Hecto Pascals/millibars) and
Dewpoint (degrees C).
aM2!
Wind Direction/Speed (direction in Degrees, speed in Metres/Sec )
and a 2 digit Status Code.
aM3!
Temperature (degrees C), Pressure (Hecto Pascals/millibars) and
Dewpoint (Degrees C).
aM4!
Pressure (Hecto Pascals/millibars).
aM5! to aM8! For future use.
aM9!
Power Supply Voltage (Volts).
aMC!
Wind Direction/Speed (direction in Degrees, speed in Metres/Sec ),
Temperature (degrees C), Pressure (Hecto Pascals/millibars),
Humidity (%) and CRC.
aMC1!
Wind Direction/Speed (direction in Degrees, speed in Metres/Sec ),
Temperature (degrees C), Pressure (Hecto Pascals/millibars),
Dewpoint (degrees C) and CRC.
aMC2!
Wind Direction/Speed (direction in Degrees, speed in Metres/Sec ), a
2 digit Status Code and CRC.
aMC3!
Temperature (degrees C), Pressure (Hecto Pascals/millibars),
Dewpoint (Degrees C) and CRC.
aMC4!
Pressure (Hecto Pascals/millibars) and CRC.
aMC5! to aMC8! For future use.
aMC9!
Power Supply Voltage (Volts) and CRC.
aD0!
Request a line of the above data.
MetPak II and MetPak II R User Manual
© Gill Instruments Ltd
Page 44
Last Change
09 March, 2012
Operation
SDI-12 Command Details
Command
Description
Response
Example
?!
Unit Address
a<CR><LF>
0<CR><LF>
aAb!
Change the unit address
b<CR><LF>
1<CR><LF>
atttn<CR><LF>
00055<CR><LF>
a is unit identifier.
0 is unit identifier.
ttt is time in seconds.
005 is 5 sec. measurement.
n is number of data values.
5 is the number of data readings
(Direction, Speed, Temperature,
Pressure and Humidity).
a = 0, the default.
b = the new address.
aM!
Wind Direction/Speed
(direction in Degrees,
speed in Metres/Sec ),
Temperature (degreesC), Pressure (Hecto
Pascals/millibars) and
Humidity (%).
Measurement command to
retrieve a reading of the maximum
time the MetPak II/MetPak II R will
take to complete a measurement,
have data ready and the number
of data values.
0D0!
Retrieve a line of the
above data.
a<dir><mag><temp><pressure><
humidity><CR><LF>
0+220+000.01+021.6+1013.0
+041.9<CR><LF>
aM1!
Wind Direction/Speed
(direction in Degrees,
speed in Metres/Sec ),
Temperature (degrees
C), Pressure (Hecto
Pascals/millibars) and
Dewpoint (degrees C).
atttn<CR><LF>
00055<CR><LF>
0D0!
Retrieve a line of the
above data.
a<dir><mag><temp><pressure><
dewpoint><CR><LF
0+357+000.03+021.6+1013.0
+008.0<CR><LF>
aM2!
Wind Direction/Speed
(direction in Degrees,
speed in Metres/Sec )
and a 2 digit Status
Code.
atttn<CR><LF>
00053<CR><LF>
0D0!
Retrieve a line of the
above data.
a<dir><mag><status><CR><LF>
0+029+000.01+00<CR><LF>
aM3!
Temperature (degrees
C), Humidity (%),
Dewpoint (Degrees C).
atttn<CR><LF>
00053<CR><LF>
0D0!
Retrieve a line of the
above data.
a<temp><humidity><dewpoint>
<CR><LF
0+21.6+041.0+0007.8<CR><LF>
aM4!
Pressure (Hecto
Pascals/millibars).
atttn<CR><LF>
00051<CR><LF>
0D0!
Retrieve a line of the
above data.
a<pressure><CR><LF>
0+1013.0<CR><LF>
aM9!
Power Voltage (Volts)
atttn<CR><LF>
00011<CR><LF>
0D0!
Retrieve a line of the
above data.
a<voltage><CR><LF>
0+12.5<CR><LF>
Last Change
09 March, 2012
MetPak II and Met Pak II R User Manual
© Gill Instruments Ltd
Page 45
Operation
Command
aMC!
Description
Response
Example
Wind Direction/Speed
(direction in Degrees,
speed in Metres/Sec ),
Temperature (degreesC), Pressure (Hecto
Pascals/millibars)
Humidity (%) and CRC.
atttn<CR><LF>
00056<CR><LF>
a is unit identifier.
0 is unit identifier.
ttt is time in seconds.
005 is 5 sec. measurement.
n is number of data values.
6 is the number of data readings
(Direction, Speed, Temperature,
Pressure, Humidity and CRC).
0D0!
Retrieve a line of the
above data.
a<dir><mag><temp><pressure>
<humidity><CRC><CR><LF>
0+139+000.06+022.2+1017.8
+042.7+00BIQ<CR><LF>
aMC1!
Wind Direction/Speed
(direction in Degrees,
speed in Metres/Sec ),
Temperature (degrees
C), Pressure (Hecto
Pascals/millibars),
Dewpoint (degrees C)
and CRC.
atttn<CR><LF>
00056<CR><LF>
0D0!
Retrieve a line of the
above data.
a<dir><mag><temp><pressure>
<dewpoint><CRC><CR><LF
0+140+000.06+022.2+1017.7
+009.0+00D{Z<CR><LF>
aMC2!
Wind Direction/Speed
(direction in Degrees,
speed in Metres/Sec ),
a 2 digit Status Code
and CRC.
atttn<CR><LF>
00053<CR><LF>
0D0!
Retrieve a line of the
above data.
a<dir><mag><status><CRC>
<CR><LF>
0+098+000.04+00@sh<CR><LF>
aMC3!
Temperature (degrees
C), Humidity (%),
Dewpoint (Degrees C)
and CRC.
atttn<CR><LF>
00053<CR><LF>
0D0!
Retrieve a line of the
above data.
a<temp><humidity><dewpoint>
<CRC><CR><LF
0+022.2+042.7+009.0LV{<CR><LF>
aMC4!
Pressure (Hecto
Pascals/millibars) and
CRC.
atttn<CR><LF>
00051<CR><LF>
0D0!
Retrieve a line of the
above data.
a<pressure><CRC><CR><LF>
0+1017.8GM <CR><LF>
aMC9!
Power Voltage (Volts) and
CRC
atttn<CR><LF>
00011<CR><LF>
0D0!
Retrieve a line of the
above data.
a<voltage><CRC><CR><LF>
0+12.2K@R<CR><LF>
Measurement command to
retrieve a reading of the
maximum time the MetPak
II/MetPak II R will take to
complete a measurement, have
data ready and the number of
data values.
MetPak II and MetPak II R User Manual
© Gill Instruments Ltd
Page 46
Last Change
09 March, 2012
Operation
3.2.7
Safe Mode
Summary
The MetPak II/MetPak II R Safe Mode provides a means of recovering
communication with the MetPak II/MetPak II R whatever configuration setting may
have been made. For instance if the unit has been set for SDI-12 operation Safe
Mode can be used to change the communication option back to RS232, RS422 or
RS485.
Connection
Connect the MetPak II/MetPak II R for RS232 communication as detailed on
Page 17, Figure 7.
Method
Configure the MetPak II/MetPak II R using HyperTerminal:
Note at this stage the MetPak II/MetPak II R supply to be switched off.
Run Hypertrm.exe
(Typically accessed via
Start | All Programs | Accessories | Communications | Hyperterminal).
If using a Vista or Windows 7 PC Hyperterminal is not supplied, in this case it is
possible to use Gill Wind Software as a Terminal programme on these PC’s
instead.
Select New Connection from the File menu.
Enter a name for the connection, for example Test and, optionally, select an icon to
represent it. Click on the OK button.
In the Connect To dialog box, change Connect Using to COMX (where X is the
number of the selected COM port). Click on the OK button.
In the COMX Properties dialog box, adjust the Port settings to match the MetPak
II/MetPak II R unit’s settings. The Safe Mode settings are :
Bits per second
Data bits
Parity
Stop bits
Flow Control
4800 (Note 4800 Baud rate setting)
8
None
1
None
Click on the OK button.
A blank HyperTerminal screen will be opened.
Hold down the * key on the keypad.
With the * key still held down, apply power to the MetPak II/MetPak II R.
This will result in placing the unit into SAFE MODE.
Press Enter to start a new line (Ignore illegal command line).
Last Change
09 March, 2012
MetPak II and Met Pak II R User Manual
© Gill Instruments Ltd
Page 47
Operation
To now change communication from SDI-12 to RS232.
Type COMMS RS232 and press Enter.
Type Q and press Enter to exit Safe Mode.
Data will now scroll on screen.
Note however for RS232 changes to take place the unit must be powered down
and back up again.
Close the 4800 baud rate HyperTerminal Program.
Power down the MetPak II/MetPak II R and re-apply power.
Open a new HyperTerminal program at 19200-baud rate.
RS232 data will now scroll on screen at the MetPak II/MetPak II R default 19200baud rate.
The * command can now be used if required to place the unit into SETUP mode
and make any other changes to the MetPak II/MetPak II R configuration.
MetPak II and MetPak II R User Manual
© Gill Instruments Ltd
Page 48
Last Change
09 March, 2012
4. Troubleshooting
4.1
Fault-Finding
Common Problems
Table 12
Common problems and their solution
Symptom
No output
Corrupted output
One way communication
Unexpected Temperature
/Dewpoint readings
Unexpected Wind readings
Unexpected
Temperature/Dewpoint and
Humidity readings
Unexpected Barometer
Readings
Status code not 00 or A
Last Change
09 March, 2012
Solution
Check DC power to MetPak II/MetPak II R, cable and
connections.
Check communications settings of the MetPak
II/MetPak II R and host system match, including
correct Com port.
Check that the unit is in Continuous mode.
Check that in-line communication devices are wired
correctly.
NOTE: It is usual for the MetPak II/MetPak II R TX + to
be connected to converter device RX +.
If appropriate use Safe Mode to attempt to obtain
communication with the MetPak II/MetPak II R.
Check that the communication settings of the MetPak
II/MetPak II R and host system match.
Try a slower baud rate.
Check cable lengths and type of cable.
Check that the wiring is in accordance with the manual.
Check that the Temperature and Dewpoint units of
measure (C, F, K) settings are correct on power up.
Check that the Wind Sensor units of measure (m/s,
knots, kph, ft/min, mph) settings are correct on power
up.
Check that the HygroClip filter is clean.
Should the Barometer read 8000 this might indicate
that the unit has been powered up at lower than -15
deg C. Re-cycle the power to clear the Barometer
8000 reading.
See Table 13
MetPak II and Met Pak II R User Manual
© Gill Instruments Ltd
Page 49
Troubleshooting
Table 13
4.2
Status codes as output with the MetPak II/MetPak II R data string
Code
Status
00
OK
A
Acceptable data (NMEA Mode)
01
02
04
Wind Sensor Axis 1 failed
Wind Sensor Axis 2 failed
Wind Sensor Axis 1 and 2 failed
08
Wind Sensor NVM error
09
Wind Sensor ROM error
0B
10
20
40
Wind Sensor reading failed.
HygroClip error
Dewpoint error
Humidity error
XX
More than one fault
V
Void Data, Wind Sensor reading
failed. (NMEA Mode)
Condition
No fault conditions detected in
measurement period.
No fault conditions detected in
measurement period.
U Axis blocked or faulty.
V Axis blocked or faulty.
U and V axis blocked or faulty
Non Volatile Memory checksum failed,
data could be uncalibrated.
Read Only Memory checksum failed, data
could be uncalibrated.
Wind Sensor faulty.
HygroClip faulty.
Hub Pec faulty.
HygroClip faulty.
Fault condition that can be the sum of
0B,10, 20 or 40. e.g 1B would mean that
both the Wind Sensor (0B) and HygroClip
(10) were faulty.
Wind Sensor faulty.
Servicing
In the event of failure, prior to returning to an authorised Gill distributor it is
recommended that:
All cables and connectors are checked for continuity, bad contact,
corrosion etc.
A bench test is carried out as described in the next section.
Contact your supplier if a fault persists.
4.3
Bench Tests
Carry out a bench test as follows:
1.
Connect the MetPak II/MetPak II R unit to the host PC and power supply,
using a known working test cable.
2.
Check that the unit is correctly configured by going into Set Up mode (see
page 39).
3.
Check for normal output data, and that the Status Code is OK – 00 or A.
4.
If the status code is other than 00 or A, refer to Table 13 for a list of status
(error) codes.
5.
Use an office fan or similar to check that the unit is sensing wind, turning the
unit to simulate changing wind direction and to check that both axes are
functioning.
6.
Check for output changes in temperature and relative humidity sensor (the
fan will also cause small changes in these properties).
MetPak II and MetPak II R User Manual
© Gill Instruments Ltd
Page 50
Last Change
09 March, 2012
Troubleshooting
WindSensor MetPak II R (Modified WindSonic)
NOTE: The WindSonic used on the MetPak II R is specifically built to
interface with a MetPak II R. It cannot be used for other applications .
Option1 to 3 WindSonics cannot be configured or be used with MetPak II R.
If it is suspected that the WindSensor is faulty or operation needs to be checked
then wire the unit to a test cable and PC RS232 port as follows.
WindSonic
9 Way circular connector
Cable – 3
twisted pairs
PC
Typical 9 Way ‘D’
Connector
Signal
Pin
names
no's
Signal names
Pin
nos.
TX
RX
4
6
Signal Ground
1
Do NOT connect
at this end
N/A
V supply +
3
+
V Supply -
2
-
RXD
TXD
Screen wire
Signal
Ground
Chassis
ground
2
3
5
N/A
DC
Power
supply
Use a supply capable of providing 5v to 30v dc at 50mA.
Using Wind Software (download from http://www.gill.co.uk/main/software.html) or a
Terminal programme such as HyperTerminal or Gill Wind Software (used as a
terminal programme, open a PC connection at 19200 bauds.
Select the required COM port (normally COM 1 for RS232 serial connections)
Click on OK
Last Change
09 March, 2012
MetPak II and Met Pak II R User Manual
© Gill Instruments Ltd
Page 51
Troubleshooting
From the Wind Menu, Select Tools/Synch Comms
Wind Software should respond with the following information.
If it does not then check wiring and if ok suspect that the WindSensor is faulty.
A few seconds later a line of data should appear on the Wind Screen
This should show:Q Unit Designator.
141 Wind Direction.
000.18 Wind Speed.
M units of measure (metres/Second).
00 Status code (See Table 13).
13 Hex Check sum
Alternatively to check the Anemometer Output with Wind Software opened as
previously or with an opened HyperTerminal connection:Type ?
Type Q
The WindSensor should respond with one line of Wind data.
MetPak II and MetPak II R User Manual
© Gill Instruments Ltd
Page 52
Last Change
09 March, 2012
5. Maintenance
Wind Sensor General (WindSonic)
If there is any build-up of deposits on the unit, it should be gently cleaned with a
cloth, moistened with soft detergent. Solvents should not be used, and care should
be taken to avoid scratching any surfaces. The unit must be allowed to defrost
naturally after being exposed to snow or icy conditions, do NOT attempt to remove
ice or snow with a tool.
There are no moving parts or user-serviceable parts requiring routine maintenance.
Opening the unit or breaking the security seal will void the warranty and the
calibration.
UV Shield (RM Young Model 41003)
If there is any build-up of deposits on the unit, it should be gently cleaned with a
cloth, moistened with soft detergent. Solvents should not be used, and care should
be taken to avoid scratching any surfaces. The unit must be allowed to defrost
naturally after being exposed to snow or icy conditions, do NOT attempt to remove
ice or snow with a tool.
HygroClip for Temperature, Humidity and Dewpoint (Rotronic
Model HC2-S3-GI)
For extreme environments such as maritime installations, chemical plants or other
areas of high pollution or contamination, Gill highly recommend replacement of the
temperature and humidity probe filter every 6 months to ensure proper
performance.
Corroded, discoloured or clogged dust filters should be replaced.
If the filter is not replaced it is very likely you will see elevated humidity levels with
time and if this is allowed to develop for a longer period of time it can lead to
permanent damage on the electronics of the temperature probe due to the very
high moisture content and corrosive effect of the pollutant or salt.
Rotronic Temperature and Humidity filter replacement:
Filter
The Rotronics polycarbonate dust filter screw-on cap is available from:Gill Instruments
Part Number
1723-PK-025 (2 filters).
Rotronic
Part Number
NSP-PCW-PE (1 filter).
If you need to replace the dust filter cap, carefully unscrew it and withdraw carefully
avoiding contact with the Temperature and Humidity circuit board. When re-fitting
the filter cap, ensure the circuit board connections are not bent.
Consideration should be given to an annual calibration check of the HygroClip
sensor by the manufacturer.
Ferrule
If you are replacing the whole cartridge, unscrew the metal ferrule and return the
probe to Rotronic for calibration. Refer to the Rotronic Website for more details:
http://www.rotronic-humidity.com/content/meta/kontakt.php
NOTE. If you return the sensor to a HygroClip supplier for exchange, please
request that the return unit has the dewpoint feature enabled.
Last Change
09 March, 2012
MetPak II and Met Pak II R User Manual
© Gill Instruments Ltd
Page 53
Maintenance
Barometer (on Hub PCB)
The Barometer device is maintenance-free, however, if required observe the
®
following with regard to the central Hub box screw cap Gore-Tex filter.
Pressure Sensor Filter Replacement:
There is a small venting filter for the pressure sensor of the MetPak located on the
'Hub' box lid which ensures proper conditions are present in the MetPak 'hub' box
for pressure measurements without allowing any moisture or other damaging
®
pollutants into the box. This filter is made from Gore-Tex material and is designed
to last a long time without replacement, however, Gill do recommend that this filter
is replaced every 24 months to ensure proper operation of the pressure sensor and
to keep the electronics inside the 'hub' box dry.
If you do not replace the filter every 24 months you may start to see elevated or
erroneous readings of the pressure sensor with time and this behaviour can be
®
corrected by replacement of the Gore-Tex filter unit.
®
The Gore-Tex filter kit is available from:Gill Instruments
Part Number
1723-PK-024.
To replace the filter, unscrew the 4 screws retaining the hub box lid. Remove the
existing Gore-Tex filter and M12 Nut. Fit and secure the new filter with the nut
provided. Re-fit the 4 lid screws.
Should you be uncertain as to how often you should be replacing the filters for your
application or if you wish to discuss this in more detail please contact Gill support
and we will be able to provide a recommendation for you.
Returning the MetPak II/MetPak II R
If the unit has to be returned, it should be carefully packed in the original packaging
and returned to your authorised Gill distributor, with a full description of the fault
condition. An RMA number should be obtained from Gill Instruments first if
returning directly to Gill Instruments.
MetPak II and MetPak II R User Manual
© Gill Instruments Ltd
Page 54
Last Change
09 March, 2012
6. Technical Information
6.1
Specification
Wind Measurement
Parameters
Polar Wind Speed & Direction or U and V Vectors
Units of Measurement
m/s, knots, mph, kph, ft/min
Wind Speed
Range
0-60m/s (0-134mph)
Accuracy
2% @12m/s
Resolution
0.01m/s (0.02mph)
Threshold
0.01m/s (0.02mph)
Wind Direction
Range
0-359 Degrees – No dead band
Accuracy
3@12m/s
Resolution
1
Air Temperature
Type
Pt100 1/3 Class B
Range
-35C to + 70C
Accuracy
0.1C
Resolution
0.1C (0.1F)
Units of Measure
C or F
Relative Humidity
Range
0-100%
Accuracy
0.8%@23C
Resolution
0.1%
Units of Measure
% RH
Dew Point
Last Change
09 March, 2012
Resolution
0.1C (0.1F)
Accuracy
0.15C (23C ambient temp @20C dew point)
Units of Measure
C or F
MetPak II and Met Pak II R User Manual
© Gill Instruments Ltd
Page 55
Barometric Pressure
Range
600 to 1100hPa
Accuracy
0.5hPa
Resolution
0.1hPa
Units of Measure
hPa, mbar, mmHg, InHg
Compensated for Temperature dependency –20C to +70C
Outputs
Digital Outputs
RS232, RS422, RS485 (2 wire point to point) or SDI-12
Baud Rates
1200 (SDI-12), 4800-57600 (ASCII RS232, RS422, RS485*)
Protocols
ASCII, SDI-12 V1.3 or NMEA 0183
Data Output
0.25, 0.5, 1 Hz or Polled Mode
MetPak II Status
Status codes provided within the data message string
Power Supply
Input voltage (RS232,
RS422, RS485)
4.5v to 30v dc
Current
16mA at 12v (default setting)
Input voltage (SDI-12)
9.6v to 16v dc (12v nominal)
Current
6.5mA
Environmental
Protection Class
IP65
EMC
EN 61326
Operating Temperature
-35C to +70C
Storage Temperature
-40C to +80C
Humidity
0-100%
Mechanical
External Construction
Bracket UV Stabilised white thermoplastic.
WindSonic White polycarbonate blend.
Fittings
Gloss white painted aluminium mounting bracket (with
moulded plastic V block and stainless steel U bolt), for
attachment to a vertical pipe of diameter 25mm to 50mm.
WindSonic mount on pipe 44.45mm diameter with 3mm wall
thickness (MetPak II R).
Weight
Last Change
09 March, 2012
1.1kg (including bracket)
MetPak II and Met Pak II R User Manual
© Gill Instruments Ltd
Page 56
Technical Information
6.2
Hub PCB Connections
The following tables summarise the connections for:
HygroClip (Factory connections).
WindSonic Anemometer (Factory connections MetPak II)
WindSonic 10 Metre Cable (Factory connections MetPak II R).
RS232/RS422/RS485 and SDI-12 communications (User
Connections)
Connection details are also found on the hub box lid.
Table 14
HygroClip connections (6-way connector J1)
Connector J1
Wire Colour
Signal Name
1
-
No Connection
2
Blue
RXD from HygroClip UART
3
Red
TXD to HygroClip UART
4
Yellow
Analogue 0V (Not Used)
5
Grey
Supply/Signal 0V
6
Green
Supply +ve (+3.3V DC)
Table 15
MetPak II WindSonic anemometer connections (8-way connector J4)
Connector J4
Wire Colour
Signal Name
1
-
No Connection
2
-
No Connection
Blue
RS232 TX+ Anemometer Output to
Hub
White/Blue
RS232 RX+ Hub Output to
Anemometer
5
Green
Signal 0v
6
White/Orange
Supply 0v
7
-
No Connection
8
Orange
Supply +ve (4.5v to 30V dc)
3
4
Table 16
Connector J4
Wire Colour
Signal Name
1
-
No Connection
2
-
No Connection
Blue/White
RS232 TX+ Anemometer Output to
Hub
White/Blue
RS232 RX+ Hub Output to
Anemometer
5
Green/White
Signal 0v
6
White/Orange
Supply 0v
7
-
No Connection
8
Orange/White
Supply +ve (4.5v to 30V dc)
3
4
Last Change
09 March, 2012
MetPak II R WindSonic anemometer connections (8-way connector J4)
MetPak II and Met Pak II R User Manual
© Gill Instruments Ltd
Page 57
Table 17
PC communications (8-way connector, J5)
Connector J5
Signal Name
1
SDI-12 TX/RX
2
Signal 0V
3
RS232 TX-, (or RS422/485 TX-) HUB to user
4
RS232 RX-, (or RS422/485 RX-) User to HUB
5
RS422/485 RX+, User to HUB
6
RS422/RS485 TX+, HUB to User
7
Supply 0v
8
Supply +ve (4.5v to 30v dc)
NOTE. J2, a 12-way expansion board connector and J3, a 5-way connector are not
used in the current version
Last Change
09 March, 2012
MetPak II and Met Pak II R User Manual
© Gill Instruments Ltd
Page 58
Technical Information
6.3
Electrical Conformity Certificate
EC DECLARATION OF CONFORMITY
ACCORDING TO COUNCIL DIRECTIVE
2004/108/EC
We, Gill Instruments Ltd., declare under our sole responsibility that the products:
MetPak II and MetPak II R Weather Stations
Manufactured by:
Gill Instruments Ltd
to which this declaration relates, are in conformity with the protection
requirements of Council Directive 2004/108/EC on the approximation of the laws
relating to electromagnetic compatibility.
This Declaration of Conformity is based upon compliance of the product with the
following harmonised standards:
Emissions
Immunity
EN61326
EN61326
Signed by:
A.C.R. Stickland – Director
Date of issue:
30/06/2011
Place of issue: Gill Instruments Ltd
Saltmarsh Park, 67 Gosport Street,
Lymington, SO41 9EG, UK
Last Change
09 March, 2012
MetPak II and Met Pak II R User Manual
© Gill Instruments Ltd
Page 59
Gill Instruments Limited
Saltmarsh Park,
67 Gosport Street,
Lymington,
Hampshire.
SO41 9EG
Tel: +44 (0) 1590 613500
Fax: +44 (0) 1590 613501
E-mail: [email protected]
Website: www.gill.co.uk
Copyright Gill Instruments 2011
Reg No: 3154453
MetPak IIChristchurch
and Met Pak II Road,
R User Manual
Registered Office: The George Business Centre,
New Milton, BH25 6QJ
Last Change
09 March, 2012
© Gill Instruments Ltd
Page 60