1
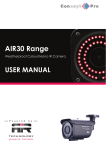
AIR45/50/HGE Range Weatherproof Colour/Mono IR Camera USER MANUAL P o w e r e d b y T E C H N O LO GY A D V A N C E D INFRARED The Concept Pro AIR45 / 50 range are weatherproof IR cameras, suitable for monitoring areas in hostile conditions and in low light. 1 3 2 4 7 5 8 6 1 Fixing Bolt for Sunvisor 5 Mounting Bracket 2. Photo Sensor 6 Bracket Adjustment 3. IR LED 7 External Lens Adjustment 4. Sunvisor 8 Service Video Output PACKING CONTENTS WALL SCREW X4 BRACKET/FIXING PLATE SCREW X4 FIXING PLATE LOCATING SCREW X2 FIXING PLATE X1 SERVICE VIDEO OUT CONNECTOR (AIR4526 MODEL ONLY) X1 EASY FIT BNC CONNECTOR X1 LENS ADJUSTMENT COVER SCREW X1 ALLEN KEY X1 EASY FIT POWER CONNECTOR X1 USER MANUAL X1 MOUNTING DRAWING PAPER X1 OSD CABLE (AIR4526HG / 4527HG / 5026HG MODELS ONLY) X1 L U LENS ADJUSTMENT TOOL X1 D ENT R USER MANUAL CAUTION 1. This installation should be made by a qualified service person and should abide to all local codes. 2. In order to prevent electronic shock and/or destroy waterproof seals, do not loosen any screws on the camera body. 3. Adjust the sunshield cover to avoid exposure of direct sunlight on the lens. 4. Do not touch the front glass directly. If necessary, use a soft cloth moistened with alcohol to wipe off dust or debris. 5. Avoid installation on a surface subjected to frequent vibration or shocks. 6. Do not operate the camera beyond its temperature range or power source ratings. 7. Should any damage or suspected damage occur, shutdown the power source, unplug and contact your service provider. 8. Do not install the camera under unstable lighting conditions. Severe lighting change or flicker can cause the camera to work improperly. 9. Never use the camera close to a gas or oil leak. 10. Do not disassemble the camera. 11. Do not drop the camera or subject the unit to physical shocks. Never keep the camera face to strong light directly, this can damage the CCD. 12. Ensure all removable covers are replaced to protect the inner components. 13. Do not install near devices which emit a strong electro-magnetic field. 14. Use a dry or damp cloth only for cleaning. PLEASE FOLLOW THE ABOVE CAUTIONS – FAILURE TO DO SO MAY INVALIDATE THE WARRANTY OR CAUSE SERIOUS INJURY. Remark: Changes or modifications not expressly approved by the manufacturer can cause the camera to be damaged and become inoperable. This may invalidate the user warranty. INSTALLATION Important: Ensure all cautionary procedures are observed during installation. It is recommended the camera is tested during the most demanding environmental conditions such as low light or bright sunlight to ensure continuity of effective CCTV monitoring. You may find the use of an ND filter helpful. Remove the camera unit carefully from the box, reserving the accessory contents in a safe place. FIXING TO A WALL Use the supplied drill mounting template to mark the spacing for drilling. Following drilling, securely attach the bracket and camera to the wall. MOUNTING TEMPLATE POSITIONING Point the Camera towards the intended area to be monitored. CONNECTION BNC CONNECTOR POWER CONNECTOR PSU Connect the video out port to your video cable running to the monitoring recorder. Check the power supply is of the correct level and connect your power supply into the power port on the Camera. View the picture on a monitoring device to check the power and video connection is working properly. Troubleshooting Ensure all power and cable connections are correct with the Camera, DVR and Test monitor or Telemetry devices if used. Power Voltage Check - Remove the OSD cover to see if the green correct power LED is lit. If there red LED is lit the power voltage is too high. If the yellow LED is lit the power voltage is not high enough. If there are no LEDs lit there is no power getting to the camera If all power and cable connections are correct and the camera picture can not be produced or configured then contact your supplier for technical support. SERVICE VIDEO OUTPUT (AIR4026 MODEL ONLY) The Service Video Out panel contains a power indicator and test monitor connection for ease of adjusting the camera settings during installation. 1 PO 2 3 PN PL VIDEO SERVICE VIDEO OUTPUT CABLE TEST MONITOR 4 AIR4526 The power indicator LEDs display the power supply being fed into the camera and whether it is too high, low or correct. 1. "PO": Red LED - Voltage is too high 2. "PN": Green LED - Voltage is correct 3. "PL": Yellow LED - Voltage is too low 4. Extra video out for testing monitor - Attach your Video test monitor with the service video cable enclosed in your camera box. The camera footage will appear on your test monitor and zoom/focus adjustments can be carried out as the installation requires. SEE OVERLEAF FOR AIR-HGE ON SCREEN DISPLAY EXTERNAL LENS ADJUSTMENT 1 1 2 Open the lens adjuster cover and adjust focus and zoom. Loose the screw on the lens adjuster cover. 2. Lens Adjustment Tool 3 3 A Focus and Zoom Adjustments A Zoom Wide / Narrow Focus Near / Far ON SCREEN DISPLAY (OSD) (AIR4526HGE / 4527HGE / 5026HGE MODELS ONLY) The Service Video Out panel contains a power indicator and test monitor connection for ease of adjusting the camera settings during installation. 1 3 PN PL AIR-HGE MODELS ONLY U L OSD OUTPUT CABLE D VIDEO ENT R PO 2 TEST MONITOR 4 The power indicator LEDs display the power supply being fed into the camera and whether it is too high, low or correct. 1. "PO": Red LED - Voltage is too high 2. "PN": Green LED - Voltage is correct 3. "PL": Yellow LED - Voltage is too low 4. Extra video out and OSD Connector - Attach your Video test monitor with the service video cable enclosed in your camera box. The camera footage will appear on your test monitor and zoom/focus adjustments can be carried out as the installation requires. OSD Controller 1) Press “U” to navigate upwards U 2) Press “D” to navigate downwards L R ENT D 3) Press “L” to navigate left 4) Press “R” to navigate right 5) Press “ENT” to open menu/sub-menu (AIR4526HGE / 4527HGE / 5026HGE MODELS ONLY) LANGUAGE ENGLISH / SPANISH / PORTUGUESE / FRENCH / GERMAN / CHINESE / JAPANESE / RUSSIAN LENS MANUAL AUTO TYPE MODE SPEED DC AUTO, OPEN, CLOSE 0~255 SHUTTER / AGC AUTO MANUAL HIGH LUMINANCE MODE SHUT+AUTO IRIS, AUTO IRIS BRIGHTNESS 0~255 LOW LUMINANCE MODE AGC, OFF BRIGHTNESS 0.25~1.00 MODE SHUT+AGC SHUTTER 1/50~1/10000 AGC 6.00~44.80 WHITE BALANCE ATW PUSH LOCK MANUAL ANTI CR USER 1 USER 2 PUSH SPEED DELAY CNT ATW FRAME ENVIRONMENT 0~255 0~255 X0.50~X2.00 INDOOR/OUTDOOR LEVEL 0~255 B-GAIN R-GAIN B-GAIN R-GAIN 0~255 0~255 0~255 0~255 PICT ADJUST MIRROR BRIGHTNESS CONTRACT SHARPNESS HUE GRAIN OFF/ON 0~255 0~255 0~255 0~255 0~255 NR MODE Y LEVEL C LEVEL Y/C, C, Y, OFF 0~15 0~15 NR BACKLIGHT OFF/BLC/HLC ATR OFF ON LUMINANCE CONTRAST LOW, MID, HIGH LOW, MIDLOW, MID, MIDHIGH, HIGH PRIVACY OFF ON AREA SEL TOP BOTTOM LEFT RIGHT COLOUR TRANSP MOSIAC 1~4 0~288 0~288 0~468 0~468 1~8 0.00~1.00 OFF/ON MOTION DETECTION OFF ON DETECT SENSE 0~127 BLOCK DISPLAY OFF/ON/ENABLE/ SELECT AREA MONITOR AREA OFF/ON AREA SELECT 1~4 TOP 0~288 BOTTOM 0~288 LEFT 0~288 RIGHT 0~288 CAMERA ID OFF ON OPENS VIRTUAL KEYBOARD SAVE ALL IMPORTANT - PLEASE NOTE: When all configurations have been made select SAVE ALL at the bottom of the OSD before exiting DIMENSIONS 85mm(3.35”) 97mm(3.85”) 100mm(3.94”) 40mm(1.57”) 219mm(8.62”) 300mm(11.81”) 319mm(12.56”) AIR-IR IR LAMPS Extend the IR range up to 80m with AIR-IR. * Lens should be used at 6mm or above to achieve even illumination 302.2mm(11.89”) 85mm(3.35”) 219mm(8.62”) 97mm(3.85”) 300mm(11.81”) 40mm(1.57”) 319mm(12.56”) ITEM Type AIR5026HGE AIR4527HGE Colour/Monochrome (Removable IR Cut Filter) Signal System PAL Pick Up Device 1/3" Sony Colour High Resolution CCD Picture Elements 976H×582V 650TVL Resolution Min Illumination 0Lux (60Pieces IR LED ON) 50Hz Vertical Frequency Horizontal Frequency 15.625KHz Clock Frequency PAL:36.00MHz Scanning System 2:1 Interlace ≥52dB S/N Ratio Electronic Shutter Lens 1/50-1/100,000s 6-50mm Varifocal Auto Iris IR Lens 9-22mm Varifocal Auto iris IR Lens White Balance Selectable Back Light Selectable Auto Gain Control Selectable 0.45 GAMMA Video Out-put 1V p-p,75Ω Power Supply DC12V ±10%/AC24V±10% Current Consumption IR Effect Distance Dimension Weight DC:730~750mA/AC:510~530mA (Max) 50~55m (163.9~180.3ft) (Outdoor) 45~50m (147.5~163.9ft) (Outdoor) 319x219x100mm 2.5Kg Storage Temperature -30°+60° (-22°+140°) Operating Temperature -30°+40° (-22°+104°) Design and specification are subject to change without notice. ITEM Type AIR4526 AIR4526HGE Colour/Monochrome (Removable IR Cut Filter) Signal System PAL Pick Up Device 1/3" Sony Colour High Resolution CCD Picture Elements Resolution 795H x 596V 976H x 582V 520TVL 650TVL 0Lux (60Pieces IR LED ON) Min Illumination 50Hz Vertical Frequency 15.625KHz Horizontal Frequency Clock Frequency PAL:28.375MHz PAL:36.00MHz 2:1 Interlace Scanning System S/N Ratio ≥50dB ≥52dB 1/50-1/100,000s Electronic Shutter 3.5-8mm IR Varifocal Lens Lens AUTO Tracking Selectable Back Light ON Selectable Auto Gain Control ON White Balance Selectable 0.45 GAMMA Video Out-put 1V p-p,75Ω Power Supply DC12V ±10%/AC24V±10% Current Consumption IR Effect Distance Dimension Weight DC:600mA/AC480mA (Max) DC:620mA/AC500mA (Max) 30~35m (98.4~114.8ft) (Outdoor) 319x219x100mm 2.5Kg Storage Temperature -30°+60° (-22°+140°) Operating Temperature -30°+40° (-22°+104°) Design and specification are subject to change without notice. AIR CAMERA RANGE AIR15 Range 18 IR LEDs 420 TVL / 520 TVL Options 3.6mm / 6mm Fixed Lens Options 182 x 70 x 81mm (WxHxD) AIR30 Range 42 IR LEDs Varifocal Lens Options Service Video Output Option On Screen Display Option External Lens / Zoom Adjustments 202 x 85 x 118mm (WxHxD) AIR-IR It is possible to extend the IR range of the AIR 45/50 range with an easy to attach bolt-on twin IR lamp. The AIR-IR twin lamp allows the camera unit to view up to 80m.