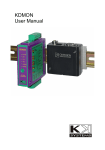
Download KD420 User Manual
Transcript
KD420
User Manual
Copyright
© 2004-2013 KK Systems Ltd. No reproduction of any part of this document, in any form, is
allowed without prior written permission from KKSystems Ltd. All other copyrights and
trademarks acknowledged.
Extract from Conditions of Sale
Any electronic device or system can fail, possibly resulting in the loss of valuable programs
or data. It is your responsibility to ensure that all such valuable material is backed-up at all
times. We are not liable for any direct, indirect or consequential loss caused directly or
indirectly through the use of this product. All our software is sold on an “as is” basis without
a warranty of any kind. We do not claim that this product is suitable for all potential
applications. It is your responsibility to verify that the product works in its intended
application. In the interest of progress, we reserve the right to alter prices and specifications
without prior notice.
Safety Warning
The KD420 is not authorised for use in any situation where injury or death could result from
its failure. No interface should be connected to a dangerous potential.
Contents
1.
KD420 Overview ..........................................................................1
1.1
Quick Start Guide ............................................................................................3
1.2
Block Diagram..................................................................................................4
1.3
Front Panel Description ..................................................................................5
1.4
Options Switch.................................................................................................5
1.5
1.5.1
1.5.2
1.5.3
1.6
KD420 Analogue Input Circuitry.....................................................................6
Voltage Input ...............................................................................................6
Current Input ...............................................................................................7
KD420 Analog Measurement Accuracy ......................................................7
Power Requirements .......................................................................................8
2.
Specification ................................................................................9
3.
Ports and Connections Reference...........................................10
3.1
3.1.1
Port 1 - KD420 Configuration........................................................................10
Port 1 – KD420 Modbus Slave 2-Wire and 4-Wire....................................12
3.2
Port 2 – Analog Sensing ...............................................................................14
3.3
Port 2 – 2-wire RS485 Modbus Master.........................................................15
4.
Mounting.....................................................................................17
5.
Configuration .............................................................................18
6.
5.1
Installing KD420 Configuration Software ....................................................18
5.2
Using KD420 Configuration Software..........................................................18
5.2.1
Modbus Slave Settings .............................................................................20
5.2.2
ADC Settings.............................................................................................22
5.2.2.1
Noise Reduction...............................................................................22
5.2.2.2
Performance Options .......................................................................23
5.2.3
Modbus Master Settings ...........................................................................25
5.2.3.1
Modbus Register Numbering ...........................................................26
5.2.4
Monitor Page.............................................................................................26
Troubleshooting ........................................................................27
6.1.1
6.1.2
7.
KD420 Power Up Problems ......................................................................27
KD420CFG.EXE unable to connect ..........................................................27
KD420 Configuration via Modbus............................................28
7.1
7.1.1
7.1.2
7.1.3
Configuration Registers................................................................................28
Modbus Register Numbering ....................................................................28
Communications Parameters....................................................................29
Voltage and current format........................................................................30
KD420 User Guide
1. KD420 Overview
The KD420 is an analog sensor to Modbus interface which supports the following analog
inputs
•
•
•
analog current 4-20mA (a 20V sensor supply is provided)
analog voltage –30V to +30V
external relay contact sensing (uses the analog voltage input)
It presents the values in the following ways which are all updated concurrently:
1)
They are readable via Modbus RTU SLAVE registers
In this case, the following data formats are presented concurrently:
•
•
•
•
•
•
•
•
•
•
•
40000: Current in 4-20mA range (logical value: 1=yes, 0=no)
40001: Current – as a 16-bit unsigned integer in microamps (0 to 64000)
40002: Current – as a 32-bit IEEE float. point value, big-endian, mA (2 registers)
40004: Current – as above, little-endian (2 registers)
40006: Current – as a null-terminated textual float +00.000, mA (8 registers)
40020: Current – as above, E notation +0.000e+00 (11 registers)
40101: Voltage – as a 16-bit signed integer in millivolts (-32000 to +32000)
40102: Voltage – as a 32-bit IEEE float. point value, big-endian, V (2 registers)
40104: Voltage – as above, little-endian (2 registers)
40106: Voltage – as a null-terminated textual float +00.000, V (8 registers)
40120: Voltage – as above, E notation +0.000e+00 (11 registers)
2)
The KD420 writes them into an RS485 Modbus RTU SLAVE device
A Modbus register in the KD420 is used to configure the following parameters
•
•
•
Starting register number to write to
Selection of which parameter and data format to write
Update interval (1-60 seconds)
Version 1.0
Page 1
Version 1.0
POWER SUPPLY
7-35V DC 300mA
RS422
or
2- wire RS485
or
4- wire RS485
MODBUS MASTER
Modbus
RTU
Slave
Interface
Modbus
RTU
Master
Interface
Analog
Interface
2- wire RS485
4-20mA
TC
Modbus RTU SLAVE device
_
+
Thermocouple Transmitter
with a 4-20mA Interface
KD420 User Guide
Page 2
KD420 User Guide
1.1 Quick Start Guide
•
Unpack the unit and check you have the following items:
KD420
User Manual
•
The factory configuration of both KD420 serial ports is:
9600 baud
8 bits/word
No parity
1 stop bit
If this is not as desired, the KD420 can be reconfigured for a wide range of baud rates
from 30 to 115200. This requires KD420’s Port 1 to be connected to a Windows
computer, via an RS422 interface. The supplied KD420CFG.EXE program is used.
Port 1 is available on both the 8-way connector and on the RJ11 connector.
For configuration instructions, see page 18.
For a Windows computer with RS232 or USB ports, a suitable RS422 interface is the
KK Systems K2, K2-TB, USB-485, KD485-STD.
If you wish to configure the KD420 via Modbus (i.e. without using the KD420CFG.EXE
program), see page 28.
•
Refer to the configuration section on page 18 and configure the KD420 as required.
Version 1.0
Page 3
KD420 User Guide
1.2 Block Diagram
Options Switch
1
2
3
4
Data Flow Indicator LEDs
RJ-11
DEBUG
PORT 1 GND
4-20 OK
2RX
1TX
1RX
RS485 driver
control
TXA
PORT 1 1
RS-4XX 2
3
4
CFG
20V
TXB
RXA
INPUT 2
RXB
DO NOT CONNECT
6
PORT 1 GND
INPUT 1
5
47R
A-D CONVERTER
5
6
0 to -1V
PROCESSOR
& MEMORY
4
GND
-33V to +33V
3
B
2
A
1
RS-485
ISOLATION
PORT 2
+5V
22k
RS-485 driver control
22k
POWER + 7
INPUT _ 8
10k
GND
SWITCHING POWER SUPPLY
Port 1 is RS422/485 and is used for the KD420’s Modbus Slave interface. It also serves as
a configuration port; all KD420 features are configured using the supplied KD420CFG.EXE
Windows program.
Port 1 is accessible via the 8-way “Port 1” terminal block and via the RJ-11 connector. Only
one of these two connectors may have connections to it at any one time. The RJ-11 is
provided for specialised applications.
Port 2 is a composite connection for the two analog (voltage and 4-20mA current) features,
and for the 2-wire RS485 interface which can operate as a Modbus Master.
Pin 4 of Port 2 should always be connected to earth or a good ground. This is because
Port 2 is fully floating and the grounding helps to eliminate static charge and optimise EMC
compatibility.
Version 1.0
Page 4
KD420 User Guide
1.3 Front Panel Description
KD420
Switch used
to enter
C onfiguration Mode
4-20 OK
4-20mA current wit hin limits *
2RX
Port 2 receiving data
1TX
Port 1 transmitting data
1RX
Port 1 receiving data
CFG
Config uration Mode active
POWER
Power ON
SENSOR
INTERFACE
* this LED has
other functio ns also
SYSTEMS
The front panel functions are mostly self-explanatory.
The 4-20 OK LED illuminates when the current drawn by the 4-20mA analog sensor is
inside those limits. This LED also indicates A-D converter activity; this takes place
approximately every second. Only the general (continuous) state of this LED indicates
whether the 4-20mA current is within its limits.
1.4 Options Switch
Options Switch
ON
1
2
3
4
This switch is currently unused.
Version 1.0
Page 5
KD420 User Guide
1.5 KD420 Analogue Input Circuitry
The KD420 has two analogue inputs: voltage and current. An understanding of the internal
implementation of these is not usually necessary but may be useful in some applications.
1.5.1 Voltage Input
There are three particular aspects to be aware of:
The A-D converter has a resolution of 12 bits i.e. 1 part in 4096 or 0.025%. The measurable
voltage input range is -33V to +33V. If the voltage range you are measuring fully spans this
range, you will get the full 0.025% resolution. If however you are measuring a much smaller
voltage range e.g. just 0 to +1V then the resolution will drop correspondingly to 1.6%. The
absolute accuracy of the measurement will be similarly affected.
The input resistance of the voltage input is not infinite; it is about 140k ohms. This means
that if the source resistance of your voltage source is e.g. 1.4k ohms, you will get a 1%
measurement error.
When the voltage input has nothing connected to it, it floats up to +1.25V. This incidentally
enables the sensing of e.g. an isolated relay contact connected between the voltage input
and its analogue ground, by connecting the relay contact across the KD420 voltage input.
Version 1.0
Page 6
KD420 User Guide
1.5.2 Current Input
This is designed for standard 4-20mA transducer transmitters. The current is passed
through a 47 ohm resistor and the voltage drop across this resistor is measured, using the
12-bit A-D converter.
The measurable current range is 0 to 22mA and the 12-bit A-D conversion gives a
resolution of 0.025% i.e. 6uA.
The KD420 provides an unregulated -20V output (which approximately tracks the KD420
supply voltage, minus 4 volts) for powering the 4-20mA transducer. To use this supply,
connect it to the negative terminal of the transducer, and connect the positive terminal of the
transducer to the KD420 current measurement input. Consult the wiring diagrams for
details.
1.5.3 KD420 Analog Measurement Accuracy
We specify the voltage/current measurement accuracy at 1% of full scale, over the specified
temperature range. The actual factory calibration procedure is done at room temperature to
around 0.05%.
Version 1.0
Page 7
KD420 User Guide
1.6 Power Requirements
The power supply specification depends on the mode of operation.
The KD420 power input is 11-35V DC, 2 watts max. The constant power nature of the
internal power circuitry means that at a higher supply voltage it will draw less current. The
following diagram shows the relationship
260
240
220
Input Current (mA)
200
180
The peak current which occurs around 4V
can reach 600mA.
160
140
120
Input must reach the startup voltage
(typ. 4V, guaranteed 7V) in less than 1 second
otherwise the power supply will not start up.
100
80
60
40
20
0
0
2
4
6
8 10 12 14 16 18 20 22 24 26 28 30 32 34 36
Input Voltage (V)
This means that a power unit needs to be rated at 300mA, to handle the startup current,
even though the KD420 will draw much less at say 24V.
However, the 20V output (provided for powering a 4-20mA analog sensor) is not regulated
and approximately tracks the KD420 supply voltage, minus 4V. This output is intended to
work with a 24V power input to the KD420.
Version 1.0
Page 8
KD420 User Guide
2. Specification
RS422/485 interface:
Receiver threshold 200mV typ (differential).
Hysteresis 70mV typ.
Voltage monitoring:
-30V to +30V. Input impedance 100kΩ min
Source impedance 100Ω max (for best accuracy)
Measurement accuracy 1%
Absolute maximum input -60V to +60V
Current monitoring:
4mA to 20mA. Sensing resistance 47Ω.
Measurement accuracy 1%
Absolute maximum current 50mA
20V output:
Within 17V to 23V with a 24V DC KD420
power input. Current limited at 30mA typ; short circuit
protected (1 minute)
Isolation:
3-way isolated (Port 1 - Port 2 - Power In)
64V PK, tested at > 1000V AC RMS, 1 second.
All Port 2 features share a common ground (pin 4).
Environmental:
Operating temperature -20C to +50C. Storage temperature
-25C to +70C. Relative humidity 0 to 90%, non-condensing.
Ventilation:
Rail-mounted KD420 must have a 50mm gap
above and below.
EMC compliance:
Emissions EN50081-2 (94). Immunity EN50082-2 (95)
Dimensions:
29mm (W) x 114mm (H) x 97mm (L) approx
in rail-mounted position, incl. screw terminals.
Version 1.0
Page 9
KD420 User Guide
3. Ports and Connections Reference
Port 1 has two functions: KD420 configuration, and the Modbus RTU Slave connection. It
is accessible via the 8-way “Port 1” terminal block or via the RJ-11 connector. Only one of
these two connectors may have connections to it at any one time. The RJ-11 is provided for
specialised applications where a custom cable is used.
Port 2 is used for the analog sensors and for a Modbus RTU Master mode.
3.1 Port 1 - KD420 Configuration
When used for KD420 configuration, Port 1 operates in RS422 mode i.e. 4 wires plus
ground.
The configuration program, KD420CFG.EXE, runs under Windows. There are two common
methods for creating an RS422 interface on a Windows computer: an RS232 to RS422
converter, or a USB-RS422 converter.
The following instructions show the connections:
KD420 Configuration Connections using a RS232 to RS422 Converter
IBM-compa tible PC with a 9-wa y ser ial port
Port 1 screw
termi nal s
RS232
RXA (2) [3]
RXB (7) [4]
TXA (8) [1]
TXB (3) [2]
GND (5) [5]
RJ-11 connector
(vi ew from outsi de)
KD420 internal connections
TXA
1
TXB
2
RXA
3
RXB
4
K2 or K2-TB RS232 to RS422 Converter
Pin numbers shown for both
(K2) and [K2-TB]
5
GND
6
7
IMPORTAN T: The screw termin als and the RJ11
are internally interconn ected . The y are no t
separate se rial ports. U se o nly one at an y time.
8
Version 1.0
Page 10
KD420 User Guide
KD420 Configuration Connections using the KK Systems USB-485 Converter
IBM-compa tible PC
with a USB port
Port 1 screw
termi nal s
USB-485 Converter
USB
RXA (2)
RXB (7)
TXA (8)
TXB (3)
GND (5)
RJ-11 connector
(view from outsi de)
KD420 internal connections
TXA
1
TXB
2
RXA
3
RXB
4
5
GND
6
7
IMPORTANT: The screw terminals and the RJ11
are internally intercon nected . Th ey a re n ot
separate se rial ports. U se only one a t a ny time.
8
Note: normal KD420 configuration will also work over 2-wire RS485 because it is done by
writing to Modbus registers. However, the firmware upgrade option needs RS422 (4-wire),
which is also sometimes called “4-wire RS485”.
Port 1 can be built with an RS232 interface as a custom option – contact factory.
Version 1.0
Page 11
KD420 User Guide
3.1.1 Port 1 – KD420 Modbus Slave 2-Wire and 4-Wire
The following diagrams show both 4-wire and 2-wire RS485 connections for Port 1:
Version 1.0
Page 12
KD420 User Guide
RS485 Bus Termination
On cable runs exceeding around 300 metres, two terminators should be connected in the
usual locations, at both ends of the cable(s). An example of these is shown in the Port 2
notes on page 15. Each terminator should be a resistor equal in value to the characteristic
impedance of the cable which for good quality data communication twisted pair cables is
around 110 ohms. For best results a 10nF capacitor should be in series with each resistor;
this eliminates the DC loading of the termination resistor.
Version 1.0
Page 13
KD420 User Guide
3.2 Port 2 – Analog Sensing
The following diagram shows the two KD420 analog functions: 4-20mA and voltage
measurement. The KD420 can operate both concurrently.
KD420
RJ-11
Thermocouple Transmitter
with a 4-20mA Interface
4-20mA Port
PORT 1
+
PORT 2
1
6
2
5
3
4
4
3
5
2
6
1
_
TC
4-20mA
_
Voltage Measurement Input
_
30V to + 30V
+
Pin 4 of the Port 2 terminal block should be earthed
for best electrostatic and EMC performance
7
8
EARTH
For powering the 4-20mA transducer, the KD420 provides an unregulated -20V output
(which approximately tracks the KD420 supply voltage, minus 4 volts) on pin 6. Refer to the
overall diagram on page 4. This supply is connected to the negative terminal of the
transducer as shown in the above diagram, and the positive terminal of the transducer is
connected to the KD420 current measurement input (pin 5).
Important: KD420 isolation is between Port 1, Port 2, and the power input. The various
features on Port 2 (4-20mA, voltage input, and 2-wire RS485) are NOT isolated from each
other and they share a common ground (pin 4).
Version 1.0
Page 14
KD420 User Guide
3.3 Port 2 – 2-wire RS485 Modbus Master
KD420 can act as a Modbus RTU Master and can write the process values seen on the 420mA and/or +/-30V inputs into specified registers of a single Modbus RTU Slave.
RJ-11
KD420
PORT 1
PORT 2
1
6
2
5
3
4
4
3
5
2
6
1
MODBUS RTU SLAVE device
GND
B
T
A
T
7
8
Pin 4 of the Port 2 terminal block should be earthed
for best electrostatic and EMC performance
EARTH
Note that Modbus communication in this mode (Port 2) has priority over Modbus
communication on Port 1. Normally this will never be seen, but if the Slave device attached
to Port 2 is very slow to respond, this could cause long response times on Port 1.
RS485 Bus Termination
On cable runs exceeding around 300 metres, two terminators should be connected as
shown. Each terminator should be a resistor equal in value to the characteristic impedance
of the cable which for good quality data communication twisted pair cables is around 110
ohms. For best results a 10nF capacitor should be in series with each resistor; this
eliminates the DC loading of the termination resistor.
Version 1.0
Page 15
KD420 User Guide
Important: KD420 isolation is between Port 1, Port 2, and the power input. The various
features on Port 2 (4-20mA, voltage input, and 2-wire RS485) are NOT isolated from each
other and they share a common ground (pin 4).
Version 1.0
Page 16
KD420 User Guide
4. Mounting
The KD420 clips to a standard 35mm DIN rail
114mm
35mm symmetric DIN rail
Overall Dimensions
(including terminals)
29mm
97mm
Removing unit from DIN rail
Method 1
Lift base of unit
upwards
Method 2
Use a suitable tool to
open up DIN rail clip
Version 1.0
Page 17
KD420 User Guide
5. Configuration
The KD420 is configured by connecting a PC serial port, via an RS232 or USB to RS422
converter, to the KD420 (port 1) and running the supplied KD420CFG.EXE configuration
program. This software provides a graphical interface for configuring the KD420.
To connect to the KD420, refer to KD420 Configuration on pages 18-22.
Suitable RS232-RS422 or USB-RS422 converters are available from KK Systems Ltd.
5.1 Installing KD420 Configuration Software
To install KD420CFG.EXE, click on the KD420CFG.MSI file and follow the instructions.
5.2 Using KD420 Configuration Software
In order for KD420CFG.EXE to communicate with the KD420, briefly press the button on the
KD420 front panel. This puts the KD420 into "config mode" as indicated by the CFG LED
being illuminated continuously.
When in the config mode, the KD420 Port 1 communication settings are changed to
9600,n,8,1 and Modbus slave address 1.
The KD420 will remain in config mode for 1 minute unless it remains connected to a PC
running KD420CFG.EXE. After this time, it will automatically revert to the communication
settings and port address dictated by the current configuration settings and the CFG LED
will go out.
Tthe KD420 config mode can be terminated at any time, by pressing the KD420 front panel
button, or by powering down the KD420.
The KD420 will also enter config mode when it powers up. If KD420CFG.EXE does not
communicate with the KD420 within 5 seconds, the KD420 it will exit config mode and start
up normally.
Version 1.0
Page 18
KD420 User Guide
With the KD420 connected to the PC serial port and powered up, start the KD420CFG.EXE
Configuration program from the shortcut in the Window “Start” menu. You should see the
following:
Select the PC port that the KD420 is connected to (or press Demo to explore the program
without actually having the KD420 connected).
Version 1.0
Page 19
KD420 User Guide
5.2.1 Modbus Slave Settings
The following tab configures functions applicable to Port 1 (RS485 Modbus RTU Slave):
The “Sample whenever…” option reads one or both of the analog parameters (those that
are enabled in the ADC Settings tab) every time there is any Modbus read, and returns
those values. This will thus always return the most recent value.
The “Sample every…” option is provided for applications where the fastest possible Modbus
comms response is required but the analog parameter being measured does not need to be
read each time. This option reads one or both of the analog parameters (those that are
enabled in the ADC Settings tab) at the specified interval and stores them in memory from
which they can be retrieved by a read of the appropriate Modbus registers.
When the “Sample every…” option is selected, the A-D conversion, and any 50/60Hz noise
filtering selected, are done in the background. The Modbus response time is thus reduced
to little more than the serial comms time which depends primarily on the baud rate and the
Version 1.0
Page 20
KD420 User Guide
length of the parameter being read. See the Performance description on the following
pages for details.
An obvious example for the “Sample every..” option might be temperature which can usually
be adequately read once per second, but if 100 KD420 units are connected to an RS485
bus then the highest Modbus comms performance is required in order to interrogate them
all within a reasonable time.
Important: The KD420 uses the “Performance” options in the ADC Settings tab to decide
which of the two (current and/or voltage) analog values should be read by the A-D
converter. It does not attempt to work it out by looking at which Modbus registers are being
read. This maximises performance, but if e.g. the “Enable voltage channel” option is
disabled, a read of the Voltage registers (40101 onwards) will return garbage.
The Slave Address is the Modbus address on which the KD420 will respond when not in
configuration mode..
Version 1.0
Page 21
KD420 User Guide
5.2.2 ADC Settings
The following tab configures A-D converter options:
5.2.2.1
Noise Reduction
When the 50Hz or 60Hz option is set, the KD420 reads the analog value continuously for
20ms or 17ms respectively, adds up the readings, and divides that by the number of
readings taken. The number of readings thus averaged is approximately 30 or 26,
respectively. This provides a high degree of filtering of noise, especially mains (power line
frequency) noise.
Setting this value to “none” performs a single read with no averaging. This setting will
provide the fastest read times but without any attempt to eliminate mains generated noise
on the input.
Version 1.0
Page 22
KD420 User Guide
5.2.2.2
Performance Options
Normally these 3 options are all enabled and any Modbus read will populate all KD420
registers. These options are provided for applications where Modbus comms performance
and the analog reading rate need to be optimised concurrently.
When a Modbus Master reads the KD420, the total time will be the sum of these 5 items:
1. Modbus Read command packet to the KD420 – this depends mainly on the baud rate
2. A-D conversion – this takes 0.65ms for each analog channel. If the 50Hz or 60Hz filtering
is enabled, add 20ms / 17ms respectively for one analog channel or 40ms / 34ms
respectively for two.
3. Formatting the return data – this takes around 500μs for the textual float formats and
much less for the other data types
4. Modbus protocol related tasks e.g. enforcing the 3.5 byte “dead time”, CRC checking and
generation, etc.
5. Modbus Read return packet from the KD420 – this depends mainly on the baud rate and
the type of parameter being read
At the commonly used baud rate of 9600, or any lower value, there is little to be
gained from changing the KD420 factory defaults because the Modbus comms time
(items 1 and 5 above) dominates.
At the highest available baud rate of 115200, the comms time is much shorter – particularly
if only a 16-bit integer value is being read – and there is a progressive improvement to be
gained by using the KD420 features selectively. Let’s look at some actual cases:
The fastest comms option is to select the “Sample every…” mode, and then enabling and
reading a single analog channel as a 16-bit integer at 115200 baud takes a total of 4.5ms
i.e. 220 readings per second. But the actual analog value will be updated only at intervals of
1 second or longer. The 50/60Hz filter setting is available but does not affect the comms
performance. The “Enable textual…” option has no effect on the timing in this mode.
The 2nd fastest option uses the “Sample whenever…” mode, no 50/60Hz filtering,
unchecking the “Enable textual…” option, and then enabling and reading a single analog
channel as a 16-bit integer at 115200 baud takes a total of 6.3ms i.e. 150 readings per
second. Reading the same data as a 11-byte textual float takes 9.5ms i.e. 105 readings per
second.
Version 1.0
Page 23
KD420 User Guide
The above but at 9600 baud takes 25ms and 45ms respectively.
The slowest option (at 9600 baud) is with all factory defaults, 50Hz filtering on, and
reading an 11-byte textual float, which will take about 65ms for one channel.
Version 1.0
Page 24
KD420 User Guide
5.2.3 Modbus Master Settings
The following tab configures the Modbus Master feature that enables the KD420 to write
analog values into a Modbus RTU Slave attached to Port 2:
The Modbus master can write voltage and current values in any one of a number of formats.
Some of these formats will use a number of consecutive 16 bit Modbus holding registers:
Format
#Registers,
16 bit integer
1
32bit IEEE floating point value (big endian)
2
32bit IEEE floating point value (little endian)
2
ASCII textual float (+00.000 format), null terminated
8
ASCII textual float (+0.000E+00 format), null terminated
11
Boolean: within 4-20mA range (1=yes, 0=no) (current only)
1
Version 1.0
Page 25
KD420 User Guide
16 bit integer values measure current as 0 to 64000 (in mA x 1000) and voltage as -32000
to +32000 (in volts x 1000).
5.2.3.1
Modbus Register Numbering
There is often confusion over Modbus register numbering with some manufacturers using
the older Modicon 4xxxx notation and others using register numbers based from 1. The
Modbus register numbers used with the KD420 should be specified as a decimal number
based from zero and with the Modbus function code determining the register type. For
example to read Modbus holding register 40001, you would specify register 0 and function
code 3 (read holding registers). Similarly, to read Modbus input register 30099, you would
specify register 98 and function code 4 (read input registers).
5.2.4 Monitor Page
This tab offers a debugging function:
Version 1.0
Page 26
KD420 User Guide
6. Troubleshooting
6.1.1 KD420 Power Up Problems
With a 24V power input, there should be an output of approximately 20V between pin 4 and
pin 6 of the 6-way Port 2 terminal block, with pin 4 being the positive terminal.
The KD420 internal power supply will fail to start if the supply voltage rises from zero to the
internal power supply startup voltage (approximately 4V) very slowly. See the Power
Requirements section for details.
If after power-up, the CFG LED enters a repeating pattern of n rapid blinks followed by a
longer pause, this indicates that a hardware fault has been detected by the KD420 powerup test firmware. This fault requires a return to the factory.
6.1.2 KD420CFG.EXE unable to connect
Check the COM port is correct. If using a USB to RS422 converter, look in Control Panel /
Devices / COM&LPT Ports to see what COM port number has been allocated by the
operating system.
Version 1.0
Page 27
KD420 User Guide
7. KD420 Configuration via Modbus
7.1 Configuration Registers
7.1.1 Modbus Register Numbering
There is often confusion over Modbus register numbering with some manufacturers using
the older Modicon 4xxxx notation and others using register numbers based from 1. The
Modbus register numbers used with the KD420 should be specified as a decimal number
based from zero and with the Modbus function code determining the register type. For
example to read Modbus holding register 40001, you would specify register 0 and function
code 3 (read holding registers). Similarly, to read Modbus input register 30099, you would
specify register 98 and function code 4 (read input registers).
The KD420 implements the following Modbus holding registers (within the KD420 Port 1
Modbus slave) for the purpose of "in-the-field" reconfiguration of the KD420.
Configuration is performed by updating any of these values (in any sequence). The
configuration update only actually takes effect once the value ABCDh is written to register
number 40200 (register address 199).
The configuration registers (starting with register 40201) listed below can be both written to
and read from. The current effective configuration values can always be read from a similar
sequence of registers starting at register 40301.
Register
Value
40201
(200)
Port 1 (KD420 Slave port) comms settings (see below)
40202
(201)
Port 2 (KD420 Master port) comms settings (see below)
40203
(202)
Port 1 (KD420 Slave) address (1 to 247)
40204
(203)
Port 1 (KD420 Slave) sample interval (0 for on demand, or interval between
1000 to 60000ms)
40205
(204)
Port 2 (KD420 Master) slave device address (to write to) (0 to 247)
Version 1.0
Page 28
KD420 User Guide
40206
(205)
Port 2 (KD420 Master) number of retries (0 to 65535)
40207
(206)
Port 2 (KD420 Master) timeout (0 to 65535ms)
40208
(207)
Port 2 (KD420 Master) 4-20mA sample interval (0 to disable or 1000 to
60000ms)
40209
(208)
Port 2 (KD420 Master) slave starting register for 4-20mA (to write to)
40210
(209)
Port 2 (KD420 Master) 4-20mA format (see below)
40211
(210)
Master: voltage sample interval (0 to disable or 1000 to 60000ms)
40212
(211)
Master: slave starting register for voltage (to write to)
40213
(212)
Master: voltage format (see below)
40214
(213)
ADC noise averaging (0 for 50Hz, 1 for 60Hz)
7.1.2 Communications Parameters
Each communications port configuration is packed into a 16 bit holding register.
bit# 15 14 13 12 11 10 9
value
8 7 6 5 4 3 2 1 0
SB P1 P0 BW
baud rate
Where:
SB defines the number of stop bits: 1 = 2 stop bits; 0 = 1 stop bit;
P1, P0 define the parity: 0 = off; 1 = even; 2 = odd;
The least significant (LS) 8 bits indicate the baud rate with values 0 to 20 corresponding to
30 to 115200 as follows:
bits 7-0 Baud Rate
0
30
1
37.5
Version 1.0
Page 29
KD420 User Guide
2
50
3
75
4
100
5
110
6
134.5
7
150
8
300
9
600
10
1200
11
2000
12
2400
13
3600
14
4800
15
7200
16
9600
17
19200
18
38400
19
57600
20
115200
7.1.3 Voltage and current format
The following voltage and current (4-20mA) format values are used to determine the format
used when the KD420 (acting as a Modbus Master on its Port 2) writes a voltage or current
value to the Modbus Slave device.
Format
#Registers Config Value
16 bit integer
1
0
32bit IEEE floating point value (big endian)
2
1
32bit IEEE floating point value (little endian)
2
2
ASCII textual float (+00.000 format), null terminated
8
3
ASCII textual float (+0.000E+00 format), null terminated
11
4
Version 1.0
Page 30
KD420 User Guide
Boolean: within 4-20mA range (1=yes, 0=no) (4-20mA only)
1
5
KK Systems Ltd
Tates, London Road
Pyecombe, Brighton
BN45 7ED
Great Britain
www.kksystems.com
Version 1.0
Page 31


