1
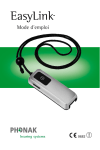
hearing systems
Campus S
User Guide
TM
0681
!
Contents
Description
Welcome to the Phonak world of multi-frequency FM communication
Multi-frequency FM system components
Package components
Available microphones
Switching the Campus S on/off
Changing the channel and synchronization
Key lock Campus S
Charging the battery
Connecting the Campus S to a TV set, video recorder, radio or CD player
Connecting another microphone
Changing the battery
Wearing the Campus S
Operating range
Setting of the FM receiver
MLxS switch positions
Important notes
Page
3
5
6
7
8
9
10
12
14
15
16
17
18
20
21
Description
1
5
1
2
3
4
5
6
2
4
3
8
6
On/off button
Channel selection buttons
FM channel in use
Battery status indicator
Direct frequency synchronization
There are different microphone options
available (see page 6)
7
9
7
8
9
10
11
11
Carrying clip
Battery compartment
Audio socket
Battery charger socket
Label for your initials
10
Welcome to the world of multi-frequency FM
communication.
By choosing the Campus S, you now possess a state-of-the-art FM transmitter that
delivers maximum performance in conjunction with the latest multi-frequency
MicroLink receivers and the WallPilot, while retaining full compatibility with regular
MicroLink receivers.
This new FM system is extremely flexible in use and sets new standards for communication in the educational sector. It also performs excellently in other settings.
The Campus S is a Swiss quality product that will make your communication much
easier for many years to come.
Multi-frequency FM system components
1
12
Campus S:
Multi-frequency FM transmitter, specially recommended for educational applications.
1
WallPilot:
Automatic frequency synchronizer, tunes receivers to a room frequency as people enter.
2
3
4
3
3 MLxS:
Miniaturized multi-frequency FM receiver for BTE instruments from Phonak and most
other manufacterers.
4 Perseo / Claro dAZ FM:
Miniaturized multi-frequency FM receiver with the same functionality as the MLxS,
integrated with the shell design.
4
Package components
1
1
2
3
12
13
Campus S with rechargeable battery.
• Microphone (to be ordered separately).
Power supply.
1 m (3 feet) audio-cable with 3.5 mm connectors.
Pouch (to be ordered separately).
5
Available microphones
1
1
2
MiniBoom: Innovative, lightweight clip-on boom microphone.
Lapel Microphones
2 MiniMic MM8: Very flexible lapel microphone with OFF/Omni/Directional switch.
MiniMic MM5: Highly robust omnidirectional lapel microphone.
6
Switching the Campus S on/off
directional
omnidirectional
1
1
2
12
OFF
To switch ON/OFF: Press the I button for 2 seconds.
When the Campus S is switched ON, the LCD display shows the channel in use and
the battery status. When the Campus S is switched off, the LCD display goes blank.
For MiniMic MM8: Remove the windscreen from the microphone and ensure that the
microphone switch is in either the (directional) or (omnidirectional) position.
7
Changing the channel and synchronization
1
2
1
2
!
1
Channel selection: Press one of the channel selection buttons for 2 seconds.
= selects a higher channel
= selects a lower channel
Synchronization: Press the Direct Frequency Synchronization (DFS) button
for
2 seconds to send the selected frequency to the receiver (MLxS or Perseo/Claro dAZ
FM).
Ensure that the Campus S is set to the same channel as the FM receivers, otherwise
the signal will not be received. Distance Campus S – FM receiver for synchronization max. 1 m (3 feet).
8
Key lock Campus S
As with cell phones, this feature prevents the accidental activation of the keys.
To lock keys: Press the two keys shown with the arrows simultaneously for
2 seconds. The “ ” symbol appears in the display.
To unlock keys: Press the same two keys simultaneously for 2 seconds.
9
Charging the battery
1
2
Your Campus S must be recharged after approx. 12 hours of operation.
1 Insert the 1.3 mm plug into the corresponding socket underneath your Campus S.
2 Plug the battery charger into a wall power socket.
The blinking battery symbol in the LCD display indicates that the Campus S is
charging.
We recommend that you charge Campus S every evening after use.
10
New batteries take approx. 12 hours to charge. Charging for longer than this will not
damage the battery.
!
We recommend that you remove the battery compartment cover from the Campus S
if you will not be using the unit for several weeks. This prevents the battery from
fully discharging.
If necessary, the battery can be removed from the Campus S and a replacement battery
fitted. The removed battery can then be recharged using a multi-cell charger available
from Phonak. Please see page 15 for further information.
11
Connecting the Campus S to a TV set, video recorder,
radio or CD player
Audio cable
1
Headphone symbol on TV/radio etc.
2
You can use the Campus S also for high quality wireless transmission of sound from
audio equipment like TV sets, video recorders, radios and CD players.
1
2
Plug the audio cable into the headphone output of your audio equipment.
Plug the other end of the cable into the audio input underneath your Campus S.
Since the Campus S uses the microphone cable as an antenna, unroll the
microphone cable.
12
3
directional
omnidirectional
3
3
Switch on your Campus S and the microphone, then the audio equipment.
MiniMic MM8: This microphone allows you to talk directly to listeners while
showing a video, for example. If you prefer not to speak, switch off (X) the microphone.
Should your audio equipment not have a 3.5 mm connector please ask your hearing
care professional for adapters for 6.3 mm jacks, RCA/Cinch or SCART connectors.
13
Connecting another microphone
1B
A
1
1
1
2
3
LCD
2
3
Unroll the Campus S microphone cable.
Remove the clip.
Unplug the multifunctional-microphone cable.
Plug in the new microphone. Press the cable into the cable retainer.
The plug must be fully inserted.
Re-attach the clip. Ensure that it is pushed to the end-stop before snapping it into
place.
14
Changing the battery
1
1
2
3
12
13
Open the Campus S battery compartment cover by using a coin.
Let the battery slide gently out of the compartment.
Insert the new battery. Note the position of the arrow symbol on the battery and
close the battery compartment cover. All the display elements appear for a few
seconds, then the unit switches itself off.
Switch the Campus S ON as required.
15
Wearing the Campus S
3
1
1
2
3
carrying Clip
2
Use the carrying clip to secure the Campus S to a belt or neck cord.
Use the alligator clip to attach the microphone to clothing or a neck cord, approx.
20 cm (8 inches) directly below your mouth.
It is recommended to use the optional pouch to fix the Campus S safely.
16
Operating range
!
Your Campus S uses the microphone cable as an antenna. Therefore, always ensure
that the cable is unwound while you are using the Campus S.
Used with Phonak FM receivers, your Campus S should operate over a range up to
40 meters (120 feet) depending on the surroundings. High-power electrical or
electronic equipment and metallic objects can reduce the operating range.
17
Setting of the FM receiver
Wearers of Phonak hearing instruments can read about the recommended setting of
the radio receivers in the respective hearing instruments User Guides. The receiver
description below is a general description and for the benefit of people who use other
brands of hearing aid.
Prinicipal benefits of the MLxS
• Default frequency
The MLxS receiver has a programmed default frequency. It is set automatically when
the FM receiver is switched on. Your Phonak Service Center can change the default
frequency.
18
• Frequency synchronization
The Campus S can remotely re-tune your FM receiver to an alternative frequency
(see page 8). This provides a quick and simple way to change the frequency, for
example when there are nearby FM users on the same channel, or to avoid interference from a mobile phone antenna.
• Standby mode
This is an energy-saving feature: when the transmitter is switched off, the receivers
automatically enter standby mode 30–40 seconds later. Virtually no power is
consumed in this mode. The receivers detect when the transmitter is switched on
again, and automatically resume normal operation.
19
MLxS switch positions
For Phonak hearing instruments, please refer to the hearing instrument User Guide for
the correct MLxS switch position.
For all other hearing aids, the correct switch position depends on the Hearing
Instrument type.
Please ask your hearing care professional which switch position should be used.
20
Important notes
• Do not use more than one transmitter on the same channel simultaneously.
• Use only Phonak accessories.
• Do not use the Campus S in locations where it is forbidden to use electronic devices,
for example, in airplanes.
• Note that it is possible for speech or sound that is transmitted through FM to be
picked up and heard via other devices.
• Before using the system in another country, contact your hearing care professional
to make sure your channel is permitted in that country.
• Your Campus S should be serviced only by a Phonak authorized service agent.
• Do not clean the unit with water or other fluids.
The symbol with the crossed out disposal bin indicates that FM-equipment shall
not be treated as household waste. Please hand over your old or unused FMequipment to the applicable collection point for the recycling of electrical and
electronic equipment or bring your old FM-equipment to your hearing care professional
for appropriate disposal. By ensuring this product is disposed of correctly, you will help
prevent potential negative effects on the environment and human health.
Declaration of conformity
Phonak AG, Laubisrütistrasse 28, 8712 Stäfa, Switzerland
confirms that the Campus S corresponds to the standards ETS 300-422 and
ETS 300-445 including all necessary annexes.
The Campus S is used by hearing impaired people. To operate the Campus S, hearing
instruments with FM receivers (e.g. MicroLink MLxS) are required. The user benefit of
FM is an improved signal-to-noise ratio which leads to an optimized speech understanding even in very difficult listening situations.
Phonak AG
Stäfa, Switzerland
Date: 25th October 2001
22
Important Notes for Users in the USA and Canada
This device complies with Part 15 of the FCC Rules and with RSS-210 of Industry Canada.
Operation is subject to the following two conditions:
(1) this device my not cause harmful interference, and
(2) this device must accept any interference received, including interference that may
cause undesired operation.
Warning: Changes or modifications made to this equipment not expressly approved by
Phonak Inc. may void the FCC authorization to operate this equipment.
NOTE: This equipment has been tested and found to comply with the limits for a
Class B digital device, pursuant to Part 15 of the FCC Rules. These limits are
designed to provide reasonable protection against harmful interference in a
23
residential installation. This equipment generates, uses and can radiate radio
frequency energy and, if not installed and used in accordance with the
instructions, may cause harmful interference to radio communications. However,
there is no guarantee that interference will not occur in a particular installation.
If this equipment does cause harmful interference to radio or television reception,
which can be determined by turning the equipment off and on, the user is
encouraged to try to correct the interference by one or more of the following
measures:
• Reorient or relocate the receiving antenna.
• Increase the separation between the equipment and receiver.
• Connect the equipment into an outlet on a circuit different from that to which the
receiver is connected.
• Consult the dealer or an experienced radio/TV technician for help.
Restrictions
This transmitter is authorized by rule under the Low Power Radio Service (47 C.F.R.
24
Part 95) and must not cause harmful interference to TV reception or United States Navy
SPASUR installations. You do not need an FCC license to operate this transmitter. This
transmitter may only be used to provide: auditory assistance to persons with disabilities, persons who require language translation, or persons in educational settings;
health care services to the ill; law enforcement tracking services under agreement with
a law enforcement agency; or automated maritime telecommunications system (AMTS)
network control communications. Two-way voice communications and all other types of
uses not mentioned above are expressly prohibited.
This device may not interfere with TV reception or Federal Government radar.
25
Phonak distributors worldwide
Group companies:
Australia
Austria
Belgium
Brazil
Canada
China
Denmark
France
Germany
Italy
Japan
Jordan
Netherlands
New Zealand
Norway
Poland
Spain
Sweden
Switzerland
United Kingdom
USA
Independent
general agents:
Manufacturer:
(detailed information on www.phonak.com)
Phonak Australasia Pty. Ltd., Baulkham Hills N. S. W. 2153
Hansaton Akustische Geräte GmbH, 5020 Salzburg
Lapperre N.V., 1702 Groot-Bijgaarden
CAS Produtos Médicos, São Paulo – SP 04363-100
Phonak Canada Limited, Mississauga, Ontario L5S 1V9
Phonak (Shanghai) Co. Ltd., Shanghai City 200233
Phonak Danmark A/S, Nitivej 10, 2000 Frederiksberg
Phonak France SA, 69500 Bron
Phonak GmbH, 70736 Fellbach-Oeffingen
Phonak Italia S.r.l., 20159 Milano
Phonak Japan Co., Ltd., Tokyo 101-0044
Phonak Middle East, 11181 Amman
Phonak B.V., 3439 ME Nieuwegein
Phonak New Zealand Ltd., Takapuna, Auckland 9
Phonak AS, 0105 Oslo
Phonak Polska Sp. z o.o., 00-567 Warszawa
Phonak Ibérica S.A., 03008 Alicante
Phonak AB, 117 43 Stockholm
Phonak AG, Phonak Schweiz, 8712 Stäfa
Phonak UK Limited, Warrington, Cheshire WA1 1PP
Phonak LLC, Warrenville, IL 60555-3927
A complete list of Phonak distributors is available at Phonak's
Internet site: www.phonak.com. Please visit us or ask your
hearing care professional for information.
Phonak AG, Laubisrütistrasse 28, CH-8712 Stäfa, Switzerland
0681
!
Service and Warranty
Phonak offers you a comprehensive global warranty which becomes effective on the date
of purchase. Please ask your hearing care professional about the details and duration.
This warranty covers any repairs due to defects in material and/or workmanship. The
warranty does not cover damage from improper handling or care, exposure to chemicals,
immersion in water or undue stress. Damage caused by third parties or non-authorized
service centers renders the Phonak warranty null and void. This warranty does not
include any service performed by a hearing professional in their office. This
warranty applies to the Phonak products listed below:
Serial number:
Date of purchase:
029-0919-02/V02.02/2006-11/FO Printed in Switzerland © Phonak AG All rights reserved
Your hearing care professional: