1
105mm
CODE PAIRING & MELODY SELECTION
Melody
selector button
Learning button
Battery cover
Battery compartment
Doorbell pusher
Battery
compartment
MOUNTING
Door bell pusher
Receiver
To stop the Chime whilst it is alerting press the reset button
Clear the transmitter on the Chime memory
Or
Hang on the wall
Stand on the desk
or use sticker provided
POWER
Receiver
6V DC
300mA
-
Doorbell pusher
+
Open the cover
or
'C' Size
1.5V
WARNING
The user is cautioned that changes and modifications made to
the equipment without the approval of Hearing Products
International Ltd could void the user's authority to operate this
equipment.
The manufacturer is not responsible for any radio or TV
interference caused by unauthorized modifications to this
equipment.
Name plate
'C' Size
1.5V
If the device is operated using a mains adapter, only use
the Hearing Products International Ltd approved mains adapter.
Do not use any other type of mains adapter.
Call button
'C' Size
1.5V
105mm
MAINTENANCE
- For best results, use good quality alkaline batteries.
- Always replace old or weak batteries.
- Keep doorbell dry. If wet, dry immediately.
- Do not use cleaning solvents on electronic products.
- Solvents contain chemicals that can damage circuitry.
Use damp towel or cloth to clean. Dry immediately.
- Do not expose the receiver unit to rain or immerse in water,
it is not Waterproof.
- Do not immerse transmitter in water as it is not waterproof, it is
water resistant to IP44 .
+
Using C size Battery
1
2
Using an AC/DC adaptor
3
First, press and hold the button for 3 seconds to enter the pairing
mode. Press the
button to move to the zone which is to be
deleted. Press and hold the
and
buttons together for 3
seconds.
The receiver will generate a tone to indicate the transmitter on this
zone has been deleted.
Change the melody in desired zone
First, press and hold the button for 3 seconds to enter the pairing
mode. Press the button to move to the zone then press the
button to select the melody required. Press the
button until the
pairing mode is exited.
ON/OFF button
Sensitivity
Microphone
Power On/OFF
Battery Installation
+
+
Insert 2 AAA battery compartment
Turn ON and turn OFF
This device has two ways to turn power on and off.
Hardware ON/OFF Slide the switch to ON or OFF
position.
If the slide switch is OFF, you cannot use the
software switch to turn on the power. If the unit is
not in use for a long period, use the hardware
switch to turn off the unit
Hardware switch
Software ON/OFF This allows the transmitter to
be controlled externally.
Off: If the sensor is ON, press and hold the
software ON/OFF switch 5 seconds, the LED will
flash 1 time.
ON: If the sensor is OFF, press and hold the
software ON/OFF switch 5 seconds, the LED will
Software switch
flash 3 times.
The sound sensor defaults to "ON" when the
hardware switch is moved from OFF to ON.
The sound sensor works with the receiver (chime) and must be
paired prior to use.
Step 1: Insert batteries in the sensor to be used.
Step 2: Insert batteries in the receiver to be
used.
ID
Step 3: Enter pairing mode for receiver
(chime unit). Press and hold the
learning button
3 seconds.
The LED #1 will flash.
Step 4: Press the
button again to move to
the zone you want to pair with.
Learning
Press melody selector to scroll through button
the melodies. Once you hear your
Melody
selector
preferred melody, do not press again as
it is now selected.
There are 18 melodies & sound effects in
sequence.
Step 5: Switch on the sensor and speak into the microphone, the
red LED indicator will light. If successful, the receiver will
generate a short tone.
Press the button to exit pairing mode, the system is ready
to use
CHIME
Reset
Hanging Hole
ID
Speaker
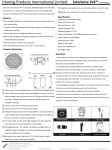
USER MANUAL
EchoChime300TM
WIRELESS Home Care System
DC jack
ON/off button
Operation
1.Open the cover. 2. Slide the power to the ON position,
3.Select the desired sensitivity low, mid, or high, this sets the level
of sound required to trigger the transmitter.
4.Stick the microphone to the device you want to detect.
Code Conflict
If the sound sensor coding and another transmitter is the same.
you must change the code of the sound sensor.
Open the cover
Battery low indicator
If a zone LED light is blinking, it indicates that the battery is low for
this transmitter. You must replace the battery as soon as possible.
If the white flash at the top of the Chime blinks every 5 seconds,
this indicates the receiver is batteries are low. You must replace the
batteries of the receiver.
Slide the on/off switch
to OFF position
While pressing the test button
Slide the on/off switch to 'on'
position and hold the button 5
seconds. The LED will flash 5 times
when a new code is generated
When you have changed the code of the sound sensor you will then
need to re- pair the sound sensor with the receiver.
CR2032
4
LIGHT & CHIME
Volume control
Flasher
Battery
compartment
LIGHT
Function Switch
LIGHT
CHIME
Receiver
Code Matching & Melody Selection
PLEASE NOTE THE BELL PUSH AND CHIME ARE PAIRED
AND READY TO USE.
Step 1: Insert battery to the
ID
transmitter to be used (bell push).
Step 2: Insert batteries to the receiver
to be used (chime unit).
Step 3: Enter pairing mode for
receiver (chime unit).
Press and hold the
learning
Learning button
button for 3 seconds.
Melody selector button
The LED #1 will flash.
Step 4: Press the
button again to
move to the zone you wish to pair with.
Press
melody selector to scroll through the melodies.
Once you hear your preferred melody, do not press again
as it is now selected.
There are 18 melodies & sound effects in sequence.
Step 5: Once the zone and melody are selected, press the bell push
button once to pair. If successful, the receiver (chime)will
generate a short tone. Press the
button to exit pairing
mode, the system is ready to use.
LIGHT & CHIME
PARTS & FUNCTION DOOR BELL
5
6
Open the cover
CR2032
Buzzer
LED indicator
Align mark
Function switch
Magnet
Insert the battery into the PIR detector, the PIR detector will start to
detect motion automatically after 15 seconds. Walk to the front of
the detector within 8m.
Once the motion has been detected, the detector will send out a
trigger signal to the receiver (chime) then go into a sleep mode for
10 seconds. During this time it will not detect motion.
LED indicator
PIR lens
Mounting backet
Battery Installation
Open battery cover
Press and hold the test button, insert
Remove the battery the battery and hold the button 5
seconds. The LED will flash 5 time
when a new code is generated
Code Matching & Melody Selection
The magnetic sensor works with the receiver (chime)
And must be paired before using
Step 1: Insert batteries to the sensor.
Step 2: Insert batteries to the
ID
receiver (chime).
Step 3: Enter pairing mode for receiver
(chime unit).
Press and hold the
learning
button 3 seconds.
The LED #1 will flash.
Learning
Step 4: Press the button again to move to
button
the zone you want to pair with.
Melody
Press
melody selector to scroll
selector
through the melodies. Once you hear
your preferred melody, do not press
again as it is now selected.
There are 18 melodies & sound effects in
sequence.
Step 5: Once you have selected the zone and melody, trigger the
magnetic sensor by holding the sensor and magnet
together then, move them apart.
CHIME
Open the cover
LIGHT
CHIME
LIGHT
LIGHT & CHIME
The telephone signaler works with the receiver (chime),
and must be paired before using.
Step 1: Insert battery to the telephone
ID
transmitter.
Step 2: Insert batteries to the receiver
(chime).
Step 3: Enter pairing mode for receiver
(chime unit).
Press and hold the learning
button 3 seconds.
Learning
button
The LED #1 will flash.
Melody
Step 4: Press the button again to select zone
selector
with the telephone icon.
Press melody selector to scroll
through the melodies. Once you hear the telephone sound,
do not press again as it is now selected.
Step 5: Once you have selected the zone and sound, press the
test button on the telephone signaler once. If successful,
the receiver will generate a short tone. Press the button
to exit pairing mode it is now ready to use.
Test the Sensor
Part & Function
Battery cover
Battery
compartment
Code Matching & Melody Selection
Operation
When the magnet moves away from the
alarm unit, the alarm
or bell will be activated and send out a signal
to the receiver (chime).
8
9
9V battery
(6F22)
Alarm Mode
The alarm sound will automatically turn off
Using as alarm sensor:
within 15 seconds and sound again 30
Slide the switch to siren
seconds later if the door or window does not position
close.
Bell Mode:
The bell will generate a Ding Dong tone and
sound again 30 seconds later if the door
does not close.
Using as visitor sensor:
Slide the switch to bell
position
If successful, the receiver will generate a
short tone. Press the
button to exit
pairing mode, the system is now ready to
use.
Plug the telephone line into the telephone socket as the diagram.
The system is ready to use.
7
Install two CR2032 batteries to the batter compartment.
Remove the back paper of the double sided tape on the back of the
unit.
Stick the alarm unit to the window/door frame and the magnet unit
to the door/window by the side of the alarm unit..
10
The PIR sensor works with the receiver (chime)
and must be paired before using
Step 1: Insert battery to the sensor.
Step 2: Insert batteries to the receiver (chime).
Step 3: Enter pairing mode for receiver (chime
unit).
ID
Press and hold the learning button 3
seconds. The LED #1 will flash.
Step 4: Press the button again to move to the
zone you want to pair with.
Press
melody selector to scroll
through the melodies. Once you hear
your preferred melody, do not press
again as it is now selected.
There are 18 melodies & sound effects
in sequence.
Step 5: Once you have selected the zone and
melody, trigger the PIR sensor once.
To trigger the sensor move your hand
across the lens.
If successful, the receiver will generate
a short tone. Press the button to exit
pairing mode, the system is now ready
to use.
11
Hearing Products International Limited
Echo House, 26/27 Haigh Park, Stockport, SK4 1QR, England
Tel. +44 (0) 161 480 8003
Fax +44 (0) 161 480 8006
www.hear4you.com
CHIME
Battery
compartment
Installation
LIGHT & CHIME
Test
Battery Installation
Parts and Function
If the telephone signaler coding is the same as another transmitter
you must change the code. When you have changed the code repair the telephone signaler.
CR2032
Telephone Plug
Rj11
Code Conflict
LIGHT
Battery installation
LIGHT & CHIME
Part & Function
For CE certificate see our webb site: www.hear4you.com
Hearing Products International Ltd. reserve sole right to
alter prices, design and/or technical specifications or
colours without prior notice. E & O.E. 07/2012 V1
Echochime300TM Instructions.
Learning
button
Melody
selector
C
Copyright Hearing Products International limited 07/2012 V1.
UK: Waste electrical products and batteries should not be disposed of
with household waste. Separate disposal facilities exist, for your
nearest facilities see www.recycle-more.co.uk or Hearing Products
International Limited for full details www.hear4you.com.
RoHS
12